Introduction
The Edge browser, developed by Microsoft, has gained popularity for its sleek interface, robust performance, and seamless integration with Windows 10. As with any web browser, Edge accumulates temporary files, cookies, and other data as you browse the internet. While this data is intended to enhance your browsing experience by speeding up page loading times and storing website preferences, it can also lead to issues such as slow performance, website errors, and privacy concerns.
Clearing the cache in Edge browser is a simple yet effective way to address these issues and ensure a smooth browsing experience. By removing the accumulated cache, you can free up valuable storage space, eliminate outdated or corrupted files, and enhance your privacy by erasing potentially sensitive information.
In this article, we will delve into the importance of clearing the cache on Edge browser and provide step-by-step instructions on how to do so. Whether you are experiencing sluggish performance, encountering website errors, or simply want to maintain a clutter-free browsing environment, understanding the process of clearing the cache in Edge browser is essential for optimizing your online experience.
Why Clearing Cache on Edge Browser is Important
Clearing the cache on Edge browser is crucial for several reasons. When you visit websites, the browser stores various types of data, including images, scripts, and other files, in a temporary storage location known as the cache. While this mechanism is designed to enhance your browsing experience by speeding up page loading times and reducing server load, it can also lead to certain issues if not managed effectively.
One of the primary reasons to clear the cache is to address performance issues. Over time, the cache can become bloated with a large volume of files, some of which may be outdated or corrupted. This accumulation can result in slower browsing speeds, longer page load times, and overall sluggish performance. By clearing the cache, you can free up valuable storage space and ensure that the browser retrieves fresh, up-to-date content from websites, thereby improving the overall speed and responsiveness of your browsing experience.
Moreover, clearing the cache is essential for resolving website errors. In some cases, outdated or corrupted cache files can interfere with the proper functioning of websites, leading to display issues, broken elements, or unexpected errors. By clearing the cache, you can eliminate these problematic files and ensure that the browser fetches the latest versions of website resources, thereby mitigating potential compatibility issues and enhancing the overall stability of your browsing sessions.
Privacy and security considerations also underscore the importance of clearing the cache. The cache may store sensitive information such as login credentials, session data, and browsing history, posing a potential risk if accessed by unauthorized users. By regularly clearing the cache, you can minimize the exposure of such data and enhance your privacy and security while browsing the web.
In summary, clearing the cache on Edge browser is important for optimizing performance, resolving website errors, and safeguarding your privacy and security. By understanding the significance of this maintenance task, you can ensure a seamless and secure browsing experience while making the most of Edge's features and capabilities.
How to Clear Cache on Edge Browser
Clearing the cache on Edge browser is a straightforward process that can be accomplished in a few simple steps. By following these instructions, you can effectively remove temporary files, cookies, and other cached data, thereby optimizing the performance and privacy of your browsing sessions.
Step 1: Open Edge Browser Settings
Begin by launching the Edge browser on your device. In the top-right corner of the browser window, you will find the "Settings and more" icon, represented by three horizontal dots. Click on this icon to access the browser's settings menu.
Step 2: Access the Privacy, Search, and Services Menu
Within the settings menu, scroll down and locate the "Privacy, search, and services" option. Click on this section to expand the menu and reveal additional privacy-related settings.
Step 3: Choose the Clear Browsing Data Option
Under the "Privacy, search, and services" menu, select the "Choose what to clear" option. This will open a new window where you can customize the types of data to be cleared, including browsing history, cookies and other site data, cached images and files, and more.
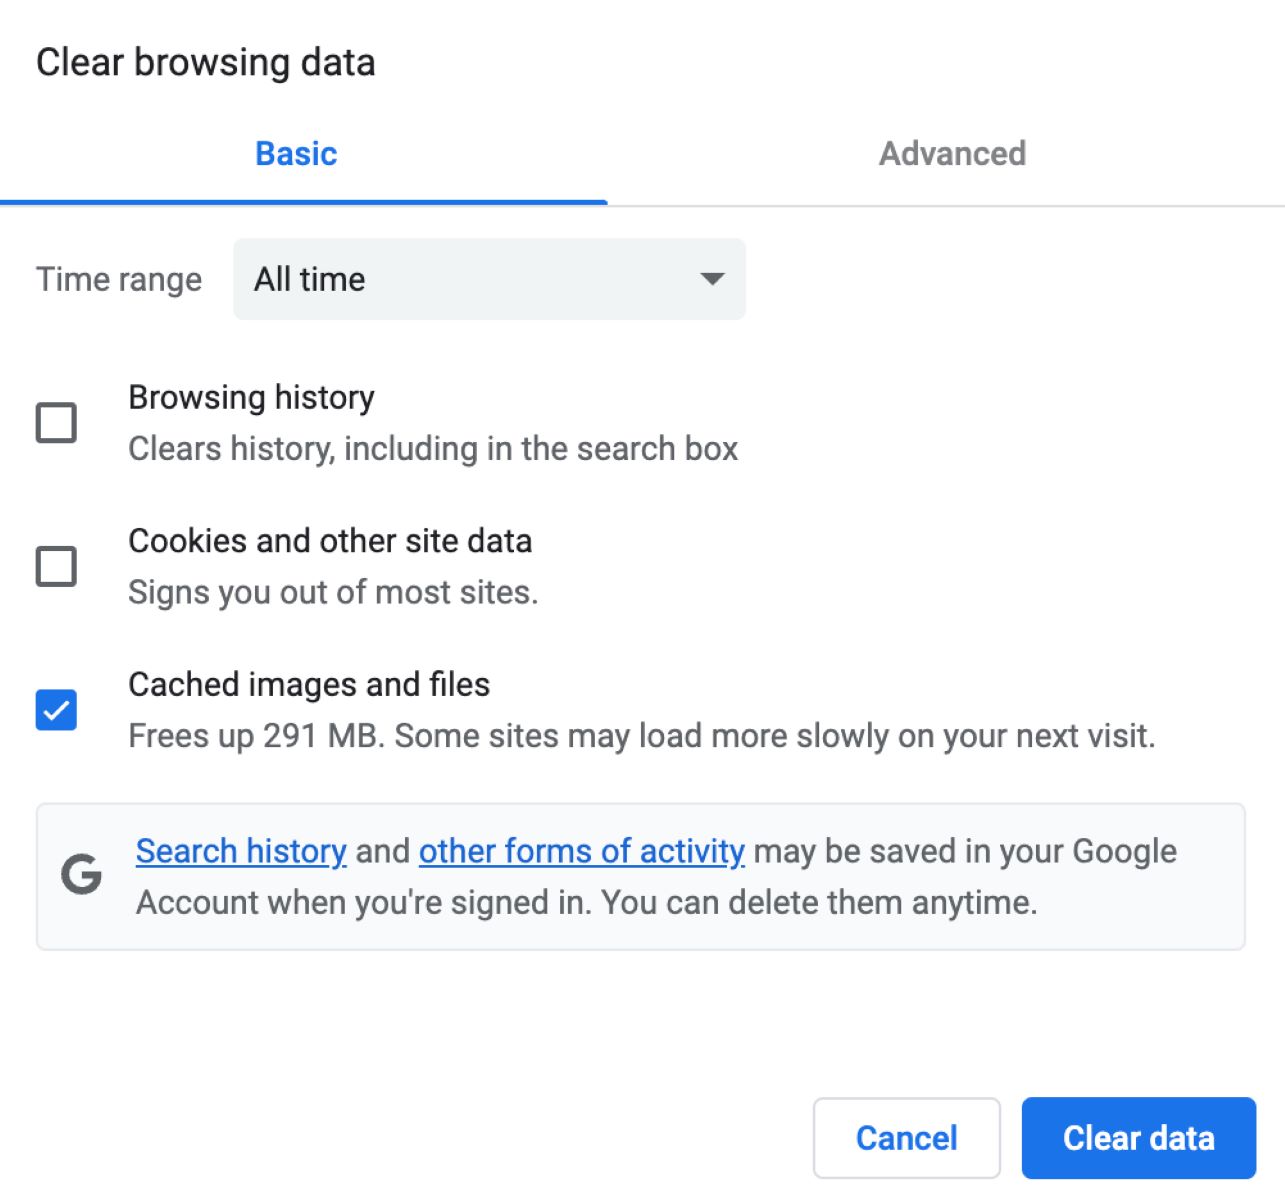
Step 4: Select the Cached Images and Files Option
Within the "Choose what to clear" window, ensure that the "Cached images and files" option is checked. This indicates that you intend to clear the cached images and files from your browsing data.
Step 5: Clear Browsing Data
Once you have selected the desired options, click on the "Clear now" button to initiate the clearing process. Edge browser will proceed to remove the selected data, including the cached images and files, from your browsing history.
Step 6: Confirm the Clearing Process
After clicking "Clear now," Edge browser will confirm the completion of the clearing process. You will receive a notification indicating that the selected browsing data has been successfully cleared.
By following these steps, you can effectively clear the cache on Edge browser, thereby optimizing its performance, resolving potential website errors, and enhancing your privacy and security while browsing the web. Regularly clearing the cache is a simple yet impactful maintenance task that can contribute to a seamless and enjoyable browsing experience on Edge browser.
Conclusion
In conclusion, the process of clearing the cache on Edge browser is a fundamental maintenance task that holds significant implications for optimizing performance, resolving website errors, and safeguarding privacy and security. By understanding the importance of this process and following the step-by-step instructions provided, users can effectively manage their browsing data and ensure a seamless online experience.
Clearing the cache on Edge browser serves as a proactive measure to address performance issues that may arise from the accumulation of outdated or corrupted files. By removing these unnecessary elements, users can free up valuable storage space and enable the browser to fetch fresh, up-to-date content from websites, thereby enhancing browsing speeds and overall responsiveness.
Moreover, the act of clearing the cache is instrumental in resolving website errors that may stem from outdated or problematic cached files. By eliminating these potential sources of compatibility issues, users can mitigate display errors, broken elements, and unexpected website behavior, thereby contributing to a more stable and reliable browsing experience.
From a privacy and security standpoint, regularly clearing the cache on Edge browser is essential for minimizing the exposure of sensitive information stored in the cache, such as login credentials, session data, and browsing history. By erasing potentially sensitive data, users can bolster their privacy and security while browsing the web, reducing the risk of unauthorized access to personal information.
By following the outlined steps to clear the cache on Edge browser, users can take proactive control of their browsing data, ensuring that their online activities are optimized for performance, stability, and privacy. This simple yet impactful maintenance task aligns with the broader goal of maintaining a clutter-free and secure browsing environment, allowing users to make the most of Edge browser's features and capabilities.
In essence, the process of clearing the cache on Edge browser empowers users to proactively manage their browsing data, optimize performance, and enhance their privacy and security while navigating the web. By incorporating this routine maintenance task into their browsing habits, users can enjoy a seamless and secure online experience, making the most of what Edge browser has to offer.