The robotics industry is fast evolving. It is anticipated that robotics projects for beginners and automation will get more advanced and innovative in the near future. Robots are increasingly becoming useful for our day to days living.
Industrial robots are becoming a very significant aspect of the manufacturing industries. They help to improve efficiency which is the essence of a contemporary factory. We have, therefore, created this robotics guide to help those who are working in the robotics industry, those who work with robots and any individual who has an interest in robotics. However, before we begin with the step by step tips on how to build a simple robot, we will begin with the basics.
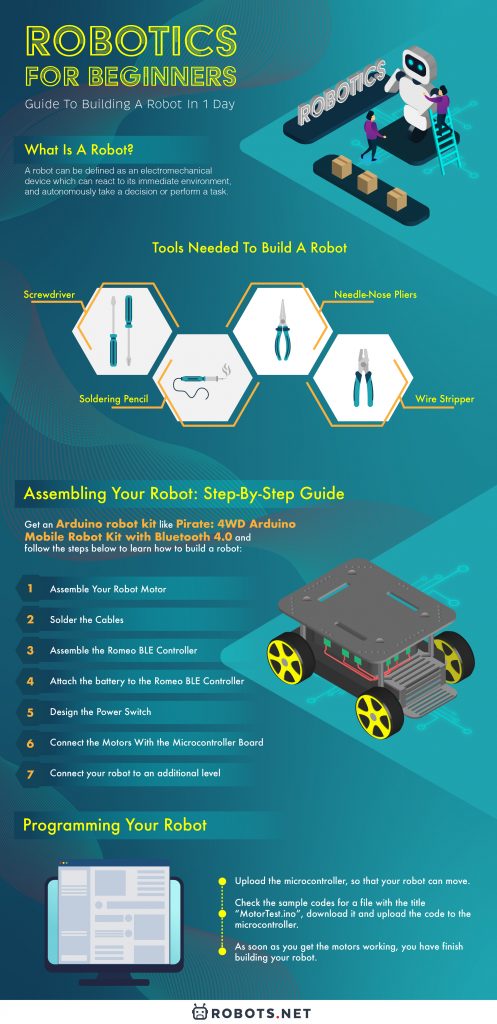
What Is A Robot?
In general, a robot can be defined as an electromechanical device which can react to its immediate environment in one way or the other, and autonomously take a decision or perform a task.
A robot’s ability to take a decision and react to its environment is what distinguishes it from cars and toasters, for instance. These objects unlike a robot can’t identify as they could not perceive or react autonomously to their environment.
The robot is commonly regulated by an electronic circuitry or computer program. A robotic platform or body is the part of a robot that determines how the robot will look and the role it will perform. The most commonly used robot platform is the wheeled type. It has some benefits when compared with other robot platforms.
Some of these benefits include things like comparatively low-cost and plenty of design options. They equally come with simple structure and design. The wheeled robotic platform is the best type of robot body for beginners.
Components Of A Robot
The brain of a robot is the microcontroller, it executes the program, makes the decision for the robot, makes computation and engages in communications. The Arduino UNO and Romeo are two most commonly microcontrollers used by DIY Arduino robots.
Robotic motors are devices that could convert electrical energy into mechanical energy. Motor drivers function as an intermediary devices between a microcontroller, a battery, and motors. It supplies the electric at a suitable voltage and helps the microcontroller to move the motors to move properly.
Robots’ ability to perceive and react to their environment comes from their numerous types of electromechanical sensors. For instance, an infrared sensor could help an Arduino robot to identify how far it is from an abject. When it detects such distance, it feeds the information back into the microcontroller. A grayscale sensor, on the other hand, can be used to produce a line-tracking robot.
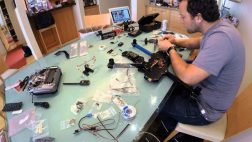
Robotics For Beginners: How To Build A Robot
In this part of the guide, we provide you with a step by step tip on how to make a simple robot. This is especially dedicated to DIY newbies who want to build their own Arduino robot. Having discussed the fundamental parts of a robot, this section will talk about the essential tools you need, how to assemble the robotic parts, program your robot and make it move.
So, let’s begin.
What do you need to build a robot?
Tools Needed To Build A Robot
Screwdriver
You need a screwdriver for turning, driving in or eliminating screws and fasteners. It is better to purchase a screwdriver set that comes with different shapes and sizes, so you can handle different types of screws.
Soldering Pencil
You need a soldering pencil. It an essential part of any electrical work. You’d use it for soldering and de-soldering items on circuit boards. For this how to make robot tutorial, the soldering pencil will help us to solder the cables of the motor.
The tip of a soldering pencil is very hot when it is heated up. You must, therefore, be cautious about the way you handle it to prevent injury. If you’re a first time user, take some time to get familiar with how to use the pencil before you begin working on your project.
Needle-Nose Pliers
Needle-nose pliers are frequently utilized for cutting off the extra length of cables and wires. While pliers are commonly utilized for a project, they are not an essential part of this project.
Wire Stripper
A wire stripper is a hand-held device utilized for stripping the electrical insulation on wires. You can use the scissors as an alternative tool if you prefer. When utilizing a wire stripper, take care to only eliminate the first insulation layer. This exposes the lead wire inside and makes it easier for you to solder.
Assembling Your Robot: Step-By-Step Guide
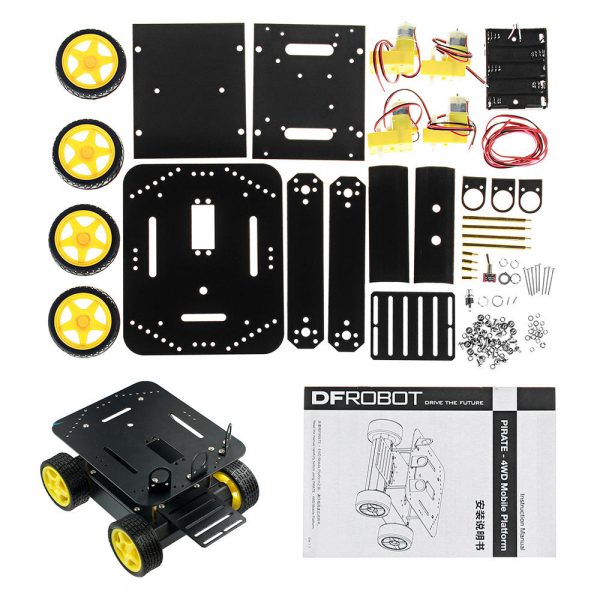
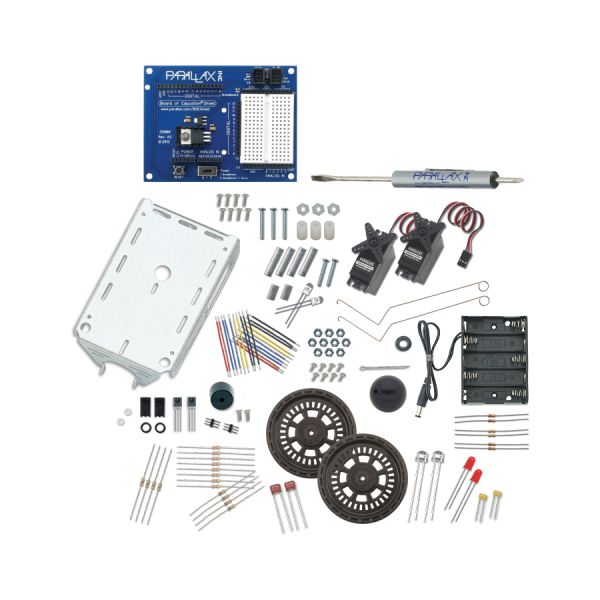
Get an Arduino robot kit like Pirate: 4WD Arduino Mobile Robot Kit with Bluetooth 4.0 and follow the steps below to learn how to build a robot:
1. Assemble Your Robot Motor
Check the components bag for eight long screws. You will use these screws to hold your motors and keep them properly secure.
You will also find washers and gaskets in the robots component bag. Washers will help you to boost friction when fastening the motor and helps to keep it in place. The gaskets work for preventing the screw nuts from getting loose and falling when the robot is moving and when it collides with objects.
2. Solder the Cables
Look for black and red wires. They are included in the component bag. Fasten one black and one red wire with a length of 15 centimeters to each one of the four motors. After you have done this, use the wire stripper to remove the insulation from the two ends of the cables. Don’t overdo it. When you’re done, solder the wires on the pins attached to the motors. Repeat for the remaining four motors.
Mark the right positions for the red and black wires and solder accordingly.
3. Assemble the Romeo BLE Controller
Get three copper supports from the components bag. These supports are commonly one centimeter long. You will use them to secure the Romeo controller board. The controller board is made up of three holes. Put the three copper supports into those holes and fasten them into place with suitable screws.
4. Attach the battery to the Romeo BLE Controller
Get two countersunk screws with flat heads out of the component bag and attach the battery to the bottom of the car for your DIY robotics.
5. Design the Power Switch
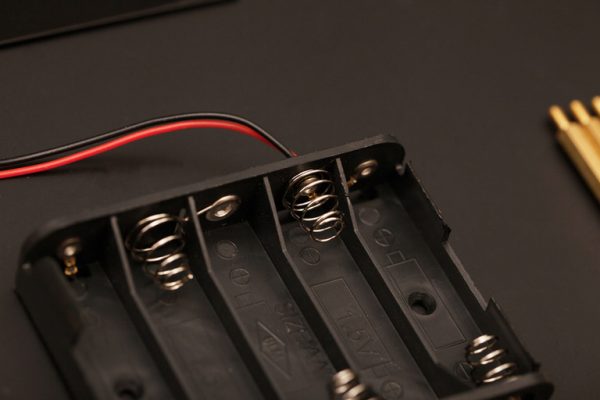
Batteries are a significant part of robotic technology. The power switch helps you to limit or regulate your use of power. The power switch turns off power anytime the robot is not performing any task or in motion. So, put your power switch together and configure it. Be mindful of the gasket sequence and screw nuts when putting your robots switch together.
When you have finished assembling the switch, begin to solder the wiring system of the switch. Use some of the wires you previously cut off. Strip the insulation from the two ends to expose the copper wire inside as you did in the previous step. Solder the stripped end of the wires to the switch pins. While doing this be conscious of the switch pins position. To do this:
a) Link up a switch to the charger of the battery and note the exact position of these two items.
b) Solder the red cables that connect the switch with the battery charger.
c) to finish up, get a red cable and a black cable. Affix one end of the first wire to the negative pole of the battery charger and the other end of the second wire to the positive pole of the charger of the battery. Then connect the opposite ends of both wires to the Romeo BLE controller.
When you finish soldering it ensure you verify that the wiring system connecting the battery and Romeo controller is the same from beginning to end.
6. Design the Power Switch
With the use of eight M3 x 6mm screws, connect the side plates in the front and at the rear side of the bumper plates.
When fastening the screws don’t fasten it completely in the beginning. This will make it easy for you to detach the upper board if you eventually need to make any alterations.
When you finish, re-connect the base plate to the body of your robotic car.
7. Connect the Motors With the Microcontroller Board
Link up your motors with the microcontroller board. Be careful when doing this. You should solder the red and black wires of the left motor into M2 and solder the red and black wires of the right motor into M1.
Your attention should be focused on the pack of the battery. You should solder the black wire into the GND wire port band solder the red wire in the wire port with the VND label. You need your screwdriver to lose or tight the wire ports. Ensure you fasten these ports well as soon as you insert the wires.
When you have finished soldering the motor wires into the microcontroller board, go ahead and connect the top plate to the bottom of the robotic car. You can fasten the sensor plate before connecting the top plate. Alternatively, you can skip this step and do it later on.
8. Connect your robot to an additional level
Look for the four holes on the bottom of the top plate. Screw the four M3 by 60mm Copper Standoffs in and connect an extra plate. You can utilize M3 x 6mm screws to connect the plate to the copper standoffs.
Add some wheels to the robotic platform you have developed and your robotic structure is set!
Programming Your Robot
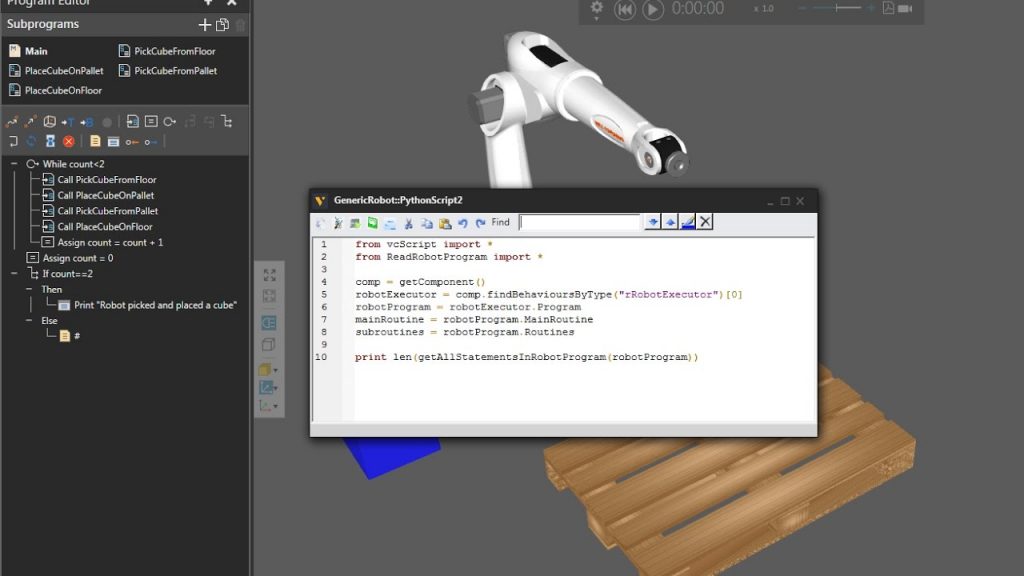
When you have finished building your robotic platform, the next step is to upload the microcontroller, so that your robot can move. Now, you have finished assembling your robot, it has all the essential features it needs to move.
What you need to do now is to check the sample codes for a file with the title- “MotorTest.ino”, download it and upload the code to the microcontroller. Once you download and upload it, the motor will and wheels will start functioning almost immediately. If they don’t work, verify if you install the batteries and power switch correctly.
As soon as you get the motors working, you have finish building your robot. You can now let your robotic car move. If the robotic car moves in a forward direction within seconds and moves backward in another second, you’ve got the component settings right. If not, you need to do some kinds of adjustments.