Introduction
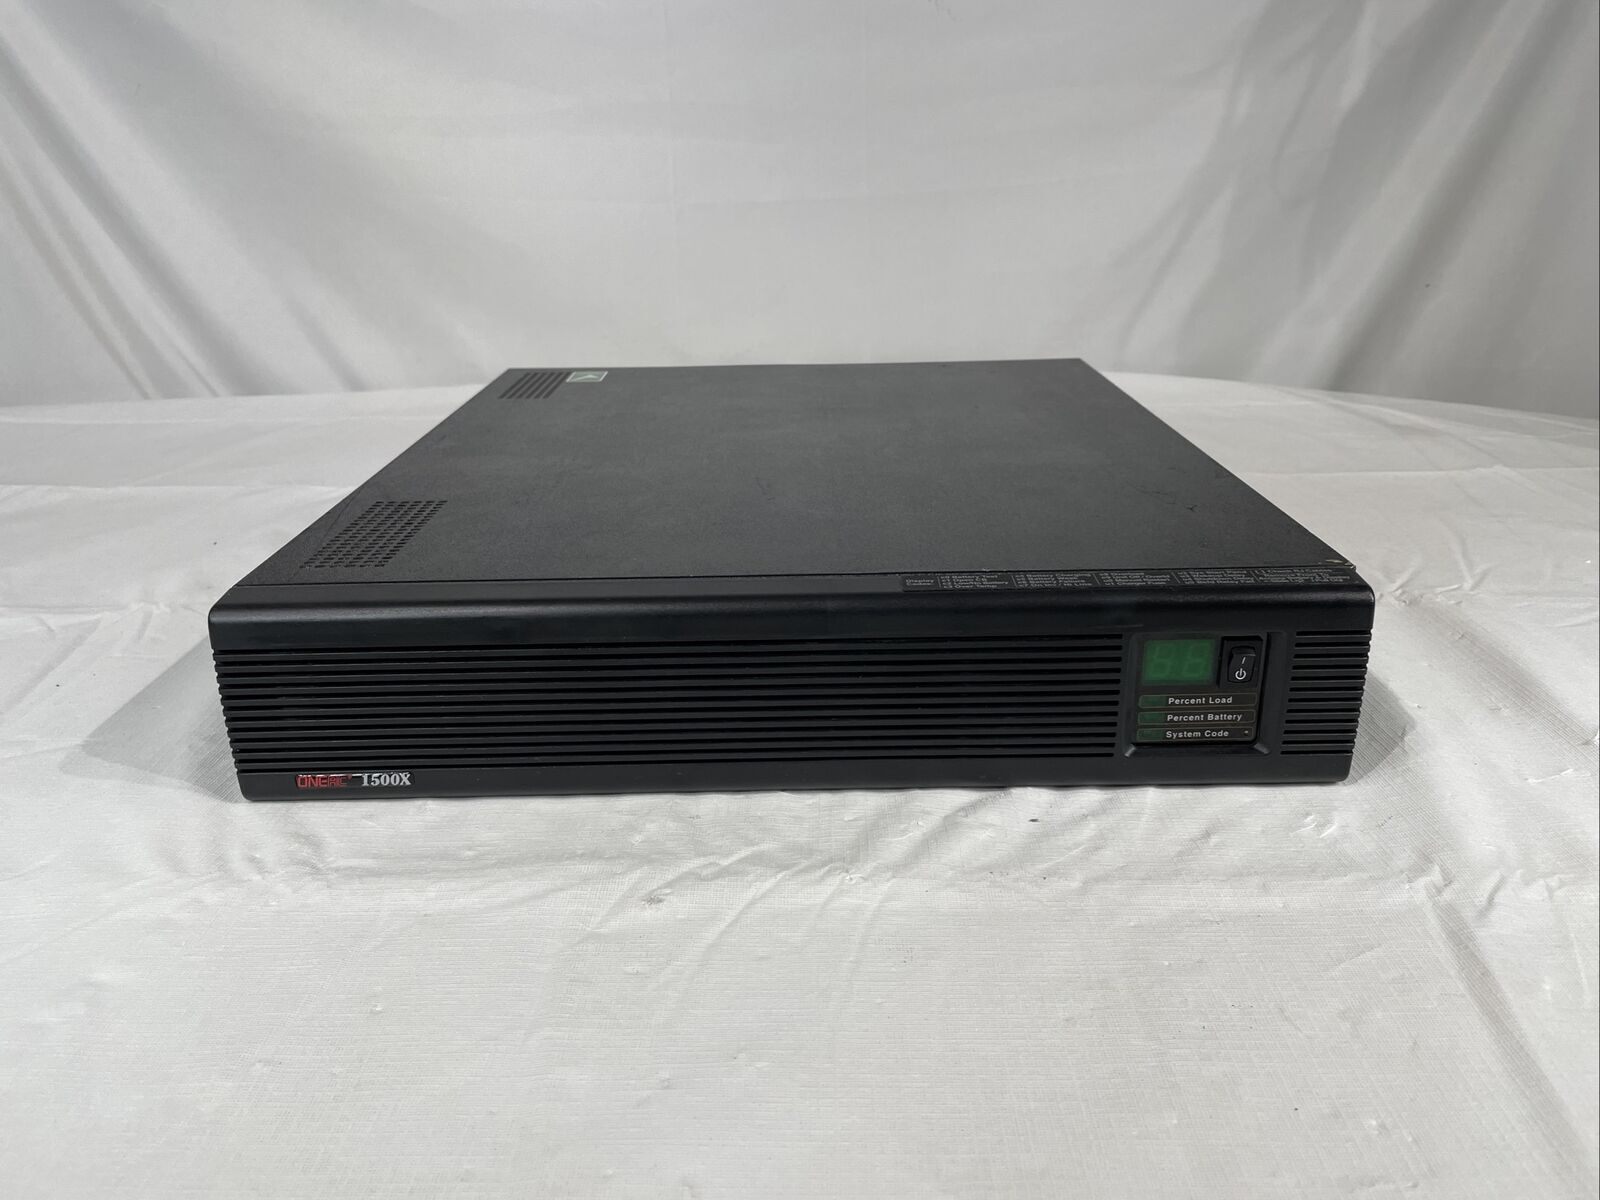
Welcome to this guide on how to replace the ONEAC UPS Battery 1500X. UPS batteries are an essential component of uninterruptible power supply systems, providing backup power during electrical outages, surges, or fluctuations. Over time, these batteries may need to be replaced to maintain the UPS system’s functionality and reliability.
Replacing the battery of a ONEAC UPS 1500X is a straightforward process that can easily be done by following a few steps. This guide will take you through the necessary steps to ensure a successful battery replacement. By properly replacing the battery, you can restore the UPS system’s ability to provide uninterrupted power to your critical devices and equipment.
Before we dive into the steps, it is important to note that safety is paramount. Make sure to adhere to all safety precautions, including wearing protective gear and working in a well-ventilated area. Additionally, always refer to the manufacturer’s guidelines or user manual specific to your ONEAC UPS model. Now let’s get started!
Checking the Battery Status
Before replacing the ONEAC UPS Battery 1500X, it is essential to check the battery’s status to confirm if replacement is indeed necessary. Here is how you can check the battery status:
- Power off the UPS: Start by turning off the main power switch of the UPS to ensure your safety during the inspection.
- Visual inspection: Look for any signs of physical damage or leakage on the battery. If you notice any bloating, corrosion, or fluid leakage, it is a clear indication that the battery needs to be replaced.
- LED indicators: Many UPS models have LED indicators to display the status of the battery. Refer to the user manual for your specific ONEAC UPS model to understand the meaning of different LED light colors or patterns. If the LED indicators show a fault or low battery status, it is likely time to replace the battery.
- Battery runtime: If the UPS provides a monitoring interface or software, check the battery runtime remaining. If the runtime has significantly decreased compared to the original specification, it indicates that the battery’s capacity has significantly diminished, and replacement is necessary.
Remember to document the battery status before and after replacement to keep track of the UPS’s maintenance history. This information can be helpful in troubleshooting any future issues and planning for timely replacements.
Now that you have assessed the battery status, let’s move on to the next step – gathering the necessary tools for the battery replacement process.
Gathering the Necessary Tools
Before you begin replacing the ONEAC UPS Battery 1500X, it’s important to gather all the necessary tools to ensure a smooth and efficient battery replacement. Here are the tools you will need:
- Safety equipment: Prioritize your safety by wearing safety gloves and safety glasses to protect yourself from any potential accidents or battery-related hazards.
- User manual: Keep the user manual or documentation provided by ONEAC handy. It contains valuable information specific to your UPS model, including detailed instructions and diagrams for battery replacement.
- Replacement Battery: Purchase a compatible replacement battery for your ONEAC UPS 1500X. Make sure to check the specifications and model compatibility to ensure a proper fit.
- Screwdriver or Allen wrench: Depending on your UPS model, you may need a screwdriver or an Allen wrench to remove screws or fasteners securing the battery compartment or battery cover.
- Battery cables: Ensure that you have the necessary battery cables to connect the new battery securely. These cables should be compatible with your UPS model.
- Cleaning supplies: It’s always a good idea to have some cleaning supplies on hand, such as a soft cloth or paper towels, to clean the battery compartment and terminals if necessary.
Once you have gathered all the required tools, double-check to ensure you have everything before proceeding with the battery replacement process. Having everything prepared will save you time and effort during the replacement process.
In the next section, we will discuss how to disconnect the UPS from power before safely proceeding with the battery replacement.
Disconnecting the UPS from Power
Before you begin replacing the ONEAC UPS Battery 1500X, it is crucial to disconnect the UPS from power to ensure your safety and prevent any accidental damage. Follow these steps to disconnect the UPS from power:
- Power off connected devices: Safely shut down and power off any devices or equipment that are connected to the UPS. This will ensure that there are no active power sources that could cause a potential electrical hazard.
- Unplug the power cord: Locate the power cord connected to the UPS and unplug it from the electrical outlet. This will disconnect the UPS from the main power source.
- Check for battery power: Even after unplugging the power cord, the UPS may still have residual battery power. To verify if there is any remaining power, try powering on any connected devices to see if they receive power. If they do, allow them to fully power down.
- Double-check for safety: Before proceeding to the next steps, visually inspect the UPS to ensure all power sources have been disconnected. Check for any loose cables or connections that could pose a safety risk during the battery replacement process.
By following these steps, you have successfully disconnected the ONEAC UPS 1500X from power, minimizing any potential electrical dangers. In the next section, we will discuss how to identify the battery compartment for the battery replacement.
Identifying the Battery Compartment
After disconnecting the ONEAC UPS from power, the next step is to identify the battery compartment where the old battery is located. Follow these steps to locate the battery compartment:
- Refer to the user manual: Consult the user manual or documentation provided by ONEAC specific to your UPS model. The manual should contain detailed illustrations or descriptions that indicate the location of the battery compartment.
- Inspect the UPS casing: Examine the UPS casing for any markings, labels, or indicators that suggest the location of the battery compartment. Look for any removable panels or covers that may provide access to the battery.
- Check the rear or bottom of the UPS: In many UPS models, the battery compartment is located at the rear or bottom. Carefully turn the UPS around or invert it (if possible) to check for any visible signs of the battery compartment.
- Observe previous battery placement: If you are replacing a battery that has already been installed, take note of its current location. This can give you a clue about where to find the battery compartment.
Once you have identified the battery compartment, make sure to take note of any specific instructions or precautions mentioned in the user manual. This will help you proceed with the battery replacement process smoothly and avoid any unnecessary mistakes or mishaps.
In the next section, we will discuss how to remove the battery cover to gain access to the old battery.
Removing the Battery Cover
With the battery compartment identified, the next step in replacing the ONEAC UPS Battery 1500X is to remove the battery cover. Follow these steps to safely remove the battery cover:
- Ensure the UPS is in a stable position: Place the UPS on a flat and stable surface to prevent it from tipping over during the battery removal process. This will help maintain balance and avoid any potential damage to the UPS or injury to yourself.
- Prepare necessary tools: Depending on your UPS model, you may need a screwdriver or Allen wrench to remove any screws or fasteners holding the battery cover in place. Have these tools ready before proceeding.
- Identify the fastening mechanism: Locate the screws or fasteners that secure the battery cover to the UPS casing. They may be situated on the front, sides, or rear of the UPS, depending on the model. Consult the user manual or refer to any markings or indications on the casing for guidance.
- Remove the screws or fasteners: Using the appropriate tool, carefully loosen and remove the screws or fasteners that hold the battery cover in place. Keep the screws or fasteners in a safe place to prevent loss or misplacement.
- Gently lift off the battery cover: Once the screws or fasteners are removed, gently lift the battery cover off the UPS casing. Be cautious and ensure a firm grip to avoid accidental dropping or damage to the cover or the UPS internals.
By following these steps, you have successfully removed the battery cover and gained access to the old battery. Handle the battery cover with care and set it aside in a safe place while you proceed to the next step of disconnecting the old battery.
In the next section, we will discuss the process of disconnecting the old battery from the UPS.
Disconnecting the Old Battery
Now that you have removed the battery cover, it’s time to disconnect the old battery from the ONEAC UPS 1500X. Follow these steps to safely disconnect the old battery:
- Observe battery connections: Take a moment to observe how the old battery is connected to the UPS. Note the positions of the positive (+) and negative (-) terminals, as well as any other auxiliary connections.
- Disconnect auxiliary connections: If there are any additional cables or connectors attached to the old battery, such as communication cables or monitoring wires, carefully disconnect them by gently pulling the connectors apart.
- Disconnect the main battery cables: Locate the main battery cables connected to the old battery. These cables are usually color-coded, with red for positive and black for negative. Use caution and, if necessary, a pair of pliers or a wrench to loosen the cable clamps or connectors.
- Remove the old battery: Once the cables are disconnected, carefully lift the old battery out of the battery compartment. Be mindful of the weight of the battery and any sharp edges.
- Safely set aside the old battery: Place the old battery in a designated area away from flammable materials or extreme temperatures. It is essential to dispose of the old battery properly according to local regulations.
During this process, be mindful of your surroundings and avoid touching any exposed metal parts or terminals to minimize the risk of electrical shock. Take note of the battery’s orientation, as you will need to install the new battery in the same alignment.
Now that the old battery has been safely disconnected, we can move on to installing the new battery in the next section.
Installing the New Battery
With the old battery safely disconnected, it’s time to install the new battery into the ONEAC UPS 1500X. Follow these steps to ensure a proper and secure installation:
- Follow safety guidelines: Put on your safety gloves and make sure you are working in a well-ventilated area to avoid exposure to harmful fumes or gases.
- Prepare the new battery: Take the new replacement battery and inspect it for any signs of damage or defects. Ensure that it matches the specifications and model compatibility requirements for your ONEAC UPS 1500X.
- Align the new battery: Position the new battery correctly in the battery compartment, ensuring that it is aligned properly with the positive (+) and negative (-) terminals in the same orientation as the old battery.
- Connect the main battery cables: Take the main battery cables, ensuring that the red cable is connected to the positive terminal and the black cable to the negative terminal. Tighten the cable clamps or connectors securely to establish a reliable connection.
- Reconnect auxiliary connections: If there were any additional cables or connectors attached to the old battery, reconnect them to the corresponding ports or terminals on the new battery, following any specific instructions provided in the user manual.
It’s crucial to ensure that all connections are secure and properly tightened. Loose connections can lead to poor performance, unstable power supply, or even damage to the UPS unit or the new battery.
Once the new battery is properly installed and connected, we can move on to the next step of securing the battery cables to ensure stability.
Securing the Battery Cables
After installing the new battery in the ONEAC UPS 1500X, the next step is to secure the battery cables to ensure stability and prevent accidental disconnection. Follow these steps to properly secure the battery cables:
- Arrange the cables properly: Take a moment to organize the battery cables neatly to avoid any tangling or interference with other components inside the UPS unit. This will facilitate easy access and prevent any potential damage in the future.
- Secure the cable clamps or connectors: Using pliers or a wrench, tighten the cable clamps or connectors on the battery terminals. Make sure they are firm, but be cautious not to overtighten as it may damage the terminals.
- Avoid pinching or crushing cables: Pay careful attention to the routing of the battery cables, ensuring they are not pinched between the battery or any other components. Any sharp edges or excessive pressure can lead to damage or failure of the cables.
- Verify proper cable placement: Double-check that the red (positive) cable is securely connected to the positive terminal (+) and the black (negative) cable is connected to the negative terminal (-). Proper cable placement is crucial for the UPS to function correctly.
- Inspect cable connections: Once the cables are firmly secured, visually inspect the connections to ensure there are no loose or exposed wires. If any issues are identified, resolve them promptly before proceeding.
Properly securing the battery cables is essential for maintaining a stable electrical connection and ensuring the longevity of the UPS system. It helps prevent disruptions in power supply and minimizes the risk of electrical hazards.
With the battery cables securely in place, we can now proceed to the next step of replacing the battery cover.
Replacing the Battery Cover
After securing the battery cables, it’s time to put the battery cover back on the ONEAC UPS 1500X. Follow these steps to ensure a proper replacement of the battery cover:
- Inspect the battery compartment: Before replacing the battery cover, take a moment to inspect the battery compartment to ensure there are no loose wires or obstructions that could interfere with the cover’s proper placement.
- Align the battery cover: Position the battery cover in the appropriate orientation to align with the screw holes or fasteners on the UPS casing.
- Insert the screws or fasteners: Using the appropriate tool, insert and tighten the screws or fasteners to secure the battery cover to the UPS casing. Follow the specific guidelines provided in the user manual to ensure the correct tightening torque.
- Double-check for proper fit: After securing the battery cover, verify that it fits snugly and is properly aligned with the UPS casing. There should be no gaps or irregularities that could compromise the UPS’s structural integrity.
- Ensure accessibility: While ensuring a secure fit, confirm that the necessary access points, such as ventilation holes or control panel openings, are not blocked by the battery cover.
Properly replacing the battery cover is crucial to protect the battery and internal components of the UPS from dust, debris, and potential damage. It also helps maintain the aesthetics of the UPS unit.
Once you have securely replaced the battery cover, we can proceed to the next step of reconnecting the UPS to power.
Reconnecting the UPS to Power
After successfully replacing the battery cover, the next step is to reconnect the ONEAC UPS 1500X to power. Follow these steps to safely reconnect the UPS:
- Double-check the power cord: Confirm that the power cord is unplugged from the electrical outlet to prevent any accidental power supply during the reconnection process.
- Position the UPS: Place the UPS in its desired location, ensuring it is on a stable surface away from any obstructions or sources of heat or moisture.
- Plug in the power cord: Take the power cord and plug it securely into a suitable electrical outlet. Ensure that the outlet is compatible with the UPS’s power requirements and is grounded properly.
- Power on the UPS: Locate the main power switch on the UPS and switch it on. The UPS unit will now receive power and initiate the startup process.
- Monitor the startup process: Observe the UPS as it begins the startup procedure, indicated by LED lights or display indicators. The UPS may perform self-checks and configuration adjustments before reaching a ready state.
- Verify normal operation: Confirm that the UPS is operating normally by checking the LED indicators or any monitoring interface provided by the manufacturer. Ensure that there are no error messages or abnormal behavior.
Take note of any specific instructions or additional steps outlined in the user manual provided by ONEAC. Adhere to all guidelines to ensure a smooth and safe reconnection process.
With the UPS successfully reconnected to power, we can move on to the final step of verifying the battery replacement.
Verifying the Battery Replacement
After reconnecting the ONEAC UPS to power, it is important to verify the success of the battery replacement process. Follow these steps to ensure that the new battery is functioning correctly:
- Monitor LED indicators: Observe the LED indicators or display on the UPS to check for any error messages or warnings related to the battery. A properly functioning battery should not trigger any fault indicators.
- Run a self-test: Many UPS models offer a self-test feature to verify the health and functionality of the battery. Refer to the user manual to perform a self-test and ensure that the new battery is providing the expected backup power.
- Check battery runtime: Monitor the estimated battery runtime provided by the UPS. Compare this with the expected runtime specified in the user manual or manufacturer’s specifications for your specific UPS model. Significant discrepancies may indicate further investigation or adjustments are necessary.
- Confirm device power: Connect critical devices or equipment to the UPS and verify that they receive power during a simulated power outage or blackout. Check that the devices are functioning as expected and that the UPS is providing uninterrupted power.
- Maintain documentation: Document the date and details of the battery replacement for future reference. This information will be useful for tracking the lifespan of the new battery and scheduling future replacements.
If any issues are encountered during the verification process or if you notice that the UPS is not functioning correctly, refer to the troubleshooting section of the user manual or seek professional assistance. It is important to address any potential issues promptly to ensure the reliable operation of your ONEAC UPS.
Congratulations on successfully verifying the battery replacement! Your ONEAC UPS 1500X is now equipped with a new battery, ready to provide reliable backup power during unforeseen electrical outages or fluctuations.


