Introduction
Enabling a hotspot on your Chromebook can be a game-changer, providing you with the flexibility to connect other devices to the internet when a Wi-Fi network is unavailable. Whether you're in a remote location, traveling, or simply experiencing Wi-Fi connectivity issues, having the ability to create a hotspot from your Chromebook can keep you connected and productive.
In this comprehensive guide, we will walk you through the step-by-step process of enabling a hotspot on your Chromebook. By following these instructions, you will gain the knowledge and confidence to harness the full potential of your device, ensuring that you can establish a reliable internet connection for your other devices whenever the need arises.
The process of setting up a hotspot on your Chromebook is straightforward and can be accomplished with ease, even if you're not particularly tech-savvy. By the end of this guide, you will have a clear understanding of how to access the necessary settings, turn on the hotspot feature, configure its settings, and connect your devices seamlessly.
Now, let's embark on this journey to unlock the hotspot functionality of your Chromebook. Get ready to empower your device with the ability to serve as a reliable source of internet connectivity for your other gadgets, whether it's a smartphone, tablet, or another computer. With this newfound knowledge, you'll be equipped to stay connected and productive in a variety of situations, ensuring that a lack of Wi-Fi is no longer a barrier to your online activities.
Step 1: Accessing Settings
Accessing the settings on your Chromebook is the initial step towards enabling the hotspot feature. The settings menu serves as the control center for various functions and configurations, allowing you to customize your device according to your preferences. To begin, you'll need to access the settings by following these simple steps:
-
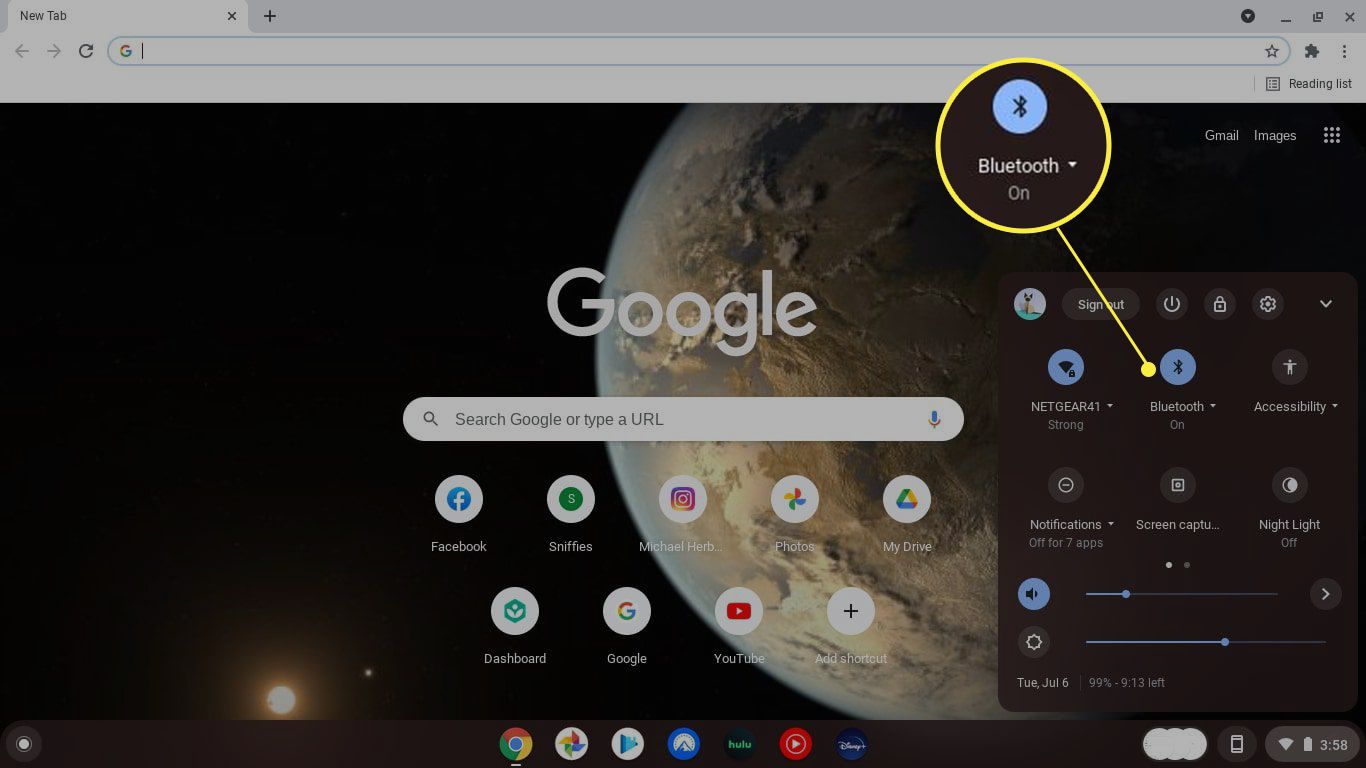
Click on the Time: Located in the bottom-right corner of the screen, you'll find the time display. Click on it to unveil a panel that presents several quick settings options.
-
Select the Gear Icon: Within the panel that appears after clicking on the time, look for the gear icon, which signifies the settings menu. Click on this icon to proceed to the main settings interface.
-
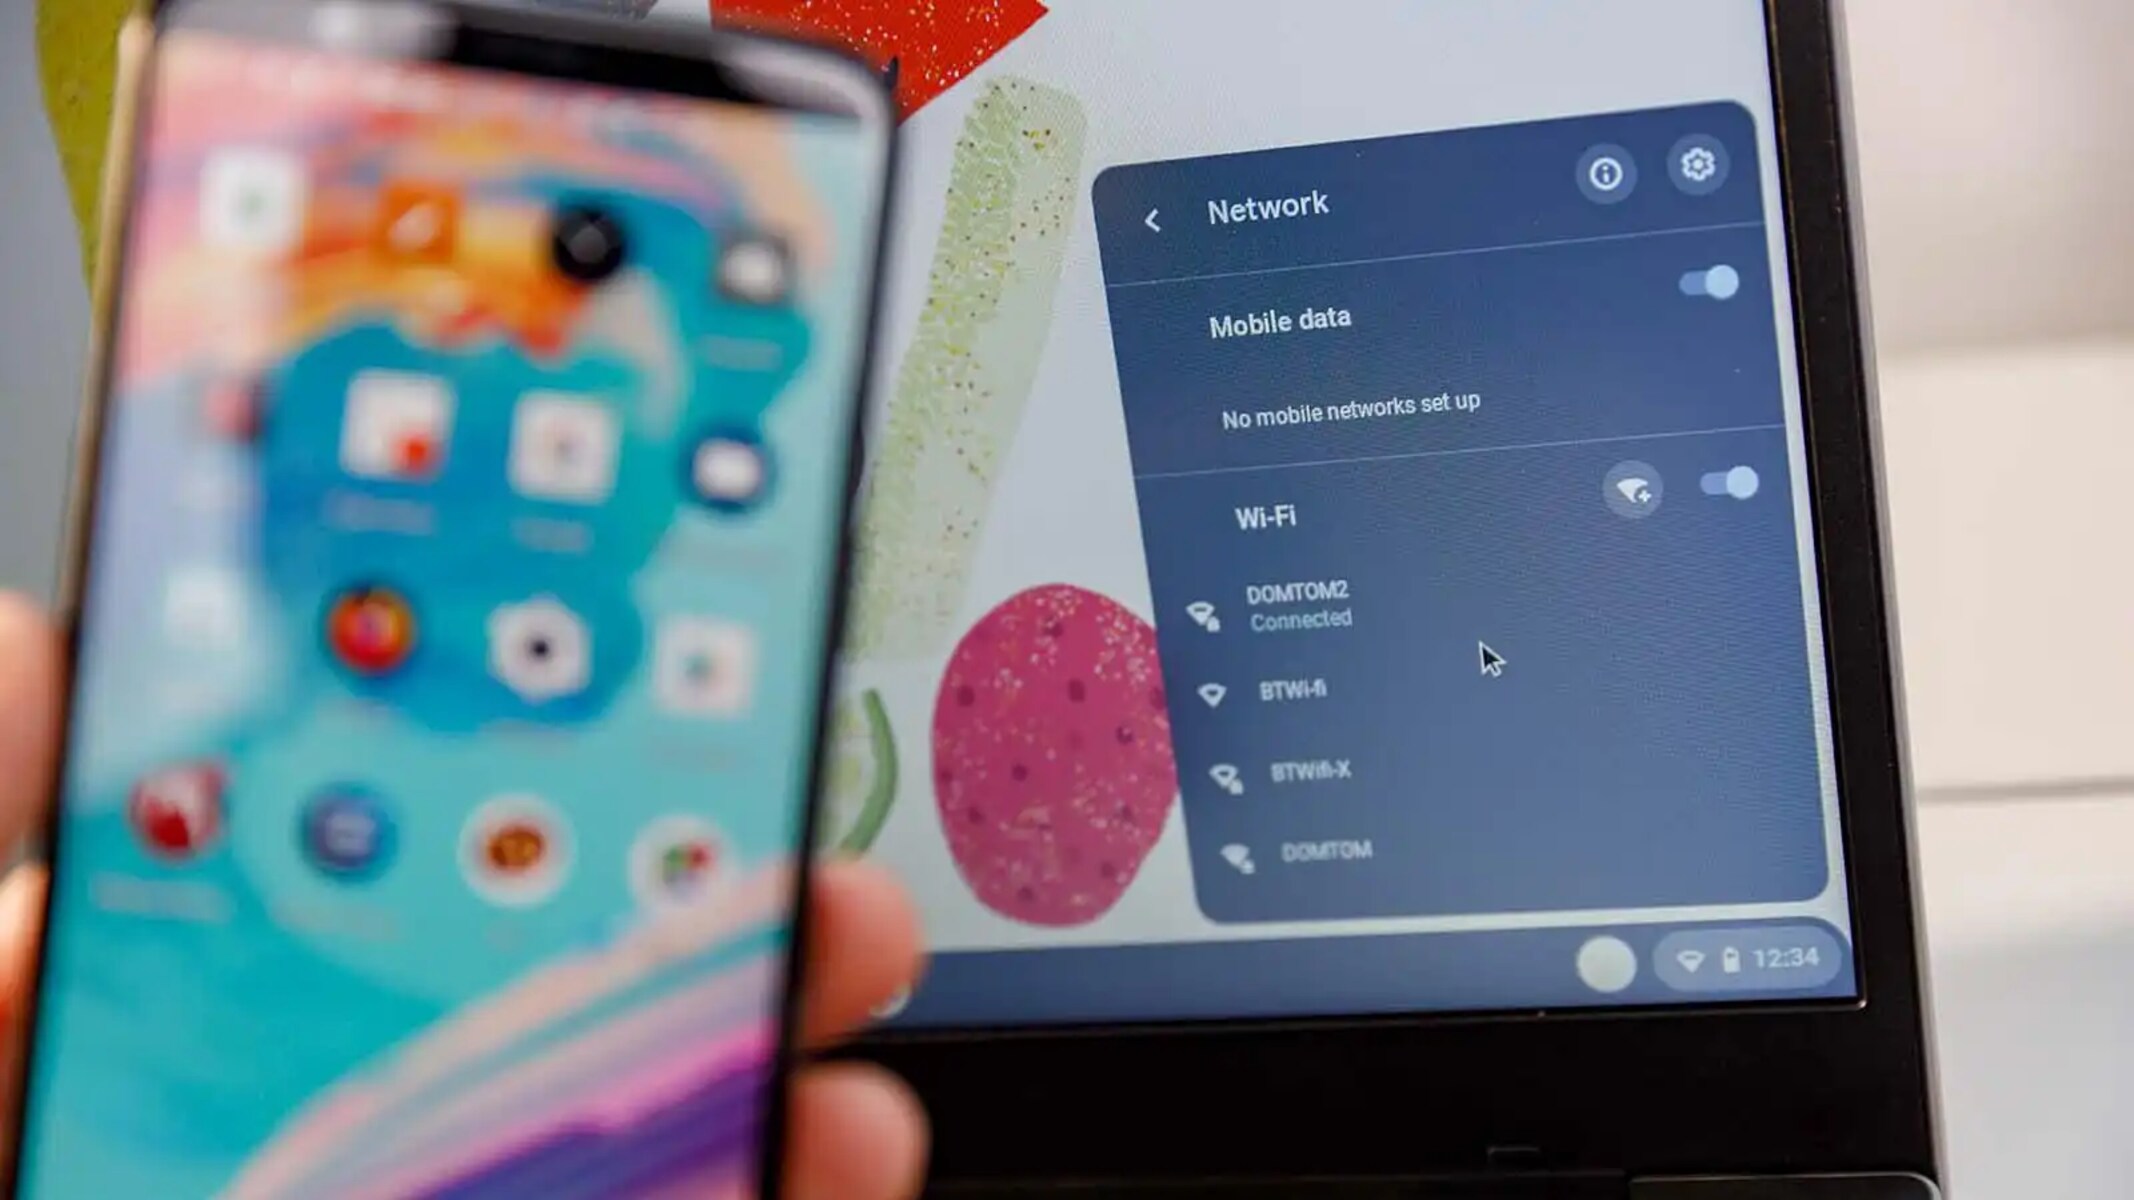
Navigate to 'Network': Once you're in the settings menu, navigate to the 'Network' section. This is where you'll find all the network-related settings, including Wi-Fi, Bluetooth, and the hotspot feature.
-
Choose 'Internet Connection': Under the 'Network' section, locate and select 'Internet connection.' This will lead you to the specific settings related to internet connectivity, including the option to enable the hotspot feature.
By successfully following these steps, you will have accessed the settings menu on your Chromebook, positioning yourself to move on to the next crucial steps in enabling the hotspot feature. This fundamental process sets the stage for the subsequent actions required to activate and configure the hotspot, ultimately allowing you to establish a reliable internet connection for your other devices.
With the settings now within reach, you're ready to embark on the next phase of the hotspot setup process. By navigating through the settings menu, you're taking a significant stride towards harnessing the full potential of your Chromebook and leveraging its capabilities to keep you connected in various scenarios. As we move forward, you'll gain the knowledge and confidence to enable the hotspot feature and configure it according to your preferences, ensuring that you can establish a seamless internet connection for your other devices whenever the need arises.
Step 2: Turning on Hotspot
Enabling the hotspot feature on your Chromebook is a pivotal step that empowers your device to serve as a source of internet connectivity for other devices. By activating the hotspot, you create a Wi-Fi network that other gadgets can connect to, ensuring that they can access the internet through your Chromebook. This functionality is particularly valuable when a traditional Wi-Fi network is unavailable, allowing you to stay connected and productive in a variety of situations.
To turn on the hotspot feature on your Chromebook, follow these straightforward steps:
-
Access the Internet Connection Settings: Once you've navigated to the "Internet connection" section within the settings menu, you'll find the option to enable the hotspot feature. Locate and select the "Hotspot" option to proceed to the hotspot settings interface.
-
Toggle the Hotspot Switch: Within the hotspot settings interface, you'll find a switch that allows you to turn the hotspot feature on or off. Simply toggle the switch to the "on" position to activate the hotspot. Upon doing so, your Chromebook will begin broadcasting a Wi-Fi network that other devices can connect to.
-
Customize Hotspot Name and Password (Optional): While in the hotspot settings interface, you have the option to customize the network name (SSID) and password for your hotspot. This step is particularly important if you want to ensure the security and uniqueness of your hotspot network. By setting a personalized network name and a strong, memorable password, you can enhance the security and accessibility of your hotspot.
-
Confirm Activation: Once you've turned on the hotspot and, if applicable, customized the network name and password, you're all set. Your Chromebook is now serving as a hotspot, ready to provide internet connectivity to other devices within its range.
By following these steps, you've successfully turned on the hotspot feature on your Chromebook, unlocking its potential to keep you connected and productive even in the absence of a traditional Wi-Fi network. With the hotspot activated, you're now poised to connect your other devices to your Chromebook's hotspot, ensuring that they can access the internet seamlessly.
As you move forward in this process, you'll gain the knowledge and confidence to configure the hotspot settings according to your preferences, further enhancing the functionality and security of your hotspot. With the hotspot feature now active, you're ready to proceed to the next phase of the setup process, where you'll configure the hotspot settings to ensure a seamless and secure internet connection for your other devices.
Step 3: Configuring Hotspot Settings
Configuring the hotspot settings on your Chromebook is a crucial aspect of enabling a seamless and secure internet connection for your other devices. By customizing the hotspot settings according to your preferences, you can ensure that the network is tailored to meet your specific needs, including security, accessibility, and overall performance. To embark on this essential configuration process, follow these detailed steps:
-
Customize Network Name (SSID): Within the hotspot settings interface, locate the option to customize the network name, also known as the SSID (Service Set Identifier). This name is what other devices will see when they search for available Wi-Fi networks. By setting a personalized and easily identifiable SSID, you can enhance the accessibility and recognition of your hotspot network.
-
Set a Strong Password: Security is paramount when it comes to creating a hotspot. Within the hotspot settings, you'll find the option to set a password for your network. It's crucial to establish a strong, unique password that can prevent unauthorized access and protect your internet connection. By incorporating a combination of uppercase and lowercase letters, numbers, and special characters, you can fortify the security of your hotspot.
-
Choose the Security Type: Chromebook offers different security types for hotspots, including WPA and WPA2. Selecting the appropriate security type is essential for safeguarding your network against potential threats. It's recommended to opt for the latest security protocols available to ensure the highest level of protection for your hotspot.
-
Manage Connected Devices: In the hotspot settings, you may have the option to manage the devices connected to your hotspot. This feature allows you to view and control the devices that are currently accessing your network. By monitoring the connected devices, you can ensure that your hotspot is being used responsibly and securely.
-
Adjust Band and Channel Settings (Advanced): For users with advanced networking knowledge, Chromebook may offer the ability to adjust the band and channel settings for the hotspot. This advanced configuration allows for optimization of the network's performance in crowded Wi-Fi environments, ensuring a stable and efficient connection for your devices.
By meticulously configuring these hotspot settings, you can tailor the network to meet your specific requirements, ensuring that it delivers a seamless, secure, and reliable internet connection for your other devices. With these settings in place, you're poised to harness the full potential of your Chromebook's hotspot feature, empowering you to stay connected and productive in diverse scenarios.
As you proceed to configure the hotspot settings, you're taking a significant stride towards optimizing the functionality and security of your hotspot. By customizing these settings, you're not only enhancing the accessibility and performance of your hotspot but also fortifying its defenses against potential security threats. With the hotspot settings now configured, you're ready to connect your devices and experience the convenience and reliability of your Chromebook's hotspot in action.
Step 4: Connecting Devices to Hotspot
Now that you've successfully enabled and configured the hotspot on your Chromebook, it's time to connect your other devices and experience the convenience of seamless internet access. Whether you're using a smartphone, tablet, or another computer, connecting to your Chromebook's hotspot is a straightforward process that allows you to stay connected on the go. Follow these steps to connect your devices to the hotspot:
-
Access Device Settings: On the device you want to connect to the hotspot, navigate to the Wi-Fi or network settings. This can usually be found in the device's settings menu, often represented by a gear or cog icon.
-
Scan for Available Networks: Within the Wi-Fi settings, initiate a scan for available networks. Your Chromebook's hotspot, identified by the customized network name (SSID) you configured earlier, should appear in the list of available networks.
-
Select the Chromebook's Hotspot: From the list of available networks, locate and select your Chromebook's hotspot. It will be identified by the personalized network name you set during the hotspot configuration.
-
Enter Hotspot Password (if applicable): If you set a password for your hotspot during the configuration process, you'll be prompted to enter it when attempting to connect from another device. Enter the password accurately to establish the connection.
-
Establish Connection: Once the correct password is entered, the device will attempt to establish a connection to your Chromebook's hotspot. Upon successful authentication, the device will be connected to the hotspot, allowing it to access the internet through your Chromebook's network.
-
Confirmation: After the connection is established, your device will display a confirmation, indicating that it is now connected to the Chromebook's hotspot. You should see the Wi-Fi or network icon on the device's screen, showing that it is connected to the internet via the hotspot.
By following these steps, you can effortlessly connect your devices to the hotspot created by your Chromebook, ensuring that they have access to the internet even when a traditional Wi-Fi network is unavailable. Whether you're in a remote location, traveling, or simply experiencing connectivity issues, your Chromebook's hotspot provides a reliable solution for staying connected and productive.
As you connect your devices to the hotspot, you're leveraging the full potential of your Chromebook's capability to serve as a source of internet connectivity for your other gadgets. This seamless connectivity empowers you to remain productive and connected in various scenarios, ensuring that a lack of Wi-Fi is no longer a barrier to your online activities.
Conclusion
In conclusion, the ability to enable a hotspot on your Chromebook opens up a world of possibilities, allowing you to stay connected and productive in diverse scenarios. By following the step-by-step guide outlined in this comprehensive tutorial, you've gained the knowledge and confidence to harness the full potential of your Chromebook's hotspot feature.
The process began with accessing the settings on your Chromebook, providing you with the foundational steps to navigate to the network settings and initiate the hotspot setup. From there, you seamlessly transitioned to turning on the hotspot, a pivotal moment that empowered your Chromebook to broadcast a Wi-Fi network for other devices to connect to.
The subsequent phase involved configuring the hotspot settings, where you had the opportunity to customize the network name, set a strong password, and select the appropriate security type. These actions ensured that your hotspot was tailored to meet your specific needs, providing a secure and reliable internet connection for your other devices.
Finally, you learned how to connect your devices to the Chromebook's hotspot, experiencing the convenience and flexibility of seamless internet access. Whether you're on the go, in a remote location, or facing Wi-Fi connectivity issues, your Chromebook's hotspot serves as a dependable source of internet connectivity, ensuring that you can remain connected and productive in various situations.
As you've navigated through this guide, you've not only acquired the technical know-how to enable and configure the hotspot but also unlocked the potential to overcome connectivity challenges with ease. The empowerment provided by your Chromebook's hotspot feature extends beyond the realm of technology, offering you the freedom to stay connected, productive, and engaged in a digital world that thrives on connectivity.
By embracing the capabilities of your Chromebook's hotspot, you've transcended the limitations of traditional Wi-Fi networks, ensuring that a lack of connectivity no longer hinders your online activities. With this newfound knowledge, you're equipped to leverage the hotspot feature to its fullest potential, allowing you to navigate the digital landscape with confidence and connectivity at your fingertips.