Introduction
Are you in a situation where you need to quickly set up a Wi-Fi hotspot to connect your devices to the internet? Perhaps you're at a location with unreliable or no Wi-Fi access, or maybe you're traveling and need a secure connection for your devices. In such scenarios, your Chromebook can come to the rescue by allowing you to easily set up a hotspot, providing internet access to your devices wherever you are.
In this article, we'll guide you through the simple steps to utilize your Chromebook as a hotspot. Whether you're using a Chromebook at home, at a coffee shop, or on the go, the process is straightforward and can be completed in just a few clicks. By following the steps outlined in this guide, you'll be able to create a reliable and secure Wi-Fi hotspot using your Chromebook, enabling seamless connectivity for your other devices.
Stay tuned as we delve into the step-by-step process of turning on your Chromebook's hotspot, connecting devices to it, and customizing the hotspot settings to suit your specific needs. With these easy-to-follow instructions, you'll be empowered to leverage the full potential of your Chromebook and stay connected wherever you go. Let's get started!
Step 1: Turn on your Chromebook's hotspot
Setting up a Wi-Fi hotspot using your Chromebook is a straightforward process that can be accomplished in just a few clicks. By activating the hotspot feature, you can share your Chromebook's internet connection with other devices, such as smartphones, tablets, or laptops. Here's how you can easily turn on your Chromebook's hotspot:
-
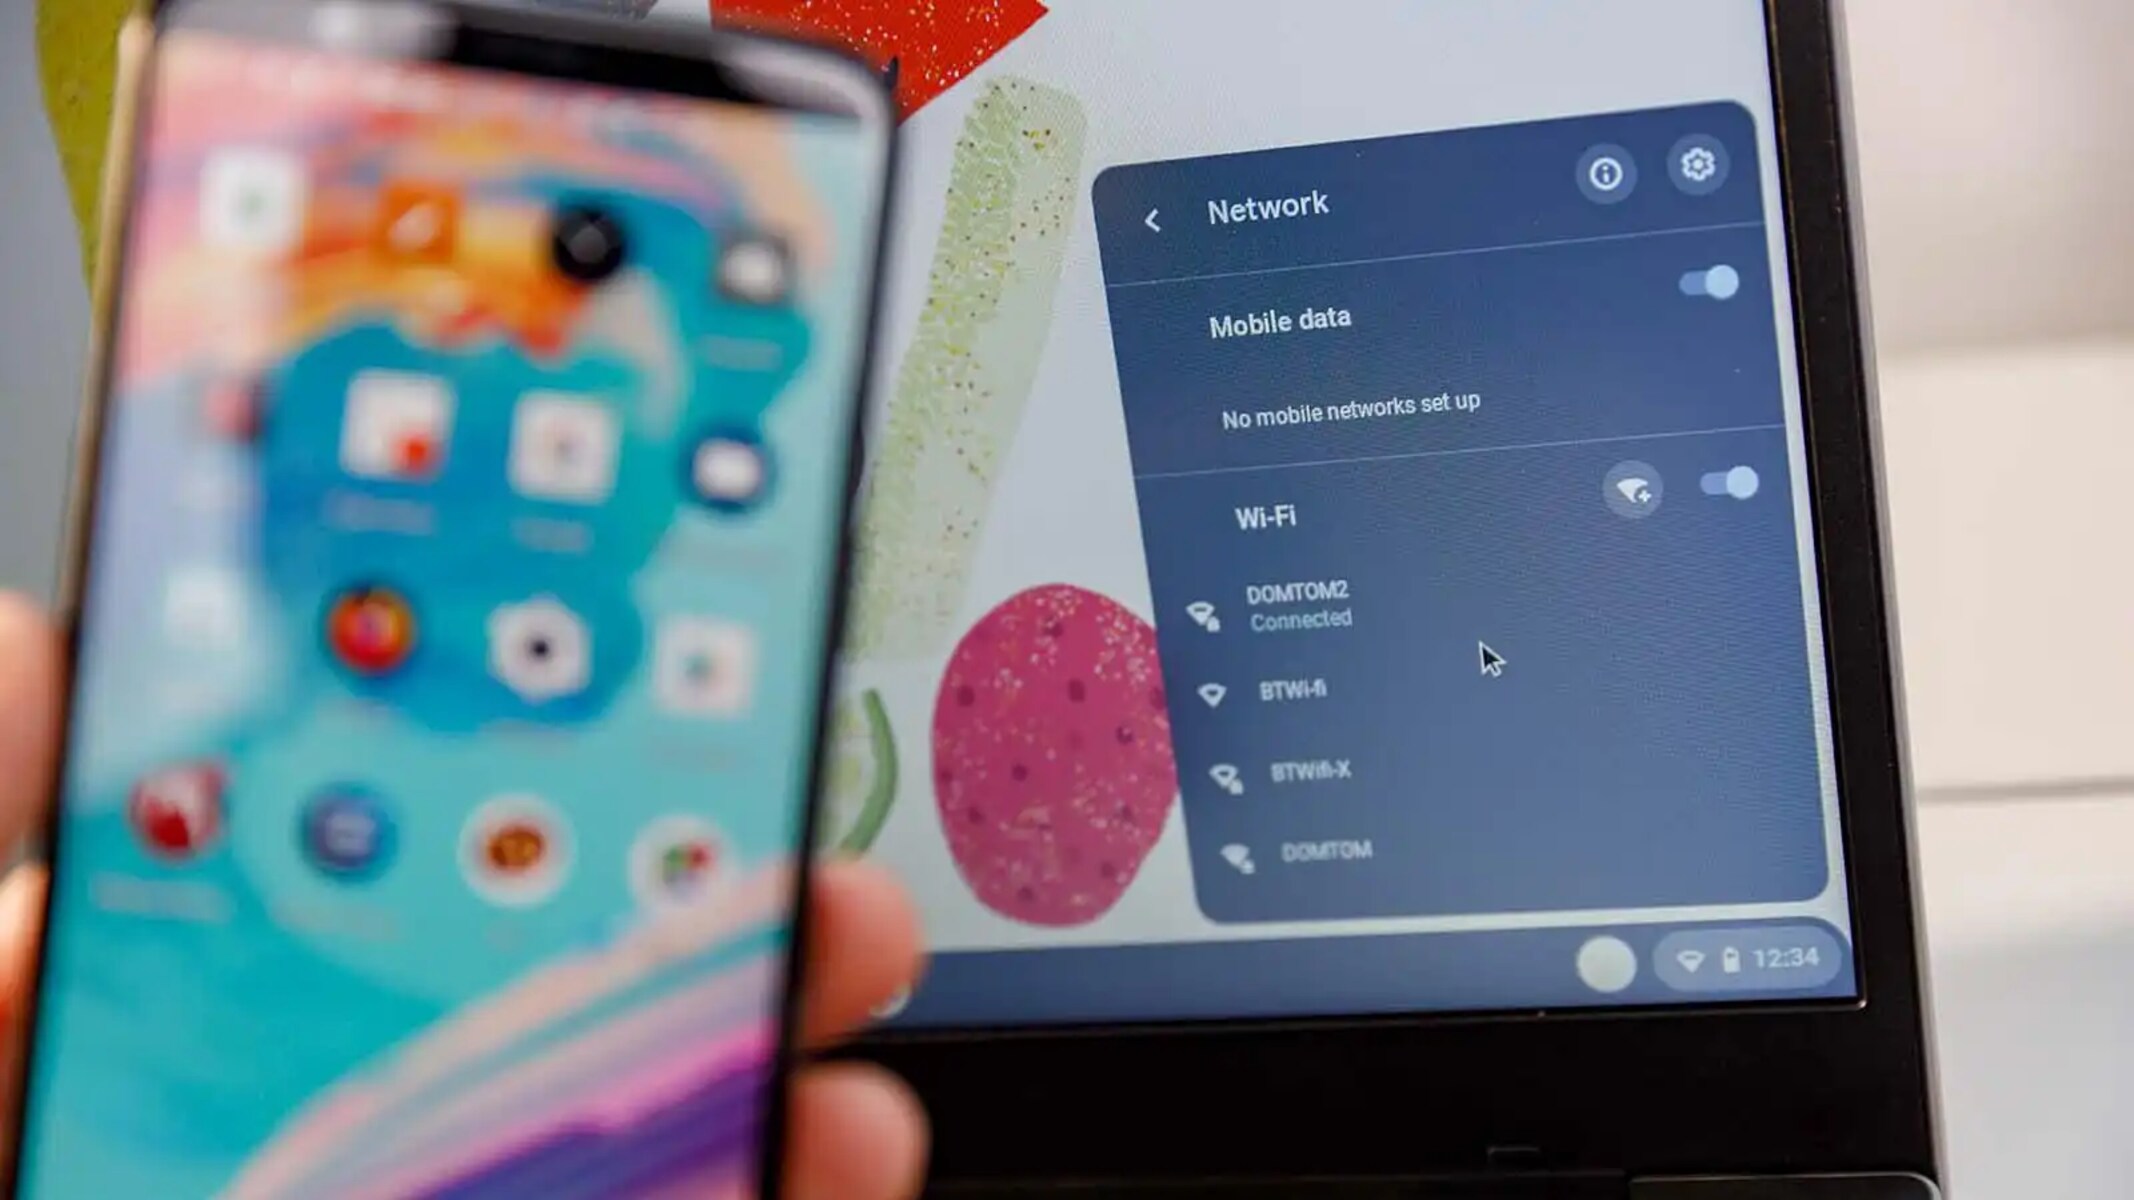
Access the Network Menu: Begin by clicking on the system tray located in the bottom-right corner of your Chromebook's screen. This will open the system menu, where you'll find the network icon. Click on the network icon to reveal the network settings.
-
Enable Hotspot Mode: Within the network settings menu, locate and select the "Hotspot" option. This will prompt your Chromebook to enable the hotspot mode, allowing it to broadcast a Wi-Fi signal that other devices can connect to.
-
Customize Hotspot Settings (Optional): If you wish to customize your hotspot settings, such as changing the network name (SSID) or setting a password for security, you can do so by clicking on the "Hotspot settings" option. This allows you to personalize the hotspot to suit your preferences and ensure a secure connection for connected devices.
-
Turn on the Hotspot: Once you've accessed the hotspot settings and made any desired customizations, simply toggle the switch to turn on the hotspot. Your Chromebook will now start broadcasting a Wi-Fi signal, making it visible to other devices in the vicinity.
-
Verify Hotspot Status: To confirm that the hotspot is active, look for the hotspot icon in the system tray. This icon indicates that the hotspot is operational and ready for other devices to connect.
By following these simple steps, you can swiftly activate the hotspot feature on your Chromebook, transforming it into a convenient Wi-Fi access point for your other devices. With the hotspot turned on, you're now ready to connect your smartphones, tablets, or laptops to your Chromebook's Wi-Fi signal, ensuring seamless internet access wherever you are.
Step 2: Connect devices to your Chromebook's hotspot
Once you've successfully activated the hotspot on your Chromebook, the next step is to connect your devices to the newly created Wi-Fi network. Whether you're using a smartphone, tablet, or another laptop, the process of joining your Chromebook's hotspot is quick and straightforward. Here's a detailed guide on how to connect your devices to your Chromebook's hotspot:
Connecting Devices to the Hotspot:
-
Access Wi-Fi Settings: On the device you wish to connect to the Chromebook's hotspot, navigate to the Wi-Fi settings. This can usually be found in the device's settings menu or by tapping on the Wi-Fi icon in the notification panel.
-
Locate and Select the Chromebook's Hotspot: In the list of available Wi-Fi networks, you should see your Chromebook's hotspot listed. The network name (SSID) will be the one you specified during the hotspot setup. Select the Chromebook's hotspot to initiate the connection process.
-
Enter Hotspot Password (If Applicable): If you've configured a password for your Chromebook's hotspot, you will be prompted to enter it at this stage. Input the designated password to authenticate and connect to the hotspot. This step ensures that only authorized devices can access the hotspot, enhancing security.
-
Verify Connection: Once the correct password is entered, the device will proceed to establish a connection to the Chromebook's hotspot. You may see a "Connected" status next to the hotspot name, indicating that the device is now successfully linked to the hotspot.
-
Enjoy Seamless Connectivity: With the device successfully connected to the Chromebook's hotspot, you can now enjoy seamless internet access. Whether you need to browse the web, stream media, or access online services, your connected device can leverage the internet connection provided by the Chromebook's hotspot.
Additional Considerations:
-
Multiple Device Connectivity: It's important to note that your Chromebook's hotspot can typically support multiple devices simultaneously. This means that you can connect several devices, such as smartphones, tablets, and laptops, to the hotspot without any issues.
-
Signal Strength and Range: The connectivity experience may vary based on the signal strength and range of the Chromebook's hotspot. For optimal performance, ensure that the connected devices are within a reasonable distance from the Chromebook to maintain a stable connection.
By following these steps, you can effortlessly connect your devices to your Chromebook's hotspot, enabling them to benefit from the internet access provided by your Chromebook. Whether you're at home, in a public space, or on the move, the ability to create and connect to a reliable Wi-Fi hotspot using your Chromebook offers unparalleled convenience and flexibility.
Step 3: Customize hotspot settings
Customizing the hotspot settings on your Chromebook allows you to tailor the Wi-Fi network to your specific preferences and enhance its security. By personalizing the hotspot, you can ensure that it meets your connectivity needs while maintaining a protected environment for connected devices. Here's a detailed overview of how you can customize the hotspot settings on your Chromebook:
Accessing Hotspot Settings:
After enabling the hotspot on your Chromebook, you have the option to customize its settings to align with your requirements. To access the hotspot settings, follow these steps:
- Click on the system tray located in the bottom-right corner of your Chromebook's screen to open the system menu.
- Select the network icon to reveal the network settings, and then click on the "Hotspot settings" option.
Personalizing the Hotspot:
Once you've accessed the hotspot settings, you can personalize various aspects of the Wi-Fi network to suit your preferences. Here are the key customization options available:
-
Network Name (SSID): You can modify the network name, also known as the SSID, to make it easily recognizable and distinguishable. This is particularly useful when multiple Wi-Fi networks are present in the vicinity, allowing you to identify your hotspot with a unique and memorable name.
-
Security Settings: It's essential to prioritize the security of your hotspot. You can set a custom password for the hotspot, ensuring that only authorized devices can connect to it. By implementing a strong and unique password, you can safeguard the network from unauthorized access and protect your data.
-
Band and Channel Selection: Depending on your specific requirements and the available Wi-Fi spectrum, you may have the option to select the preferred band (2.4GHz or 5GHz) and channel for your hotspot. This can help optimize the network performance and minimize interference from other nearby Wi-Fi networks.
-
Visibility Options: In some cases, you may have the flexibility to adjust the visibility of your hotspot. This includes options to make the network visible to all nearby devices or limit its visibility to specific devices based on predefined criteria.
Enhanced Security Measures:
Customizing the hotspot settings allows you to implement enhanced security measures, thereby fortifying the network against potential threats. By customizing the security settings and password, you can create a secure and encrypted Wi-Fi environment that safeguards the data transmitted between your Chromebook and connected devices.
Tailored Connectivity Experience:
Personalizing the hotspot settings enables you to tailor the connectivity experience to your liking. Whether it's choosing a memorable network name, optimizing the network performance, or strengthening security measures, customizing the hotspot settings empowers you to create a Wi-Fi network that aligns with your specific preferences and requirements.
By customizing the hotspot settings on your Chromebook, you can create a personalized and secure Wi-Fi environment, ensuring that your connected devices have access to a reliable and protected internet connection. Whether you're using the hotspot for work, leisure, or staying connected while on the move, the ability to customize the settings enhances the overall utility and security of your Chromebook's hotspot.
Conclusion
In conclusion, leveraging your Chromebook as a Wi-Fi hotspot presents a versatile and convenient solution for establishing internet connectivity on the go. By following the simple steps outlined in this guide, you can harness the full potential of your Chromebook and transform it into a reliable access point for your other devices.
The ability to activate the hotspot feature on your Chromebook with just a few clicks empowers you to create a secure and personalized Wi-Fi network wherever you are. Whether you're in a location with limited Wi-Fi access, traveling, or simply seeking a dedicated internet connection for your devices, the Chromebook's hotspot functionality offers unparalleled flexibility.
Furthermore, the seamless process of connecting your devices to the Chromebook's hotspot ensures that you can stay connected without the constraints of traditional Wi-Fi networks. Whether it's accessing online resources, staying productive, or enjoying entertainment, the hotspot functionality extends the connectivity of your Chromebook to your other devices, enabling a seamless and unified online experience.
Customizing the hotspot settings further enhances the utility and security of the Wi-Fi network, allowing you to tailor the network name, security measures, and visibility options to align with your specific preferences. This personalized approach ensures that the hotspot not only meets your connectivity needs but also provides a protected environment for your connected devices.
In essence, the ability to utilize your Chromebook as a hotspot transcends the conventional limitations of Wi-Fi access, offering a practical and adaptable solution for staying connected in diverse scenarios. Whether you're a student, professional, or avid traveler, the Chromebook's hotspot functionality empowers you to establish a dependable internet connection for your devices, fostering productivity, entertainment, and seamless connectivity.
By embracing the potential of your Chromebook as a Wi-Fi hotspot, you can unlock a world of possibilities, ensuring that your devices remain connected and accessible wherever you go. The combination of simplicity, versatility, and customization makes the Chromebook's hotspot feature a valuable asset, providing a reliable bridge to the digital world in an increasingly interconnected environment.