Introduction
Are you tired of constantly misplacing your stylus or shelling out dollars for a new one every time it goes missing? What if there was a way to create your own stylus using everyday materials? Well, the good news is that you can! Crafting your own stylus can be a fun and rewarding DIY project that not only saves you money but also allows you to customize the stylus to your preferences.
In this guide, we will take you through the step-by-step process of creating your very own stylus using common household items. Whether you're an artist looking for a more precise drawing tool, a student in need of a reliable note-taking accessory, or simply someone who enjoys getting crafty, this DIY stylus project is perfect for you.
By the end of this guide, you'll have a personalized stylus that suits your needs and reflects your creativity. So, roll up your sleeves, gather your materials, and let's embark on this magical journey of crafting your very own stylus!
Materials Needed
Before diving into the exciting process of creating your DIY stylus, it’s essential to gather the necessary materials. The beauty of this project lies in its simplicity, as many of the items can be found around your home or easily purchased at a local store. Here’s what you’ll need:
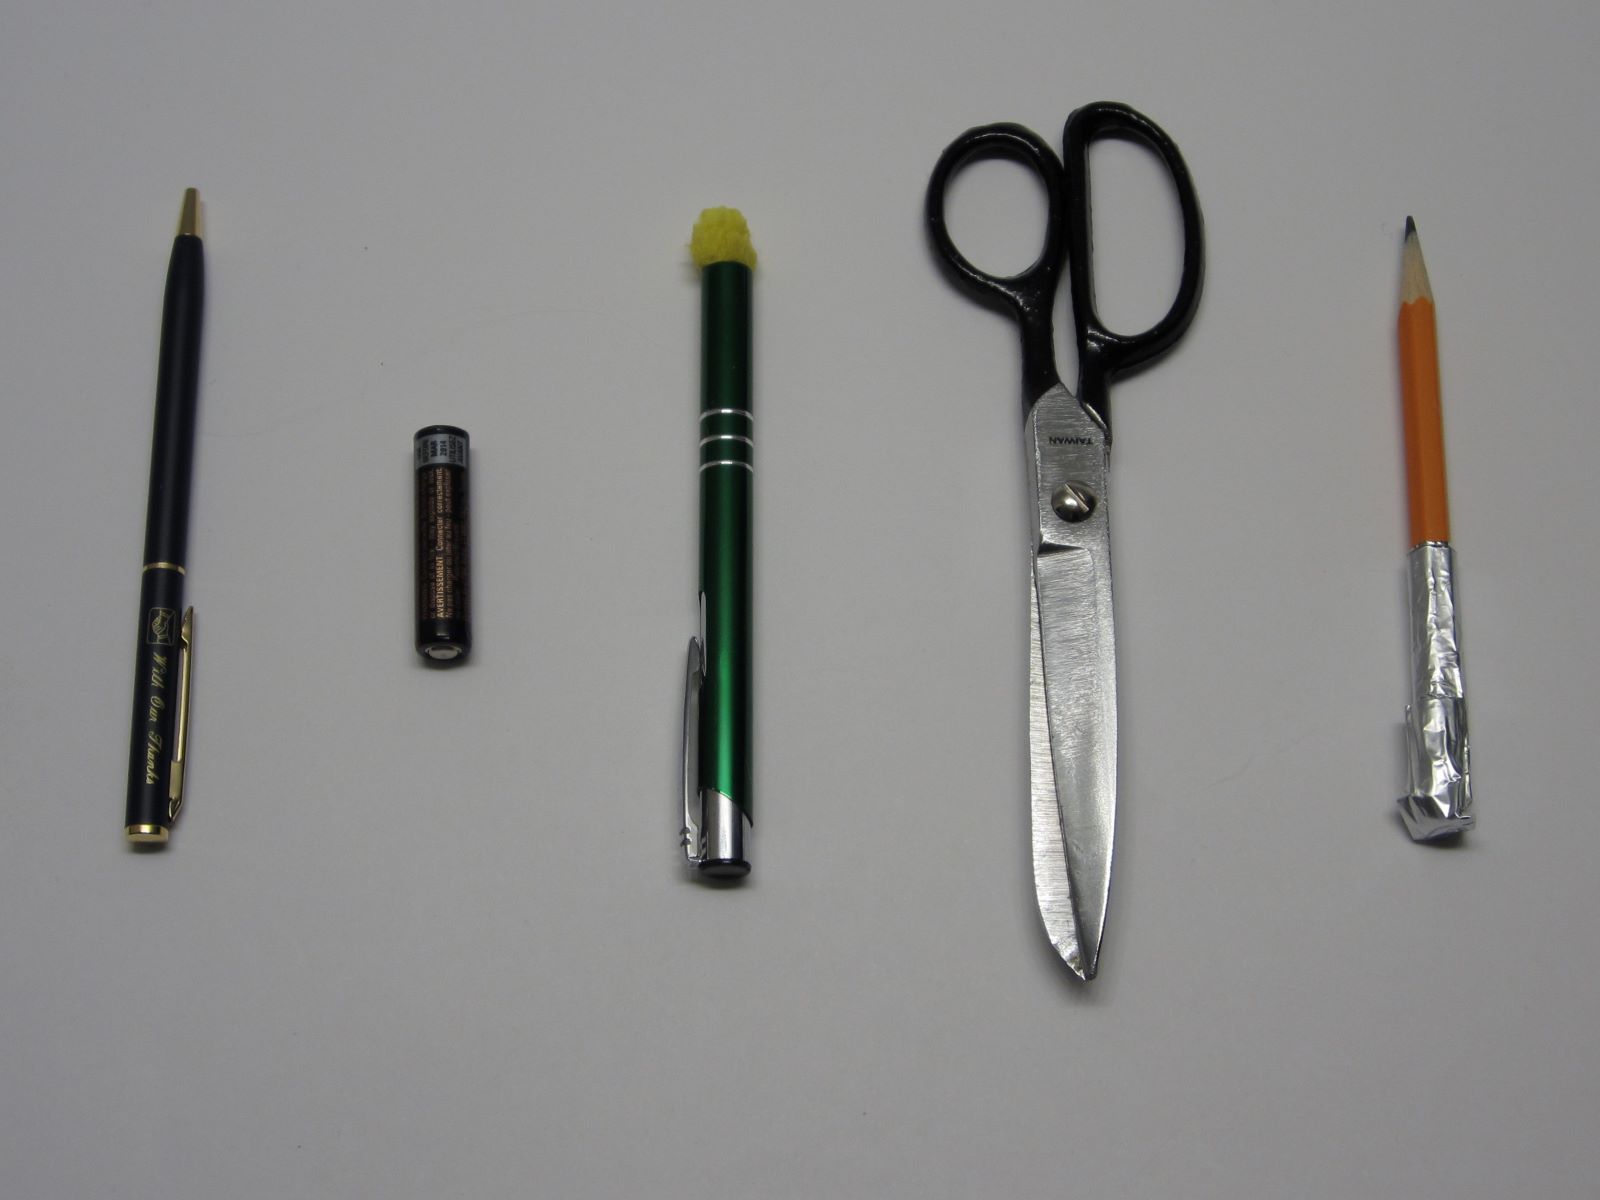
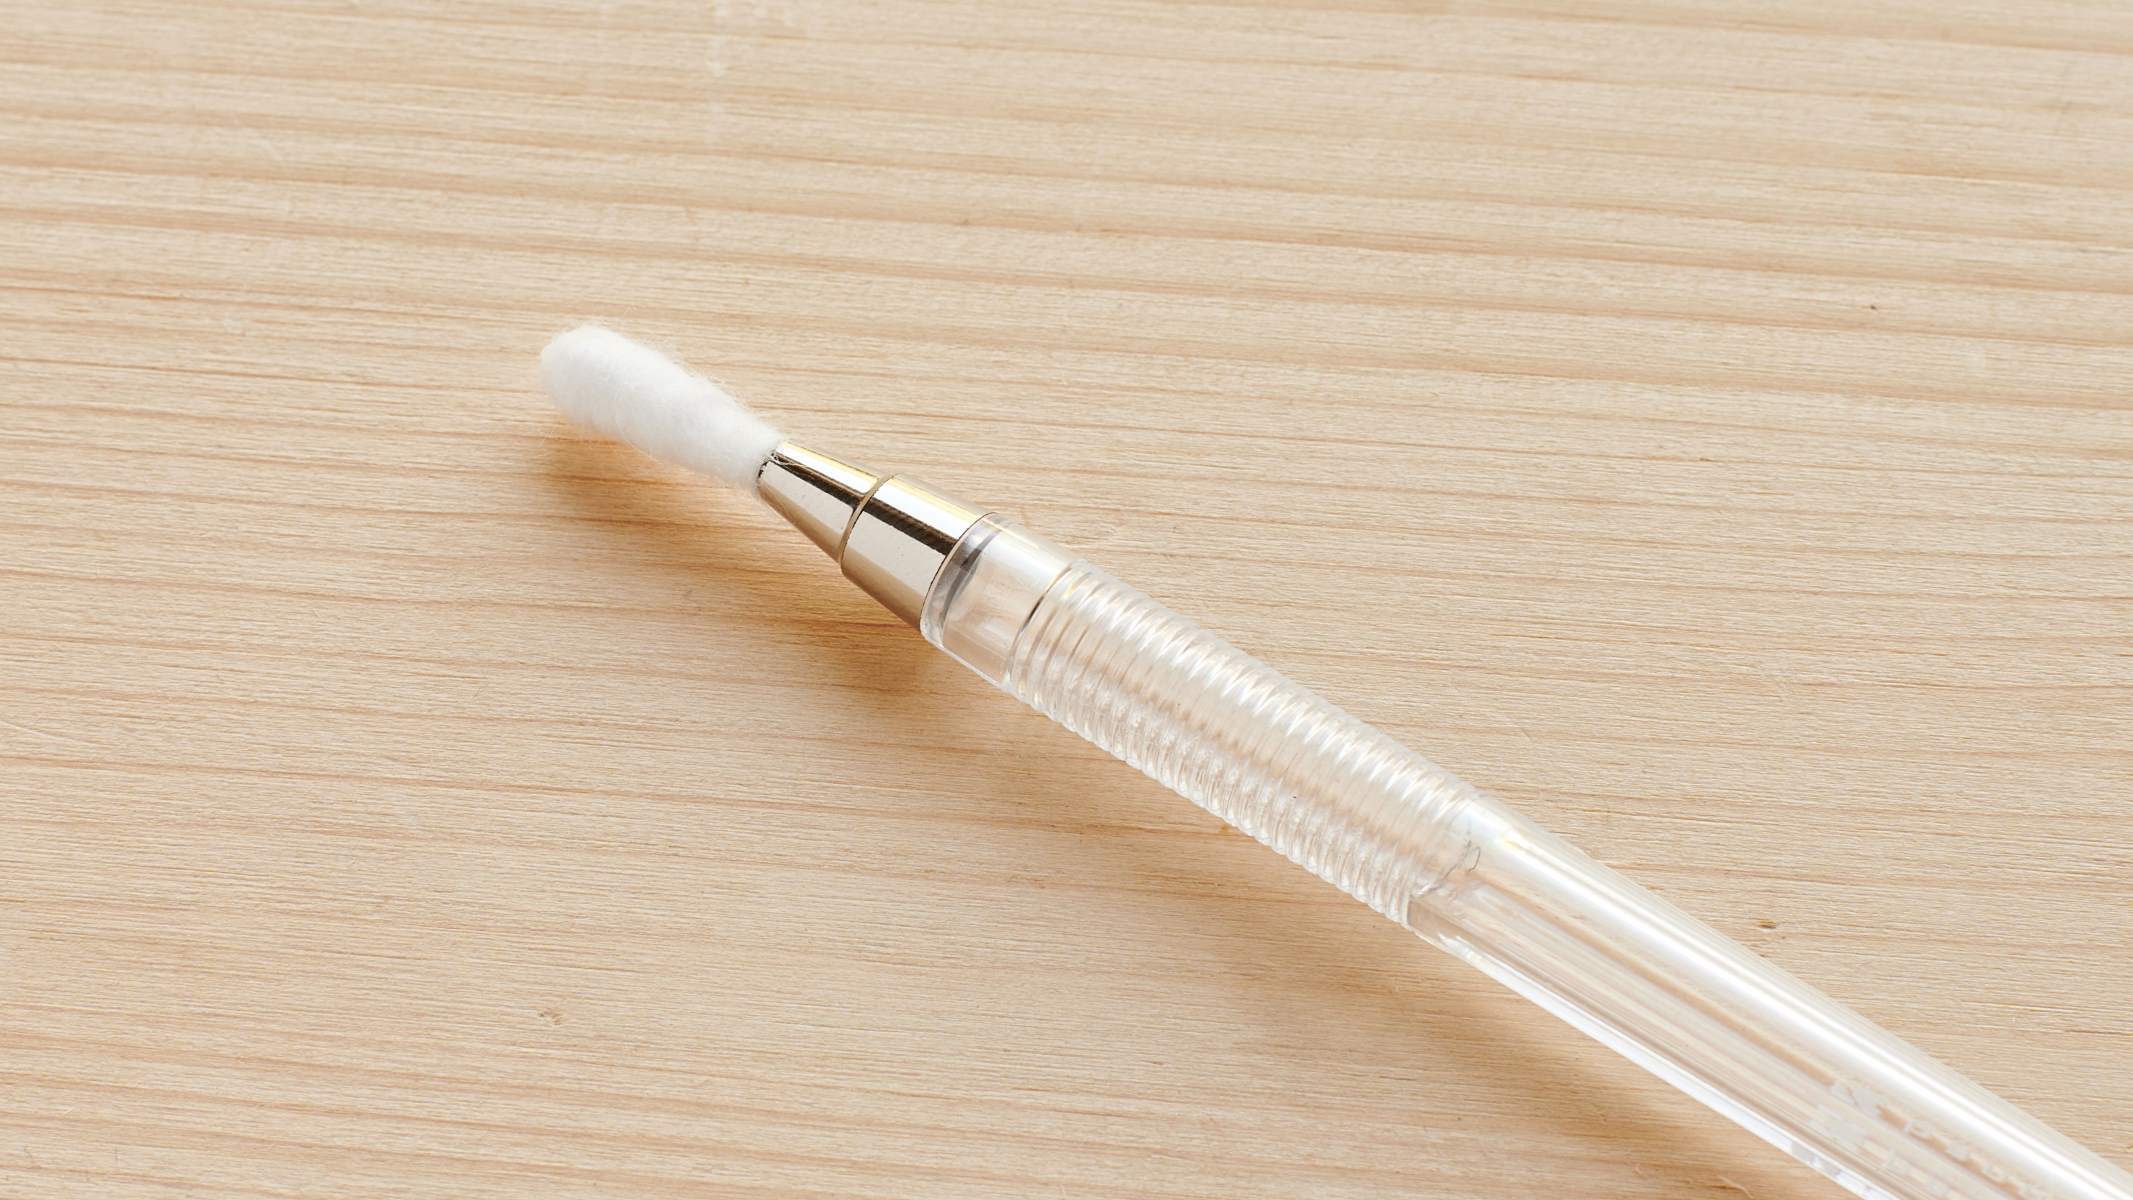
- Ballpoint Pen: Look for a pen with a removable, non-metallic barrel. The pen’s barrel will serve as the foundation for your stylus.
- Foam or Sponge: A small piece of foam or sponge is required to provide the necessary cushioning for the stylus tip.
- Aluminum Foil: This will be used to create the conductive tip of the stylus.
- Scissors: A pair of scissors will come in handy for cutting and shaping the materials.
- Tape: Any adhesive tape, such as electrical or masking tape, will be used to secure the components in place.
- Optional: Decorative Elements: If you’re feeling creative, consider adding decorative elements like washi tape or colorful markers to personalize your stylus.
With these basic materials at your disposal, you’re well-equipped to embark on the journey of crafting your very own stylus. Now that you have everything you need, let’s move on to the first step: choosing the right pen for your DIY stylus.
Step 1: Choosing the Right Pen
When creating a DIY stylus, the choice of pen serves as the foundation for your project. It’s crucial to select a pen with specific characteristics to ensure the success of your homemade stylus. Here’s what to consider when choosing the right pen:
Non-Metallic Barrel: Look for a ballpoint pen with a removable non-metallic barrel. The absence of metal in the barrel is essential, as it allows the stylus to interact with touchscreens without causing scratches or damage.
Comfort and Grip: Consider the comfort and grip of the pen, as this will influence the ergonomics of your stylus. A pen that feels comfortable to hold and use for extended periods is ideal for creating a stylus that fits seamlessly into your hand.
Smooth Barrel Surface: Opt for a pen with a smooth barrel surface. This will make it easier to attach the conductive material and ensure a consistent interaction with the touchscreen.
Once you’ve identified a suitable pen that meets these criteria, you’re ready to move on to the next step: preparing the pen for the stylus conversion. With the right pen in hand, you’re one step closer to crafting a personalized stylus that perfectly suits your needs and preferences.
Step 2: Preparing the Pen
Now that you’ve selected the ideal pen for your DIY stylus, it’s time to prepare the pen for its transformation. This step involves disassembling the pen and making necessary modifications to ensure that it functions effectively as a stylus. Follow these simple guidelines to prepare the pen:
Disassemble the Pen: Carefully disassemble the pen by removing the ink cartridge and any internal components, leaving only the non-metallic barrel. Take care not to damage the barrel during this process.
Trimming and Smoothing: Trim any excess material from the barrel and ensure that the surface is smooth and free from any rough edges. This step is crucial for creating a comfortable and user-friendly stylus.
Optional Grip Enhancement: If desired, you can enhance the grip of the stylus by adding a layer of tape or a comfortable grip material to the barrel. This customization can improve the overall ergonomics of your DIY stylus.
By following these preparation steps, you’ll have a well-prepared pen barrel that forms the basis of your DIY stylus. With the pen ready for the next phase, you’re now set to move on to the exciting process of adding the conductive material to complete your personalized stylus creation.
Step 3: Adding Conductive Material
Adding a conductive material to the tip of the stylus is a critical step in ensuring its functionality on touchscreens. The conductive material facilitates the transfer of electrical signals from the stylus to the screen, enabling precise and responsive interactions. Here’s how you can add the conductive material to your DIY stylus:
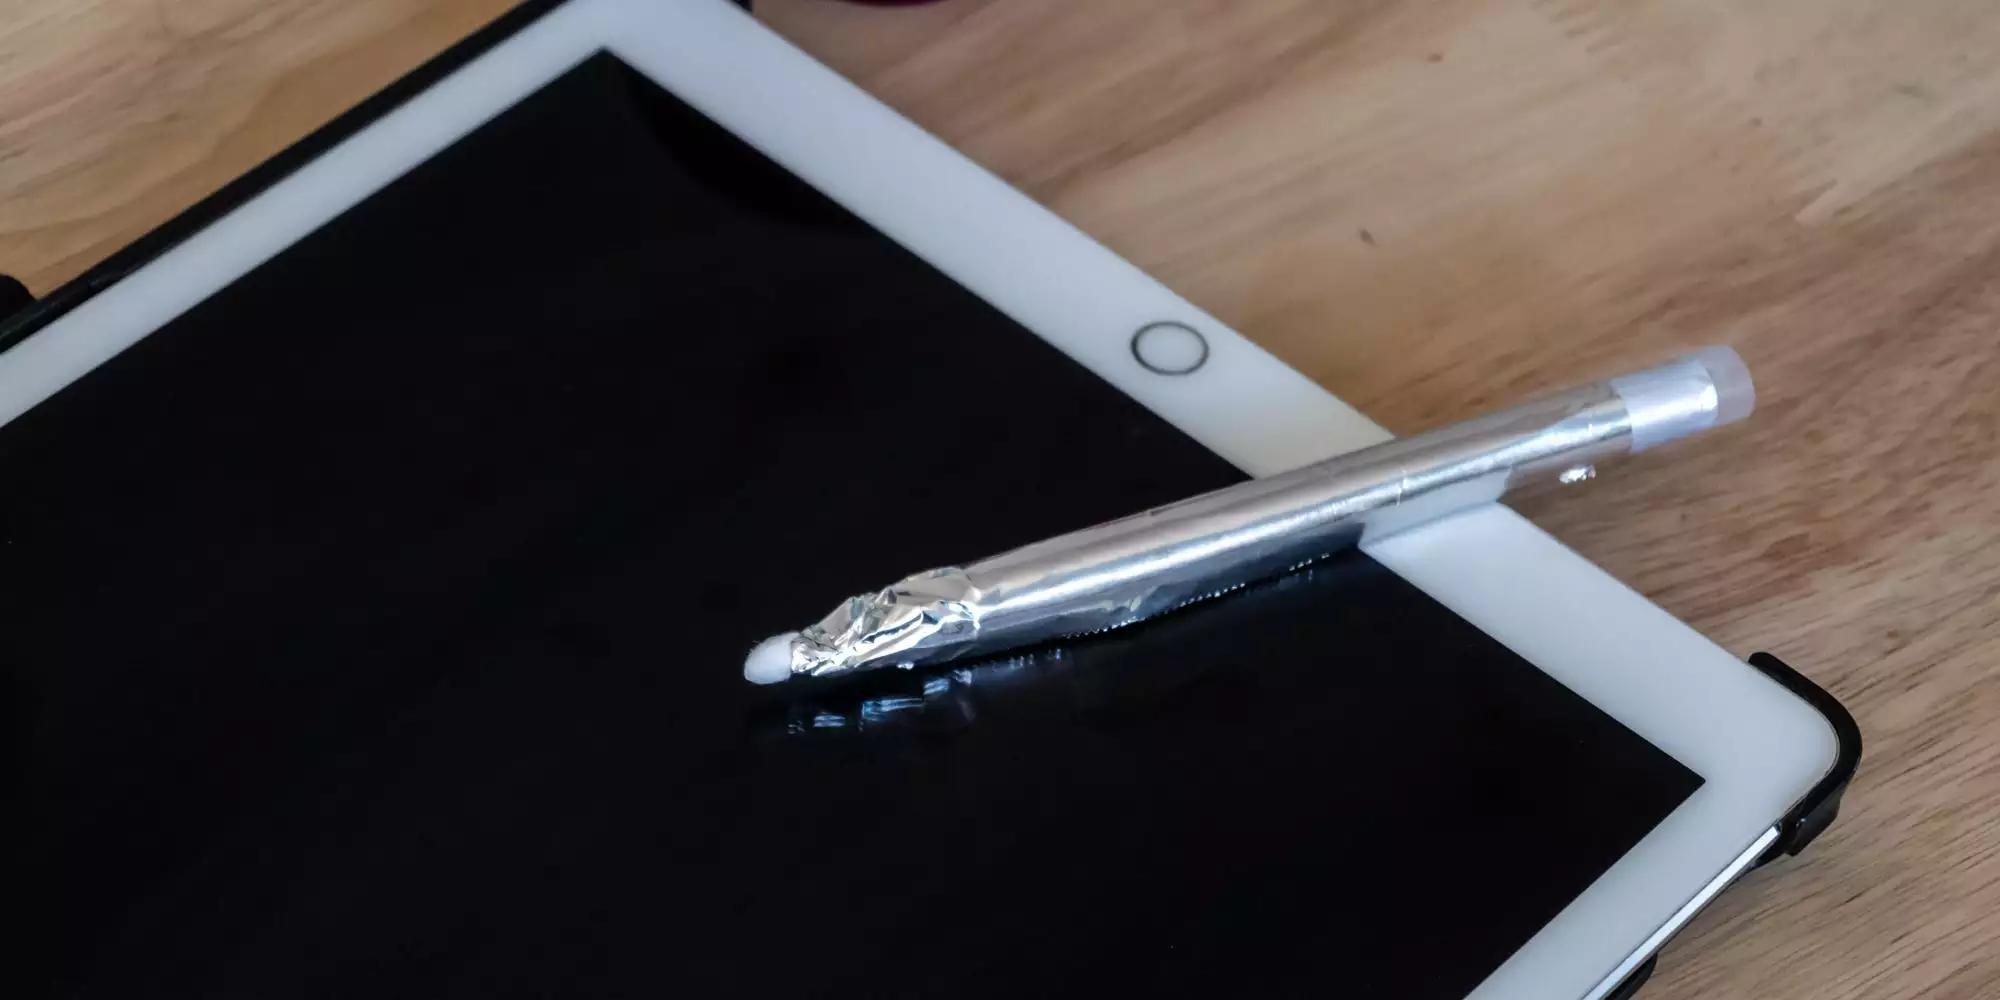
Prepare the Aluminum Foil: Cut a small piece of aluminum foil, approximately the size of a fingertip, to serve as the conductive tip of the stylus. It’s essential to ensure that the foil is clean and free from any wrinkles or creases for optimal performance.
Attach the Foil to the Stylus: Carefully affix the aluminum foil to the tip of the pen barrel using adhesive tape. Ensure that the foil makes direct contact with the surface of the touchscreen when the stylus is in use. The foil should be securely attached and extend slightly beyond the tip of the barrel for effective touchscreen interaction.
Testing the Conductivity: Before finalizing the attachment of the foil, it’s advisable to test the conductivity of the stylus on a touchscreen device. Verify that the stylus effectively registers touch inputs and accurately interacts with the screen. If necessary, make adjustments to the foil to optimize its conductivity.
By adding the conductive material to the stylus, you’re one step closer to completing your personalized DIY stylus. With the conductive tip in place, the stylus is poised to deliver precise and responsive performance on various touchscreen devices. The next step involves testing the stylus to ensure its functionality and effectiveness.
Step 4: Testing the Stylus
After assembling your DIY stylus, it’s crucial to conduct thorough testing to ensure its functionality and effectiveness across different touchscreen devices. Testing the stylus allows you to make any necessary adjustments and guarantees a seamless user experience. Here’s how you can test your newly crafted stylus:
Touchscreen Compatibility: Begin by testing the stylus on various touchscreen devices, such as smartphones, tablets, and touchscreen laptops. Verify that the stylus accurately registers touch inputs and provides a smooth and responsive interaction with the screen. Pay attention to the precision and sensitivity of the stylus across different applications and tasks.
Pressure Sensitivity: Evaluate the pressure sensitivity of the stylus by testing it in drawing or note-taking applications. Determine if the stylus effectively captures varying levels of pressure to create precise strokes or annotations. This step is particularly important for artists and individuals who require a stylus with nuanced pressure sensitivity for creative endeavors.
Multi-Touch Functionality: Assess the stylus’s ability to support multi-touch gestures, such as pinch-to-zoom and rotating gestures, on compatible devices. Ensure that the stylus enables seamless multi-touch interactions, enhancing the overall user experience on touchscreen devices.
By rigorously testing the stylus across different scenarios and applications, you can fine-tune its performance and address any potential issues. Once you’re satisfied with the stylus’s functionality, you’ll have successfully crafted a personalized and functional stylus that caters to your specific needs and preferences.
Conclusion
Congratulations on completing the magical journey of crafting your very own stylus! Through this DIY guide, you’ve learned how to transform everyday materials into a personalized and functional stylus that enhances your touchscreen interactions. By following the step-by-step process, you’ve harnessed your creativity and resourcefulness to create a practical tool tailored to your needs.
As you reflect on this DIY project, consider the satisfaction that comes with crafting a useful and unique tool from simple materials. Your DIY stylus is a testament to your ingenuity and ability to repurpose everyday items for innovative purposes.
Furthermore, by customizing the stylus to your preferences, you’ve imbued it with a touch of your personality and creativity. Whether you’ve added decorative elements, adjusted the grip, or fine-tuned the conductive tip, your stylus is a reflection of your individuality.
As you embark on your touchscreen endeavors, whether it’s digital artistry, note-taking, or navigating digital interfaces, your DIY stylus will serve as a reliable companion, tailored to your unique touch and preferences.
Remember, the journey of crafting doesn’t end here. Feel free to experiment with different materials, designs, and functionalities to further personalize and refine your stylus. Your creativity knows no bounds, and there are endless opportunities to enhance and expand the capabilities of your DIY stylus.
Embrace the satisfaction of creating something truly magical and practical—a stylus born from your imagination and brought to life through your hands. The skills and resourcefulness you’ve demonstrated in this DIY project are a testament to your ability to turn ordinary objects into extraordinary creations.
Now, armed with your personalized stylus, venture forth and let your creativity flow, your ideas take shape, and your digital experiences become even more immersive and enjoyable. Your DIY stylus is a testament to the power of creativity and resourcefulness, and it stands as a reminder that magic can be crafted from the simplest of materials.