Introduction
Welcome to the world of Windows Updates! As a computer user, you are probably aware of the importance of keeping your operating system up to date. Regularly installing updates not only enhances the performance of your system but also ensures its security.
While Windows operating systems are designed to automatically download and install updates, there may be instances when you need to manually intervene. This could be due to various reasons such as limited internet connectivity, specific update requirements, or the need to troubleshoot issues that automatic updates may not resolve.
In this article, we will guide you through the process of manually downloading and installing Windows updates. By mastering this skill, you can take control of your system’s update management and optimize its performance.
Before we dive into the details, it’s important to note that manually downloading and installing updates requires a basic understanding of the Windows operating system and familiarity with the Microsoft Update Catalog. However, even if you’re a beginner, we will provide step-by-step instructions to help you navigate through the process effortlessly.
So, if you’re ready to become a Windows update expert, let’s get started by understanding why manual installation of updates may be necessary.
Why Manually Download and Install Windows Updates
Automatic updates are generally sufficient for most users to keep their Windows operating systems up to date. However, there are situations where manual intervention becomes necessary. Here are a few reasons why you might need to manually download and install Windows updates:
- Limited Internet Connectivity: If you have a slow or unreliable internet connection, downloading large updates automatically may be a challenge. Manually downloading updates allows you to choose the timing and method that works best for you.
- Specific Update Requirements: Sometimes, certain updates are only available through manual installation. This could be due to compatibility issues or updates that require additional user input.
- Troubleshooting and Issue Resolution: Occasionally, an automatic update may fail to install correctly, leading to system issues. By manually downloading and installing updates, you can bypass any potential installation problems and ensure a smooth update process.
- Control and Customization: Manual installation gives you greater control over the updates you install and the ability to prioritize critical updates over optional ones. This customization can be helpful for system administrators or users who have specific requirements for their systems.
By taking the initiative to manually download and install Windows updates, you can ensure that your system remains up to date and secure, even in challenging circumstances. Now that we understand the reasons behind manual installation, let’s move on to gathering information on the required updates.
Gathering Information on Required Updates
Before diving into the process of manually downloading and installing Windows updates, it’s crucial to gather information on the updates that your system requires. This step ensures that you download and install the right updates for optimal performance and security.
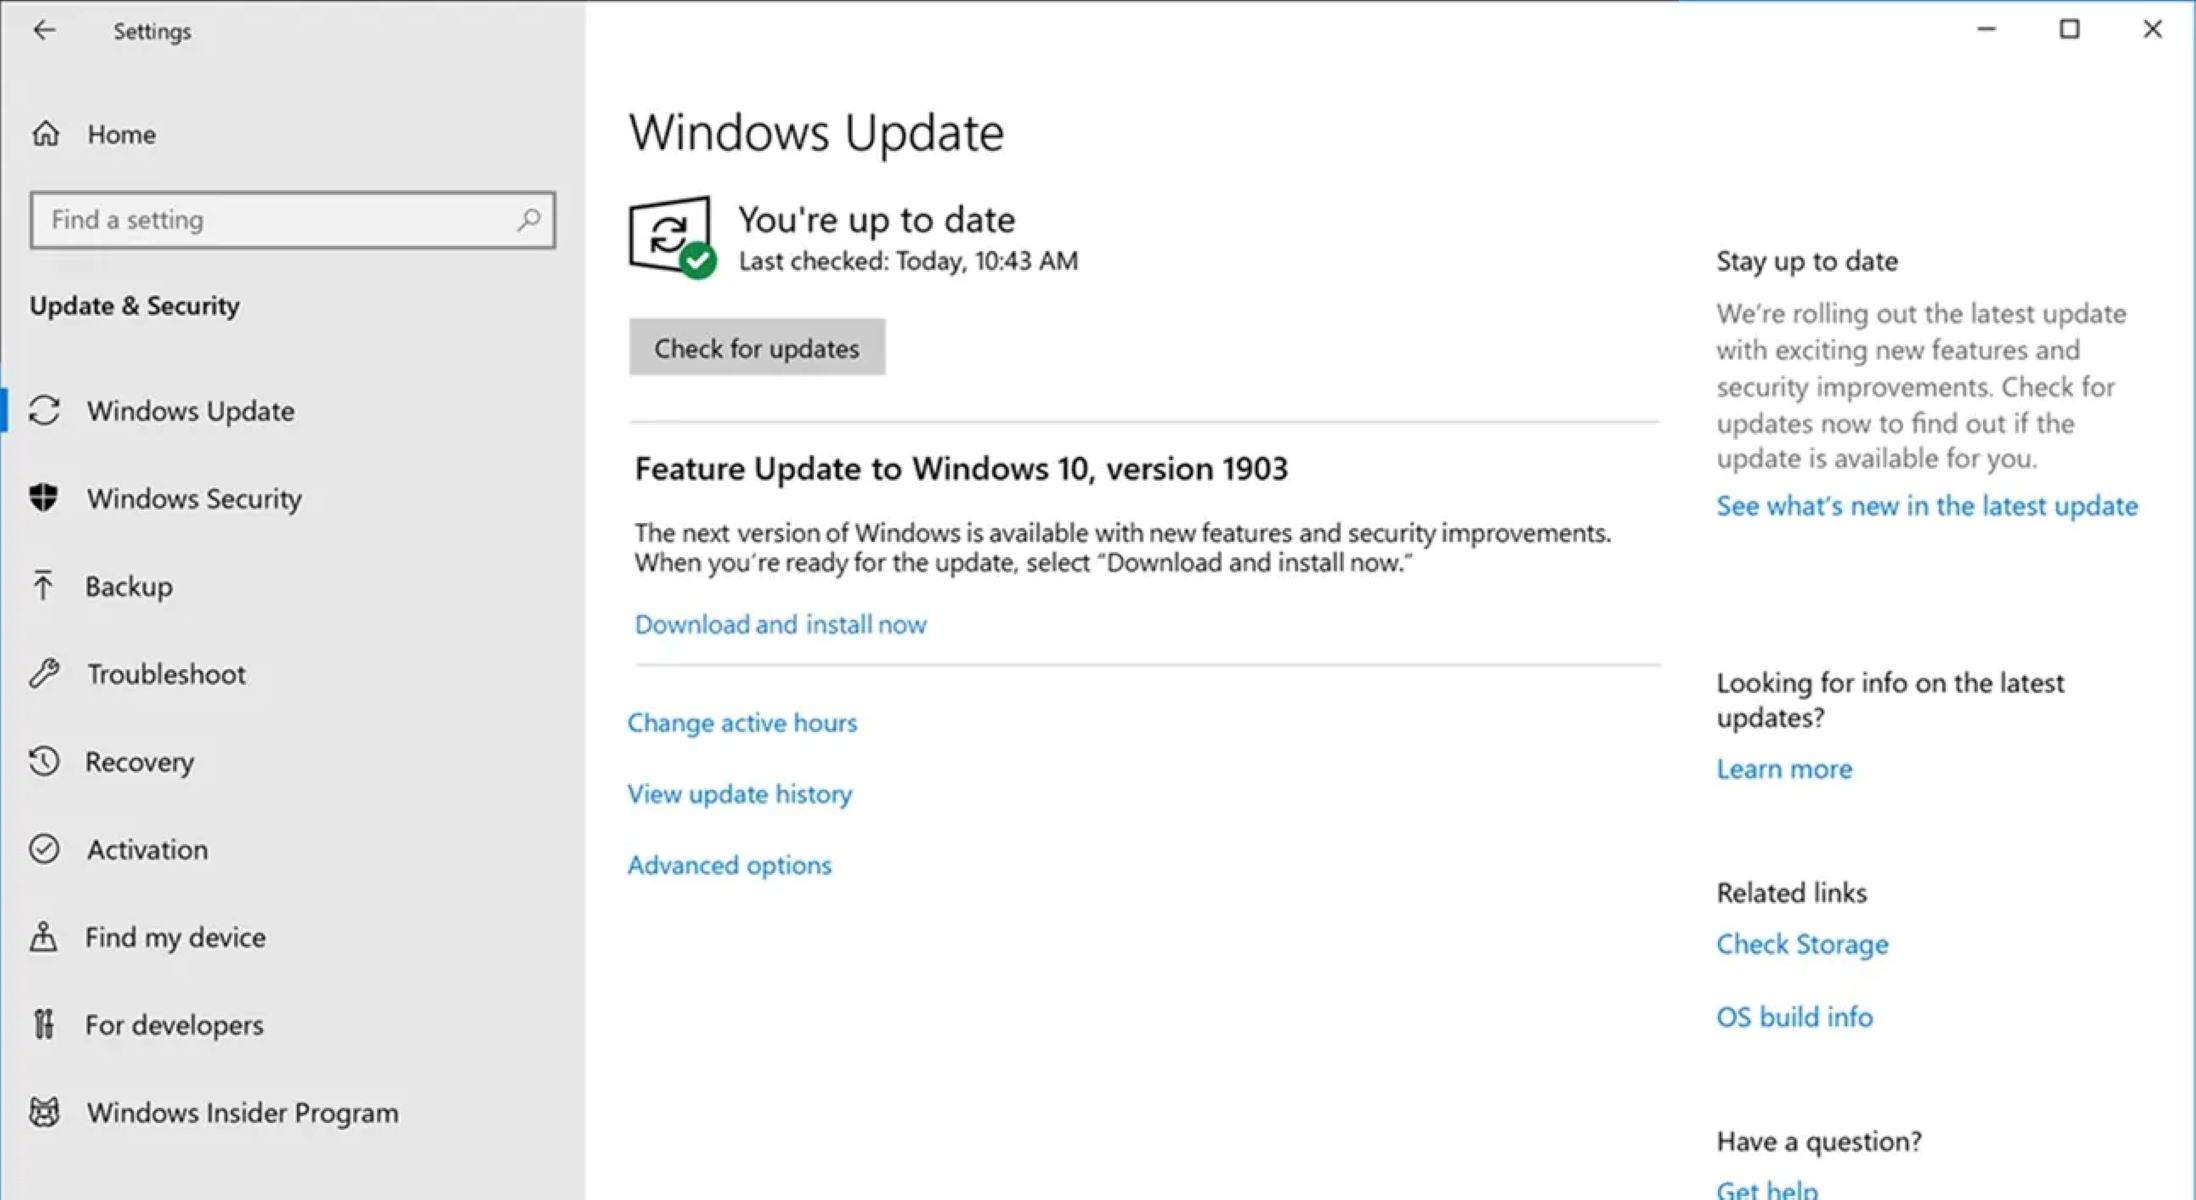
To begin, you can open the Windows Update settings on your computer. In Windows 10, you can access these settings by clicking on the Start button, selecting “Settings,” and then choosing “Update & Security.” In earlier versions of Windows, you can find the Windows Update settings in the Control Panel.
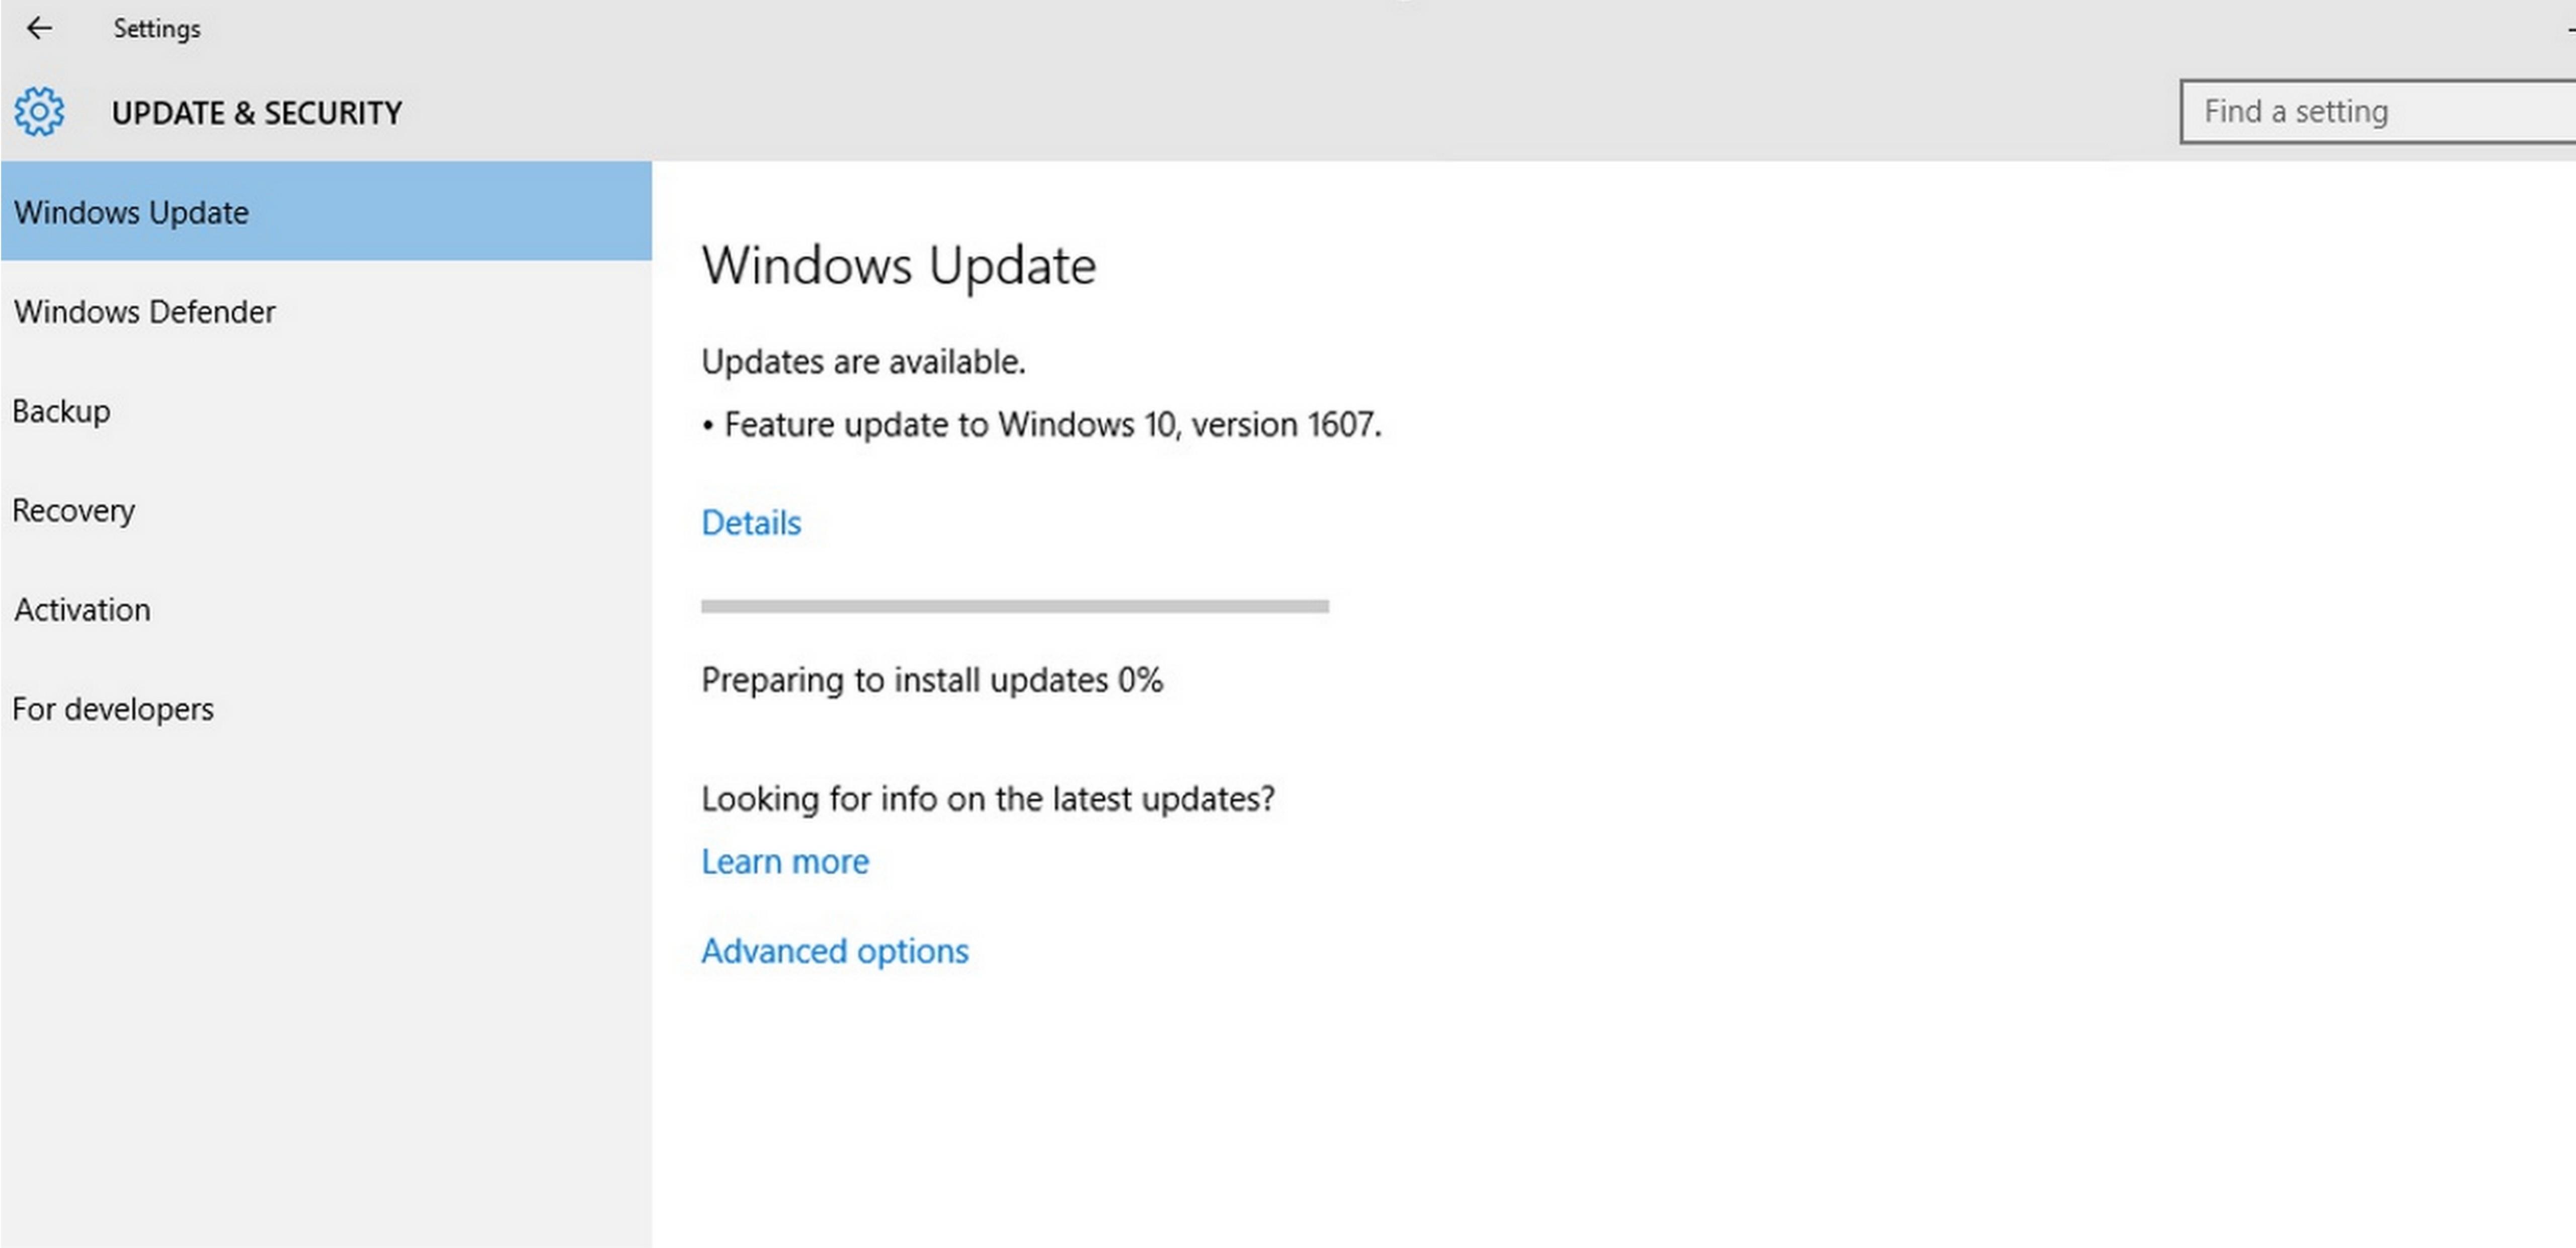
Once you’ve accessed the Windows Update settings, you may discover that your system is already in the process of downloading or installing updates automatically. If this is the case, it’s recommended to let the automatic process complete before proceeding with manual installation.
If your system is up to date or if you have specific updates in mind, you can manually check for available updates within the Windows Update settings. Click on the “Check for updates” button to initiate a manual scan of available updates. This process may take a few minutes as Windows checks with Microsoft’s servers to determine if there are any new updates available for your system.
Once the scan is complete, Windows will display a list of available updates, along with their descriptions and important information. It’s essential to review this information carefully to understand the purpose and impact of each update. Pay attention to whether an update is labeled as “Important” or “Optional,” as this can help you prioritize which updates to download and install.
In addition to the Windows Update settings, you may also find it useful to visit the Microsoft Update Catalog website. The catalog provides a comprehensive database of updates, including those for Windows operating systems, Microsoft Office, and other Microsoft products. You can search for specific updates by their KB number or browse through categories to find relevant updates for your system.
To wrap things up in this section, gathering information on the required updates is a crucial initial step in the manual download and installation process. By understanding the purpose and impact of each update, you can make informed decisions and ensure that your system stays up to date. Next, we’ll explore how to access the Microsoft Update Catalog to find and download the updates you need.
Accessing the Microsoft Update Catalog
The Microsoft Update Catalog is a valuable resource for finding and downloading updates for various Microsoft products, including Windows operating systems. It provides a centralized platform where you can search for specific updates and access detailed information about each one. To begin using the Microsoft Update Catalog:
- Open your preferred web browser and navigate to the Microsoft Update Catalog website.
- Once on the website, you can either search for updates using keywords or enter the Knowledge Base (KB) number associated with the desired update. The KB number is a unique identifier assigned to each update by Microsoft.
- After entering the search criteria, click on the “Search” button to initiate the search process.
- The search results will display a list of updates that match your search criteria. Each update is accompanied by its title, KB number, version number, release date, and other relevant information. Take your time to review these details to ensure you select the correct update.
- When you find the update you want to download, click on the title to access the specific update page.
- On the update page, you will find additional information about the update, including a description of its purpose and any known issues or prerequisites. Make sure to review this information carefully before proceeding.
- To download the update, select the appropriate version for your system architecture (32-bit or 64-bit) by clicking on the “Download” button next to the version you need. The update file will be saved to your computer’s download location.
By accessing the Microsoft Update Catalog, you have a convenient and reliable way to find and download updates for your Windows operating system. This ensures that you have the most up-to-date and secure version for your system requirements.
Now that we’ve learned how to access the Microsoft Update Catalog and locate the necessary updates, the next step is to understand how to download these updates onto your computer. In the following section, we will discuss the process of searching for and downloading Windows updates successfully.
Searching and Downloading Updates
Searching for and downloading updates from the Microsoft Update Catalog is a straightforward process once you have identified the updates you need. To successfully search for and download Windows updates:
- Open your web browser and navigate to the Microsoft Update Catalog website as mentioned earlier.
- Enter specific search terms or the KB number of the update you’re looking for in the search bar at the top of the page.
- Click on the “Search” button to initiate the search process.
- Review the search results and click on the title of the desired update to access the update page.
- On the update page, select the appropriate version of the update for your system architecture (32-bit or 64-bit).
- Click on the “Download” button next to the selected version to start the download.
- A pop-up window may appear, asking you to confirm the download. Click on “Save” to proceed.
- Choose a location on your computer to save the downloaded update file. It’s recommended to select a location that is easily accessible and memorable, such as the Downloads folder.
- Wait for the download to complete. The speed of the download will depend on various factors, such as your internet connection speed and the size of the update.
- Once the download is finished, you will have a file with the .msu extension (Microsoft Update Standalone Package). This file contains the update package that you will install manually.
By following these steps, you can successfully search for and download Windows updates from the Microsoft Update Catalog. Remember to choose the appropriate system architecture version to ensure compatibility with your operating system.
Now that you have the downloaded update file, we will proceed to the next section, which focuses on preparing for the manual installation process. This preparation step is essential to ensure a smooth and successful installation of the downloaded updates.
Preparing for Manual Installation
Before you can manually install the downloaded updates on your Windows system, it’s crucial to make some preparations to ensure a smooth installation process. These preparations involve ensuring that your system is ready to handle the updates and taking necessary precautions.
Here are the steps to prepare for manual installation:
- Make sure to close any open applications or programs on your computer. This ensures that the installation process is not interrupted by conflicting processes.
- Ensure that you have administrative privileges on your user account. Administrative privileges are required to install updates and make system changes.
- Create a system restore point, if possible. This allows you to revert any changes made during the installation process in case any issues arise.
- If you have any other updates that need to be installed, ensure that they are available and ready to be installed as well. It’s generally recommended to install updates in a specific order to avoid any conflicts or dependency issues.
- Review the documentation or release notes provided with the updates to ensure that you are aware of any specific instructions or prerequisites for successful installation.
By taking these preparatory steps, you are proactively minimizing the chances of encountering issues during the installation process. It’s always a good idea to be prepared and have a clear understanding of the installation requirements.
With the preparations complete, you are now ready to move on to the exciting part—installing the downloaded updates manually. In the next section, we will guide you through the step-by-step process of installing the updates onto your Windows system.
Installing the Downloaded Updates
Now that you have downloaded the necessary updates and prepared your system, it’s time to embark on the process of installing the updates manually. Follow these steps to successfully install the downloaded updates on your Windows system:
- Locate the downloaded update file with the .msu extension on your computer. Double-click on the file to initiate the installation process.
- If prompted by User Account Control (UAC), click “Yes” to grant the necessary permissions to install the update.
- The update installation wizard will open, providing you with information about the update. Read through the details carefully and click on the “Next” or “Install” button to proceed.
- The installation process will start, during which you may see progress indicators or a status bar. Be patient and avoid interrupting the process.
- Once the installation is complete, you will likely be prompted to restart your computer. If so, save any unsaved work and click “Restart” to allow the system to finalize the installation.
- After your computer restarts, give it some time to configure the installed updates. This process may take a few minutes, so be patient and avoid making any changes until it’s complete.
- Once the updates are configured, your system will be up to date with the latest features, enhancements, and security patches provided by the installed updates.
It’s important to note that the installation process may vary slightly depending on the specific update and your Windows version. However, the general steps outlined above should guide you through the process smoothly.
With the downloaded updates successfully installed on your system, you are now ready to verify the installation and ensure that everything is functioning as expected. In the next section, we will discuss how to verify the successful installation of the updates.
Verifying Successful Installation
After manually installing the downloaded updates on your Windows system, it’s crucial to verify that the installation was successful and that the updates are functioning as intended. Verifying the installation helps ensure that your system is up to date and that the updates have been applied correctly. Here’s how you can verify the successful installation:
- Restart your computer if you haven’t done so already. Restarting allows any pending updates or configurations to take effect.
- Once your system has booted up, go to the Windows Update settings to check for any remaining updates. Open the Settings app, click on “Update & Security,” and then select “Windows Update.”
- Click on the “Check for updates” button to initiate a manual scan for available updates. If no updates are found, it indicates that the previously downloaded updates have been installed successfully.
- If updates are found, proceed with the installation, as these might be additional updates that weren’t available at the time of your initial installation.
- Additionally, check for any specific changes or new features that were introduced by the installed updates. For example, new options or settings may be available in certain applications, security improvements may have been made, or system stability may have been enhanced.
- Ensure that your system is functioning as expected after the update installation. Test various functions, such as opening applications, connecting to the internet, and using peripherals, to confirm that everything is working correctly.
- Monitor your system for any unusual behavior or issues that may arise after the update installation. If you encounter any problems, consult Microsoft’s support documentation or their community forums for assistance.
By following these verification steps, you can have confidence that the updates have been successfully installed on your Windows system and that your system is up to date. Regularly verifying the installation of updates is key to maintaining a secure and optimized system.
With the successful verification of the update installation, you are now ready to enjoy the benefits of an updated Windows system. In the next section, we will discuss some common issues that you may encounter during the manual update installation process and how to troubleshoot them effectively.
Troubleshooting Common Issues
While manually downloading and installing updates on your Windows system is usually straightforward, there may be instances where you encounter issues during the process. In this section, we will address some common issues that you may experience and provide troubleshooting tips to help you overcome them:
- Installation Failure: If an update fails to install, double-check that you have administrative privileges and sufficient disk space available. Try restarting your computer and installing the update again. If the problem persists, check for error codes and search for specific solutions on Microsoft’s support website.
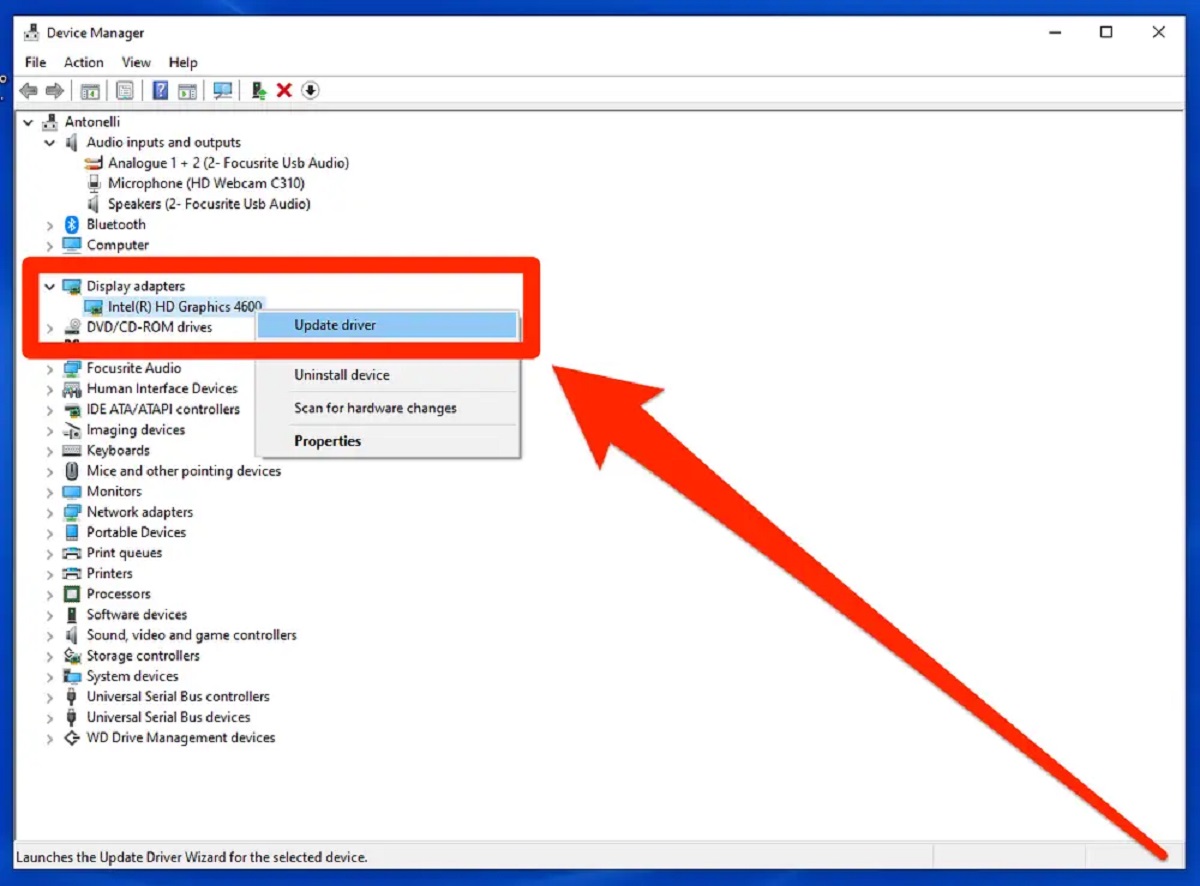
- Compatibility Issues: Certain updates may have compatibility requirements or conflict with other software or drivers on your system. Review the documentation or release notes for the update and ensure that your system meets the necessary prerequisites. If compatibility issues arise, consider updating or uninstalling conflicting software or drivers.
- Internet Connectivity Problems: If you encounter issues while downloading updates, check your internet connection for stability. If you have a slow or unreliable connection, consider using a different network or downloading the updates on another device and transferring them manually to your system.
- Missing or Corrupted Files: If you receive an error indicating that certain files are missing or corrupted during installation, you can try running the System File Checker (SFC) tool. Open Command Prompt as an administrator and run the command “sfc /scannow” to scan and repair system files. Restart your computer and attempt the installation again.
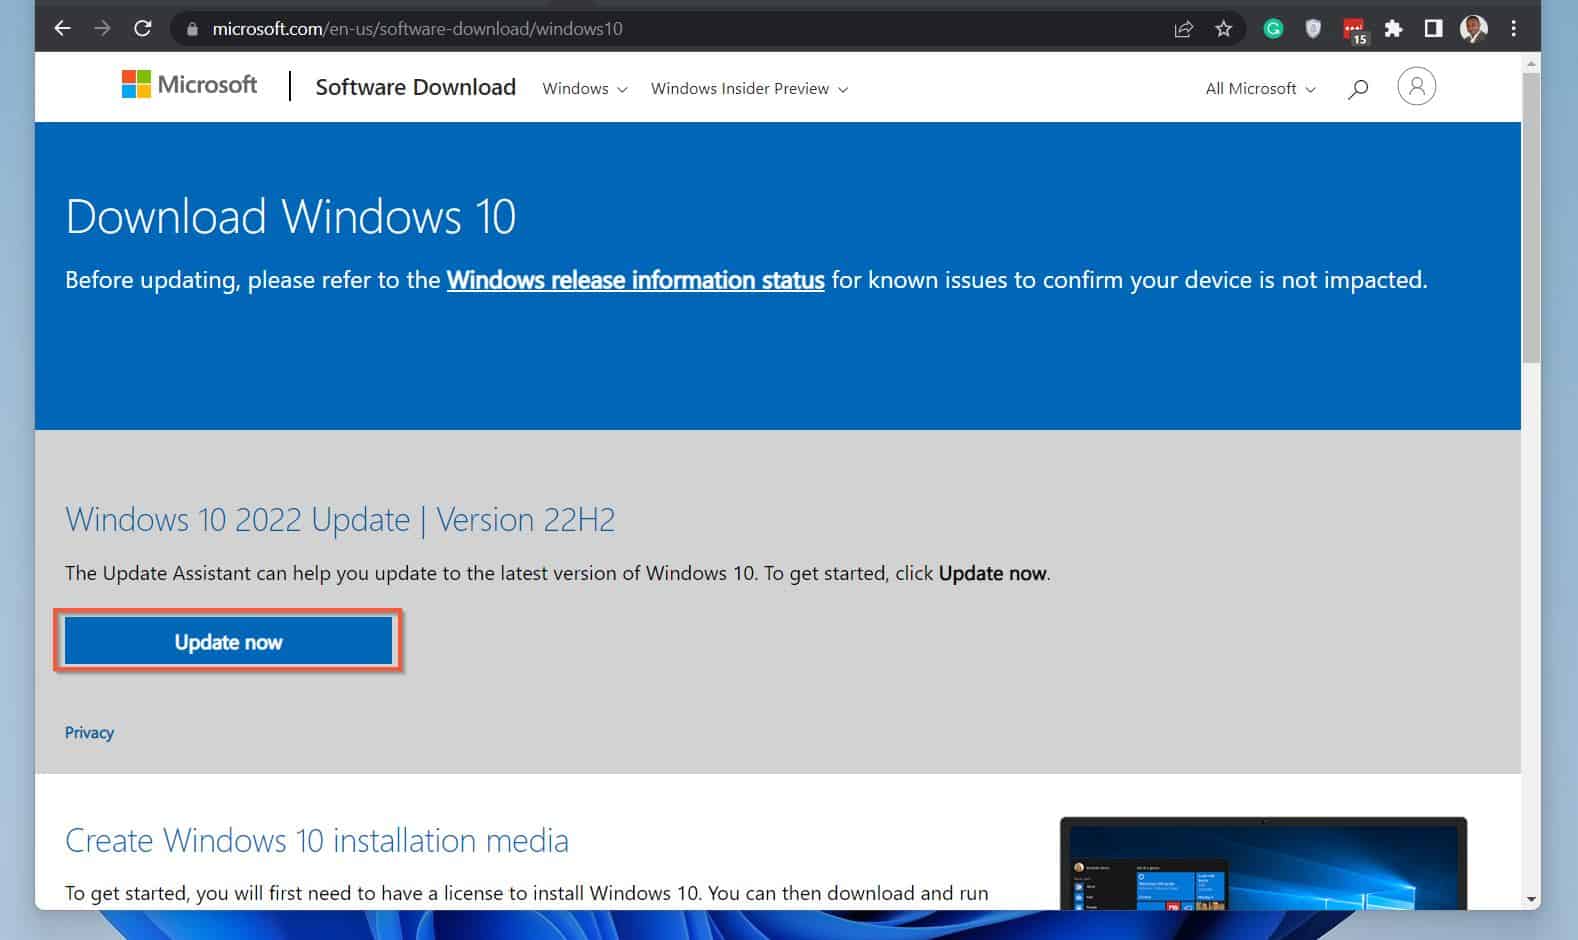
- Update Compatibility for Older Windows Versions: Some updates may only be available for newer versions of Windows. If you are using an older version and are unable to find specific updates, it may be a limitation of your operating system. Consider upgrading to a newer Windows version to access the latest updates and security patches.
- Insufficient System Resources: Installing updates may require significant system resources, such as memory and processing power. If you encounter performance issues during installation, close unnecessary applications and consider temporarily disabling security software to allocate more resources to the update process.
If you encounter any other specific issues during the manual update installation process, it’s recommended to search for error codes or descriptions of the problem online. Microsoft’s support website, forums, and online communities can provide valuable insights and solutions for troubleshooting specific issues.
By following these troubleshooting tips and seeking assistance when needed, you can overcome common issues and ensure that the manual update installation process goes smoothly on your Windows system.
Now that we have explored troubleshooting tips, we can conclude our guide to manually downloading and installing Windows updates. By taking control of the update process, you optimize your system’s performance and security. Remember to regularly check for updates and stay up to date with the latest patches and enhancements for your Windows system.
Conclusion
Manually downloading and installing Windows updates provides you with control and flexibility over your system’s update process. In this comprehensive guide, we covered the importance of manual updates, how to gather information on required updates, accessing the Microsoft Update Catalog, searching and downloading updates, preparing for installation, installing the downloaded updates, verifying successful installation, and troubleshooting common issues. By following these steps, you can effectively manage and optimize your Windows system.
Remember that regular updates are crucial for the security, performance, and stability of your computer. While automatic updates are convenient for most users, manual installation can be particularly useful in scenarios where you have limited connectivity, specific update requirements, or encounter issues that automatic updates fail to resolve.
Whether you are a beginner or an experienced user, understanding the manual update process empowers you to take control of your system’s update management. Stay proactive by regularly checking for updates, reviewing the documentation, and installing the latest patches and security enhancements provided by Microsoft.
By staying up to date with Windows updates, you ensure that your system is equipped with the latest features, bug fixes, and security measures. Embrace the process of manually downloading and installing updates to maintain a secure, efficient, and reliable Windows environment.
Thank you for following this guide. We hope it has been informative and helpful in your journey of managing your Windows system’s updates.