Introduction
Are you eager to use Snapchat on your computer? While Snapchat is primarily designed for mobile devices, there are methods available to download and use it on your desktop or laptop. Whether you want to access the app’s features on a larger screen or simply prefer the convenience of a computer, this guide will walk you through the various methods to download Snapchat on your PC.
Snapchat is a popular multimedia messaging app known for its unique features, such as disappearing messages, augmented reality filters, and fun stickers. With Snapchat, users can send photos, videos, and messages to their friends and followers, with the content automatically disappearing after being viewed for a set period of time.
While Snapchat is primarily available for smartphones and tablets, there are ways to enjoy the app’s features on your computer. In the following sections, we’ll explore three popular methods for downloading Snapchat on a computer. These methods include using an Android emulator like BlueStacks or NoxPlayer, which allows you to run Android apps on your computer, or using the Snapchat website through a web browser.
Before we delve into the different methods, let’s take a look at the system requirements to ensure your computer meets the necessary specifications to download and use Snapchat smoothly.
System Requirements
Before you proceed with downloading Snapchat on your computer, it’s important to ensure that your system meets the necessary requirements. While Snapchat is not officially available for desktop operating systems, using Android emulators allows you to run the app on your computer. Here are the general system requirements to successfully install and run the emulators:
- Operating System: The Android emulators are compatible with Windows, macOS, and Linux.
- Processor: A multicore processor, preferably with at least 2 GHz clock speed, is recommended for optimal performance.
- RAM: A minimum of 2 GB RAM is required to run the emulators and Snapchat smoothly.
- Storage: Make sure you have enough free storage space on your computer to download and install the Android emulator and the Snapchat app.
- Graphics Card: While not specifically mentioned, having a dedicated graphics card can provide better visual performance when using the Android emulators.
- Internet Connection: A stable internet connection is essential for downloading the emulator and the required software.
While these are the general system requirements, it’s always a good idea to check the specific requirements of the emulator you choose as they may vary slightly. Make sure you have the latest versions of the required software, such as Java or .NET Framework, installed on your computer to ensure compatibility with the Android emulator.
Now that we have covered the system requirements, let’s move on to the different methods you can use to download Snapchat on your computer.
Method 1: Using Android Emulator
If you want to download Snapchat on your computer, using an Android emulator is one of the most common and effective methods. Android emulators simulate the Android operating system on your computer, allowing you to run Android apps, including Snapchat. Here’s how you can use an Android emulator to download and use Snapchat:
Step 1: Download an Android Emulator
The first step is to choose and download an Android emulator. There are several reliable options available, such as BlueStacks, NoxPlayer, and Andy. Visit the official websites of these emulators and download the installer compatible with your computer’s operating system. Once the download is complete, run the installer to install the emulator on your computer.
Step 2: Install the Emulator
After the emulator installer is downloaded, open it and follow the on-screen instructions to install the Android emulator on your computer. The installation process may take a few minutes, so be patient.
Step 3: Configure the Emulator
Once the emulator is installed, launch it on your computer. You might need to sign in with your Google account or create a new one to access the Google Play Store within the emulator. Follow the setup wizard to complete the initial configuration process of the emulator.
Step 4: Download Snapchat APK
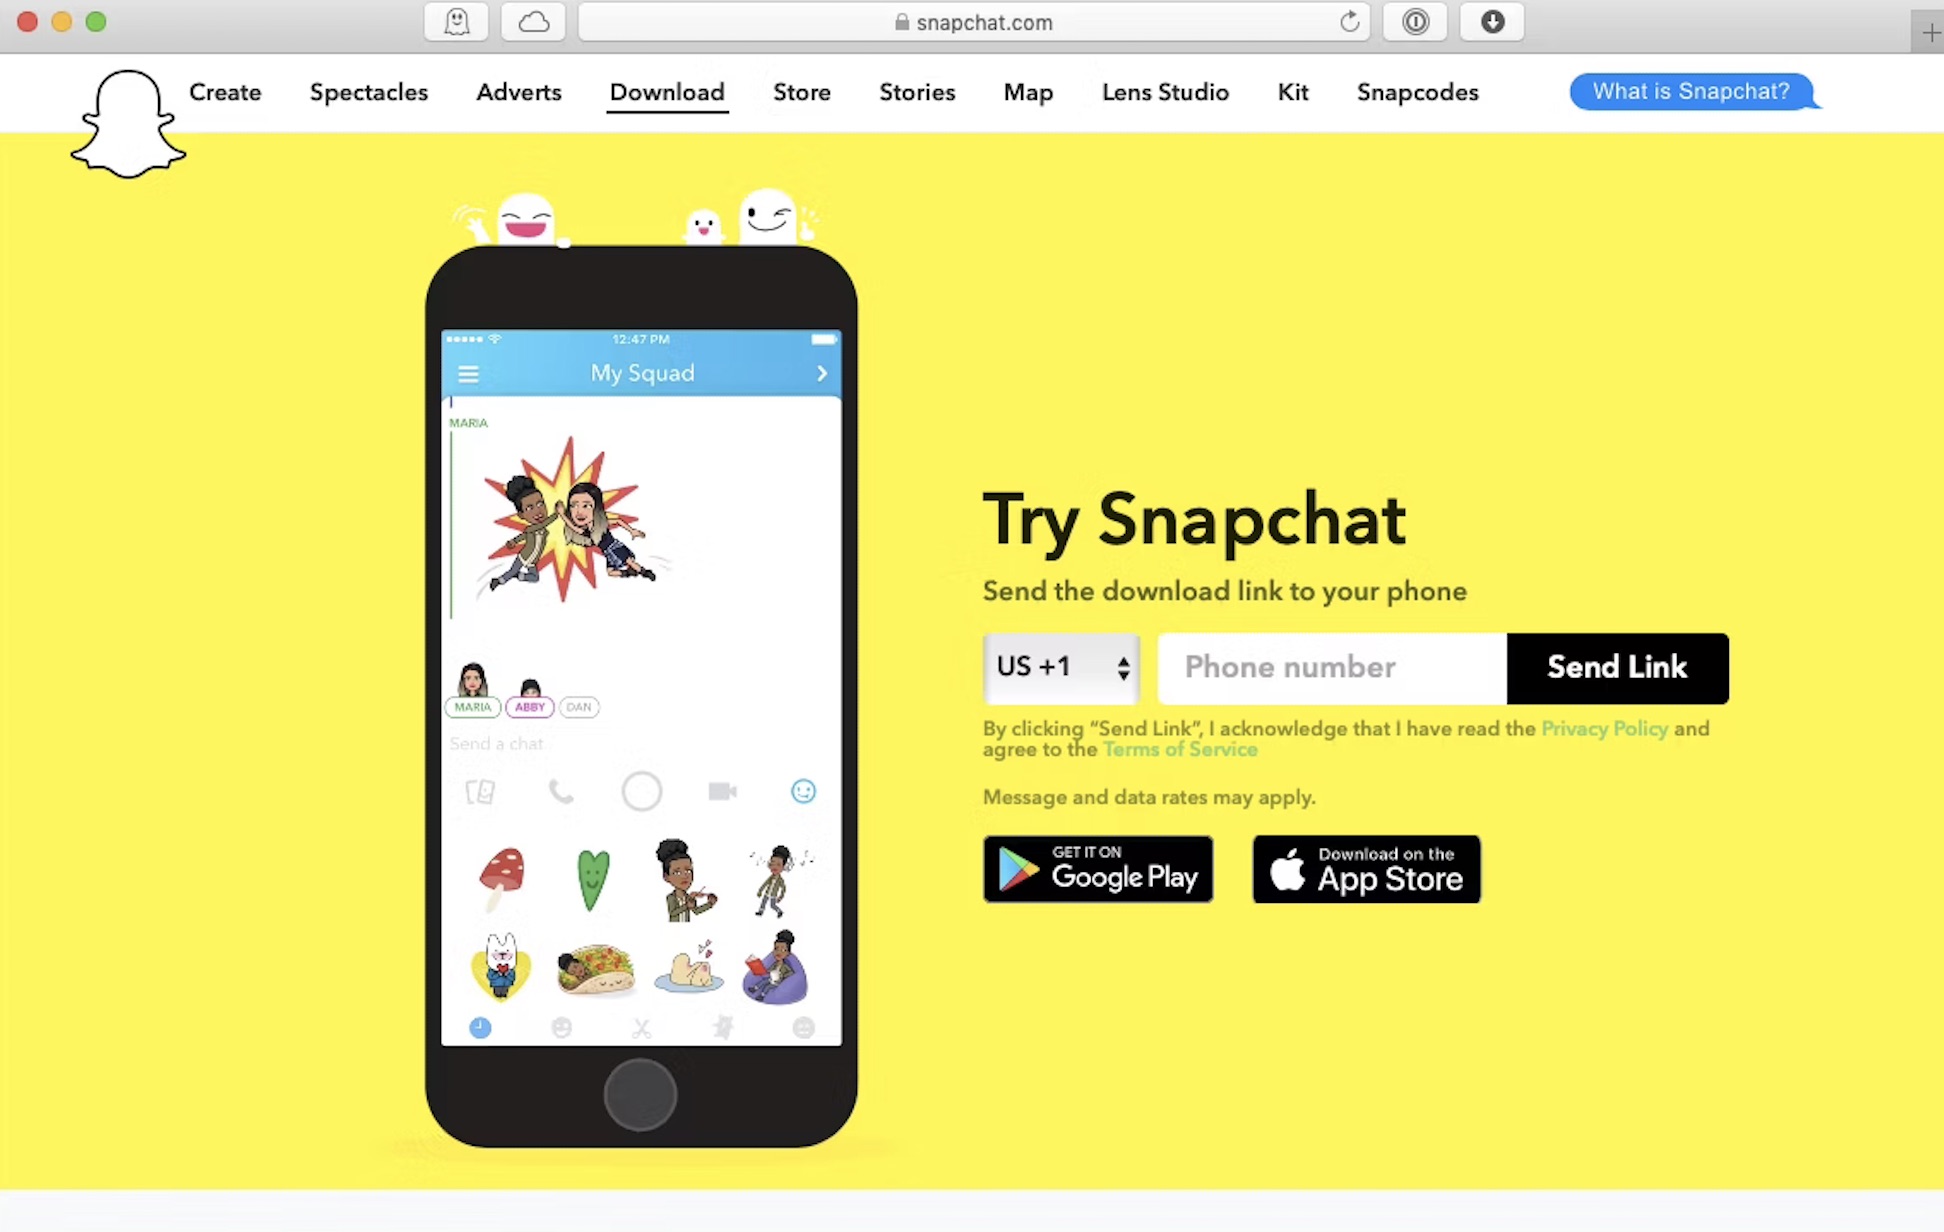
Now that your emulator is up and running, you need to download the Snapchat APK file. Go to the Snapchat website or a trusted APK provider and download the latest version of the Snapchat APK to your computer.
Step 5: Install Snapchat on the Emulator
Once you have the APK file, simply drag and drop it onto the emulator screen. The emulator will automatically install the Snapchat app. Alternatively, you can double-click on the APK file and select the emulator as the default program to open it. Wait for the installation process to complete.
After the installation is finished, you can find the Snapchat app icon in the app drawer of the emulator. Simply click on it to launch Snapchat, sign in with your Snapchat credentials or create a new account, and start enjoying Snapchat on your computer!
Using an Android emulator provides a seamless experience of using Snapchat on your computer. However, if you prefer another method, you can also try using BlueStacks or NoxPlayer, which are widely used emulators specifically designed for running Android apps on a computer.
Step 1: Download an Android Emulator
The first step in using an Android emulator to download and use Snapchat on your computer is to choose and download the emulator itself. There are several reliable options available, but two popular choices are BlueStacks and NoxPlayer. Here’s how to get started:
1. BlueStacks: BlueStacks is a well-known Android emulator that offers a user-friendly interface and excellent performance. To download BlueStacks, visit the official BlueStacks website (www.bluestacks.com) and click on the “Download BlueStacks” button. The website will automatically detect your operating system, whether it’s Windows or Mac, and provide the correct download link for your computer.
2. NoxPlayer: NoxPlayer is another reliable Android emulator that offers a smooth and customizable experience. To download NoxPlayer, visit the official NoxPlayer website (www.bignox.com) and click on the “Download” button. Just like BlueStacks, the website will detect your operating system and provide the appropriate download link.
Once you click on the download link, the installer file for the Android emulator will begin downloading to your computer. The file size may vary depending on the emulator and your internet connection speed. It’s important to download the emulator from the official website to ensure that you get the genuine and secure version of the software.
After the download is complete, locate the installer file on your computer. It’s usually located in the “Downloads” folder. Double-click on the installer file to start the installation process. You may be prompted with user account control messages asking for permission to make changes to your system. Click “Yes” to proceed with the installation.
Follow the on-screen instructions to complete the installation of the Android emulator. The installation process may take a few minutes, as the emulator needs to download additional files and set up the necessary components. Once the installation is finished, you will see a shortcut icon on your desktop or in your “Applications” folder, depending on your operating system.
Congratulations! You have successfully downloaded an Android emulator on your computer. Now you can move on to the next step and configure the emulator to start using Snapchat.
Step 2: Install the Emulator
After downloading the Android emulator onto your computer, the next step is to install it. Installing the emulator will allow you to launch and use Android apps, including Snapchat, on your computer. Here’s how you can install the emulator:
- Locate the installer file that you downloaded onto your computer in the previous step.
- Double-click on the installer file to start the installation process. You may be prompted with a security warning or a user account control message. Click “Yes” or “Allow” to proceed.
- Review and accept the Terms of Service or License Agreement presented by the installer. Read through the information carefully before proceeding.
- Choose an installation location for the emulator. The default location is usually the recommended option, but you can select a different directory if desired.
- Click on the “Install” or “Next” button to begin the installation process. The emulator will start extracting files and installing the necessary components.
- Wait for the installation to complete. The progress bar will indicate the status of the installation. This may take a few minutes depending on your computer’s performance.
- Once the installation is finished, you may be prompted with an option to launch the emulator immediately. Check the box if you want to launch it now, or uncheck it if you prefer to launch it manually later.
- Click “Finish” or “Close” to exit the installer. The emulator is now installed on your computer.
After the installation is complete, you can locate the emulator’s shortcut icon on your desktop or in your “Applications” folder. Double-click on the icon to launch the emulator.
Upon launching the emulator for the first time, there may be some additional setup steps or configurations required. Follow the on-screen instructions to complete the initial setup of the emulator. This may involve signing in with your Google account or creating a new account to access the Google Play Store.
Once the emulator is successfully installed and configured, you are now ready to use it to download and install Snapchat on your computer.
Step 3: Configure the Emulator
After installing the Android emulator on your computer, the next step is to configure it. Configuring the emulator involves setting up various options and preferences to ensure optimal performance and compatibility. Here’s how you can configure the emulator:
- Launch the Android emulator by double-clicking on its shortcut icon on your desktop or in your “Applications” folder.
- On the initial startup, the emulator may provide you with some setup options or a welcome screen. Follow the on-screen instructions to proceed with the setup process.
- If prompted, sign in to your Google account or create a new account. This is necessary to access the Google Play Store within the emulator.
- Once you have signed in or created a Google account, you may be asked to customize some settings, such as language preferences, date, and time. Adjust these settings according to your preferences.
- Next, familiarize yourself with the emulator’s interface. The interface typically resembles a virtual Android device, with a home screen and navigation buttons.
- Take some time to explore the emulator’s settings and options. You can usually access these settings by clicking on the gear or menu icon located on the emulator’s home screen or in the navigation bar.
- In the settings, you can customize various aspects of the emulator, such as display resolution, orientation, storage allocation, and performance settings. Adjust these settings according to your computer’s specifications and your personal preferences.
- Additionally, you can configure the emulator’s internet connectivity by accessing the network settings. Ensure that the emulator is properly connected to the internet for seamless downloading and installation of apps.
- Once you have made the necessary configurations, save the settings and exit the settings menu.
With the emulator properly configured, you are now ready to use it to download and install Snapchat. The configuration settings may vary slightly depending on the chosen emulator, but the general process remains the same.
Continue to the next step to sign in to the Google Play Store within the emulator and start the process of downloading Snapchat.
Step 4: Download Snapchat APK
Once you have successfully installed and configured the Android emulator on your computer, the next step is to download the Snapchat APK file. The APK file contains the installation package for the Snapchat app. Here’s how you can download the Snapchat APK:
- Open a web browser within the Android emulator by clicking on the browser icon or accessing the Play Store and searching for a browser app.
- In the browser, search for “Snapchat APK” or go to a trusted APK provider website, such as APKMirror or APKPure.
- Access the website and search for the latest version of the Snapchat APK.
- Make sure to download the APK file from a reliable source to ensure that you are getting the official and safe version of Snapchat.
- Click on the download link or button to initiate the download of the APK file.
- Wait for the download to complete. The time taken may vary depending on your internet connection speed.
- Once the download is finished, locate the APK file in the download directory or the designated folder within the Android emulator. The default location is usually the “Downloads” folder.
- If prompted, grant permission to install apps from unknown sources within the emulator. This option can usually be found in the emulator’s security settings.
Downloading the Snapchat APK allows you to manually install the app onto the Android emulator, bypassing the need to access the Google Play Store. It is important to note that downloading APK files from unverified or unreliable sources can pose risks to your computer’s security. Always exercise caution and ensure that you are downloading the APK file from a reputable source.
Now that you have successfully downloaded the Snapchat APK, you are ready to proceed to the next step, which involves installing Snapchat onto the Android emulator.
Step 5: Install Snapchat on the Emulator
After downloading the Snapchat APK file onto your computer, the final step is to install it on the Android emulator. Installing the APK file will enable you to access and use Snapchat on your computer. Here’s how you can install Snapchat on the emulator:
- Open the file manager or the “Downloads” folder within the Android emulator.
- Locate the downloaded Snapchat APK file.
- Click on the APK file to start the installation process. The emulator will automatically recognize the file and initiate the installation.
- Follow the on-screen instructions to proceed with the installation. You may be asked to grant certain permissions for Snapchat to access various features on the emulator.
- Wait for the installation to complete. The progress bar will indicate the status of the installation. This may take a few moments, depending on your emulator and computer’s performance.
- After the installation is finished, you will see the Snapchat app icon in the app drawer or on the emulator’s home screen.
- Launch Snapchat by clicking on its app icon.
- If you have an existing Snapchat account, sign in with your credentials. Otherwise, create a new account directly within the app.
- Once signed in, you can start using Snapchat on your computer via the Android emulator.
Now that Snapchat is successfully installed on the emulator, you can enjoy all the features and functionalities that Snapchat provides. It’s important to note that the user experience may vary slightly compared to using Snapchat on a mobile device, but the core features of the app remain the same.
Remember to sign out of your Snapchat account when you are finished using it to ensure the privacy and security of your account.
Congratulations! You have now successfully downloaded, installed, and set up Snapchat on your computer using an Android emulator.
Method 2: Using BlueStacks
If you’re looking for an alternative method to download Snapchat on your computer, using BlueStacks is a great option. BlueStacks is a popular Android emulator that allows you to run Android apps on your PC or Mac. Here’s how you can use BlueStacks to download and use Snapchat:
- Step 1: Download and Install BlueStacks
- Step 2: Configure BlueStacks
- Step 3: Sign in to Google Play Store
- Step 4: Download and Install Snapchat
- Step 5: Launch Snapchat
- Step 6: Sign in to Snapchat
Start by visiting the official BlueStacks website (www.bluestacks.com) and clicking on the “Download BlueStacks” button. The website will automatically detect your operating system, whether it’s Windows or Mac, and provide the correct download link for your computer. Once the download is complete, run the installer file and follow the on-screen instructions to install BlueStacks on your computer.
After the installation is complete, launch BlueStacks on your computer. Follow the initial setup process, which includes signing in with your Google account or creating a new one. This step is necessary to access the Google Play Store within BlueStacks.
Once you’ve configured BlueStacks, sign in to the Google Play Store with your Google account. This will allow you to download and install Snapchat from the Play Store.
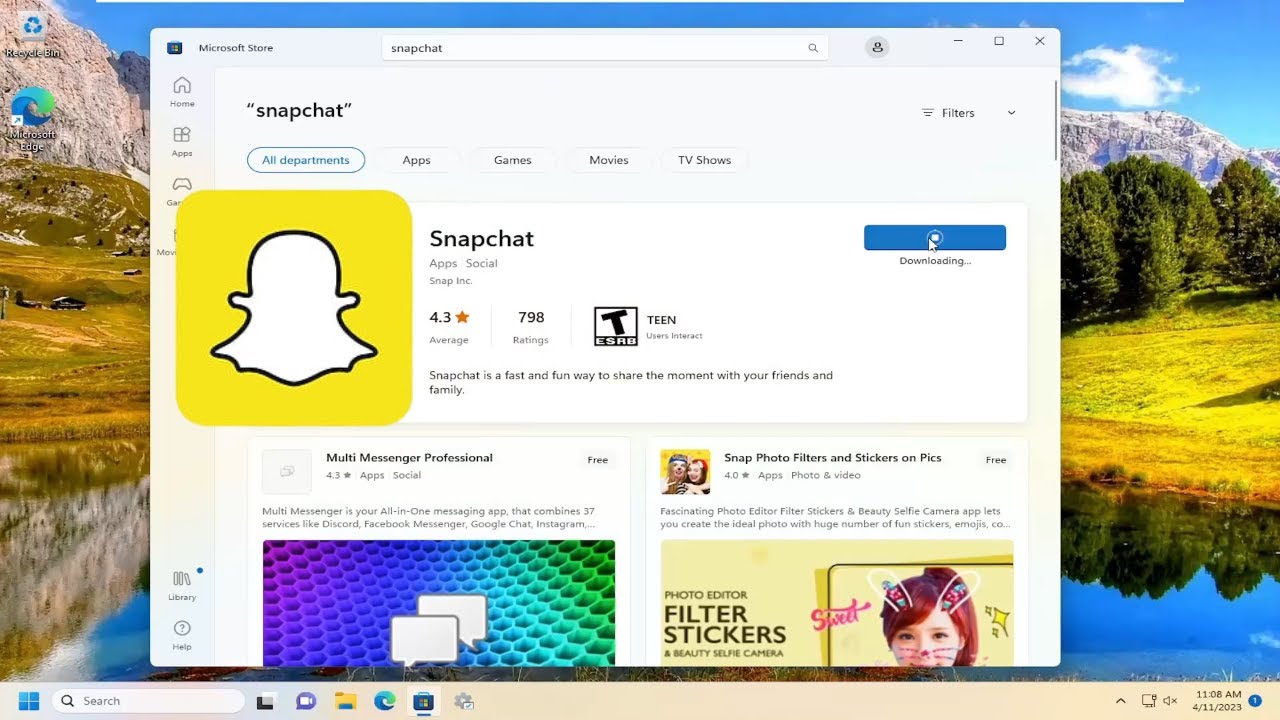
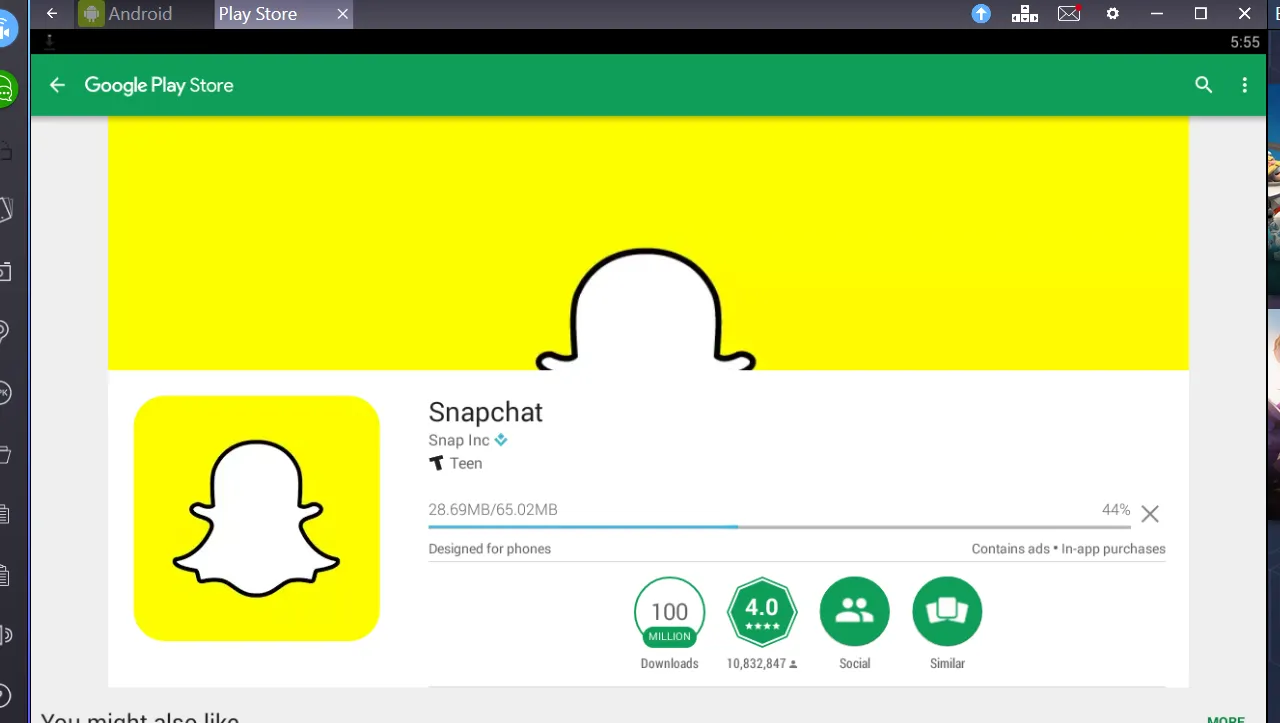
In the BlueStacks interface, open the Play Store app. Search for “Snapchat” in the Play Store’s search bar. Once you find the app, click on the “Install” button to begin the download and installation process. Wait for the installation to complete.
After the installation is finished, you can find the Snapchat app icon in the BlueStacks app drawer. Click on the Snapchat icon to launch the app.
Sign in to Snapchat using your existing Snapchat account or create a new one within the app. Once signed in, you can start using Snapchat on your computer through BlueStacks.
BlueStacks provides a user-friendly interface and a powerful emulation engine, making it a popular choice among users who want to run Android apps on their computers. By following the above steps, you can easily download, install, and use Snapchat on your computer using BlueStacks.
Step 1: Download and Install BlueStacks
The first step to using BlueStacks as a method to download Snapchat on your computer is to download and install the BlueStacks emulator itself. BlueStacks is a powerful and popular Android emulator that allows you to run Android apps on your PC or Mac. Here’s how you can get started:
- Go to the official BlueStacks website at www.bluestacks.com.
- Once on the website, you will see a prominent “Download BlueStacks” button. Click on it.
- The website will automatically detect your operating system, whether it’s Windows or Mac, and provide you with the correct download link for your computer.
- Click on the download link to begin the download of the BlueStacks installer file.
- Wait for the download to complete. The file size may vary, so the download time will depend on your internet connection speed.
- Once the download is finished, locate the installer file on your computer. It is typically located in your “Downloads” folder, but you can check your designated download location if you have specified one.
- Double-click on the installer file to start the installation process.
- You may be prompted with a security warning asking for your permission to make changes to your system. Click “Yes” to proceed.
- Follow the on-screen instructions provided by the BlueStacks installer. These instructions may include choosing an installation location, reviewing and accepting the Terms of Service or License Agreement, and configuring additional preferences.
- Click on the “Install” or “Next” button to begin the installation process.
- Wait for the installation to complete. This may take a few minutes as the installer extracts files and sets up the necessary components.
- Once the installation is finished, you will see a notification indicating that BlueStacks has been successfully installed on your computer.
With BlueStacks now installed on your computer, you are ready to move on to the next step, which involves configuring the BlueStacks emulator. Configuring the emulator will allow you to set it up according to your preferences and ensure optimal performance when running Android apps like Snapchat.
Step 2: Configure BlueStacks
After successfully installing BlueStacks on your computer, the next step is to configure the emulator. Configuring BlueStacks will involve setting up various options and preferences to ensure optimal functionality and performance. Here’s how you can configure BlueStacks:
- Launch BlueStacks by double-clicking on its desktop shortcut or locating it in your applications folder.
- Upon launching BlueStacks for the first time, you may be prompted to sign in to your Google account. Provide your Google account credentials or create a new account if you don’t have one. Signing in is necessary to access the Google Play Store and download apps like Snapchat.
- Once signed in, you will be directed to the BlueStacks home screen, which closely resembles the home screen of an Android device.
- Take a moment to familiarize yourself with the BlueStacks interface and navigation. You will notice app icons, a search bar, and navigation buttons at the bottom of the screen, replicating the Android experience.
- Click on the gear icon in the upper-right corner to access the BlueStacks settings. This will allow you to customize various aspects of the emulator.
- In the settings, you can adjust options such as display resolution, RAM and CPU allocation, and app-specific settings.
- Explore the settings and adjust them according to your preferences and computer’s capabilities. Keep in mind that higher settings may require more resources from your computer.
- Once you have configured the settings to your liking, save the changes and exit the settings menu.
By configuring BlueStacks, you can optimize the emulator to suit your needs and ensure smooth performance when using Snapchat and other Android apps. It’s important to note that the specific settings and configurations may slightly vary depending on the version of BlueStacks you are using. However, the general process remains the same.
Now that you have successfully configured BlueStacks, you are ready to proceed to the next step of signing in to the Google Play Store within the emulator and downloading Snapchat.
Step 3: Sign in to Google Play Store
After configuring BlueStacks, the next step is to sign in to the Google Play Store within the emulator. Signing in will enable you to access the vast library of Android apps available for download, including Snapchat. Here’s how you can sign in to the Google Play Store:
- Open BlueStacks on your computer by double-clicking its desktop shortcut or finding it in your applications folder.
- Click on the Google Play Store icon on the BlueStacks home screen. The Play Store icon is typically located in the “My Apps” section or on the app drawer.
- If prompted, sign in to your Google account by entering your email address and password. If you don’t have a Google account, click on the “Create Account” button to set up a new one.
- Read and accept the Terms of Service and Privacy Policy presented by Google Play Store.
- Once signed in, you will have access to the vast collection of Android apps available on the Google Play Store.
Signing in to the Google Play Store allows you to search for and download apps, including Snapchat, directly from within BlueStacks. By accessing the Play Store, you can enjoy the same functionality and features as you would on an Android device.
Now that you have successfully signed in to the Google Play Store, you are ready to proceed to the next step of downloading and installing Snapchat on BlueStacks.
Step 4: Download and Install Snapchat
With BlueStacks configured and signed in to the Google Play Store, you can now proceed to download and install Snapchat on your computer. This step will allow you to enjoy all the features and functionalities of Snapchat within the BlueStacks emulator. Here’s how you can download and install Snapchat:
- Open BlueStacks on your computer by double-clicking its desktop shortcut or finding it in your applications folder.
- Click on the Google Play Store icon on the BlueStacks home screen. This will open the Play Store.
- In the Play Store, use the search bar to search for “Snapchat”.
- Click on the official Snapchat app from the search results to open the app page.
- On the Snapchat app page, click on the “Install” button.
- Review the permissions requested by Snapchat and click “Accept” to proceed with the installation.
- Wait for the download and installation process to complete. This may take a few minutes depending on your internet speed.
- Once the installation is finished, you will see the “Open” button. Click on it to launch Snapchat within BlueStacks.
With Snapchat successfully installed, you can now sign in to your existing Snapchat account or create a new one to start using the app on your computer through BlueStacks. Enjoy sending snaps, chatting with friends, and exploring all the features that Snapchat has to offer.
Note that although you are using Snapchat on your computer through BlueStacks, the functionality and user experience will closely resemble the mobile app. You can make use of the camera and other features to capture and share moments, just as you would on a mobile device.
Congratulations! You have now successfully downloaded and installed Snapchat on your computer using BlueStacks. You can begin connecting with friends and sharing exciting moments using Snapchat’s multimedia messaging functionalities.
Method 3: Using NoxPlayer
If you’re looking for an alternative method to download Snapchat on your computer, NoxPlayer is another reliable option you can consider. NoxPlayer is an Android emulator that allows you to run Android apps on your PC or Mac. Here’s how you can use NoxPlayer to download and use Snapchat:
- Step 1: Download and Install NoxPlayer
- Step 2: Configure NoxPlayer
- Step 3: Sign in to Google Play Store
- Step 4: Download and Install Snapchat
- Step 5: Launch Snapchat
Start by visiting the official NoxPlayer website at www.bignox.com. From their website, click on the “Download” button to start downloading the NoxPlayer installer file.
Once the download is complete, run the NoxPlayer installer file and follow the on-screen instructions to install NoxPlayer on your computer. The installation process may take a few minutes, so be patient.
After NoxPlayer is successfully installed, launch it on your computer. You’ll be prompted to sign in to your Google account or create a new one. Signing in to your Google account is necessary to access the Google Play Store within NoxPlayer.
In the NoxPlayer interface, locate the Google Play Store app and open it. Search for “Snapchat” in the search bar, then select the official Snapchat app from the search results. Click on the “Install” button to begin the download and installation process. Once installation is complete, you will find the Snapchat app icon in the app drawer.
Click on the Snapchat app icon in the app drawer to launch the application. Sign in with your existing Snapchat account or create a new one to start using Snapchat on your computer through NoxPlayer.
NoxPlayer provides a seamless Android emulator experience, allowing you to run Android apps like Snapchat on your computer. By following the above steps, you can easily download, install, and use Snapchat through NoxPlayer.
Step 1: Download and Install NoxPlayer
To begin using NoxPlayer as a method to download Snapchat on your computer, you first need to download and install the NoxPlayer emulator. NoxPlayer is a reliable Android emulator that allows you to run Android apps on your PC or Mac. Follow these steps to get started:
- Visit the official NoxPlayer website at www.bignox.com.
- On the website homepage, you will find a prominent “Download” button. Click on it to initiate the download of the NoxPlayer installer file.
- Once the download is complete, locate the installer file on your computer. It is usually located in the default download directory or the designated folder you specified.
- Double-click on the installer file to start the installation process.
- Follow the on-screen instructions provided by the NoxPlayer installer. Review and accept the License Agreement or Terms of Service, if prompted.
- Choose the destination folder where you want NoxPlayer to be installed, or simply use the default location.
- Select additional options, such as creating a desktop shortcut or launching NoxPlayer automatically upon system startup, depending on your preferences.
- Click the “Install” button to begin the installation process.
- Wait for the installation to complete. This may take a few minutes as the installer extracts the necessary files and sets up the emulator.
- Once the installation is finished, you will see a confirmation message indicating that NoxPlayer is successfully installed on your computer.
With NoxPlayer installed, you are now ready to proceed to the next steps, which involve configuring NoxPlayer and downloading Snapchat from the Google Play Store within the emulator.
Note that the specific steps may vary slightly depending on the version of NoxPlayer you are installing, but the general process remains the same. Make sure to download NoxPlayer from the official website to ensure you are getting the genuine and safe version of the emulator.
Step 2: Configure NoxPlayer
After successfully installing NoxPlayer on your computer, the next step is to configure the emulator according to your preferences. Configuring NoxPlayer involves setting up various options and preferences to ensure optimal performance and usability. Here’s how you can configure NoxPlayer:
- Launch NoxPlayer by double-clicking the NoxPlayer shortcut icon on your desktop.
- Once NoxPlayer is launched, you will see the emulator’s interface that closely resembles an Android device’s home screen.
- Take a moment to familiarize yourself with the NoxPlayer interface. You will find a navigation bar at the bottom and various default apps on the home screen.
- To access the settings, click on the gear icon located at the top right corner of the NoxPlayer window.
- In the settings menu, you can customize various aspects of NoxPlayer, including resolution, performance, virtual location, and more.
- Adjust the settings according to your preferences and the capabilities of your computer. For example, you can allocate more CPU and RAM resources to NoxPlayer for improved performance.
- Explore the other options in the settings to further tailor NoxPlayer to your liking. You can modify input configurations, app permissions, keyboard layout, and more.
- Once you have configured the settings, click the “Save” button to apply the changes.
- Exit the settings menu by clicking the “Close” or “X” button.
By configuring NoxPlayer, you can optimize the emulator to meet your specific needs. Adjusting settings such as resolution and resource allocation will ensure smooth performance when running Snapchat and other Android apps on your computer.
Keep in mind that the settings and configuration options may vary slightly depending on the version of NoxPlayer you have installed. However, the general process remains the same, allowing you to customize NoxPlayer to your liking.
Now that NoxPlayer is successfully configured, you can move on to the next step of signing in to the Google Play Store within NoxPlayer to download and install Snapchat.
Step 3: Sign in to Google Play Store
After configuring NoxPlayer, the next step is to sign in to the Google Play Store within the emulator. Signing in to the Play Store will allow you to access and download apps, including Snapchat, directly onto NoxPlayer. Here’s how you can sign in to the Google Play Store:
- Launch NoxPlayer by double-clicking the NoxPlayer shortcut icon on your desktop.
- On the NoxPlayer home screen, locate and open the Google Play Store app. It is usually pre-installed or can be found in the app drawer.
- If you don’t see the Google Play Store app, you may need to install it on NoxPlayer. Visit the Google Play Store website (play.google.com) using the NoxPlayer browser, search for “Google Play Store,” and install the app.
- Once the Google Play Store is open, you will be prompted to sign in with your Google account. Enter your email address and password associated with your existing Google account. If you don’t have a Google account, click on “Create account” to set up a new one.
- Acknowledge and agree to the Terms of Service and the Privacy Policy presented by the Google Play Store.
- After signing in, you will have access to the vast library of Android apps available for download from the Play Store.
By signing in to the Google Play Store, you gain the ability to search for and download apps, including Snapchat, directly onto NoxPlayer. This allows you to experience the full functionality of Snapchat on your computer.
Now that you have successfully signed in to the Google Play Store within NoxPlayer, you can proceed to the next step of downloading and installing Snapchat on your computer.
Step 4: Download and Install Snapchat
Now that you are signed in to the Google Play Store within NoxPlayer, you can proceed to download and install Snapchat on your computer. Here’s how you can do it:
- Open the Google Play Store app in NoxPlayer by clicking on its icon on the NoxPlayer home screen.
- In the search bar at the top of the screen, type “Snapchat” and press the Enter key or click on the search icon.
- From the search results, click on the official Snapchat app.
- On the Snapchat app page, click on the “Install” button to begin the download and installation process.
- Wait for the download to complete. This may take a few moments depending on your internet speed.
- Once the download is finished, the “Install” button will change to “Open”.
- Click on the “Open” button to launch the Snapchat app within NoxPlayer.
- Allow any necessary permissions requested by Snapchat.
- If you have an existing Snapchat account, sign in with your credentials. Otherwise, create a new account within the app.
- Once signed in, you can start using Snapchat on your computer through NoxPlayer.
With Snapchat successfully downloaded and installed, you can now enjoy all the features and functionalities offered by the app on your computer. Whether you want to send snaps to your friends, explore the Discover section, or try out various filters and effects, you can do it all within NoxPlayer.
Note that while using Snapchat on NoxPlayer, the user experience will closely resemble that of using the app on a mobile device. You can make use of the app’s camera features, chat with friends, and discover new content, just as you would on a smartphone or tablet.
Congratulations! You have now successfully downloaded and installed Snapchat on your computer using NoxPlayer. Have fun connecting with friends and sharing unforgettable moments!
Conclusion
Downloading and using Snapchat on your computer can offer a whole new level of convenience and enjoyment. By utilizing Android emulators like BlueStacks, NoxPlayer, or others, you can run Android apps on your PC or Mac seamlessly. In this guide, we covered three popular methods to download Snapchat on your computer using these emulators.
Method 1 involved using an Android emulator, such as BlueStacks or NoxPlayer, which allows you to download and install Snapchat directly from the Google Play Store. This method provides a user-friendly experience with access to the full features of Snapchat.
Method 2 focused specifically on BlueStacks, a renowned Android emulator that enables you to access the Google Play Store and download Snapchat onto your computer. BlueStacks provides a smooth performance and a familiar Android interface.
Method 3 explained how to use NoxPlayer, another reliable Android emulator, to download and use Snapchat on your computer. By signing in to the Google Play Store within NoxPlayer, you gain access to the vast library of Android apps and enjoy an immersive Snapchat experience.
Whether you choose BlueStacks, NoxPlayer, or any other Android emulator, the steps provided in this guide will help you effortlessly download and use Snapchat on your computer. Emulators allow you to explore and enjoy your favorite mobile apps on a larger screen, providing an enhanced user experience.
Remember to exercise caution when downloading APK files or using emulators and only download from trusted sources to ensure the safety and security of your computer. Additionally, be mindful of the computational requirements of running an emulator on your computer to ensure optimal performance.
Now that you know how to download and use Snapchat on your computer, you can take full advantage of its features, connect with friends, and share memorable moments. Whether you’re snapping photos, recording videos, or using Snapchat’s creative tools and filters, have fun exploring everything this popular multimedia messaging app has to offer on your desktop or laptop!