Introduction
Skype has become an integral part of our lives, allowing us to connect and communicate with friends, family, and colleagues from around the world. It enables us to have audio and video calls, send instant messages, and share files seamlessly. With all these interactions happening on Skype, you may wonder if there is a way to download and save your chat history for future reference or sentimental value.
Fortunately, Skype provides the option to download your chat history, so you can keep a record of your conversations and revisit them whenever you want. Whether you need to retrieve important information or simply want to stroll down memory lane, having access to your chat history can be incredibly valuable.
In this article, we will guide you through the step-by-step process of downloading your Skype chat history. We will explain how to sign in to your Skype account, access the options menu, navigate to the privacy settings, request your chat history, download the chat history file, and finally, open and view your Skype chat history.
Whether you are using Skype on your computer, smartphone, or tablet, the process is relatively straightforward and can be accomplished in just a few minutes. So, let’s get started and unravel the mystery of downloading your Skype chat history!
Step 1: Sign in to your Skype account
The first step to downloading your Skype chat history is signing in to your Skype account. This will ensure that you have access to all your conversations and can proceed with the download process.
To sign in to your Skype account, follow these simple steps:
- Launch the Skype application on your device or visit the Skype website.
- Enter your Skype username, email address, or phone number in the designated field.
- Next, enter your password. Make sure you enter it correctly to avoid any login issues.
- Click on the “Sign In” button to access your Skype account.
Once you have successfully signed in to your Skype account, you are now ready to proceed to the next step of downloading your chat history. Keep in mind that you need to be signed in to your account before you can access the necessary options for saving your chat history.
It’s worth noting that if you are using the Skype application on a mobile device, you may have the option to enable biometric authentication, such as fingerprint or facial recognition, for quicker and more secure sign-ins.
By signing in to your Skype account, you are ensuring that you have the necessary permissions and access to proceed with the chat history download process. So, let’s move on to the next step and explore how to access the options menu in Skype.
Step 2: Access the options menu
Once you have signed in to your Skype account, the next step is to access the options menu. In the options menu, you will find the necessary settings and preferences to customize your Skype experience, including the ability to download your chat history.
To access the options menu in Skype, follow these steps:
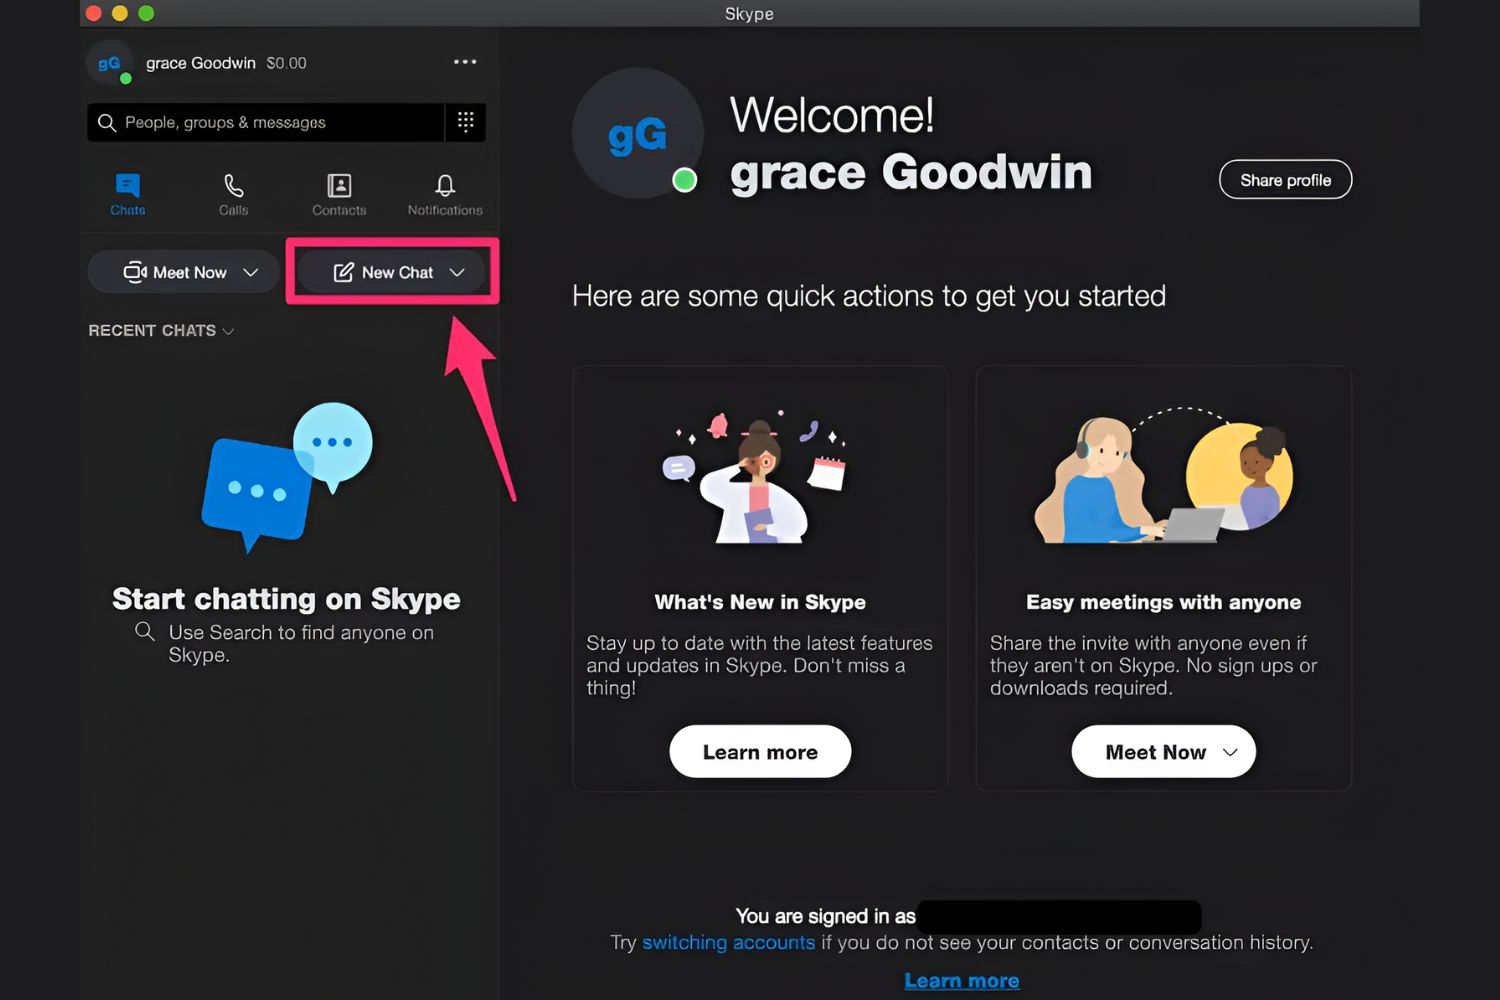
- In the Skype application or website, look for the three-dot icon or the gear-shaped symbol. This icon represents the options menu.
- Click on the icon to expand a dropdown menu or open a new options window.
- Scroll through the options and locate the “Settings” or “Preferences” option. Click on it to access the settings menu.
Depending on the version of Skype you are using, the appearance and organization of the options menu may vary. However, the basic steps to access the options menu remain the same.
If you are using the Skype application on a mobile device, you may need to tap on your profile picture or navigate to the settings section to find the options menu. Look for the “Settings” or “Preferences” tab and tap on it to access the necessary options.
Now that you have successfully accessed the options menu, you are one step closer to downloading your Skype chat history. In the next step, we will guide you through navigating to the privacy settings, where you can find the option to request your chat history.
Step 3: Navigate to the Privacy settings
Once you have accessed the options menu in Skype, the next step is to navigate to the privacy settings. This is where you will find the necessary options to request and download your chat history.
To navigate to the privacy settings in Skype, follow these steps:
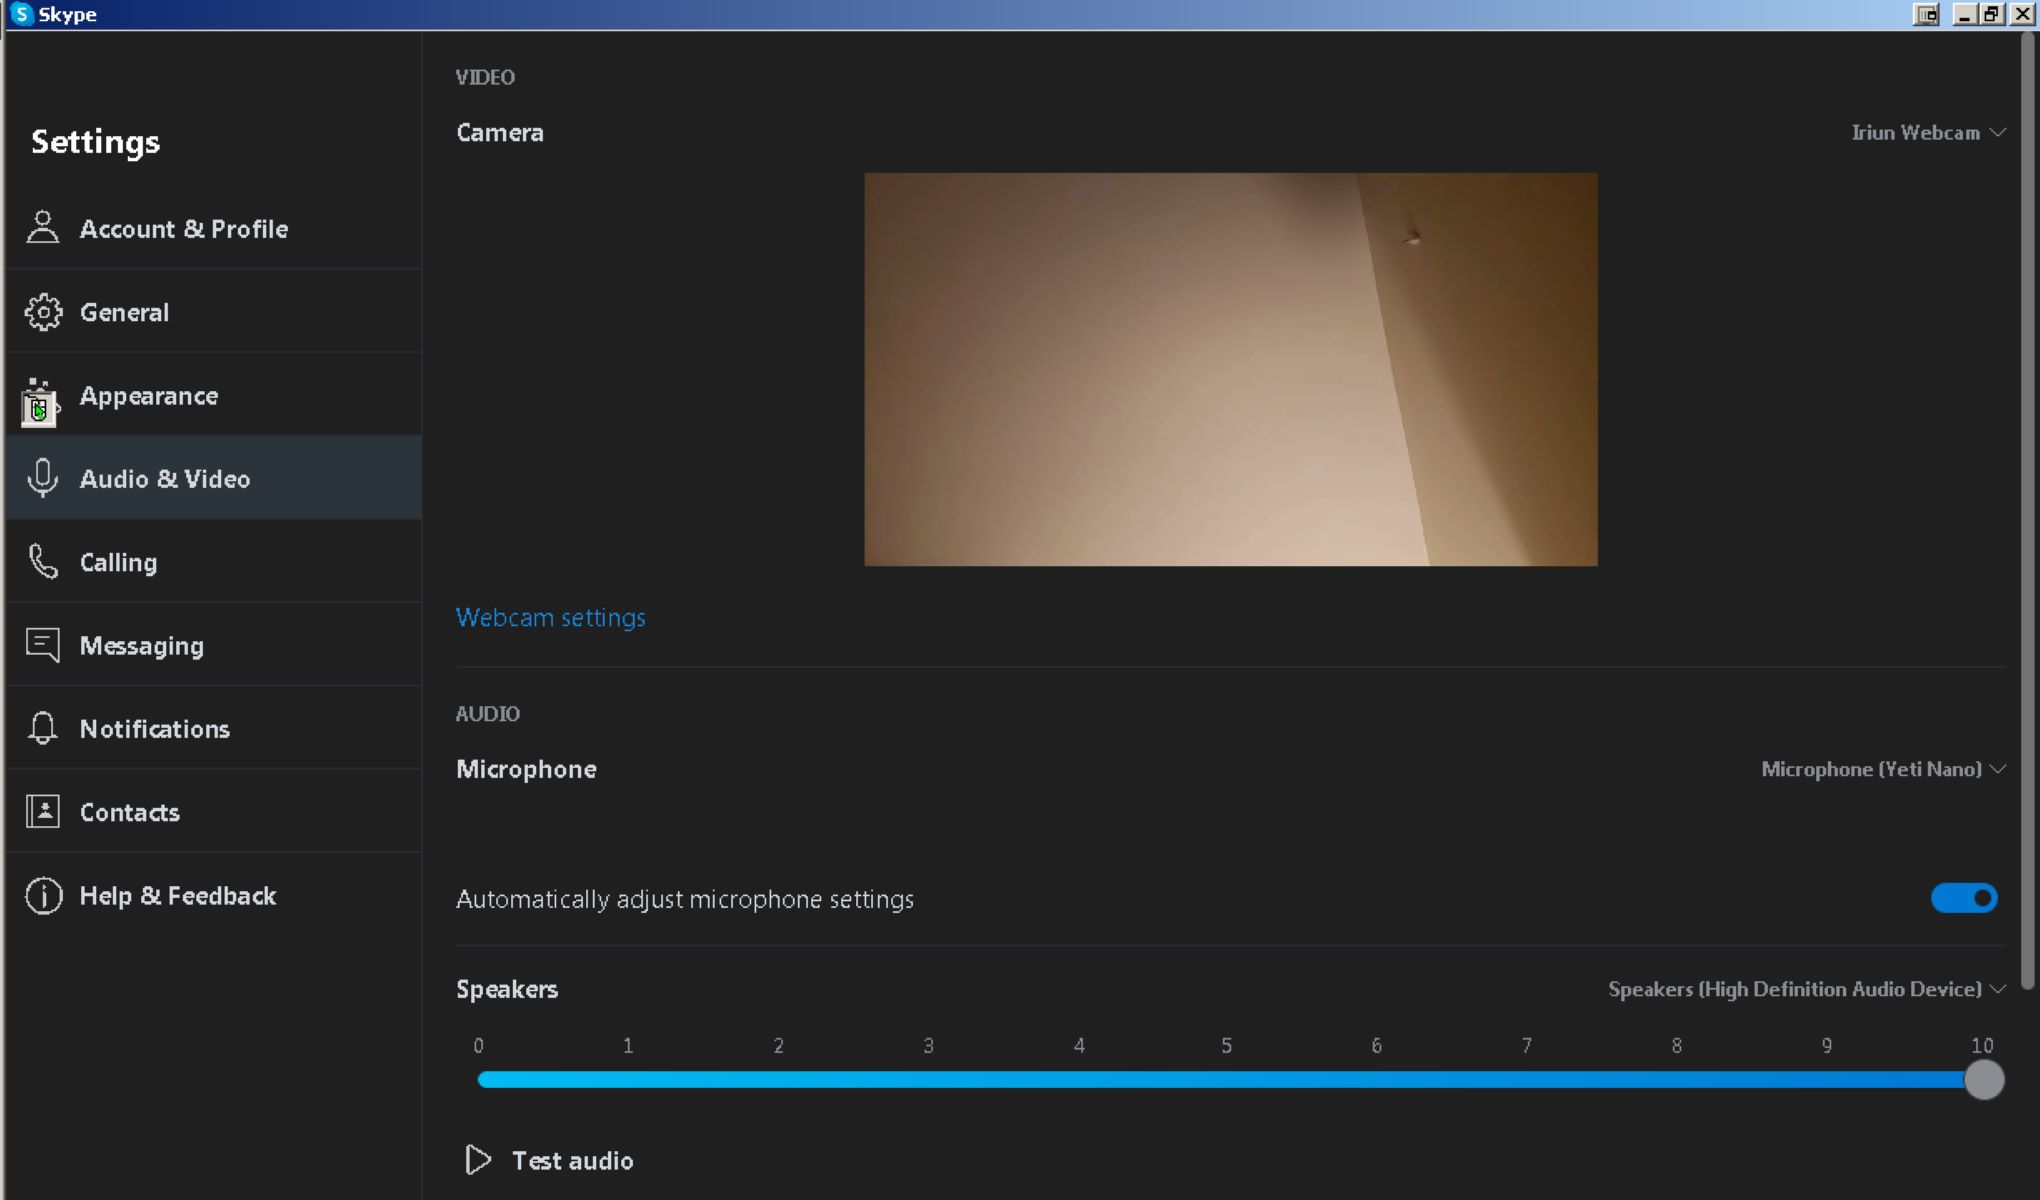
- In the options menu, look for the “Privacy” or “Privacy and Security” option. Click on it to access the privacy settings.
- Once you are in the privacy settings, take a moment to familiarize yourself with the various options available to personalize your privacy preferences in Skype.
- Scroll through the settings and locate the section related to chat history or message history.
- Within this section, you may find options to enable or disable chat history saving, adjust the duration for which the chat history is stored, and other related settings.
Depending on the version of Skype you are using, the organization and labeling of the privacy settings may vary. However, the primary purpose is to provide you with control over your chat history and privacy.
If you are using the Skype application on a mobile device, you may need to navigate to the “Settings” or “Preferences” section within the app and look for the privacy settings. In this section, you should find relevant options for managing your chat history.
Once you have found the privacy settings and located the chat history options, you are ready for the next step: requesting your chat history. In the following section, we will guide you through the process of requesting your chat history in Skype.
Step 4: Request your chat history
After navigating to the privacy settings in Skype, the next step is to request your chat history. By requesting your chat history, you are indicating to Skype that you would like to save and download your conversations for future reference.
To request your chat history in Skype, follow these steps:
- In the privacy settings, locate the option related to chat history or message history.
- Enable the chat history saving option if it is not already enabled. This ensures that your conversations are being archived.
- Depending on the version of Skype you are using, you may see an option to “Request Chat History” or “Export Chat History.” Click on this option to proceed.
- Some versions of Skype may require you to choose the specific time range for which you want to download the chat history. Select the desired time range, such as the last month, last year, or custom dates.
- Click on the “Request” or “Export” button to initiate the process of retrieving your chat history.
It’s important to note that depending on the amount of chat history you have, the retrieval process may take some time. Skype will generate a file containing your chat history, so patience is key while waiting for it to be prepared for download.
If you’re using the Skype application on a mobile device, the process of requesting your chat history may be similar. Look for the chat history options within the privacy settings and follow the steps to request and export your conversations.
Once you have successfully requested your chat history, it’s time to move on to the next step: downloading the chat history file. In the following section, we will guide you through the process of downloading your Skype chat history.
Step 5: Download the chat history file
After requesting your chat history in Skype, the next step is to download the chat history file. This file contains all of your conversations and can be saved for future reference or offline viewing.
To download the chat history file in Skype, follow these steps:
- Depending on the version of Skype you are using, you may be prompted to provide an email address or other contact information where the chat history file will be sent. Enter the required details so that you can receive the file.
- Once the chat history file is ready for download, you will receive a notification or an email containing the download link.
- Click on the provided download link to initiate the download process.
- Choose a location on your device where you want to save the chat history file.
- Wait for the download to complete. The duration of the download will depend on the size of your chat history.
- Once the download is finished, you will have a file on your device that contains all of your Skype chat history.
It’s important to note that the chat history file may be in a compressed format, such as a ZIP file. In this case, you will need to extract the contents of the file using a file compression software or built-in extraction tools on your device.
If you requested your chat history to be sent to your email, make sure to check your inbox, including your spam or junk folders, for the email containing the download link.
Now that you have successfully downloaded your chat history file, it’s time for the final step: opening and viewing your Skype chat history. In the following section, we will guide you through this last step.
Step 6: Open and view your Skype chat history
Once you have downloaded your Skype chat history file, the final step is to open and view the conversations stored within it. By accessing your chat history, you can revisit past discussions, refer to important information, or simply reminisce about old memories.
To open and view your Skype chat history, follow these steps:
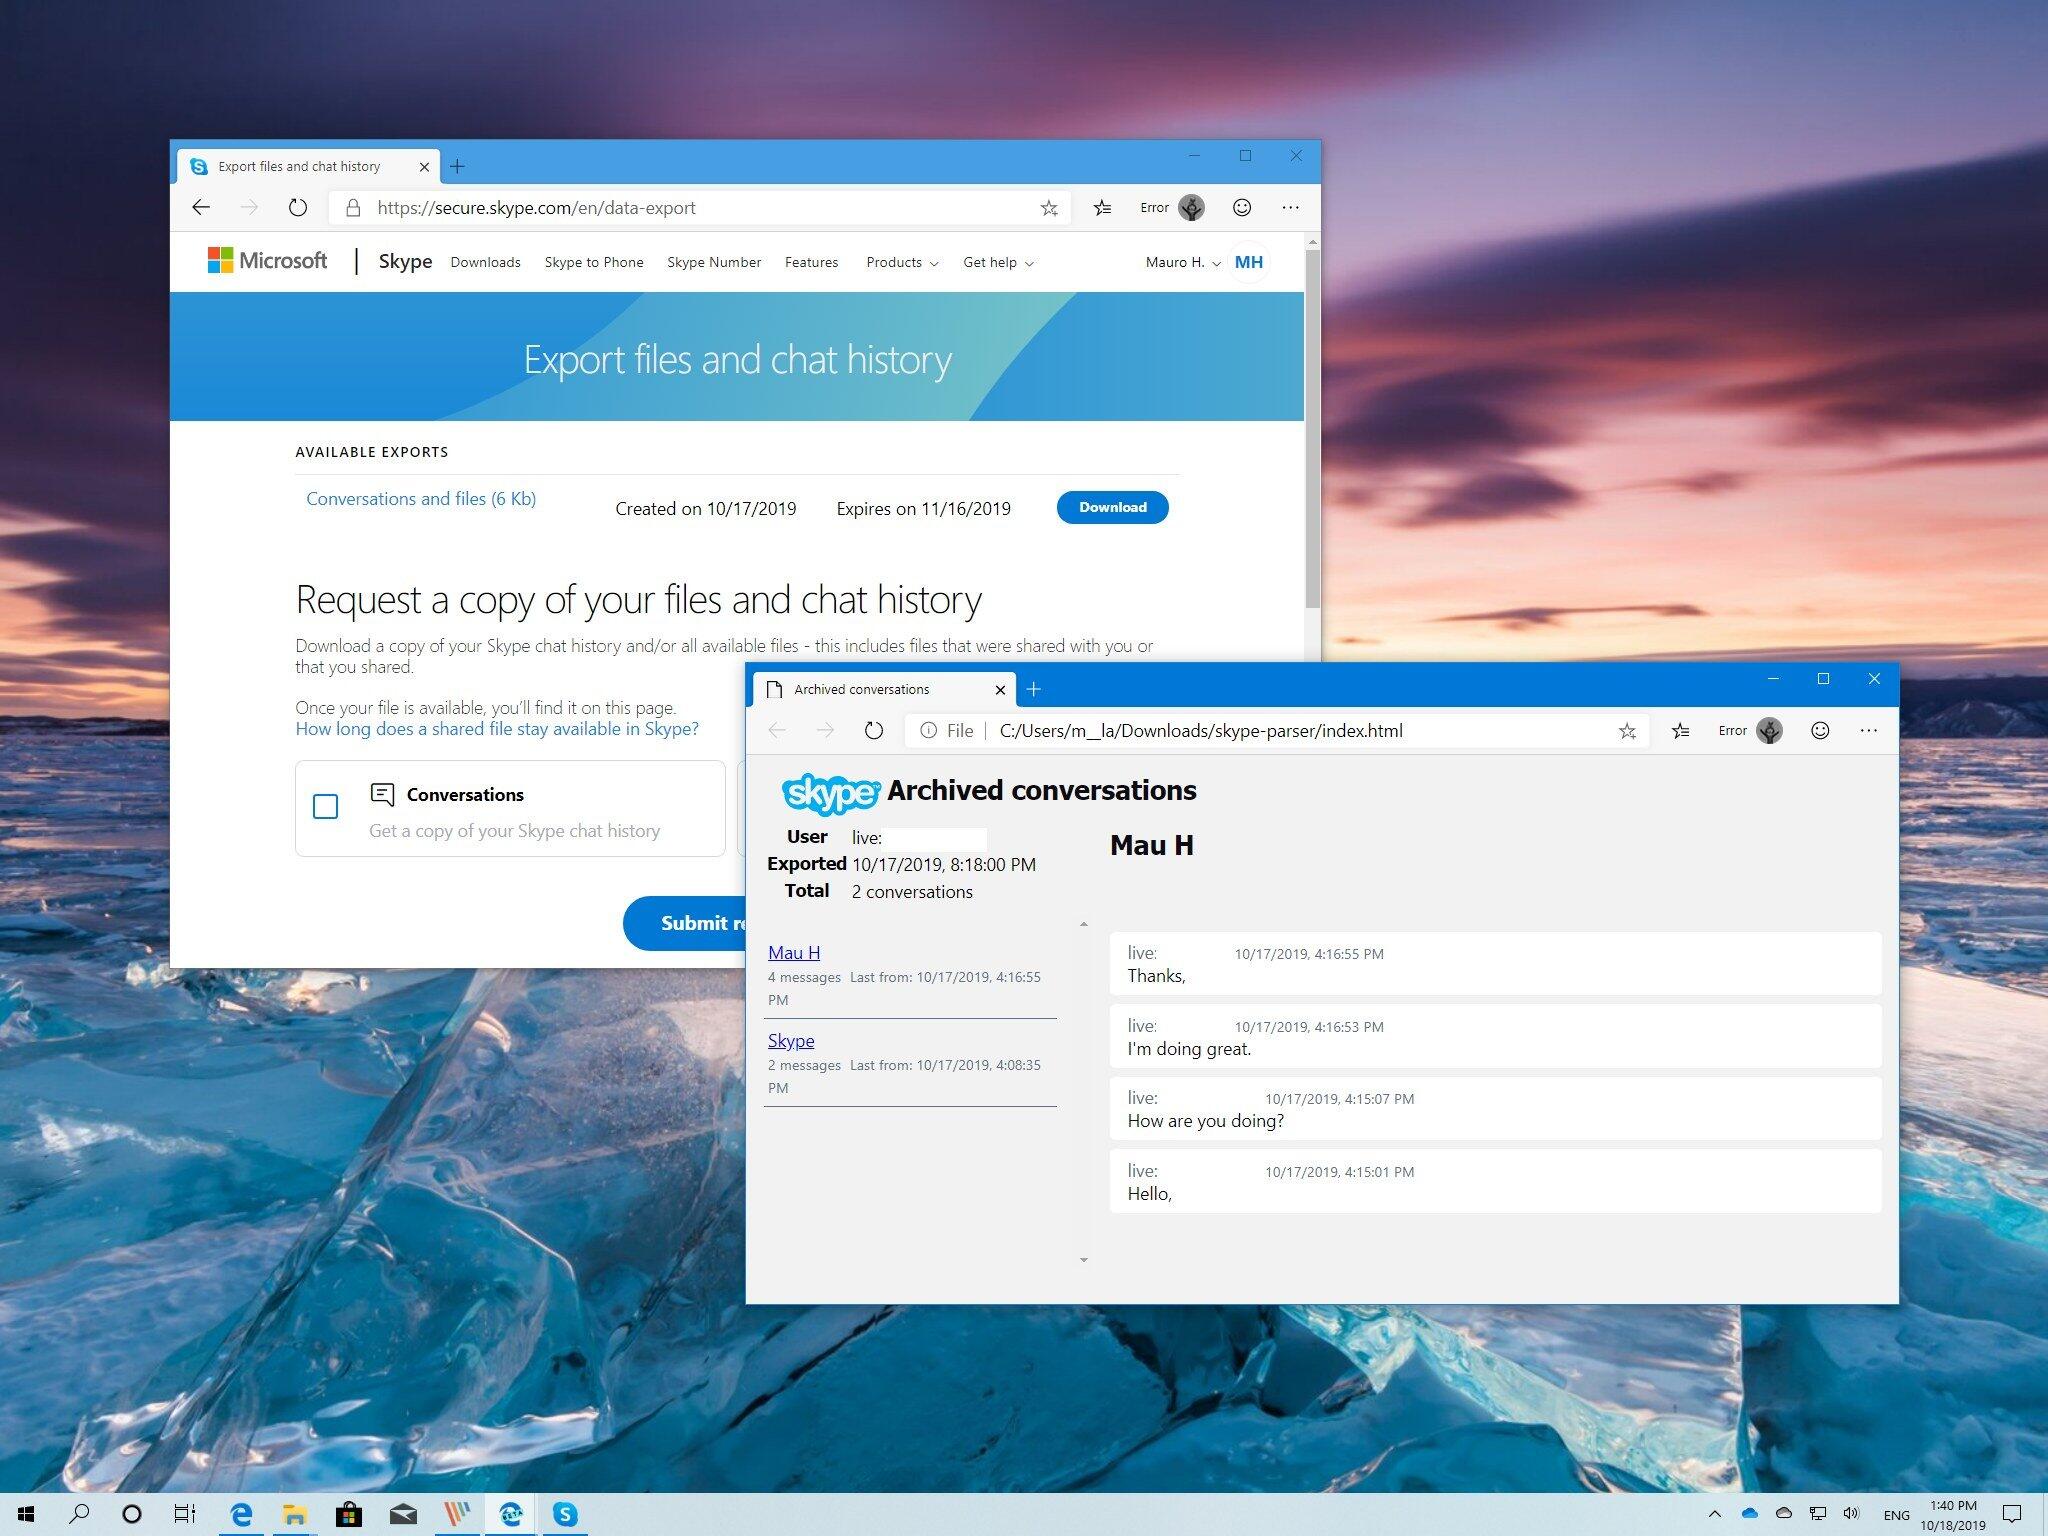
- Locate the downloaded chat history file on your device. Depending on your device settings, it may be in your designated download folder or the location you chose during the download process.
- If the chat history file is in a compressed format, such as a ZIP file, extract the contents using appropriate software or built-in extraction tools on your device. This will reveal the individual chat logs in a readable format.
- Open the extracted files and navigate to the desired conversation you want to view.
- You will see the messages exchanged with timestamps, as well as any shared media, like images, videos, or files, within each chat log.
- Scroll through the conversation to read and review the messages and media within.
Depending on the formatting of the chat history file, you may have the option to search for specific keywords, usernames, or dates to quickly find relevant conversations.
It’s worth mentioning that if you have multiple Skype accounts or have downloaded chat history from different accounts, make sure to organize and label the files appropriately to avoid confusion.
By opening and viewing your Skype chat history, you can relive important moments, find references or information you may have forgotten, or gain insights from past conversations. It provides a valuable record of your interactions and can serve as a digital diary of your communication.
Congratulations! You have successfully completed the process of downloading, opening, and viewing your Skype chat history. Enjoy exploring your conversations and preserving precious memories!
Conclusion
Downloading your Skype chat history can be a valuable way to preserve your conversations and have a record of important information or cherished memories. By following the step-by-step process outlined in this article, you can easily download, open, and view your Skype chat history.
Throughout this guide, we walked through the process of signing in to your Skype account, accessing the options menu, navigating to the privacy settings, requesting your chat history, downloading the chat history file, and finally, opening and viewing your conversations.
By being able to download your Skype chat history, you have the flexibility to revisit past discussions, retrieve crucial information, or simply relive moments that hold sentimental value. Whether you are using Skype for personal or professional purposes, having access to your chat history can be immensely beneficial.
Remember to periodically request and download your chat history to ensure that you have an up-to-date record of your conversations. Additionally, it’s a good idea to back up your chat history files to a secure location to protect them from data loss or device issues.
As technology continuously evolves, it’s important to adapt and utilize the features and capabilities that platforms like Skype offer. Downloading your chat history is just one way to make the most of your Skype experience.
So, whether you want to save memories, reference important information, or simply satisfy your curiosity, take advantage of the option to download your Skype chat history. Start preserving your conversations today and enjoy the benefits of having easy access to your past interactions.