Introduction
Welcome to the world of Peer-to-Peer (P2P) communication! In this article, we will explore how to create a P2P chat using Skype. P2P is a decentralized type of communication where participants interact directly with each other, without relying on a central server. With the rise of technology, P2P communication has gained popularity due to its numerous advantages, including increased privacy, faster communication, and reduced reliance on infrastructure.
Traditional chat applications typically rely on a central server to facilitate communication between users. This means that all messages are routed through the server, making it a potential point of failure and a potential target for security breaches. P2P communication, on the other hand, eliminates the need for a central server by allowing users to directly connect with each other.
There are several advantages to using a P2P chat system. Firstly, P2P chat offers enhanced privacy as messages are not stored or routed through a central server. This means that your conversations remain private and are not accessible to third parties. Additionally, P2P chat can be faster than traditional chat systems since messages are sent directly between users without the need for intermediaries. This results in near-instantaneous communication, making P2P chat an ideal choice for real-time conversations.
If you’re interested in setting up your own P2P Skype chat, you’ve come to the right place. In the following sections, we will guide you through the process, step by step. Don’t worry if you’re not a tech-savvy person. We’ll break down each step and explain it in simple terms, so you can easily follow along.
So, let’s dive in and explore the world of P2P chat using Skype. By the end of this article, you’ll have the confidence to create your own P2P chat and enjoy the benefits of direct communication.
What is P2P?
Peer-to-Peer (P2P) technology is a decentralized approach to network communication. In a P2P network, participants directly connect with each other without relying on a central server. This means that each participant acts as both a client and a server, allowing for the sharing and exchanging of resources, information, and services.
P2P technology gained popularity with the advent of file-sharing applications like Napster, which allowed users to share music files directly with each other. Since then, P2P has evolved and found its way into various communication systems, including chat applications like Skype.
In a traditional client-server model, communication is mediated by a central server. When you send a message through a chat application, it goes through the server before reaching the intended recipient. The server acts as a middleman, facilitating the exchange of messages between users. While this model is widely used and provides reliability and scalability, it also has its limitations. If the server goes down or becomes overloaded, communication may be disrupted, and users may lose access to their messages.
P2P technology solves these limitations by removing the need for a central server. Instead, participants in a P2P network communicate directly with each other, without any intermediate server. Each participant contributes their resources, such as processing power and bandwidth, to the network. This allows for more efficient and direct communication, as messages are routed from one participant to another in a peer-to-peer manner.
One key advantage of P2P technology is its distributed nature. Since there is no central server, the network can scale easily to accommodate a large number of participants. Additionally, P2P networks are inherently more resilient to failures. If one participant goes offline, the network can automatically reroute messages through other available participants, ensuring uninterrupted communication.
P2P technology also offers enhanced privacy and security. Since messages are not routed through a central server, there is no single point of failure and less risk of data breaches. Additionally, P2P systems often employ encryption and authentication mechanisms to ensure the privacy and integrity of exchanged information.
In summary, P2P technology is a decentralized approach to network communication that allows participants to connect directly with each other. It offers numerous advantages, including scalability, resilience, enhanced privacy, and security. Understanding the basics of P2P is fundamental to creating a P2P chat using Skype.
Advantages of P2P Chat
P2P chat brings several advantages over traditional chat systems that rely on a central server. Let’s explore some of the key advantages of using a P2P chat:
- Enhanced Privacy: P2P chat systems offer increased privacy compared to traditional chat systems. Since messages are not routed through a central server, there is no central point where conversations are stored or monitored. This means that your conversations remain private and are not accessible to third parties.
- Faster Communication: P2P chat allows for faster communication as messages are sent directly between participants without the need for intermediaries. In a traditional chat system, messages are routed through a server, which can introduce delays. With P2P chat, messages are delivered in near real-time, enabling faster and more efficient communication.
- Reduced Reliance on Infrastructure: P2P chat systems reduce reliance on a central server infrastructure. In traditional chat systems, if the server goes down or becomes overloaded, communication may be disrupted. In a P2P chat, participants connect directly with each other, so even if one participant goes offline, communication can continue through other available participants.
- Decentralization: P2P chat is a decentralized form of communication, meaning there is no single point of failure. Each participant in the P2P network acts as both a client and a server, contributing to the overall network. This decentralized nature provides increased resilience and scalability.
- Flexibility: P2P chat systems offer more flexibility in terms of network setup. Participants can connect directly, regardless of their geographic location or network configuration. This allows for seamless communication between users without the need for complex server setups or configurations.
- Improved Security: P2P chat systems often employ encryption and authentication mechanisms to ensure the privacy and integrity of exchanged information. This adds an extra layer of security, making it more difficult for unauthorized parties to intercept or tamper with messages.
These advantages make P2P chat an attractive choice for individuals and businesses looking for secure and efficient communication. By utilizing the power of direct peer-to-peer connections, P2P chat systems offer enhanced privacy, faster communication, reduced reliance on infrastructure, and increased resilience against failures. These benefits contribute to a more reliable and efficient chat experience for users.
Setting Up a P2P Skype Chat
Now that we understand the concept and advantages of P2P chat, let’s walk through the process of setting up a P2P chat using Skype. Follow the steps below to get started:
Step 1: Install the Required Software
The first step is to ensure that you have the necessary software installed on your devices. Make sure you have Skype installed on all the devices that will be participating in the P2P chat. Skype is a widely used messaging and communications application that supports P2P functionality.
Step 2: Configure Port Forwarding on your Router
In order for P2P chat to work, you may need to configure port forwarding on your router. Port forwarding allows incoming connections from external devices to be properly routed to your device. The specific steps for configuring port forwarding may vary depending on your router model, so refer to your router’s documentation or website for detailed instructions.
Step 3: Obtain Your External IP Address
To establish a direct connection with other participants in the P2P chat, you’ll need to know your external IP address. You can easily find your external IP address by performing a Google search for “What’s my IP address. Note down this IP address for later use.
Step 4: Create a Skype Account
If you don’t already have a Skype account, you’ll need to create one. Visit the Skype website or download the Skype application and follow the on-screen instructions to create a new account. Make sure to choose a unique username and a strong password to protect your account.
Step 5: Set Up a P2P Chat Connection
Once you have Skype installed, accounts created, and port forwarding configured, you’re ready to set up a P2P chat connection. Add the Skype usernames of the participants you want to chat with to your contacts list. Then, initiate a chat with one of the participants by selecting their username and clicking on the chat icon.
During the chat session, Skype will automatically establish a P2P connection between you and the participant. Messages, media files, and other data will be exchanged directly between the participants, bypassing the need for a centralized server.
Repeat this process with other participants to create a multi-party P2P chat session. As long as all participants have Skype installed, a strong internet connection, and port forwarding configured, you can enjoy the benefits of direct communication in your P2P chat.
Remember to respect privacy and only add participants you trust to your P2P chat sessions. Enjoy the convenience and security of P2P communication with Skype!
Step 1: Install the Required Software
The first step in setting up a P2P chat using Skype is to ensure that you have the necessary software installed on your devices. Here’s how to get started:
1. Check Compatibility: Before installing Skype, make sure that your devices meet the system requirements. Skype is available for various platforms, including Windows, macOS, Linux, iOS, and Android. Visit the Skype website or your device’s app store to check if your device is compatible.
2. Download Skype: Once you’ve confirmed compatibility, download the appropriate version of Skype for your device. You can find the download link on the Skype website or in your device’s app store. Follow the on-screen instructions to proceed with the installation.
3. Create a Skype Account: If you don’t already have a Skype account, you’ll need to create one. Launch the Skype application and click on the “Sign up” or “Create an account” option. Fill in the required information, such as your name, email address, and desired username and password. Ensure that you choose a unique username and a strong password to protect your account.
4. Verify Your Account: After creating your account, you may be required to verify your email address or phone number. Follow the verification process outlined by Skype to ensure the security of your account.
5. Sign In: Once your account is verified, you can sign in to Skype using your username and password. Make sure to remember these credentials as you’ll need them to log in each time you want to use Skype.
6. Complete Initial Setup: Upon signing in, you may be prompted to complete the initial setup process, such as importing contacts or customizing your profile. Follow the prompts and personalize your Skype experience as desired.
7. Install Skype on Other Devices: If you plan to use multiple devices for P2P chat, such as a laptop and a smartphone, repeat the installation process on each device. Ensure that you sign in to Skype using the same account to synchronize your messages and contacts across all devices.
By following these steps, you can easily install Skype on your devices and create a Skype account. With Skype installed, you are now ready to proceed to the next steps and set up your P2P chat connection. Remember to keep your Skype application up to date to benefit from the latest features and security enhancements.
Step 2: Configure Port Forwarding on your Router
Configuring port forwarding on your router is an essential step in setting up a P2P chat using Skype. Port forwarding allows incoming connections from external devices to be properly routed to your device. Here’s how to configure port forwarding on your router:
1. Access your Router’s Settings: Open a web browser and enter your router’s IP address in the address bar. Most routers use common default IP addresses such as 192.168.0.1 or 192.168.1.1. If you’re unsure of your router’s IP address, refer to your router’s manual or check the manufacturer’s website.
2. Log in to your Router: Enter the username and password for your router when prompted. If you haven’t changed the default login credentials, you can find them in your router’s manual or on the manufacturer’s website. It’s important to keep your router’s login credentials secure.
3. Locate the Port Forwarding Settings: Once logged in, navigate to the port forwarding or virtual server section in your router’s settings. The exact location and naming of this section may vary depending on your router model and firmware. Refer to your router’s documentation for guidance.
4. Add a New Port Forwarding Rule: In the port forwarding settings, look for an option to add a new rule or a virtual server. Click on this option to create a new port forwarding rule.
5. Enter the Details: In the port forwarding rule configuration, you’ll need to provide specific details. This includes:
- Service/Application: Select the option that allows you to manually specify a service/application or a custom entry.
- Port Range: Specify the port range that needs to be forwarded. For Skype, the default ports are 80, 443, 1024-65535.
- Protocol: Choose whether to forward TCP, UDP, or both protocols.
- IP Address: Enter the local IP address of the device you’re using for the P2P chat. You can find this IP address by checking the network settings on your device.
6. Save the Settings: Once you’ve entered the necessary details, save the port forwarding settings. Your router will apply the changes, and incoming connections to the specified ports will be directed to your device.
Repeat this process for each device you plan to use for the P2P chat. Ensure that you specify the correct IP address for each device when configuring the port forwarding rules.
It’s important to note that the steps provided above are a general guideline, and the exact process may vary depending on your specific router model and firmware. If you encounter difficulties, refer to your router’s documentation or contact the router manufacturer’s support for further assistance.
With port forwarding configured on your router, you’ve successfully completed an essential step towards setting up your P2P chat using Skype. The next step involves obtaining your external IP address, which we’ll cover in the following section.
Step 3: Obtain Your External IP Address
In order to establish a direct connection with other participants in the P2P chat, you’ll need to know your external IP address. Here’s how you can obtain it:
1. Open a Web Browser: Launch a web browser on any device connected to the same network as the device you’re using for the P2P chat.
2. Google “What’s my IP address”: In the address bar of the web browser, type “What’s my IP address” and hit Enter. Google will display your external IP address at the top of the search results page.
3. Note Down Your External IP Address: Take note of the IP address displayed on the search results page. This IP address represents the public IP address assigned to your router by your internet service provider (ISP).
Alternatively, you can also visit websites that specifically display your external IP address. For instance, you can visit websites like www.whatismyip.com or www.ipconfig.me to obtain your external IP address.
Keep in mind that your external IP address may change periodically, especially if you have a dynamic IP address assigned by your ISP. If you plan to use the P2P chat over an extended period, it’s recommended to set up a dynamic DNS (DDNS) service to associate a domain name with your changing IP address.
Now that you’ve obtained your external IP address, you can proceed to the next step with confidence. In the upcoming section, we’ll guide you through the process of creating a Skype account, an essential step in setting up your P2P chat.
Step 4: Create a Skype Account
To participate in a P2P chat using Skype, you’ll need to create a Skype account. Follow these steps to create your account:
1. Visit the Skype Website: Open a web browser and go to the official Skype website at www.skype.com.
2. Click on “Sign up” or “Create an account”: Look for the option to create a new account on the homepage, typically labeled as “Sign up” or “Create an account”. Click on it to proceed.
3. Fill in your Information: You’ll be prompted to provide some personal information to create your Skype account. This may include your full name, email address, phone number, and preferred Skype username.
4. Create a Strong Password: Choose a strong and unique password for your Skype account. Make sure to follow best practices for password security, such as using a combination of uppercase and lowercase letters, numbers, and special characters.
5. Select Country and Language: Specify your country of residence and preferred language for using Skype. These options may help in customizing your Skype experience based on your location and language preferences.
6. Accept Terms and Conditions: Before proceeding, you’ll need to read and accept the Skype terms and conditions. Make sure you understand the terms and agree to them before proceeding with the account creation process.
7. Verify Your Account: Depending on the settings and requirements, you may need to verify your email address or phone number to activate your Skype account. Follow the verification process outlined by Skype to complete the account creation.
8. Set up Your Profile: Once your account is created and verified, you can personalize your profile by adding a profile picture, a status message, and other optional information. This step is not mandatory but can help others recognize you and interact with you on Skype.
Congratulations! You’ve successfully created a Skype account. You can now sign in to your Skype account using your newly created username and password. In the next step, we’ll guide you through the process of setting up a P2P chat connection using Skype.
Step 5: Set Up a P2P Chat Connection
Now that you have created your Skype account, it’s time to set up a P2P chat connection. Follow these steps to start engaging in direct peer-to-peer communication:
1. Add Participants to your Contacts: To initiate a P2P chat, you will need to have the Skype usernames of the participants you wish to chat with. Open the Skype application and click on the “Contacts” tab or the “+” icon to add contacts. Enter the Skype usernames of the participants and click on the “Send” or “Add” button to send them a contact request.
2. Accept Contact Requests: Participants you have added will receive your contact request. They will need to accept your request in order to establish a connection and start chatting. Similarly, you may need to accept incoming contact requests from other participants who want to connect with you.
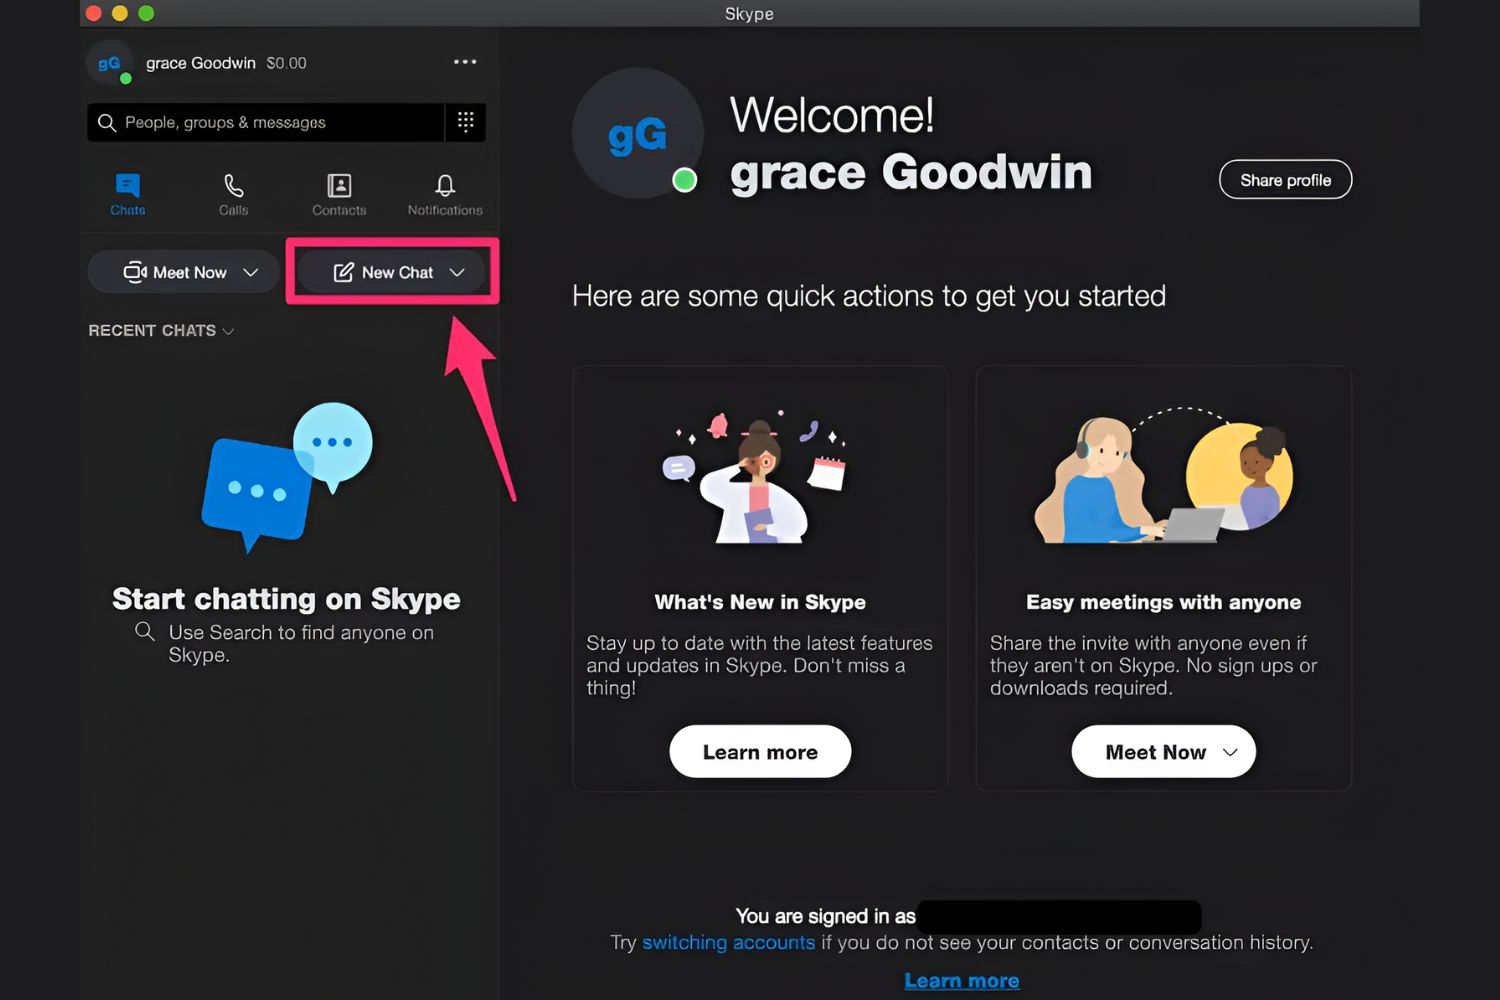
3. Initiate a Chat: Once the contact requests are accepted, select the username of a participant you want to chat with from your Skype contacts list. Click on the chat icon to initiate a chat session with that participant. A chat window will open, displaying the conversation history.
4. Exchange Messages and Media: Start exchanging messages with the participant by typing in the chat window. You can also send media files, such as images or documents, by clicking on the attachment icon or simply dragging and dropping the files into the chat window.
5. Enjoy Direct P2P Communication: During the chat session, Skype will automatically establish a peer-to-peer connection between you and the chatting participant. This direct connection allows for faster and more secure communication, as messages and media files are exchanged directly between devices without the need for a centralized server.
6. Create Multi-Party Chats: If you want to include multiple participants in your P2P chat session, you can create a multi-party chat. Simply add the Skype usernames of the participants you want to include in the chat, similar to the process of adding individual contacts. Once all participants have accepted the chat invitation, you can enjoy a multi-party P2P chat experience.
Remember to respect the privacy of others and only add participants you trust to your P2P chat sessions. Enjoy the benefits of direct communication, such as enhanced privacy, faster message delivery, and reduced reliance on centralized infrastructure, with Skype’s P2P chat feature.
If you encounter any issues or have questions regarding the P2P chat functionality, Skype provides comprehensive support resources on their website to assist you in troubleshooting and getting the most out of your P2P chat experience.
Troubleshooting Common Issues
While setting up and using a P2P chat using Skype, you may encounter some common issues. Here are some troubleshooting tips for addressing these issues:
No Incoming Messages
If you’re not receiving messages from other participants in your P2P chat, try the following:
- Check your Internet Connection: Ensure that you have a stable internet connection. If your internet is disconnected or experiencing issues, it may prevent messages from reaching your device.
- Restart Skype: Close and reopen the Skype application to refresh the connection. This can help resolve any temporary glitches in the communication.
- Check Your Firewall: Verify that your firewall settings are not blocking incoming connections from Skype. Add Skype to the list of allowed applications in your firewall settings.
Unable to Add Participants to the Chat
If you are unable to add participants to your P2P chat, try the following:
- Double-Check Skype Usernames: Make sure you are entering the correct Skype usernames of the participants you want to add. Incorrect usernames will prevent successful contact requests.
- Ask Participants to Accept Contact Requests: Confirm with the participants if they have received and accepted your contact request. Both parties need to accept the request to establish a connection.
- Verify Privacy and Blocking Settings: Ensure that neither you nor the participants have enabled privacy or blocking settings that prevent contact requests. Review and adjust the privacy and blocking settings in your Skype account.
Poor Call Quality
If you’re experiencing poor call quality during a P2P chat, try the following:
- Check your Internet Connection: Ensure that you have a stable and high-speed internet connection. A slow or unstable connection can result in degraded call quality.
- Close Bandwidth-Intensive Applications: Close any other bandwidth-intensive applications running on your device, as they can impact call quality. Examples include file-sharing programs or streaming services.
- Check Audio and Video Settings: Verify that your audio and video settings are properly configured in Skype. Adjust the microphone, speakers, and camera settings to ensure they are working correctly.
Firewall or NAT Traversal Issues
If you’re experiencing firewall or NAT traversal issues, try the following:
- Configure Port Forwarding: Make sure that you have correctly configured port forwarding on your router. Double-check the settings and consult your router’s documentation for guidance.
- Enable UPnP: If your router supports Universal Plug and Play (UPnP), enable it. UPnP can automatically handle the necessary port forwarding for Skype.
- Switch to VPN: Consider using a virtual private network (VPN) to bypass firewall and NAT traversal issues. A VPN can create a secure and private connection for Skype.
If you have followed these troubleshooting tips and are still experiencing issues, visit Skype’s support website for further assistance. They provide resources such as FAQs, community forums, and contact options to help resolve any persistent issues you may encounter during the setup or usage of your P2P chat.
Conclusion
Congratulations! You have now learned how to create a Peer-to-Peer (P2P) chat using Skype. By leveraging P2P technology, you can enjoy the benefits of direct communication, enhanced privacy, faster message delivery, and reduced reliance on centralized servers.
In this article, we explored the concept of P2P communication and its advantages over traditional chat systems. P2P chat offers increased privacy, faster communication, reduced infrastructure dependency, decentralization, flexibility, and improved security.
We then walked through the step-by-step process of setting up a P2P chat using Skype. You learned how to install the required software, configure port forwarding on your router, obtain your external IP address, create a Skype account, and set up a P2P chat connection with other participants. Troubleshooting tips were also provided to help address common issues that may arise during the setup or usage of your P2P chat.
Remember to always respect the privacy of others and only add participants you trust to your P2P chat sessions. Enjoy the convenience and security of direct communication with Skype’s P2P chat feature.
As you embark on your P2P chat journey, don’t hesitate to consult Skype’s support resources for further assistance or explore additional features and settings that Skype offers to enhance your chat experience.
Now, go ahead and connect with friends, family, or colleagues using the power of P2P chat. Embrace the benefits of direct communication and enjoy seamless, private, and efficient conversations with Skype!