Introduction
Screen recording has become a popular way to capture and share content on mobile devices, and if you’re an iPhone user, you’re in luck! With the advent of iOS 11 and later versions, Apple introduced a built-in screen recording feature that allows you to record your iPhone’s screen without the need for any third-party apps. Whether you want to create tutorials, walkthroughs, or simply record a memorable moment, screen recording can be a powerful tool at your disposal.
In this article, we will guide you through the process of downloading and using a screen recording app on your iPhone. Whether you are on the latest iOS version or have an older device, we will cover all the necessary steps to help you get started with screen recording. So, grab your iPhone and let’s dive into the world of screen recording!
Note: The steps provided in this guide are applicable to iPhones running iOS 11 and above. If you have an older iPhone model or a different operating system version, some features and steps may vary.
Before we begin, it’s important to ensure your iPhone is compatible with screen recording. While most iPhones support this feature, some older models may not be able to handle it smoothly. Therefore, it’s recommended to check your iPhone’s compatibility before proceeding.
Screen recording opens up a world of possibilities for iPhone users, allowing you to capture and share your screen with ease. Now, let’s move on to the first step and check if your iPhone is compatible with screen recording.
Step 1: Check your iPhone’s compatibility
Before you dive into screen recording on your iPhone, it’s important to check if your device is compatible with this feature. While most iPhones support screen recording, there are a few older models that may not have this capability. To ensure a seamless experience, follow these steps to verify compatibility:
- Open the “Settings” app on your iPhone.
- Scroll down and tap on “Control Center.”
- Within the “Control Center” settings, look for “Customize Controls.”
- In the “Included Controls” section, you should see an option for “Screen Recording.” If it’s already there, it means your iPhone is compatible with screen recording.
- If you don’t see “Screen Recording” listed, it means your iPhone doesn’t support this feature. However, don’t worry! You can still proceed to the next steps in this guide to download a screen recording app from the App Store.
Once you’ve determined your iPhone’s compatibility, you can move on to the next step: updating your iPhone’s software. It’s crucial to have the latest iOS version installed on your device to ensure optimal performance and access to all the latest features, including screen recording.
Let’s dive into the next step and update your iPhone’s software to pave the way for an exceptional screen recording experience!
Step 2: Update your iPhone’s software
Updating your iPhone’s software is essential to ensure that you have access to the latest features, improvements, and bug fixes. It’s particularly important for screen recording, as newer iOS versions often optimize the screen recording functionality for a smoother experience.
Here’s how you can update your iPhone’s software:
- Connect your iPhone to a stable Wi-Fi network.
- Go to the “Settings” app on your iPhone.
- Scroll down and tap on “General.”
- In the “General” settings, select “Software Update.”
- Your iPhone will now check for available updates. If a software update is available, tap on “Download and Install.”
- Follow the on-screen instructions to complete the software update process. It may take some time, so ensure that your iPhone has enough battery life or is connected to a power source.
Once the update is complete, your iPhone will restart with the latest iOS version installed. This ensures that you have access to all the latest features, including screen recording.
Now that your iPhone’s software is up to date, you’re ready to explore the built-in screen recording functionality. In the next step, we will guide you through the process of using screen recording on your iPhone without the need for any third-party apps.
Step 3: Explore built-in screen recording feature
iOS 11 and later versions introduced a convenient built-in screen recording feature that allows you to capture and share your iPhone’s screen without installing any additional apps. This built-in functionality provides a straightforward way to record your screen and save the recordings directly to your iPhone’s Photos app.
Here’s how you can explore the built-in screen recording feature:
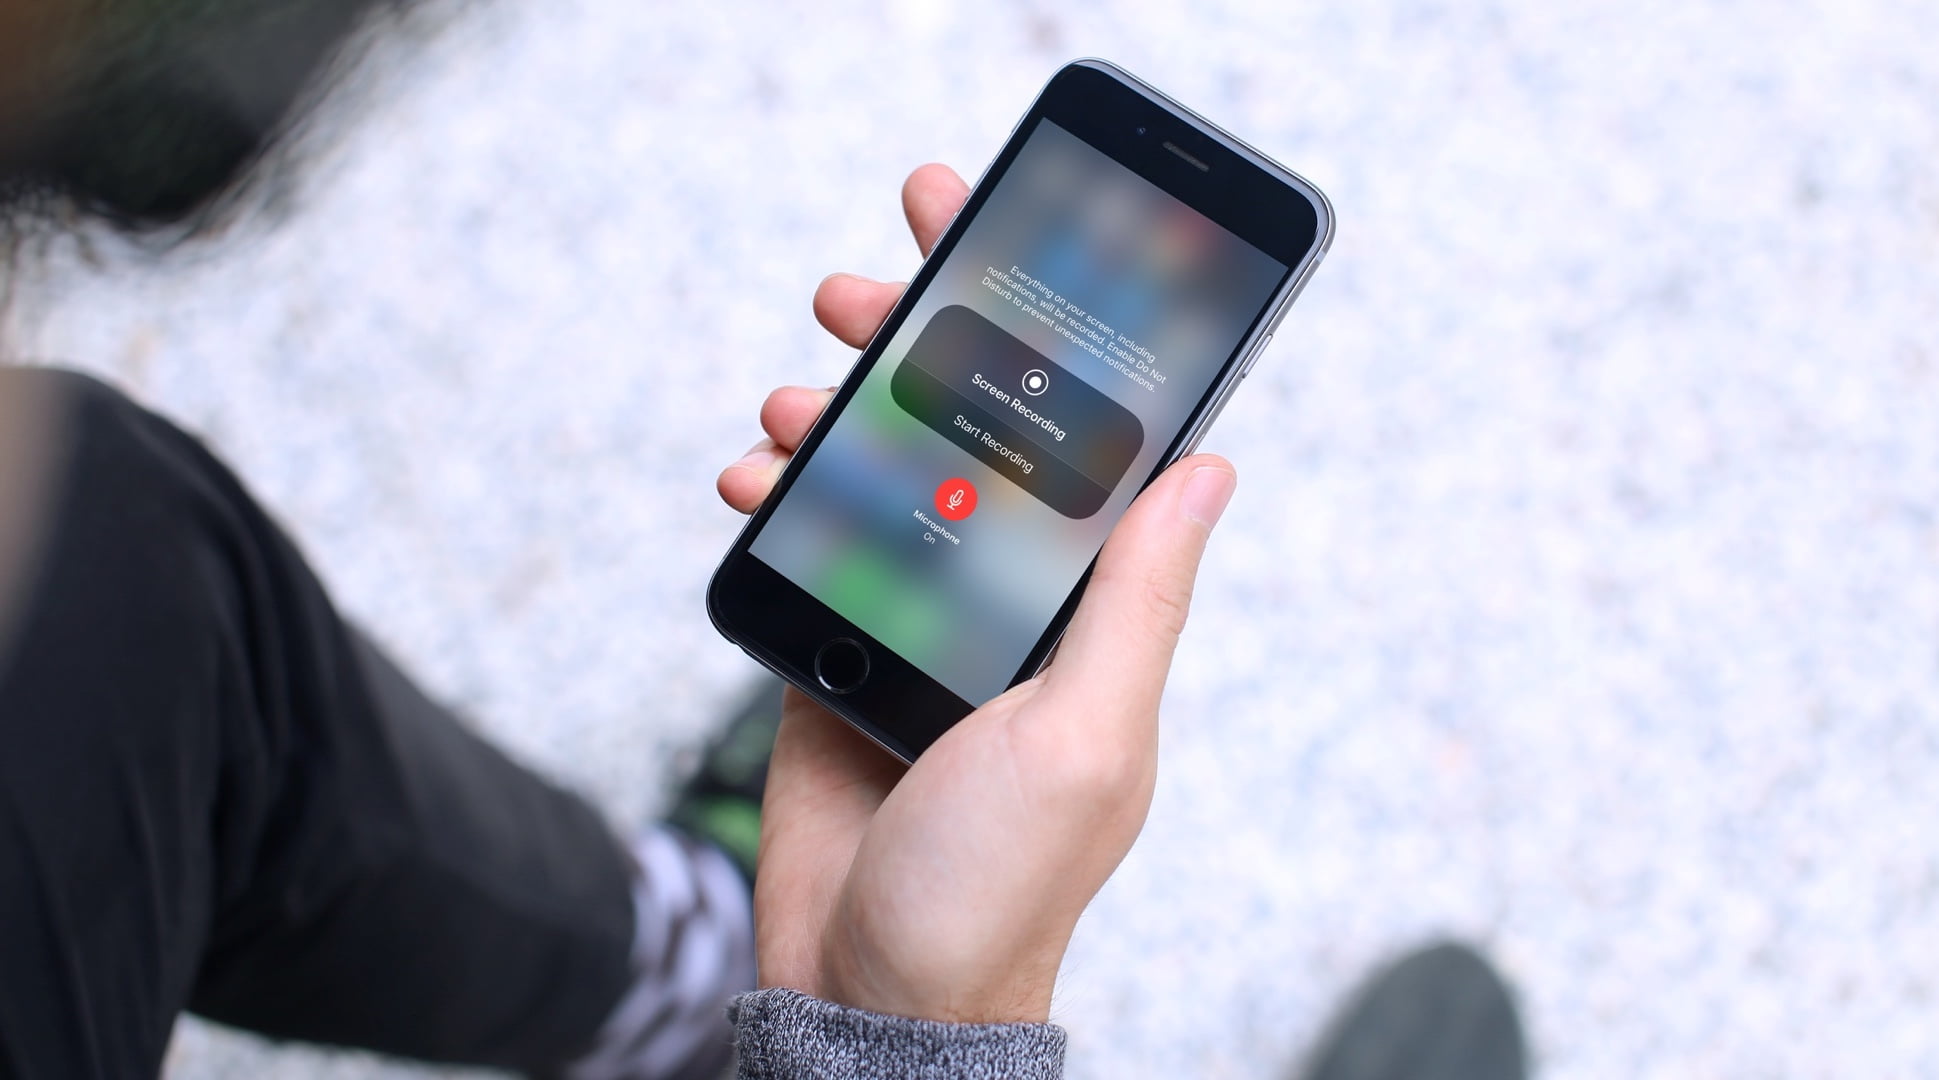
- Open the “Control Center” on your iPhone. To do this, swipe down from the top right corner of the screen on iPhone X or later models, or swipe up from the bottom of the screen on earlier models.
- In the “Control Center,” you’ll find a variety of icons for different features. Look for the “Screen Recording” icon, which resembles a filled-in circle surrounded by another circle.
- Tap on the “Screen Recording” icon. A countdown of three seconds will appear, indicating that the screen recording is about to begin.
- Your iPhone will start recording the screen along with any audio playing from your device. You can now navigate to the app or screen you want to record.
- While the recording is in progress, a blue status bar will appear at the top of your screen, indicating that the screen recording is active.
- To stop the screen recording, tap on the red status bar at the top of your screen. Alternatively, you can open the “Control Center” again and tap on the “Screen Recording” icon to stop the recording.
- Once you stop the recording, a notification will appear, indicating that the screen recording has been saved to your iPhone’s Photos app.
By exploring the built-in screen recording feature on your iPhone, you can easily record and save your screen activities without the need for external apps. This makes it a convenient option for quick and hassle-free screen recordings.
If you prefer more advanced features or additional customization options for your screen recordings, you can continue to the next step, where we will guide you on how to install a screen recording app from the App Store.
Step 4: Install a screen recording app from the App Store
If you’re looking for more advanced features or specific customization options for your screen recordings, you can explore the wide range of screen recording apps available on the App Store. These apps offer additional functionalities such as video editing, audio recording, and various settings to enhance your screen recording experience.
Follow these steps to install a screen recording app from the App Store:
- Open the “App Store” on your iPhone.
- Tap on the “Search” tab at the bottom of the screen.
- In the search bar at the top, type in “screen recording” or the specific name of the app you’re interested in.
- Tap on the “Search” button or the “Go” button on your keyboard.
- Review the list of screen recording apps that appear on your screen. Read the app descriptions, check user ratings, and reviews to make an informed choice.
- Select the screen recording app you want to install by tapping on it.
- Tap on the “Get” or “Install” button next to the app’s name.
- Authenticate the installation using your Apple ID, Touch ID, or Face ID, if prompted.
- Wait for the app to download and install on your iPhone.
- Once the installation is complete, the app’s icon will appear on your home screen. You can now open the app and explore its features.
Screen recording apps from the App Store offer a wide range of options to enhance your screen recording capabilities. From professional-grade recording tools to user-friendly interfaces, you can find an app that suits your preferences and requirements.
Now that you have installed a screen recording app, the next step is to grant the necessary permissions to the app. This will allow it to access your iPhone’s screen and audio for recording purposes. Let’s move on to the next step to configure these permissions.
Step 5: Grant necessary permissions to the screen recording app
After installing a screen recording app on your iPhone, you’ll need to grant the necessary permissions to ensure the app can access your device’s screen and audio. Without these permissions, the app may not be able to record your screen effectively. Here’s how you can grant the required permissions:
- Locate the screen recording app on your iPhone’s home screen and tap on its icon to open it.
- Upon opening the app for the first time, you may be prompted to grant various permissions. Look for any pop-up messages or prompts asking for access to your device’s screen and audio.
- Read the permission requests carefully and tap on “Allow” or “OK” to grant the necessary permissions.
- If you miss any permission prompts during the initial setup, you can still grant them manually. To do this, go to the “Settings” app on your iPhone.
- Scroll down and tap on the name of the screen recording app you installed. The name may vary based on the app you chose.
- In the app’s settings, you’ll find options to grant permissions for screen recording and audio recording. Enable these options by toggling the switches to the “on” position.
- Exit the app’s settings and return to the screen recording app.
By granting the necessary permissions, you ensure that the screen recording app can capture and record your iPhone’s screen and audio effectively. This will enable you to create high-quality screen recordings with the desired settings and features available in the app.
Now that you have configured the necessary permissions, it’s time to explore the app’s settings and customize your screen recording experience. In the next step, we will guide you on how to configure the recording settings in the screen recording app.
Step 6: Configure recording settings
Configuring the recording settings in your screen recording app allows you to customize the output and tailor it to your specific needs. Depending on the app you have installed, you may have various options and features to adjust. Here’s how you can configure the recording settings:
- Open the screen recording app on your iPhone.
- Look for a “Settings” or “Preferences” option within the app. It may be represented by a gear icon or labeled as “Settings.”
- Tap on the “Settings” or “Preferences” option to access the app’s configuration menu.
- In the settings menu, you’ll find a range of options to customize your screen recording. These options may include video resolution, frame rate, audio source, microphone settings, and more.
- Review the available options and adjust them according to your preferences. For example, if you want high-quality recordings, choose a higher video resolution and frame rate. If you want to include your voice narration, make sure the app is set to record audio from your microphone.
- Take your time to explore and experiment with different settings to find the optimal configuration for your specific recording needs.
- Once you have adjusted the settings to your satisfaction, exit the app’s settings menu.
Configuring the recording settings allows you to fine-tune your screen recording experience and capture videos with the desired quality and functionality. Whether you want to record gaming sessions, create instructional tutorials, or capture important moments, the ability to customize the recording settings empowers you to achieve your desired outcome.
Now that you have configured the recording settings, it’s time to start capturing your iPhone’s screen. In the next step, we will guide you through the process of starting a screen recording and capturing the content you want.
Step 7: Start recording your screen
With the necessary permissions granted and the recording settings configured to your preference, you are now ready to start recording your iPhone’s screen. Follow these steps to begin the screen recording process:
- Open the screen recording app on your iPhone.
- Navigate to the screen or app that you want to record.
- Depending on the app you’re using, you may need to tap on a “Record” or “Start” button within the app to initiate the recording. Alternatively, some apps may automatically begin recording as soon as you open them.
- Once the recording starts, a countdown or indicator will appear on the screen, indicating that the recording is in progress.
- Continue using your iPhone as you normally would while the screen recording is active. Interact with apps, navigate through menus, or showcase functionalities to capture your desired content.
- If desired, you can pause or resume the recording by following the instructions provided within the screen recording app. This allows you to create seamless recordings without having to stop and start again.
- When you’re finished recording, follow the app’s instructions to stop the screen recording. This can usually be done by tapping a “Stop” or “Finish” button within the app.
By following these steps, you can easily start recording your iPhone’s screen using the screen recording app you have installed. Remember to keep an eye on the recording indicator or countdown to ensure that the recording is in progress and capturing the desired content.
Now that you know how to start a screen recording, the next step is to stop and save the recording to your iPhone’s storage. Let’s move on to the final step to learn how to do this.
Step 8: Stop and save the screen recording
Once you have finished recording your iPhone’s screen, it’s time to stop the recording and save it to your device’s storage. Here are the steps to follow:
- Locate the screen recording app on your iPhone’s home screen and open it.
- Within the app, look for a “Stop” or “Finish” button. This is typically located in a prominent position within the app’s interface.
- Tap on the “Stop” or “Finish” button to end the screen recording. The app will then process and save the recording to your iPhone’s storage.
- After the recording has been saved, you may receive a confirmation message or notification indicating that the recording is ready to be accessed.
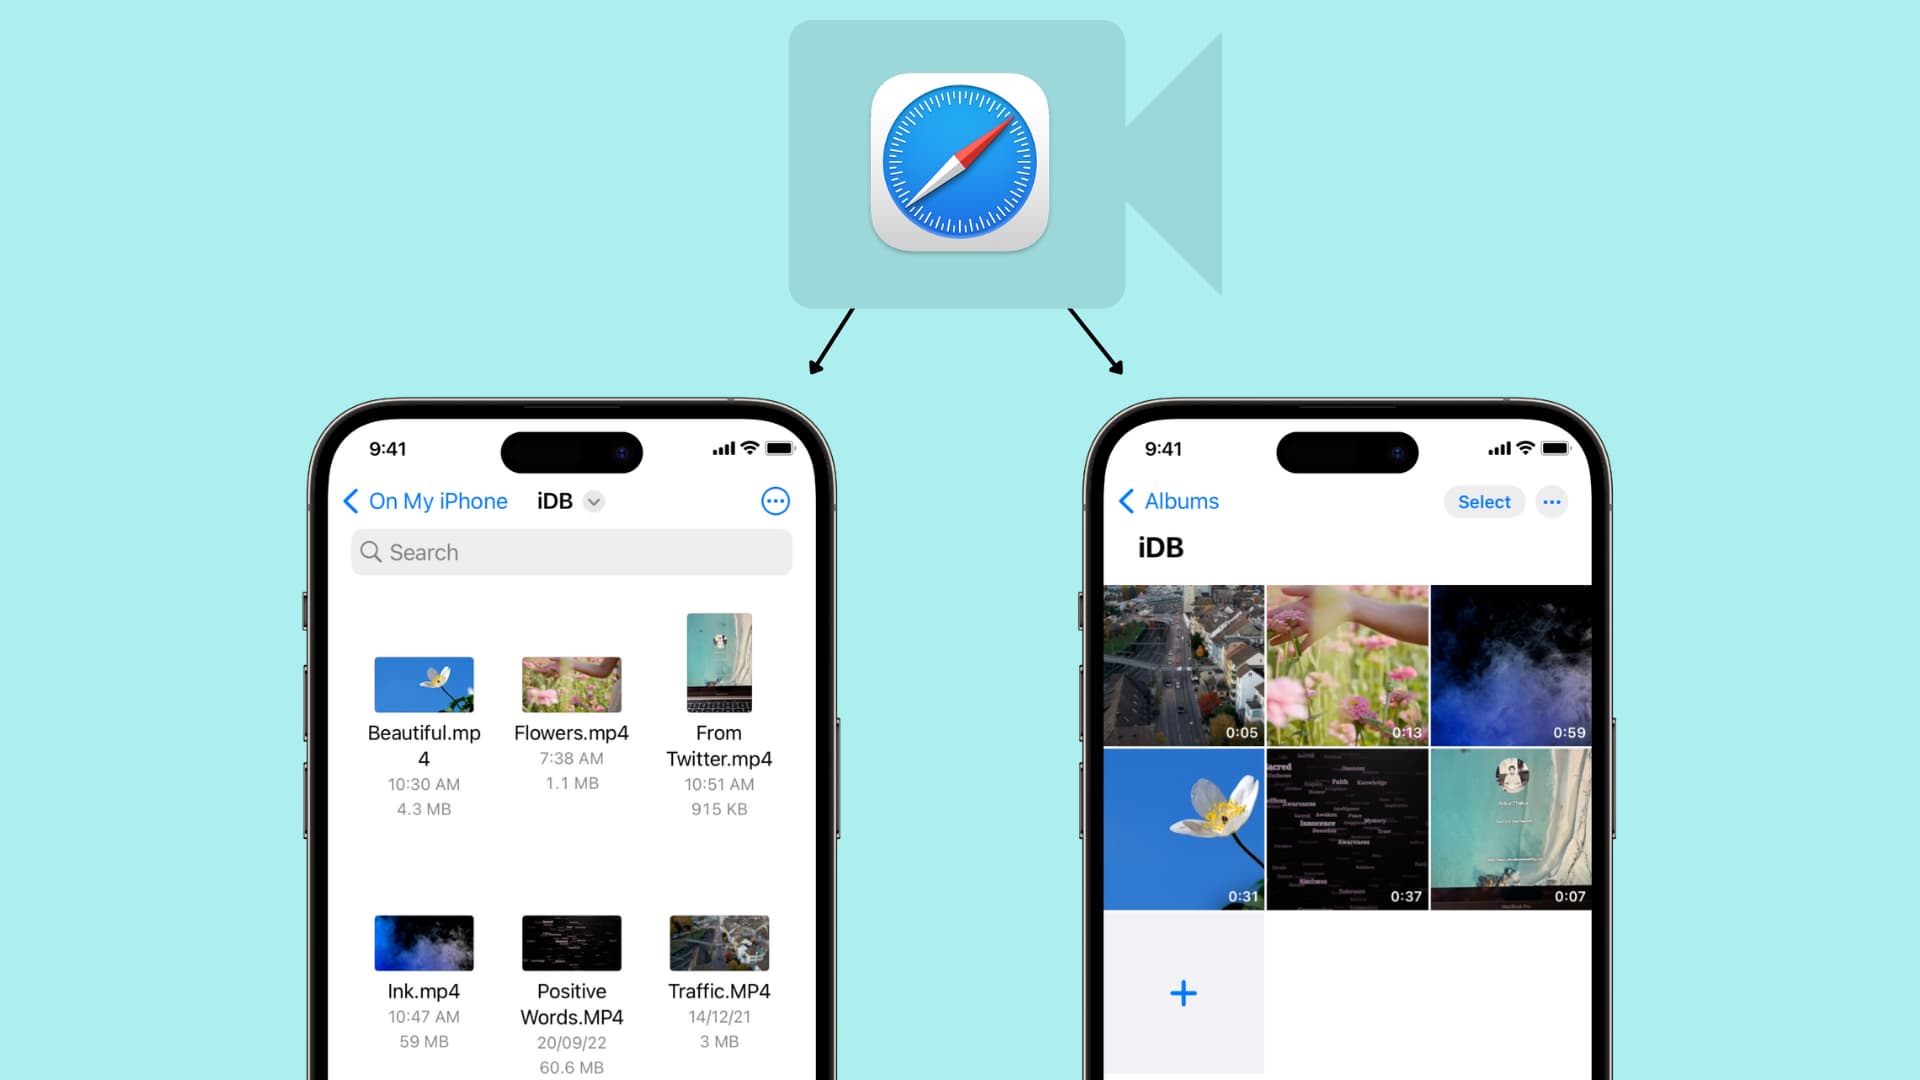
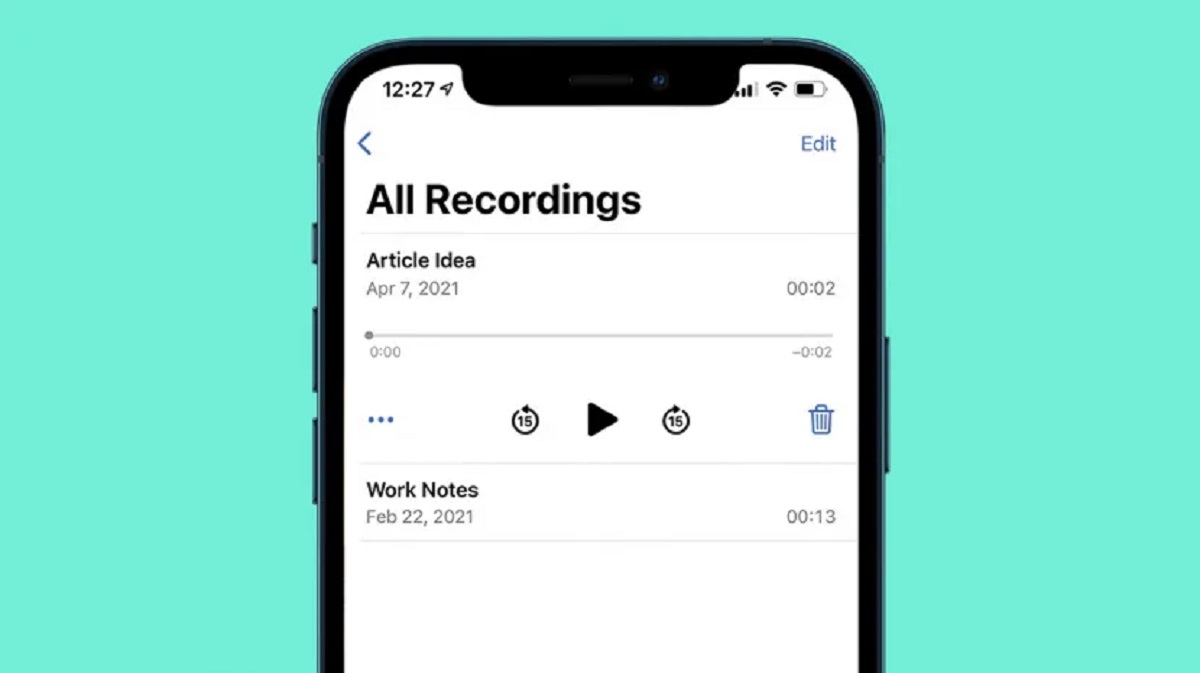
- Exit the screen recording app and go to your iPhone’s Photos app.
- Within the Photos app, navigate to the “Albums” or “Library” tab, and you should find a folder or album dedicated to the screen recordings. The name of the folder may vary depending on the screen recording app you used.
- Open the folder or album and locate your recently recorded screen recording.
- Tap on the recording to view it, edit it, or share it with others. You can also move or copy the recording to other albums or external devices if desired.
By following these steps, you can easily stop and save the screen recording from the app you used. Your recorded screen content will now be safely stored in your iPhone’s Photos app, ready for you to access and share whenever you wish.
With the completion of step 8, you have now successfully learned how to download and use a screen recording app on your iPhone. Whether you choose to explore the built-in screen recording feature or install a third-party app, you have the tools to capture and share your screen activities with ease.
Remember to always use screen recording responsibly and respect the privacy of others. Enjoy recording and sharing your iPhone’s screen, and let your creativity shine through!
Conclusion
Screen recording on your iPhone opens up a world of possibilities, allowing you to capture and share your screen activities effortlessly. Whether you opt for the built-in screen recording feature or choose to install a third-party app, the steps we outlined in this guide have provided you with the knowledge and tools to get started.
We began by checking your iPhone’s compatibility and ensuring it supports screen recording. If your device is compatible, we then explored the process of updating your iPhone’s software to ensure optimal performance and access to the latest features.
We then delved into the two main methods of screen recording: using the built-in feature or installing a screen recording app. We walked through how to explore the built-in screen recording feature, including how to start and stop recordings, as well as how to access and manage them in your Photos app.
For those seeking more customization options and advanced features, we also covered the process of installing a screen recording app from the App Store. Additionally, we explained how to grant necessary permissions, configure recording settings, and start and stop recordings within the app.
With your screen recording app ready to go, you can now capture and share your iPhone’s screen with ease. Whether you’re creating tutorials, recording gameplay, or showcasing app functionalities, the possibilities for screen recording are endless.
Remember to use screen recording responsibly and respect privacy guidelines. Be mindful of the content you record and ensure that you have the necessary permissions to capture and share it.
Now it’s time to put your newfound knowledge into action. Begin exploring the world of screen recording on your iPhone and unlock the potential to engage, educate, and entertain others with your captivating screen recordings. Happy recording!