Introduction
Augmented Reality (AR) has revolutionized the way we interact with technology, seamlessly blending the virtual world with our physical environment. With the advancements in smartphone technology, we now have the power to experience AR right on our iPhones. Whether you want to visualize furniture in your living room, play immersive games, or explore educational content, AR on iPhone provides endless possibilities.
In this article, we will guide you through the process of using augmented reality on your iPhone. From understanding the basics to exploring AR-enabled apps and games, we will cover everything you need to know to get started. So, let’s dive in and embark on an exciting journey into the world of augmented reality.
Before we delve into the technical details, it’s important to note that to utilize AR on your iPhone, you need a compatible device and the latest iOS version. AR technology heavily relies on the capabilities of your iPhone’s camera, sensors, and processing power to deliver an immersive experience. So, let’s ensure your device is ready for augmented reality adventures.
Understanding Augmented Reality
Augmented Reality (AR) is a technology that overlays digital content onto the real world, enhancing our perception and interaction with our surroundings. Unlike Virtual Reality (VR), which creates a completely immersive virtual environment, AR allows us to see and interact with the real world while adding virtual elements, such as 3D objects, graphics, or information.
AR technology relies on computer vision and object recognition to track the physical environment and accurately position virtual content in relation to real objects. This is achieved by using the camera and sensors of your iPhone to understand the depth and position of objects in the real world, allowing the virtual content to seamlessly blend in.
One of the key components enabling AR on iPhone is Apple’s ARKit. ARKit is a software framework that provides developers with tools and resources to create immersive AR experiences for iOS devices. It utilizes advanced computer vision algorithms, motion tracking, and scene understanding to deliver high-quality and realistic AR.
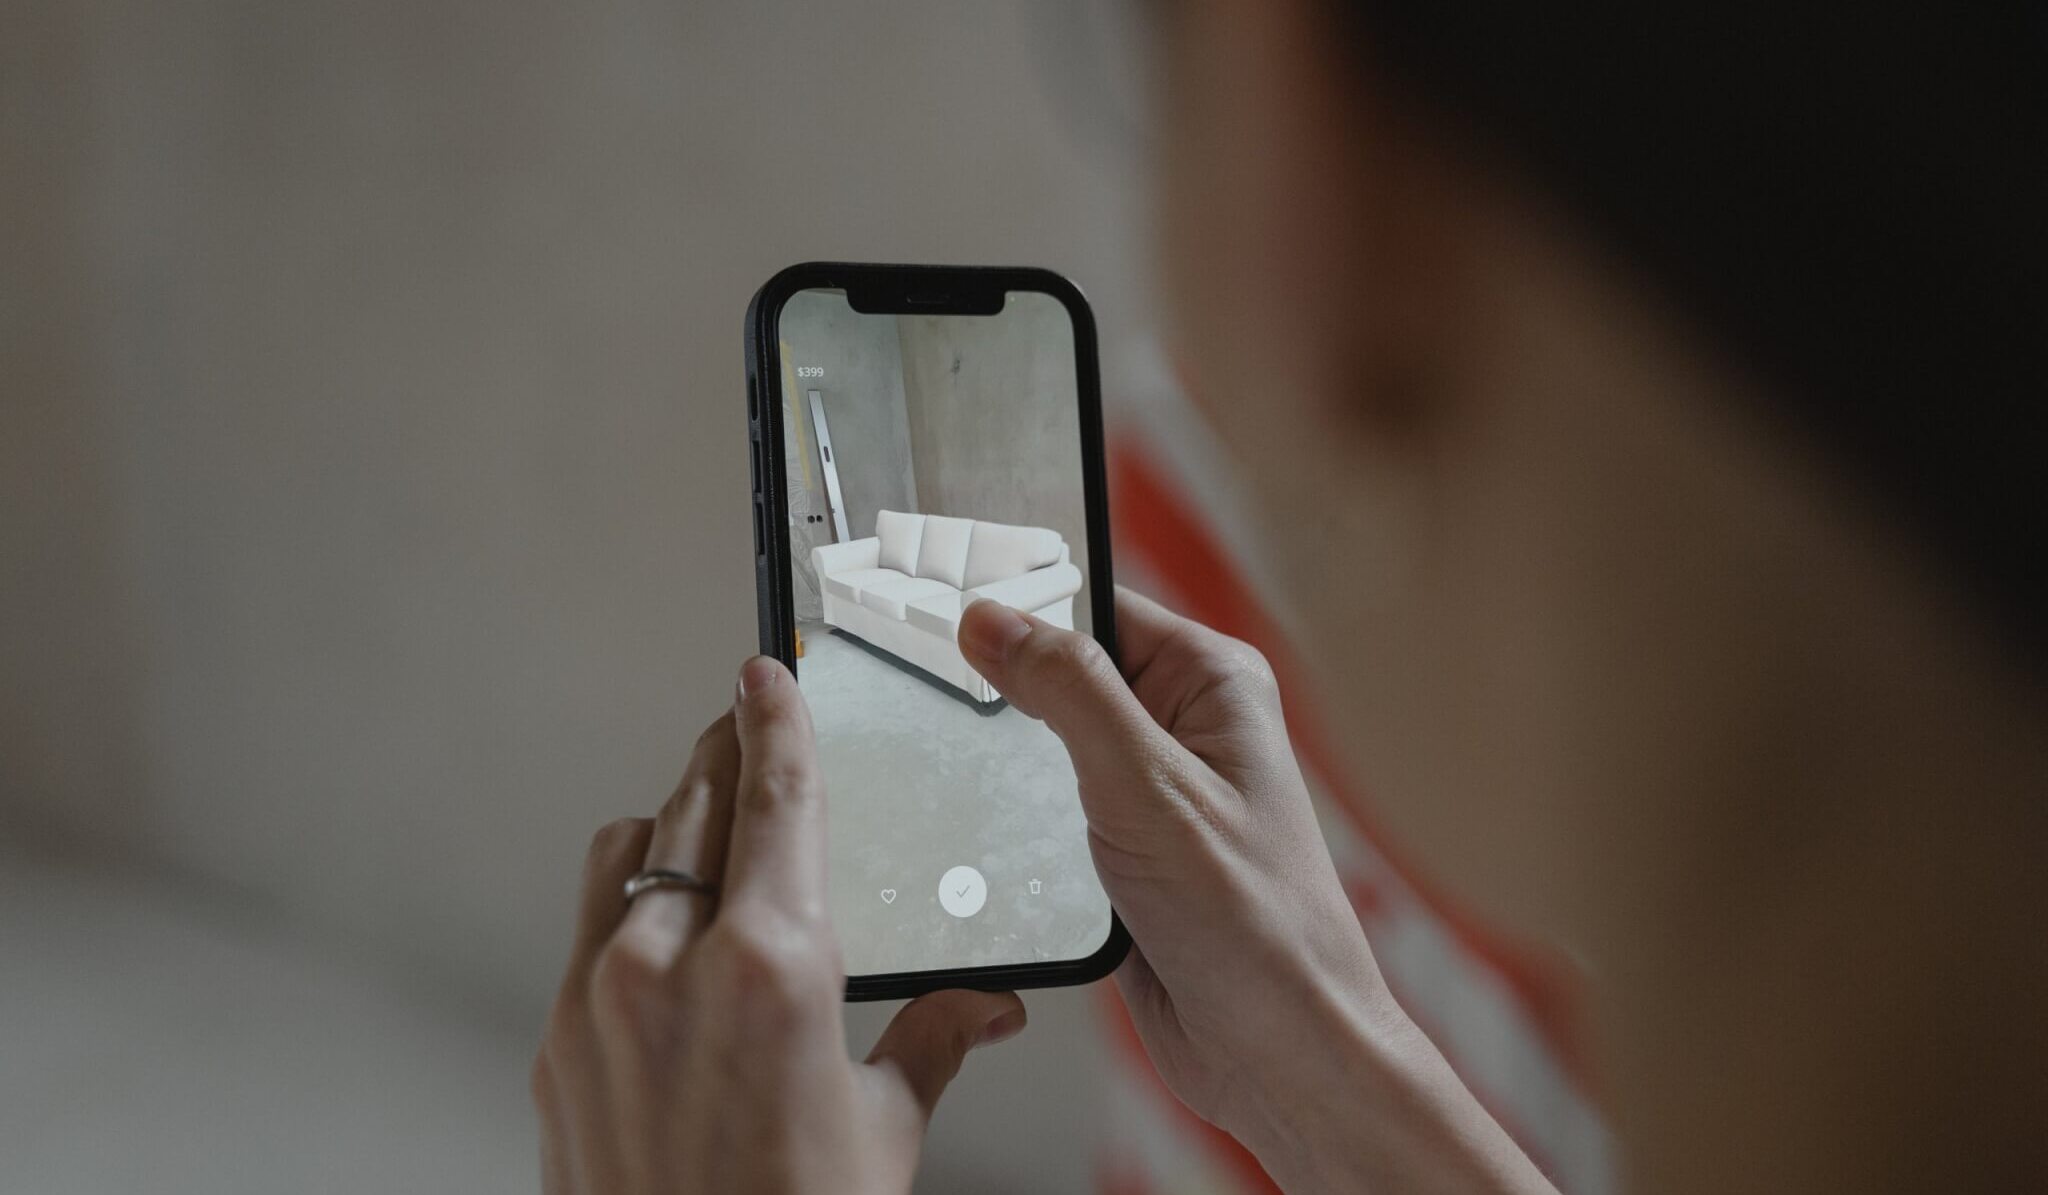
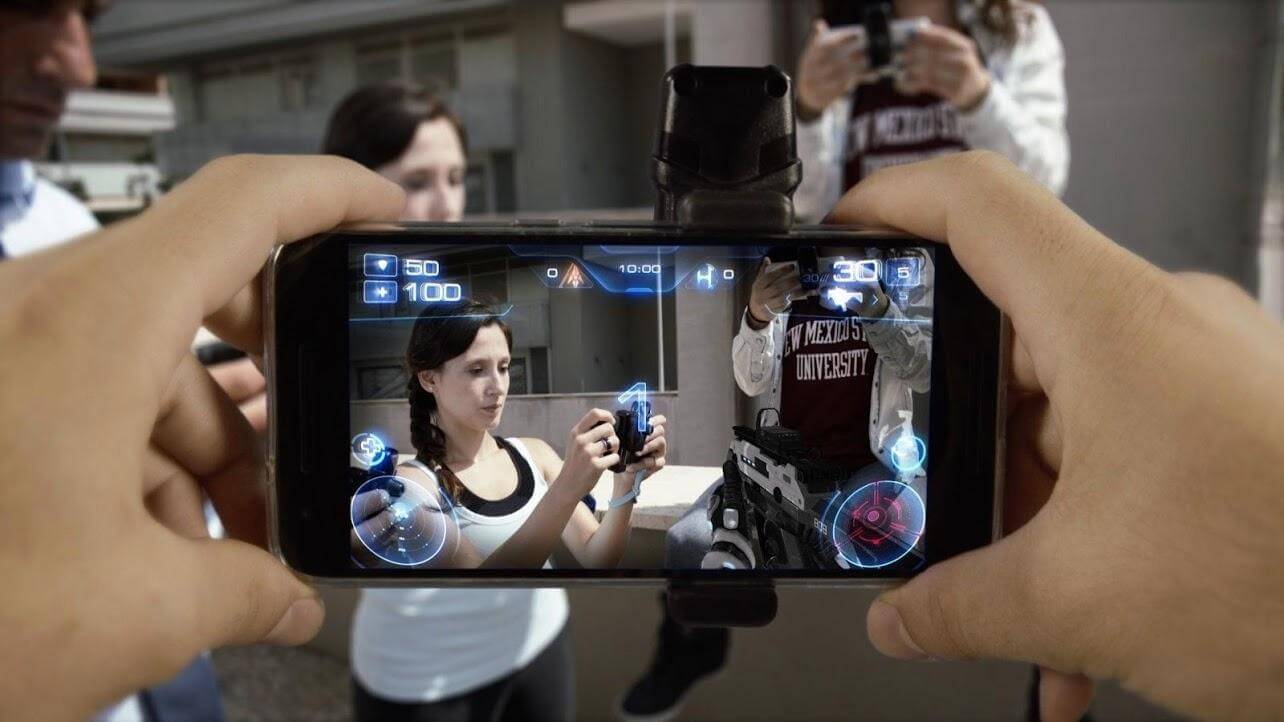
AR on iPhone opens up a world of possibilities in various industries. For example, in the gaming industry, AR games allow you to interact with virtual characters and objects in your real environment, creating a whole new level of entertainment. In the retail sector, AR enables you to visualize furniture, clothing, or accessories in your space before making a purchase, providing a more immersive and personalized shopping experience.
Besides entertainment and retail, AR has vast potential in fields such as education, healthcare, architecture, and more. From exploring anatomy in a 3D model to visualizing architectural designs in real-world settings, AR on iPhone brings learning and professional experiences to a whole new level.
With a basic understanding of how augmented reality works, let’s move on to the practical aspects of using AR on your iPhone. We will explore the steps required to get started and showcase the incredible AR experiences waiting for you.
Getting Started with Augmented Reality on iPhone
To begin your augmented reality journey on your iPhone, there are a few essential steps you need to follow. Let’s dive into the process of getting started with AR on your device:
Step 1: Check Compatibility
Before you proceed, it’s crucial to ensure that your iPhone is compatible with AR technology. AR requires specific hardware capabilities, so check if your iPhone model supports AR. Generally, iPhones from the iPhone 6S and later have the necessary components for AR functionality.
Step 2: Update iOS
Next, ensure that your iPhone’s iOS software is up to date. Apple regularly releases updates that include improvements and new features, including enhancements to AR functionality. Go to the “Settings” app, tap on “General,” and then select “Software Update” to check for any available updates and install them if necessary.
Step 3: Download AR-enabled Apps
Once your iPhone is compatible and updated, it’s time to explore the wide range of AR-enabled apps available on the App Store. From educational apps to games and practical utilities, there is an extensive selection to choose from. Some popular AR apps include Pokemon Go, IKEA Place, and Measure.
Step 4: Open ARKit App
To get a taste of augmented reality on your iPhone, locate and open an ARKit-enabled app that you have downloaded. ARKit is a software framework developed by Apple that allows developers to create AR experiences. Opening an ARKit app will activate the AR features on your device.
Step 5: Grant Permissions
When you launch an ARKit app for the first time, you will be prompted to grant permissions for the app to access your camera and other sensors. AR relies heavily on camera input, so granting these permissions is essential for a smooth AR experience. Follow the on-screen prompts to allow the necessary access.
Step 6: Explore AR Features
Once you have granted the necessary permissions, it’s time to immerse yourself in the world of augmented reality. Explore the AR features within the app you have opened and interact with the virtual content overlaid onto your real-world environment. Familiarize yourself with the gestures and controls specific to each app for an optimized experience.
With these initial steps, you have now entered the world of augmented reality on your iPhone. In the following sections, we will delve deeper into using AR apps and games, from understanding gestures and controls to capturing and sharing your AR experiences.
Step 1: Check Compatibility
Before you embark on your augmented reality journey, it’s crucial to ensure that your iPhone is compatible with AR technology. Not all iPhone models support AR, as it requires specific hardware capabilities to deliver a smooth and immersive experience.
To check if your iPhone is compatible with AR, follow these steps:
- Launch the “Settings” app on your iPhone.
- Scroll down and tap on “General.”
- Select “About” to view information about your iPhone.
- Look for the “Model Name” or “Model” entry.
- Compare your iPhone model with the list of compatible devices for AR.
Generally, iPhones from the iPhone 6S and onwards are compatible with AR technology. If you own an iPhone 6S, iPhone 6S Plus, or a later model, you should be able to enjoy augmented reality experiences on your device.
It’s important to note that the compatibility of your iPhone is not solely based on the model. The performance of AR also depends on other factors like the processor and RAM. Newer iPhone models tend to offer improved AR capabilities due to advancements in hardware technology.
If your iPhone is not compatible with AR, you may consider upgrading to a newer model to fully experience the wonders of augmented reality.
Checking compatibility is the first step towards incorporating AR into your iPhone experience. Once you ensure that your device is compatible, you can move on to the next steps, including updating your iOS, downloading AR-enabled apps, and exploring the world of augmented reality on your iPhone.
Step 2: Update iOS
Updating your iPhone’s iOS software is crucial to ensure optimal performance and compatibility with augmented reality (AR) technology. Apple regularly releases software updates that not only introduce new features but also improve existing functionalities, including enhancements to AR capabilities.
Follow these steps to update your iOS:
- Go to the home screen of your iPhone and locate the “Settings” app.
- Tap on “General” to access the general settings.
- Scroll down and select “Software Update.”
- Your iPhone will check for available updates.
- If an update is available, you will see a notification along with the details of the update.
- Tap on “Download and Install” to start the update process.
- Make sure your iPhone is connected to a stable Wi-Fi network and has sufficient battery charge or is plugged into a power source.
- Follow the on-screen prompts to complete the update installation.
- Once the update is installed, your iPhone will restart.
Updating your iOS not only ensures that you have the latest features and security patches but also optimizes your device for AR experiences. Apple continuously improves AR capabilities through software updates, allowing for better tracking, more realistic virtual objects, and overall enhanced AR performance.
If you have automatic updates enabled on your iPhone, iOS updates will be installed automatically. However, it’s recommended to manually check for updates regularly to ensure you have the latest iOS version, as AR features and compatibility may be further optimized.
Now that you have updated your iOS, your iPhone is equipped with the latest software enhancements for AR. You are one step closer to immersing yourself in augmented reality experiences on your iPhone.
Step 3: Download AR-enabled Apps
With your compatible iPhone and updated iOS, you’re now ready to explore the exciting world of augmented reality (AR) by downloading AR-enabled apps. The App Store offers a wide range of applications that leverage AR technology to provide immersive and interactive experiences.
To download AR-enabled apps, follow these simple steps:
- Launch the App Store on your iPhone by tapping on the App Store icon.
- Tap on the “Search” tab located at the bottom of the screen.
- In the search bar, type in relevant keywords such as “AR apps” or the specific app you’re interested in.
- Tap on the “Search” button to initiate the search.
- Browse through the search results and look for apps with features like “AR” or “Augmented Reality” mentioned in their descriptions or titles.
- Select an app that catches your interest and tap on it to view the details.
- Read the app description, user reviews, and explore screenshots or videos to get a better understanding of the app and its AR capabilities.
- If you decide to download the app, tap on the “Get” or “Download” button next to the app name.
- If prompted, confirm the download by authenticating with your Apple ID, password, or Face ID/Touch ID.
- Wait for the app to download and install on your iPhone.
Some popular AR-enabled apps include Pokemon Go, IKEA Place, Measure, and Snapchat. These apps offer a variety of experiences, from catching virtual creatures and visualizing furniture in your space to measuring objects with your iPhone’s camera.
Exploring AR-enabled apps on your iPhone allows you to unlock a whole new level of interactive and immersive experiences. Whether you’re looking for entertainment, educational resources, or practical utilities, there’s an AR app available to meet your needs.
Keep in mind that AR apps may utilize additional features of your iPhone, such as the camera, gyroscope, or accelerometer, to deliver a seamless AR experience. Grant the required permissions when prompted to ensure optimal functionality.
Now that you have downloaded AR-enabled apps on your iPhone, it’s time to open them and experience the exciting world of augmented reality firsthand.
Step 4: Open ARKit App
Once you have downloaded AR-enabled apps on your iPhone, it’s time to open an app that utilizes Apple’s ARKit framework. ARKit is a powerful software framework developed by Apple that allows developers to create immersive augmented reality experiences for iOS devices.
Follow these steps to open an ARKit app:
- Go to your iPhone’s home screen and locate the AR-enabled app you want to open.
- Tap on the app’s icon to launch it.
- Once the app is launched, it will activate the AR features on your device.
ARKit-enabled apps leverage the advanced features and capabilities of your iPhone, such as the camera, sensors, and processing power, to deliver a seamless and immersive AR experience. Opening an ARKit app will utilize these capabilities to track the physical environment and overlay virtual content onto the real world.
Examples of popular ARKit apps include games like “Pokémon Go,” which allows you to capture virtual creatures in your real-world surroundings, and “IKEA Place,” which lets you visualize furniture and decor items in your home.
As you explore different ARKit apps, you’ll encounter unique and engaging AR experiences tailored to specific applications, from interactive educational tools to inventive gaming experiences. The possibilities are endless.
Opening an ARKit app is an exciting step towards fully immersing yourself in augmented reality. Once you open the app, get ready to dive into the virtual world overlaid on your real environment and experience the magic of augmented reality on your iPhone.
Step 5: Grant Permissions
When using augmented reality (AR) apps on your iPhone, it’s important to grant the necessary permissions for the app to access your device’s camera, sensors, and other features. These permissions are crucial for the app to deliver a seamless and immersive AR experience. Here’s how you can grant permissions:
- Open the AR app you downloaded from the App Store.
- Once the app is launched, you may receive a prompt requesting access to your camera, location, or other features required for AR functionality.
- Review the permissions requested by the app and understand why they are necessary for the app to function properly.
- Tap on the “Allow” or “OK” button to grant the requested permissions.
The specific permissions required may vary depending on the app and the AR features it offers. Common permissions include access to the camera, motion sensors, microphone, and location data. Granting these permissions enables the app to capture your real-world environment and overlay virtual content seamlessly.
If you accidentally denied permissions or wish to review or modify the permissions granted to an AR app, follow these steps:
- Go to the “Settings” app on your iPhone’s home screen.
- Scroll down and tap on “Privacy.”
- Select the specific permission category that corresponds to what the AR app requires, such as “Camera” or “Location Services.”
- Find the AR app in the list and toggle the switch to grant or revoke the permission.
It’s crucial to understand that granting permissions to AR apps ensures a smooth and immersive experience. However, always be mindful of the privacy and security implications of granting access to sensitive features on your device. Only download apps from trusted sources and regularly review and manage the permissions granted to each app.
By granting the necessary permissions, you are allowing the AR app to utilize the full potential of your iPhone’s capabilities, providing you with an enhanced and interactive AR experience.
Step 6: Explore AR Features
Now that you have granted the necessary permissions, it’s time to dive into the exciting world of augmented reality (AR) and explore the features offered by AR-enabled apps on your iPhone. Each app may have different AR functionalities and controls, so let’s take a closer look at how you can navigate and interact with virtual content in AR:
1. Familiarize Yourself with the App Interface: Take a moment to understand the layout and controls of the AR app you are using. Look for buttons, icons, or menu options that allow you to access different AR features or settings.
2. Understand Gestures and Controls: AR apps often utilize gestures and controls to interact with virtual content. Common gestures include tapping on objects to select or interact with them, pinching to zoom in or out, and swiping for navigation or rotating objects. Explore the app’s instructions or tutorials to learn specific gestures for optimal AR experience.
3. Interact with Virtual Objects: AR apps often allow you to place virtual objects in your real-world environment. Experiment with placing, moving, or resizing these virtual objects using the app’s controls. Some apps may also provide options to customize or modify objects, allowing you to personalize your AR experience.
4. Explore Real-World Tracking: AR apps use the camera and sensors on your iPhone to track your real-world environment and overlay virtual content. Move your iPhone around to observe how the virtual objects respond and align with your physical surroundings. Notice how they adjust their position, orientation, and size as you move your device.
5. Discover Additional AR Features: Some AR apps offer advanced features like object recognition, which allows virtual objects to interact with real-world objects. Explore these features within the app to fully appreciate the intricacies of AR technology.
Remember, every AR app provides a unique experience, so don’t hesitate to experiment, explore, and have fun. Immerse yourself in the interactive and captivating world of augmented reality using the AR features available within your chosen apps.
By taking the time to familiarize yourself with the app interface, understanding the gestures and controls, and exploring the AR features, you can make the most out of your augmented reality experience on your iPhone.
Using AR Apps and Games
AR apps and games offer a wide range of immersive and interactive experiences that bring virtual content into your real-world environment. Whether you’re looking for entertainment, educational resources, or practical utilities, AR apps on your iPhone can provide unique and engaging experiences. Here are some key points to consider when using AR apps and games:
1. Understanding Gestures and Controls: Each AR app or game may have its own set of gestures and controls. Familiarize yourself with these interactions to navigate the virtual environment successfully. Common gestures include tapping, swiping, pinching, and dragging to interact with virtual objects or explore the AR world.
2. Navigating the AR Space: Move your iPhone in different directions to explore the AR space. Look around, up, down, and sideways to discover virtual elements that have been integrated into your physical environment. This allows you to fully engage with the AR experience and discover hidden details or objects.
3. Interacting with Virtual Objects: AR apps often allow you to interact with virtual objects placed in your surroundings. Experiment with touching, dragging, resizing, or rotating these objects, depending on the app’s functionality. Some apps may even respond to your gestures by providing dynamic animations or effects.
4. Playing AR Games: AR games make use of your iPhone’s camera and sensors to create immersive and dynamic gaming experiences. Engage in virtual battles, complete challenges, or solve puzzles in a mixed reality environment. Move your body or manipulate the virtual objects to successfully progress through the game.
5. Explore Educational Content: Many AR apps have educational components, allowing you to learn and discover new concepts in an interactive and engaging way. From exploring the solar system to examining detailed 3D models, AR can enhance your understanding of various subjects and make learning more enjoyable.
6. Capture and Share AR Experiences: Some AR apps allow you to capture screenshots or record videos of your augmented reality experiences. Capture memorable moments, unique objects, or impressive interactions to share with friends and family. This encourages collaboration and enables you to showcase your creativity in the virtual realm.
Remember, the more you explore and interact with AR apps and games, the more immersive and rewarding your experience will be. Let your curiosity guide you as you discover the incredible possibilities that augmented reality offers on your iPhone.
Step 7: Understanding Gestures and Controls
When using augmented reality (AR) apps and games on your iPhone, understanding the gestures and controls specific to each app is essential for a seamless and enjoyable experience. AR apps often incorporate unique interactions that allow you to interact with virtual objects and navigate the AR environment. Here are some common gestures and controls you might encounter:
1. Tap: Tapping on the screen is a fundamental gesture in AR apps. It can be used to select objects, trigger actions, or access menus and settings. Experiment with tapping to interact with virtual elements and observe how they respond.
2. Swipe: Swiping gestures are often used for navigation purposes in AR apps. You can swipe left, right, up, or down to explore different sections or move between AR scenes. Swiping may also be used to rotate objects or scroll through menus.
3. Pinch: Pinching involves using two fingers to pinch or expand on the screen. This gesture is commonly used to zoom in or out, allowing you to examine virtual objects from different perspectives or adjust their size within the AR environment.
4. Drag: Dragging gestures involve moving your finger or thumb across the screen while maintaining contact with it. This gesture allows you to move virtual objects within the AR space, reposition them, or drag them towards specific targets or locations.
5. Two-Finger Rotation: In some AR apps, you can rotate virtual objects in the AR space using a two-finger rotation gesture. Place two fingers on the screen and then rotate them clockwise or counterclockwise to rotate the object accordingly.
6. Shake: The shake gesture is often used in AR apps to trigger certain actions or animations. Shake your iPhone gently to simulate a shake gesture and observe how it affects the virtual elements or initiates specific responses.
It’s important to note that different AR apps may have their own unique gestures and controls. In each app’s settings, instructions, or tutorial section, you can usually find information about the specific gestures and controls required to interact with the app effectively.
Take some time to familiarize yourself with the gestures and controls of the AR app or game you’re using. Practicing these gestures will help you navigate the virtual world seamlessly and fully immerse yourself in the augmented reality experience on your iPhone.
Step 8: Interacting with Virtual Objects
One of the key features of augmented reality (AR) is the ability to interact with virtual objects in your real-world environment. When using AR apps and games on your iPhone, you can engage with these virtual elements through various interactions and actions. Here’s how you can start interacting with virtual objects:
1. Selecting Objects: In AR apps, you can often select virtual objects by tapping on them. When you tap an object, it may respond with animations, sound effects, or change its appearance. Experiment with selecting different objects to trigger their unique reactions.
2. Moving Objects: Many AR apps allow you to move virtual objects around within the AR space. You can do this by dragging your finger on the screen or by using specific gestures provided by the app. Move objects closer together, place them on different surfaces, or manipulate their position as desired.
3. Resizing Objects: Another common interaction with virtual objects is resizing them. You can typically pinch or spread your fingers on the screen to shrink or enlarge the virtual object’s size. Adjust the size to fit your desired scale or to integrate better with your real-world environment.
4. Rotating Objects: Some AR apps allow you to rotate virtual objects in the AR space. Use two fingers to rotate the object clockwise or counterclockwise. Rotating objects gives you a 360-degree perspective, enabling you to view them from different angles.
5. Interacting with Object Properties: In certain AR apps, virtual objects may have interactive properties. These properties could include buttons, sliders, or switches embedded in the object itself. Tap on these interactive elements to trigger specific actions or manipulate the object in unique ways.
6. Animation and Interactive Behaviors: Explore how virtual objects respond to your interactions. Some objects may animate, play sound effects, or even interact with each other or real-world objects. Experiment with different interactions to discover hidden interactive behaviors and surprising reactions.
Remember that the specific interactions and actions with virtual objects will vary depending on the AR app or game you’re using. Spend time exploring the different options available within each app and experiment with different interactions to fully engage with and enjoy the virtual objects in your AR experiences.
Step 9: Capturing AR Experiences
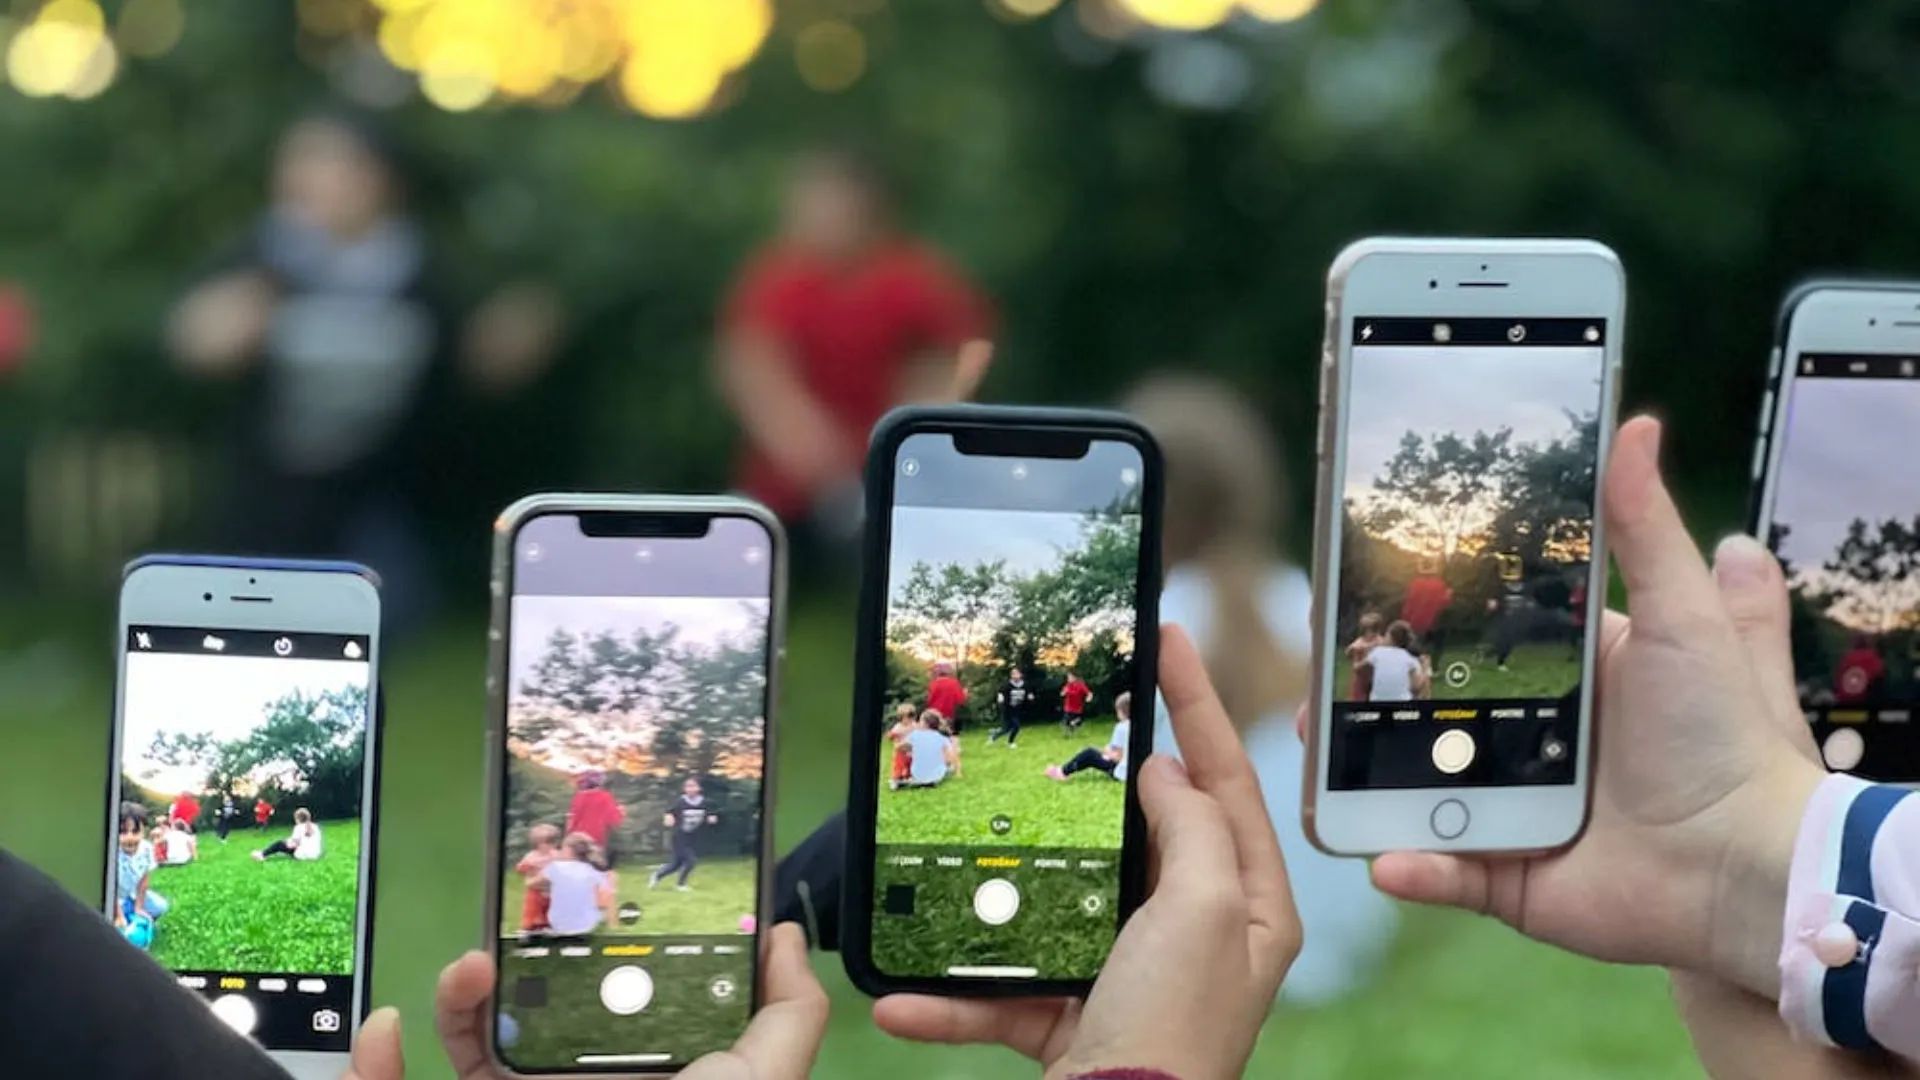
Capturing your augmented reality (AR) experiences on your iPhone allows you to preserve and share those magical moments with others. Whether you want to capture a stunning virtual object, an impressive interaction, or simply document your AR adventures, your iPhone provides several options for capturing AR content. Here’s how you can capture your AR experiences:
1. Screenshots: Taking a screenshot is the simplest and quickest way to capture an image of your AR experience. To take a screenshot on your iPhone, press the side button and the volume up button simultaneously. The screenshot will be saved in the Photos app, ready for you to access and share.
2. Screen Recording: If you want to capture a dynamic AR experience, such as an interactive game session or a sequence of actions, consider using the screen recording feature on your iPhone. To start recording your screen, swipe down from the top right corner of the screen to access the Control Center, then tap on the screen recording icon. After recording, the video will be saved in the Photos app.
3. AR-Specific Apps: Some AR apps offer built-in capture features that allow you to record videos or take photos within the app itself. Explore the app’s settings or controls to access these capturing options. This can be beneficial if the AR app provides unique tools or effects specifically designed for capturing AR content.
4. Third-Party Screen Recording Apps: If the screen recording feature on your iPhone doesn’t suit your needs, you can explore third-party screen recording apps available on the App Store. These apps often offer more advanced features, such as customizable settings, editing capabilities, and additional sharing options.
Regardless of the capturing method you choose, it’s important to experiment and test the best techniques for capturing your AR experiences. Consider factors such as lighting, the framing of the virtual objects within your real-world environment, and any specific AR interactions you want to highlight.
Once you’ve captured your AR content, you can easily share it with friends, family, or on social media platforms. Showcasing your AR experiences allows others to see the magic you’ve discovered within the augmented reality world.
Capturing and sharing your AR experiences not only allows you to relive those moments but also contributes to the growing community of AR enthusiasts, inspiring creativity and providing others with a glimpse into the exciting world of augmented reality.
Step 10: Sharing AR Content
Sharing your augmented reality (AR) content with others allows you to spread the magic and excitement of the virtual world integrated into your real environment. Whether you’ve captured stunning AR experiences or want to show off your creativity, your iPhone provides various ways to share AR content with friends, family, or the wider online community. Here’s how you can share your AR content:
1. Social Media Platforms: Share your AR content on popular social media platforms like Facebook, Instagram, Twitter, or Snapchat. Many of these platforms support AR formats, allowing you to upload photos or videos directly. You can also use AR-specific features, filters, or effects available within the platform to enhance your AR content before sharing.
2. Messaging and Chat Apps: Share your AR experiences directly with individuals or groups through messaging apps like WhatsApp, iMessage, or Telegram. Within these apps, you can send photos, videos, or recorded AR interactions, letting you share the excitement of your AR adventures in personal conversations.
3. AR-Specific Sharing Platforms: Explore platforms specifically designed for sharing AR content, such as Sketchfab, Poly by Google, or Snapchat’s Lens Studio. These platforms provide tools to upload and display your AR creations, allowing other users to view and interact with them. This is an excellent option if you want to share your AR experiences within a dedicated community of AR enthusiasts.
4. Cloud Storage and File Sharing Services: If your AR content is larger in size or you want to share it privately, consider using cloud storage services like iCloud Drive, Google Drive, or Dropbox. Upload your AR files to these services and share the link with specific individuals, granting them access to view or download the content.
5. Collaboration and AR Apps: Certain AR apps allow you to collaborate with others in real-time or share AR experiences within the app itself. Explore AR apps that support collaborative interactions or multiplayer features, enabling you to engage and connect with others through shared AR content.
When sharing AR content, remember to consider user privacy and always respect the terms and conditions of the platforms or apps you use. Be mindful of any sensitive information or personal data that may unintentionally be shared and review your settings accordingly.
Sharing your AR content not only allows others to appreciate and enjoy your creations but also contributes to the growing community of AR enthusiasts. By inspiring and captivating others with your AR experiences, you help expand the possibilities and excitement of augmented reality.
Troubleshooting Common Issues
While using augmented reality (AR) on your iPhone can be a thrilling experience, you may encounter some common issues along the way. Fortunately, most issues can be resolved with a few simple troubleshooting steps. Here are some common AR issues and how to tackle them:
1. Tracking Problems: If you’re experiencing tracking issues, where virtual objects are not properly aligned or anchored to the real world, try the following steps:
- Ensure adequate lighting in your environment, as poor lighting conditions can affect tracking accuracy.
- Restart the AR app or game to refresh the tracking system.
- Clear any obstacles or clutter that might interfere with the camera or the AR tracking.
- Check for any updates to the app or iOS and install them if available, as updates often include bug fixes and improvements in tracking stability.
2. Performance Issues: If you’re experiencing lag, stuttering, or slow performance in AR apps or games, try the following steps:
- Close any unnecessary background apps to free up system resources.
- Ensure that your iPhone is not overheating, as overheating can impact performance. Remove any protective cases, ensure proper ventilation, and avoid using AR for an extended period, especially on warmer days.
- Restart your iPhone to refresh the system.
- If the issue persists, check for any available updates to the app or iOS and install them, as updates often include performance optimizations.
3. Calibration Issues: If virtual objects appear misaligned or not properly scaled within your real-world environment, try the following steps:
- Ensure that your iPhone’s motion sensors are calibrated correctly by going to “Settings” > “Privacy” > “Motion & Fitness” and toggling off and on the “Fitness Tracking” setting.
- Restart the AR app or game to refresh the calibration.
- Verify that you are using the latest version of the app and that your iPhone has the latest iOS updates installed, as updates often include calibration optimizations.
4. App Crashes or Freezes: If an AR app or game crashes or freezes frequently, try the following steps:
- Force close the app by double-clicking the home button (or swiping up from the bottom on iPhones without a home button) and swiping the app off the screen.
- Restart your iPhone to clear any temporary issues.
- Check for any updates to the app or iOS and make sure you have the latest versions installed; updates often include bug fixes and stability improvements.
If the issues persist or are specific to a particular app or game, consider reaching out to the app developer or checking their support resources for further assistance. They may have specific troubleshooting steps or recommendations tailored to their app.
By troubleshooting common AR issues, you can ensure a smooth and enjoyable experience with augmented reality on your iPhone. Don’t let minor obstacles deter you from exploring the exciting possibilities that AR has to offer.
Conclusion
Augmented reality (AR) has opened up a whole new world of possibilities on our iPhones, allowing us to seamlessly blend the virtual and physical realms. From immersive gaming experiences to practical utilities and educational tools, AR apps have transformed the way we interact with technology.
In this guide, we have explored the steps to get started with augmented reality on your iPhone. We began by checking the compatibility of your device and ensuring that your iOS is up to date. Then, we downloaded AR-enabled apps and opened them to activate the AR features using Apple’s ARKit framework.
We went on to understand the gestures and controls used in AR apps, as well as how to interact with virtual objects within the AR space. We also explored capturing and sharing our AR experiences through screenshots, screen recordings, social media platforms, and dedicated AR sharing platforms.
Throughout the process, we encountered some common issues and learned troubleshooting techniques to resolve them. By following these steps and troubleshooting suggestions, you can make the most out of your AR experience and minimize any challenges that may arise.
Remember, the world of augmented reality is vast and constantly evolving. Stay curious, explore new AR apps, and be amazed by the creative and innovative ways developers are pushing the boundaries of AR technology on our iPhones.
So, grab your iPhone, dive into the world of augmented reality, and embark on a journey of virtual exploration and interaction. Experience the magic, unleash your creativity, and share the wonders of AR with others as you unlock endless possibilities right at your fingertips.


