Introduction
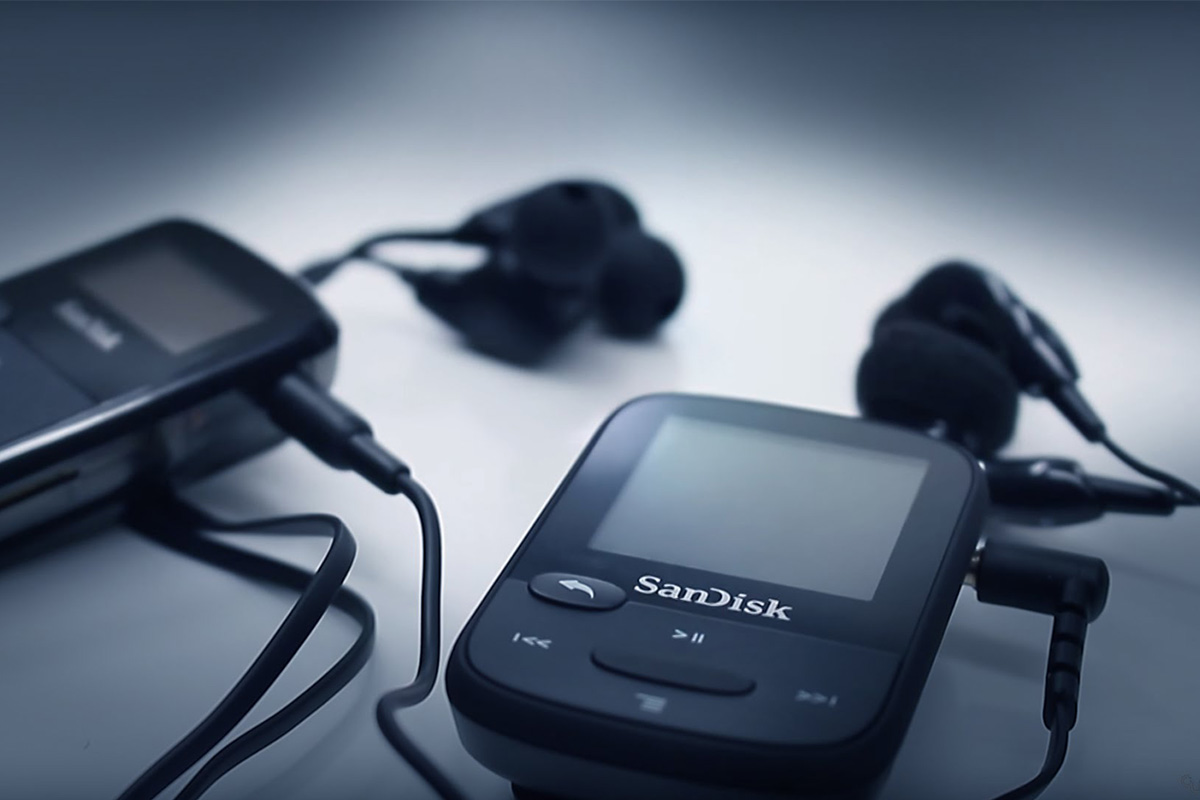
Welcome to the world of portable music with your Sandisk MP3 player! Whether you’re a music enthusiast or simply want to enjoy your favorite tunes on-the-go, downloading music onto your Sandisk MP3 player is a simple and exciting process. With just a few easy steps, you’ll be able to listen to your favorite songs anytime, anywhere.
Music has the power to uplift our mood, transport us to different places, and create lasting memories. With the convenience and portability of a Sandisk MP3 player, you can carry your entire music library in the palm of your hand. Gone are the days of bulky CD players or limited song selections. With your Sandisk MP3 player, you have the freedom to choose from millions of songs and customize your music experience.
In this article, we will guide you through the process of downloading music onto your Sandisk MP3 player. Whether you’re a beginner or an experienced tech-savvy user, you’ll find this guide straightforward and easy to follow. So, let’s get started and fill your MP3 player with the sounds that bring you joy.
Step 1: Connect your Sandisk MP3 player to your computer
The first step in downloading music onto your Sandisk MP3 player is to establish a connection between your device and your computer. This will allow you to transfer music files from your computer to your MP3 player.
To do this, start by locating the USB cable that came with your Sandisk MP3 player. Plug one end of the cable into the USB port on your MP3 player and the other end into an available USB port on your computer.
Once the connection is established, your computer should recognize the Sandisk MP3 player as a removable device. In most cases, it will automatically install the necessary drivers for your MP3 player. However, if your computer prompts you to install any additional software, follow the on-screen instructions to complete the installation process.
It’s important to ensure that your Sandisk MP3 player is connected properly and securely to avoid any interruptions during the file transfer process. Double-check that the USB cable is firmly inserted into both the MP3 player and the computer.
Once the connection is established, you’re ready to move on to the next step and explore the world of digital music at your fingertips.
Step 2: Open the Music folder on your MP3 player
Now that your Sandisk MP3 player is connected to your computer, it’s time to navigate to the Music folder on your device. This is where you will store and organize all your downloaded music files.
To open the Music folder, go to “My Computer” or “This PC” on your computer. You should see the Sandisk MP3 player listed as a removable device. Double-click on the icon to open it.
Once inside the MP3 player’s folder, look for a subfolder named “Music” or something similar. Double-click on this folder to open it.
Inside the Music folder, you will find various subfolders and files. These folders may be organized by artist, album, or genre, depending on your preferences. You can create additional subfolders to further categorize your music collection if desired.
Now that you have successfully located and opened the Music folder on your Sandisk MP3 player, you’re ready to start filling it with your favorite tunes. In the next step, we’ll guide you through the process of finding and downloading music files from your preferred source.
Step 3: Find and download music files from your preferred source
With the Music folder open on your Sandisk MP3 player, it’s time to find and download the music files you want to add to your collection. There are several sources you can use to find and download music, depending on your preference.
One of the most popular sources is online music stores or streaming platforms. These platforms offer a vast catalog of songs, albums, and playlists that you can browse and download. Some popular options include iTunes, Amazon Music, Google Play Music, and Spotify.
Another option is to visit websites that offer free and legal music downloads. These websites often have a wide range of music genres and artists to choose from. Examples of such sites include Jamendo, SoundCloud, and Free Music Archive.
Once you’ve chosen your preferred source, navigate to their website using your internet browser. Use the search function or browse through the available categories to find the music you want to download.
When you’ve found a song or album that you want to download, look for a download button or link. Click on it to initiate the download process. Depending on the platform and your internet connection, the download should start automatically or prompt you to confirm the download.
Make sure to select the desired format for your music files. Most common formats include MP3 and WAV. MP3 is a compressed format that offers a good balance between file size and audio quality, making it ideal for portable devices like MP3 players.
Once the download is complete, the music file will typically be saved in your computer’s designated download folder. In the next step, we’ll guide you through the process of transferring these downloaded music files from your computer to your Sandisk MP3 player.
Step 4: Save the downloaded music files to your computer
After successfully downloading music files from your preferred source, it’s important to save them to your computer before transferring them to your Sandisk MP3 player. This step ensures that you have a backup of your downloaded music and allows you to easily access and manage the files.
By default, downloaded music files are usually saved in your computer’s designated download folder. However, you can choose a different location to save the files, such as your desktop or a specific folder for music.
To save the downloaded music files, follow these steps:
- Open the folder where your downloaded music files are located. You can usually access this folder by clicking on the Downloads option in your web browser or by navigating to your computer’s download folder manually.
- Select the music files you want to transfer to your Sandisk MP3 player. You can either click and drag to select multiple files or use the Ctrl or Shift key while clicking to select specific files.
- Once you’ve selected the desired music files, right-click on any of the selected files and choose the “Copy” option from the context menu.
- Navigate to the location where you want to save the music files on your computer. This can be a specific folder or your desktop.
- Right-click in the destination folder and choose the “Paste” option from the context menu. This will copy the selected music files into the specified folder.
It’s a good practice to organize your music files by creating subfolders based on the artist, album, or genre. This will make it easier to locate and manage your music collection.
Now that you have successfully saved the downloaded music files to your computer, you’re ready to transfer them to your Sandisk MP3 player in the next step.
Step 5: Transfer the downloaded music files to your MP3 player
With the downloaded music files saved to your computer, it’s time to transfer them to your Sandisk MP3 player and start enjoying your favorite tunes on-the-go.
To transfer the music files, follow these steps:
- Connect your Sandisk MP3 player to your computer using the USB cable.
- Open the folder where you saved the downloaded music files on your computer.
- Select the music files you want to transfer to your MP3 player.
- Right-click on the selected files and choose the “Copy” option from the context menu.
- Go back to the folder of your Sandisk MP3 player and open the Music folder.
- Right-click inside the Music folder and choose the “Paste” option from the context menu. This will copy the selected music files from your computer to your MP3 player.
- Wait for the transfer to complete. The time it takes will depend on the size of the files and the speed of your computer and MP3 player.
It’s important to ensure that the transfer is completed successfully before disconnecting your MP3 player from your computer. You can check the progress of the transfer by keeping an eye on the progress bar or dialog box that appears during the file transfer process.
Once the transfer is complete, safely eject your Sandisk MP3 player from your computer. This ensures that all data is written and that there is no risk of data corruption.
Now you can disconnect the USB cable from your MP3 player and start enjoying the music files you transferred. Navigate through your MP3 player’s menu to find the music files and start listening to your favorite songs wherever you go.
Congratulations! You have successfully transferred the downloaded music files to your Sandisk MP3 player. In the next step, we’ll guide you through the process of safely disconnecting your MP3 player from your computer.
Step 6: Safely disconnect your MP3 player from your computer
After transferring the downloaded music files to your Sandisk MP3 player, it’s important to follow the proper steps to safely disconnect your device from your computer. This ensures that no data is lost or corrupted during the disconnection process.
To safely disconnect your MP3 player from your computer, follow these steps:
- Make sure that the file transfer process is complete. Check that all the music files have been successfully transferred to your MP3 player.
- Locate the “safely remove hardware” icon in the system tray or taskbar of your computer. It is usually represented by a small USB icon.
- Click on the “safely remove hardware” icon to open the menu of connected devices.
- Look for your Sandisk MP3 player in the list of connected devices.
- Click on the name of your MP3 player to select it for safe removal.
- Wait for the computer to notify you that it is safe to remove the device.
- Once you receive the confirmation message, gently remove the USB cable from your MP3 player.
It’s important not to abruptly remove the USB cable from your MP3 player without following the proper disconnect steps. Abruptly removing the cable can lead to data loss or corruption, potentially affecting the functionality of your MP3 player.
Now that you have successfully and safely disconnected your MP3 player from your computer, you are ready to enjoy your favorite music on the go. In the final step, we’ll summarize the process and the benefits of downloading music onto your Sandisk MP3 player.
Step 7: Enjoy your downloaded music on your Sandisk MP3 player
Now that you have successfully completed all the previous steps, it’s time to sit back, relax, and enjoy the music you’ve downloaded on your Sandisk MP3 player. Take your MP3 player with you wherever you go and immerse yourself in the sounds that bring you joy.
With your Sandisk MP3 player, you have the freedom to create playlists, shuffle through your favorite songs, and indulge in your preferred genres. Whether you’re commuting, working out, or simply relaxing at home, your MP3 player will be your perfect companion.
Take advantage of the features your Sandisk MP3 player offers, such as repeat or shuffle modes, to enhance your music listening experience. Experiment with different settings and explore the various functions of your device to discover new ways to enjoy your music collection.
One of the great benefits of downloading music onto your Sandisk MP3 player is the versatility it offers. Unlike streaming platforms, downloading music gives you the freedom to access your favorite songs even when you don’t have an internet connection. It also allows you to curate a personalized music library without relying on an external source.
Remember to periodically update your music collection by downloading new songs and albums. This way, you can continue discovering new music and keeping your playlist fresh and exciting.
So, grab your headphones, hit play, and let the music transport you to another world. Whether you’re relaxing, exercising, or simply enjoying a quiet moment, your Sandisk MP3 player will accompany you every step of the way.
Congratulations on successfully downloading and transferring your music files to your Sandisk MP3 player! Now, it’s time to delve into the melodies that bring joy to your life.
Conclusion
Downloading music onto your Sandisk MP3 player opens up a world of possibilities, allowing you to carry your favorite songs with you wherever you go. With the easy-to-follow steps outlined in this guide, you can confidently navigate the process of downloading, saving, and transferring music files to your MP3 player.
By connecting your Sandisk MP3 player to your computer and exploring your music folder, you can effortlessly organize and access your downloaded music. Finding and downloading music files from your preferred sources enables you to expand your music collection and discover new artists and genres.
Saving the downloaded music files to your computer ensures that you have a backup and makes it easier to manage your music library. Transferring the files from your computer to your Sandisk MP3 player allows you to carry your favorite songs on the go, without the need for an internet connection.
Remember to safely disconnect your MP3 player from your computer to avoid any data loss or corruption. Finally, enjoy your music and take advantage of the features and functions offered by your Sandisk MP3 player to enhance your music listening experience.
Downloading music onto your Sandisk MP3 player opens up a world of possibilities, allowing you to carry your favorite songs with you wherever you go. With the easy-to-follow steps outlined in this guide, you can confidently navigate the process of downloading, saving, and transferring music files to your MP3 player.
Enjoy the freedom that your Sandisk MP3 player brings, and immerse yourself in the sounds that fuel your passion and creativity. So, grab your MP3 player, hit play, and let the music be your constant companion on your journey through life.


