Overview
Downloading movies to iTunes from a DVD allows you to enjoy your favorite films on your computer, iPad, iPhone, or Apple TV whenever you want. With iTunes, you can easily convert your DVDs into a digital format and add them to your iTunes library for convenient access.
The process involves a few simple steps, including inserting the DVD into your computer, converting the DVD to a digital format, importing the converted file into iTunes, and organizing your movie library. This guide will take you through each step, providing you with the information you need to successfully download movies to iTunes from a DVD.
By following these steps, you can build an impressive movie library in iTunes and have your favorite films accessible at your fingertips. Whether you want to watch movies on the go or enjoy a cozy movie night at home, having your movies downloaded to iTunes provides you with the convenience and flexibility to watch them whenever and wherever you please.
So, if you’re ready to start downloading your movie collection to iTunes, let’s dive into the step-by-step process.
Step 1: Insert the DVD into your computer
The first step in downloading movies to iTunes from a DVD is to insert the DVD into your computer’s DVD drive. This will allow you to access the contents of the DVD and begin the conversion process.
Make sure your computer is turned on and insert the DVD into the appropriate drive. Your computer’s DVD drive may be located on the side or front of your computer, or it may be an external DVD drive that you connect via USB.
Once you have inserted the DVD, your computer should recognize it and automatically start playing the contents or prompt you with options. However, if nothing happens, you may need to open a media player program or navigate to the DVD drive in File Explorer (Windows) or Finder (Mac).
Some DVDs may have an autoplay feature that launches a media player automatically. If this happens, you can close the media player for now as we will be using iTunes to convert and import the DVD.
It’s important to note that not all DVDs can be downloaded and converted to iTunes due to copyright protection. If you encounter an error or the DVD is not recognized by your computer, it may be a copy-protected DVD that cannot be converted using this method.
Once the DVD is inserted and recognized by your computer, you’re ready to move on to the next step: converting the DVD to a digital format.
Step 2: Convert the DVD to a digital format
After inserting the DVD into your computer, the next step is to convert the DVD to a digital format that can be recognized by iTunes. This step is necessary to ensure compatibility and optimal playback on your Apple devices.
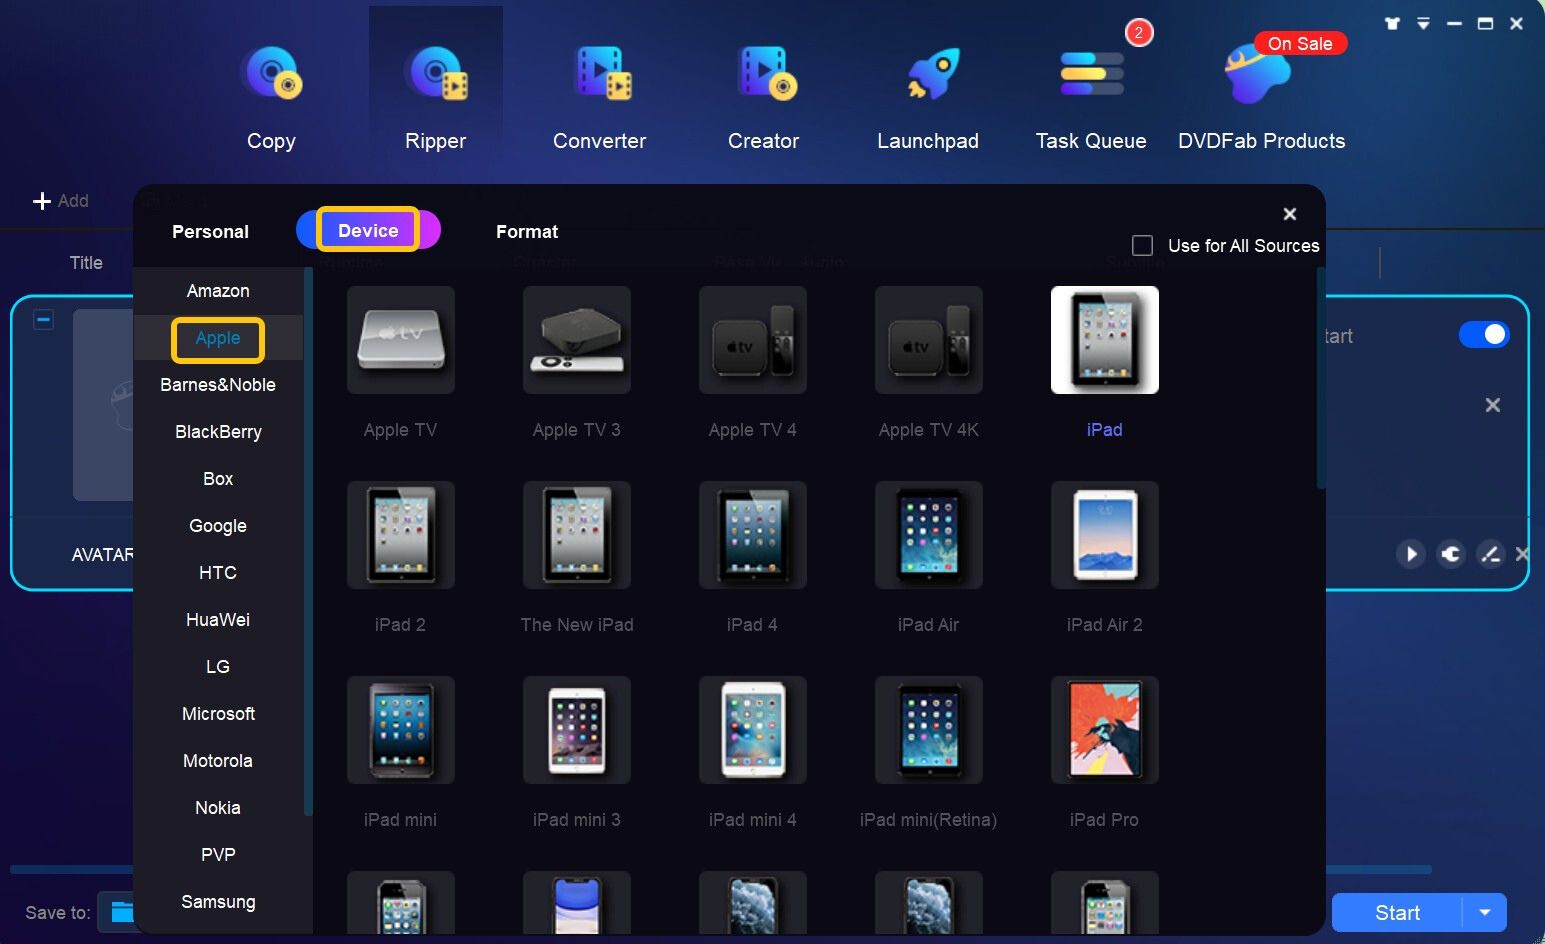
To convert the DVD, you will need software that can extract the video from the DVD and save it as a digital file. There are various software options available, both free and paid, that can accomplish this task. Some popular DVD ripping software includes HandBrake, WinX DVD Ripper, and MakeMKV.
Once you’ve chosen and installed the DVD ripping software, open the program and select the option to import the DVD. The software will scan the DVD and display a list of available video tracks, audio tracks, and subtitles. Choose the desired video track that corresponds to the movie you want to convert.
Next, you will need to select the output format for the converted file. iTunes supports a variety of video formats, including MP4, MOV, and M4V. MP4 is the most widely compatible format that offers good video quality and smaller file size. Select the MP4 format or the format that best suits your needs.
Before starting the conversion process, you can customize the output settings, such as video quality, resolution, and audio settings. Higher quality settings will result in larger file sizes, so consider your device’s storage capacity before selecting the settings.
Once you’re satisfied with the settings, click the “Convert” or “Start” button to begin the DVD conversion process. The software will extract the video from the DVD and save it as a digital file on your computer’s hard drive.
The conversion process may take some time, depending on the length and size of the movie and the speed of your computer. Once the conversion is complete, you’re ready to move on to the next step: importing the converted file into iTunes.
Step 3: Import the converted file to iTunes
With the DVD converted to a digital format, it’s time to import the converted file into iTunes. This step will allow you to add the movie to your iTunes library and make it accessible across all your Apple devices.
Open iTunes on your computer and make sure you are in the “Library” section. If you don’t have iTunes installed, you can download and install it from the Apple website.
Click on the “File” tab at the top left corner of the screen, and then select “Add File to Library” or “Add Folder to Library” from the drop-down menu. Navigate to the location where you saved the converted DVD file and select it. If you converted multiple DVD files, you can select multiple files or the folder containing the files.
Click “Open” to start the import process. iTunes will begin importing the selected files and adding them to your library. The duration of the import process will depend on the file size and the speed of your computer.
Once the import is complete, the movie will appear in your iTunes library under the “Movies” tab. You can view your library by clicking on the “Movies” tab located in the left sidebar of the iTunes window.
At this point, you can rename the movie, add metadata such as the title, genre, or year, and even add artwork to enhance the visual representation of the movie in iTunes.
If you have multiple movies to import, you can repeat the same steps for each file or folder until you have added all the movies you want to download to iTunes.
Now that your movies are successfully imported into iTunes, it’s time to organize your movie library to make it easier to browse and enjoy your collection. This brings us to the next step: organizing your movie library in iTunes.
Step 4: Organize your movie in iTunes
Now that you have imported your converted movies into iTunes, it’s important to organize your movie library so that you can easily find and enjoy your collection. Here are some tips on how to organize your movies in iTunes:
1. Create playlists: You can create playlists in iTunes to categorize your movies based on genre, director, or any other criteria you prefer. This allows you to easily access specific movies or create themed movie nights.
2. Edit movie information: iTunes allows you to edit the movie information such as title, genre, year, and even add a description. Right-click on a movie, select “Get Info,” and you can modify the details to make your library more organized and informative.
3. Add movie artwork: One of the visual appeals of a well-organized movie library is having the appropriate artwork for each movie. iTunes can automatically fetch artwork for your movies, but you can also manually add artwork by right-clicking on a movie and selecting “Get Info” and then dragging and dropping the artwork image into the designated area.
4. Use smart playlists: Smart playlists are a powerful feature in iTunes that allow you to create dynamic playlists based on specific criteria. For example, you can create a smart playlist for recently added movies or movies with a certain rating.
5. Sort and filter: In the iTunes library, you can sort your movies by different criteria such as title, genre, or year. You can also filter your movies based on specific criteria, making it easier to find the movie you want to watch.
6. Sync with your Apple devices: Once your movie library is organized in iTunes, you can sync it with your iPhone, iPad, or Apple TV. This allows you to access your movies on the go or enjoy them on a bigger screen.
By following these tips, you can create a well-organized and personalized movie library in iTunes, making it a joy to browse and watch your favorite movies.
Conclusion
Downloading movies to iTunes from a DVD may seem like a complex process, but by following the step-by-step guide outlined above, you can easily convert your DVDs into a digital format and add them to your iTunes library.
By inserting the DVD into your computer, converting the DVD to a digital format, importing the converted file into iTunes, and organizing your movie library, you can enjoy your favorite films on your computer, iPhone, iPad, or Apple TV whenever and wherever you want.
iTunes provides a convenient platform for managing and accessing your movie collection. With the ability to create playlists, edit movie information, add artwork, and sync with your Apple devices, you can create a personalized and organized movie library that reflects your preferences.
Remember, when downloading movies from a DVD, ensure that you have the necessary software to convert the DVD to a compatible format and be aware of any copyright protection on the DVD that may prevent conversion.
With your movies downloaded to iTunes, you have the freedom to enjoy them at your leisure. Whether you’re on a long flight, relaxing at home, or traveling, your movie library in iTunes provides entertainment at your fingertips.
So start converting your DVD collection to digital format and create a comprehensive movie library in iTunes. Say goodbye to bulky DVD cases and embrace the convenience of digital movie downloads.
Now, grab some popcorn, sit back, and enjoy your favorite movies with ease, thanks to the power of iTunes.