Introduction
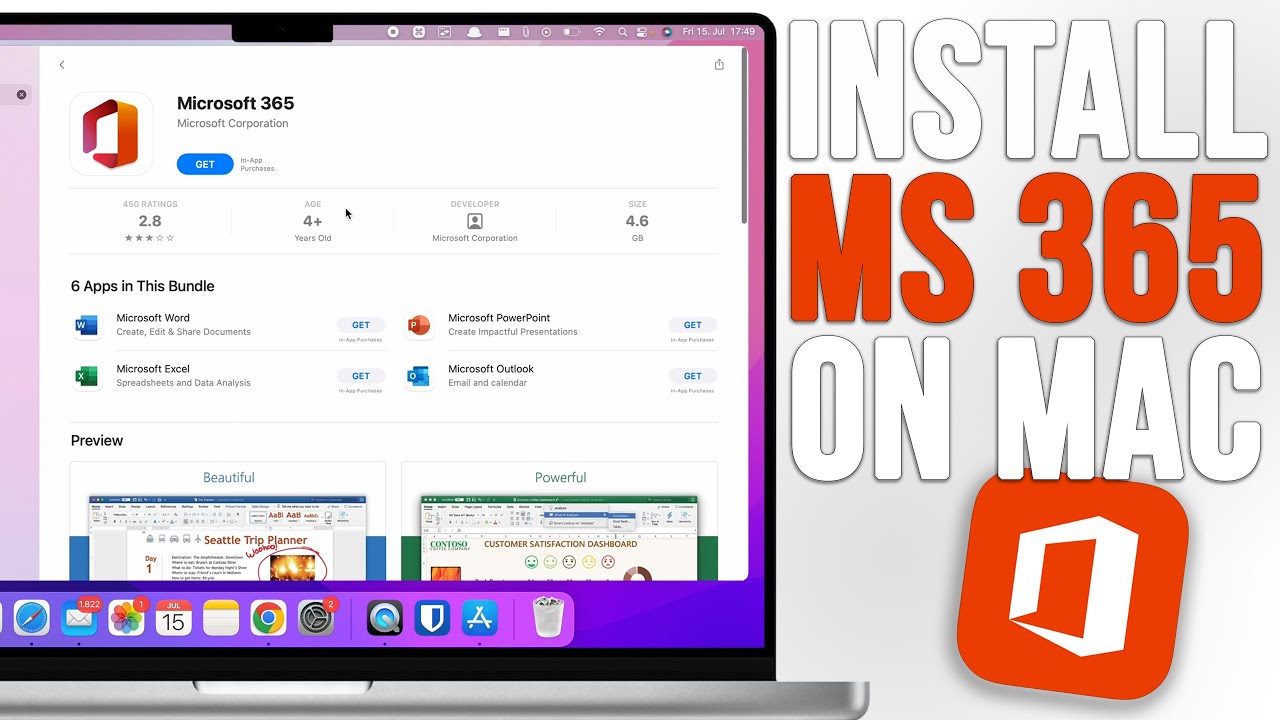
Are you a Mac user looking to download Microsoft 365? With Microsoft 365, you can access a wide range of powerful productivity tools such as Word, Excel, PowerPoint, and more, all from the convenience of your Mac. Whether you need to write documents, create spreadsheets, or design stunning presentations, Microsoft 365 has got you covered.
In this guide, we will walk you through the step-by-step process of downloading Microsoft 365 on your Mac. We will also cover other important aspects such as signing in to your Microsoft account, choosing the right subscription plan, and activating the software.
Microsoft 365 comes with a host of features that can enhance your workflow and make your life easier. With cloud storage options, collaborative editing, and seamless integration across devices, it’s no wonder that millions of people around the world rely on Microsoft 365 for their productivity needs.
Before we dive into the installation process, let’s make sure your Mac meets the system requirements for Microsoft 365. This will ensure a smooth installation and optimum performance of the software.
Step 1: Check system requirements
Before downloading Microsoft 365 on your Mac, it is essential to ensure that your system meets the minimum requirements. These requirements ensure that the software runs smoothly and provides you with the best user experience possible.
Here are the system requirements you need to check:
- Operating System: Make sure your Mac is running one of the supported operating systems, such as macOS 10.14 Mojave or later. Older versions may not be compatible with Microsoft 365.
- Processor: Your Mac should have an Intel processor, preferably one that is at least 1.6 GHz or faster. This will ensure that Microsoft 365 functions optimally.
- Memory: A minimum of 4 GB of RAM is recommended for Microsoft 365, although more RAM will provide better performance, especially when working with larger files or running multiple applications simultaneously.
- Storage Space: Ensure that you have enough free storage space on your Mac to accommodate the installation and usage of Microsoft 365. A minimum of 10 GB is typically required.
- Display: Microsoft 365 works best with a screen resolution of 1280 x 800 or higher. This ensures optimal clarity and usability of the software’s features.
- Internet Connection: To download and activate Microsoft 365, you will need a stable internet connection. It is recommended to have a broadband internet connection for smooth installation and updates.
By checking and ensuring that your Mac meets these system requirements, you can proceed to the next steps with confidence, knowing that your computer is compatible with Microsoft 365.
Now that you’ve verified your system’s compatibility, it’s time to sign in to your Microsoft account and prepare for the download and installation process. Let’s move on to the next step.
Step 2: Sign in to your Microsoft account
In order to download Microsoft 365 on your Mac, you need to have a Microsoft account. If you already have one, simply proceed to the next step. If not, don’t worry! You can easily create one for free.
Here’s how to sign in to your Microsoft account:
- Open your preferred web browser: Launch Safari, Chrome, or any other web browser that you regularly use on your Mac.
- Go to the Microsoft login page: In the address bar, type https://login.microsoft.com and press Enter.
- Enter your Microsoft account information: On the Microsoft login page, enter your email address or phone number associated with your Microsoft account. Then, click on the “Next” button.
- Enter your password: Provide your account password in the designated field. Make sure to enter the correct password to ensure a successful login.
- Complete the sign-in process: After entering your password, click on the “Sign in” button. If the provided information is correct, you will be successfully signed in to your Microsoft account.
Once you are signed in to your Microsoft account, you will have access to various Microsoft services and products, including the ability to download and install Microsoft 365 on your Mac.
If you don’t have a Microsoft account, you can easily create one by clicking on the “Create one!” or “Sign up now” link on the login page. Follow the instructions provided and fill in the required information to set up your account.
Now that you have successfully signed in to your Microsoft account, you are ready to choose a Microsoft 365 subscription plan that suits your needs. Let’s move on to the next step.
Step 3: Choose a Microsoft 365 subscription plan
Microsoft 365 offers different subscription plans to cater to various needs and requirements. Before proceeding with the download, it is important to choose a subscription plan that best suits your usage and budget.
Here’s how you can choose a Microsoft 365 subscription plan:
- Visit the Microsoft 365 website: Open your web browser and go to the official Microsoft 365 website.
- Explore the subscription options: On the website, you will find various subscription plans available. Take some time to review the features, pricing, and limitations of each plan.
- Select a plan: Based on your requirements, select the subscription plan that best fits your needs. Consider factors such as the number of users, access to specific applications, and cloud storage space.
- Click on “Buy now” or “Subscribe”: Once you have decided on a plan, click on the corresponding button to proceed with the subscription process.
- Review your selection: Before finalizing the purchase, review your selected plan, billing details, and subscription length. Make any necessary adjustments or changes.
- Complete the subscription: Follow the on-screen prompts to complete the subscription process. You may be required to provide payment details and confirm your purchase.
After completing the subscription process, you will have access to all the benefits and features included in your chosen Microsoft 365 plan. This includes the ability to download and install Microsoft 365 applications on your Mac.
It’s important to note that Microsoft 365 subscriptions are typically billed on a yearly or monthly basis. Ensure that you are comfortable with the payment terms and that the plan you choose aligns with your long-term needs.
Now that you’re subscribed to Microsoft 365, it’s time to proceed to the next step and download the software on your Mac. Let’s move on.
Step 4: Download Microsoft 365
Once you have selected a Microsoft 365 subscription plan, it’s time to download the software onto your Mac. The process is straightforward and can be completed in just a few simple steps.
Follow these steps to download Microsoft 365:
- Sign in to your Microsoft account: Open your web browser and go to the Microsoft account login page. Sign in using your email address and password.
- Access the Microsoft 365 download page: After signing in, navigate to the download page for Microsoft 365. You can find this page in the account settings or in the confirmation email you received after subscribing to the plan.
- Select the desired software: On the download page, you will see a list of available Microsoft 365 applications. Choose the ones you want to download and install on your Mac. You can select individual applications or choose the full suite.
- Start the download: Click on the “Download” or “Install” button to initiate the download process. The file size may vary depending on the applications selected, so make sure you have sufficient internet bandwidth and storage space on your Mac.
- Monitor the download progress: While the files are downloading, you can track the progress either within your web browser or through a download manager. The time it takes will depend on your internet speed.
- Complete the download: Once the download is complete, you will have the Microsoft 365 installer files on your Mac. These files can typically be found in the Downloads folder, but you may have chosen a different location during the download process.
Congratulations! You have successfully downloaded Microsoft 365 on your Mac. Now, it’s time to proceed to the next step and install the software.
It’s worth noting that the download process may vary slightly depending on your subscription plan and the version of Microsoft 365 you have chosen. However, the general steps outlined above should guide you through the process regardless of any minor differences.
Let’s move on to the next step and install Microsoft 365 on your Mac.
Step 5: Install Microsoft 365 on your Mac
Now that you have downloaded the Microsoft 365 installer files, it’s time to install the software on your Mac. The installation process is straightforward and can be completed in a few simple steps.
Follow these steps to install Microsoft 365 on your Mac:
- Locate the installer files: Open the folder where you downloaded the Microsoft 365 installer files. Typically, these files can be found in the Downloads folder or in the location you specified during the download process.
- Double-click on the installer file: Find the installer file with a name such as “Microsoft365Installer.pkg” and double-click on it. This will initiate the installation process.
- Review the license agreement: Read through the license agreement for Microsoft 365 and make sure you understand the terms and conditions. If you agree to the terms, click on the “Agree” or “Accept” button to proceed.
- Choose the installation location: Select the destination where you want to install Microsoft 365. By default, it will be installed in the Applications folder on your Mac. If you prefer a different location, click on the “Change Install Location” button and choose the desired folder.
- Initiate the installation: Once you have reviewed the settings, click on the “Install” or “Continue” button to start the installation process. You may be prompted to enter your Mac’s administrator password to authorize the installation.
- Wait for the installation to complete: The installation may take a few minutes to complete, depending on your Mac’s performance and the selected applications. During this time, it’s important not to interrupt the installation process.
- Installation complete: Once the installation is finished, you will see a confirmation message indicating that Microsoft 365 has been successfully installed on your Mac.
Congratulations! You have successfully installed Microsoft 365 on your Mac. You can now start using the suite of powerful productivity tools offered by Microsoft to enhance your work efficiency and creativity.
Now that Microsoft 365 is installed, the next step is to activate it. Let’s move on to the next step to complete the activation process.
Step 6: Activate Microsoft 365
After successfully installing Microsoft 365 on your Mac, the next step is to activate the software. Activation is necessary to confirm the legitimacy of your subscription and to gain full access to all the features and benefits.
Follow these steps to activate Microsoft 365:
- Launch any Microsoft 365 application: Open any of the installed Microsoft 365 applications, such as Word, Excel, or PowerPoint, on your Mac.
- Sign in with your Microsoft account: If prompted, sign in with the same Microsoft account that you used to purchase the subscription or sign in during the installation process.
- Enter your product key or sign in again: Depending on your subscription type, you may need to enter a product key that was provided to you or sign in once again to verify your subscription.
- Follow the on-screen instructions: If additional steps or instructions are required to complete the activation process, follow the prompts provided on the screen. This may include verifying your identity or accepting any software update agreements.
- Confirm successful activation: Once the activation process is completed, you will receive a confirmation message indicating that your Microsoft 365 subscription has been successfully activated on your Mac.
It’s important to note that the activation process may vary depending on your subscription type and the version of Microsoft 365 you have installed. However, the general steps outlined above should guide you through the process.
After activating Microsoft 365, you will have unlimited access to all the applications and features included in your subscription. You can start taking advantage of the powerful tools and functionalities to enhance your productivity and creativity.
Now that you have successfully activated Microsoft 365 on your Mac, let’s move on to the final step of setting up the Microsoft 365 apps to suit your preferences.
Step 7: Set up Microsoft 365 apps on your Mac
Now that you have activated Microsoft 365 on your Mac, it’s time to customize and set up the Microsoft 365 apps to suit your preferences. This step allows you to personalize the settings and optimize the apps to enhance your productivity and workflow.
Follow these steps to set up Microsoft 365 apps on your Mac:
- Open any Microsoft 365 application: Launch any of the Microsoft 365 applications, such as Word, Excel, or PowerPoint, that you have installed on your Mac.
- Access the settings: Click on the “Preferences” or “Options” menu, typically found in the top menu bar of the application window. It may be labeled differently depending on the specific app you are using.
- Explore the available settings: Navigate through the various settings options to customize the Microsoft 365 app according to your preferences. This may include adjusting the default font, layout, language, and other specific settings that pertain to each application.
- Tailor the app to your needs: Take the time to review and modify the settings to align with your workflow. Consider enabling or disabling features, adjusting display preferences, and configuring any additional options that enhance your productivity.
- Save your changes: Once you have made the desired adjustments to the settings, click on the applicable “Save” or “Apply” button to apply the changes and save them for future use.
- Repeat for other Microsoft 365 apps: If you have multiple Microsoft 365 applications installed, repeat the above steps for each app to ensure consistent settings across all your productivity tools.
By setting up the Microsoft 365 apps to your liking, you can enhance your efficiency and streamline your workflow. Customizing the apps according to your specific needs will allow you to work more effectively and comfortably with the software.
Remember, you can always revisit the settings at any time to make further adjustments or changes as your preferences evolve.
With the Microsoft 365 apps now beautifully customized to meet your requirements, you are all set to create, collaborate, and succeed on your Mac!
Congratulations! You have completed the setup process for Microsoft 365 on your Mac, from installation to customization. You are now equipped with the powerful suite of productivity tools to unlock your full potential.
Conclusion
Congratulations on successfully downloading, installing, activating, and setting up Microsoft 365 on your Mac! You now have access to a range of powerful productivity tools that can help you work more efficiently and accomplish your tasks with ease.
In this guide, we walked you through the step-by-step process of how to download Microsoft 365 on your Mac. From checking system requirements to signing in to your Microsoft account, choosing a subscription plan, downloading the software, installing it on your Mac, activating it, and finally setting up the apps to suit your preferences, we covered everything you need to know to get started.
By following these steps, you have unlocked a world of possibilities with Microsoft 365. Whether you need to create documents, analyze data, design presentations, or collaborate with others, Microsoft 365 provides you with the necessary tools to do so.
Remember to explore the various features of each Microsoft 365 app and continue to customize them to your liking. This will allow you to work in a way that best suits your unique workflow and preferences.
Lastly, keep in mind that Microsoft regularly releases updates and new features for their software. Be sure to stay up to date with these updates to benefit from the latest enhancements and security improvements.
Thank you for following this guide. We hope you find Microsoft 365 on your Mac to be a valuable asset in your professional and personal life. Enjoy your journey with Microsoft 365 and unleash your full potential!


