Introduction
Downloading a GoToWebinar recording is a straightforward process that allows you to access and save valuable webinar content for future reference. Whether you missed a live session or simply want to revisit the material, downloading the recording ensures you can watch it at your convenience.
GoToWebinar is a widely-used platform that enables businesses and organizations to conduct online presentations, webinars, and training sessions. It offers a range of features to enhance the webinar experience, including the ability to record sessions. By downloading these recordings, you can have a permanent copy that can be accessed even when you are offline or your subscription has expired.
In this guide, we will walk you through the steps to download a GoToWebinar recording so that you can easily save and watch it at your convenience. Whether you are a webinar host or participant, these steps will apply to you.
Before we dive into the specific steps, it’s important to note that the availability of the download option may vary depending on the settings chosen by the webinar host. Some hosts may restrict download access or limit it to certain participants. However, in most cases, you should have the option to download the recording if it has been enabled by the host.
Now that we have covered the basics, let’s get started with the step-by-step process of accessing and downloading a GoToWebinar recording.
Step 1: Accessing the GoToWebinar Recording
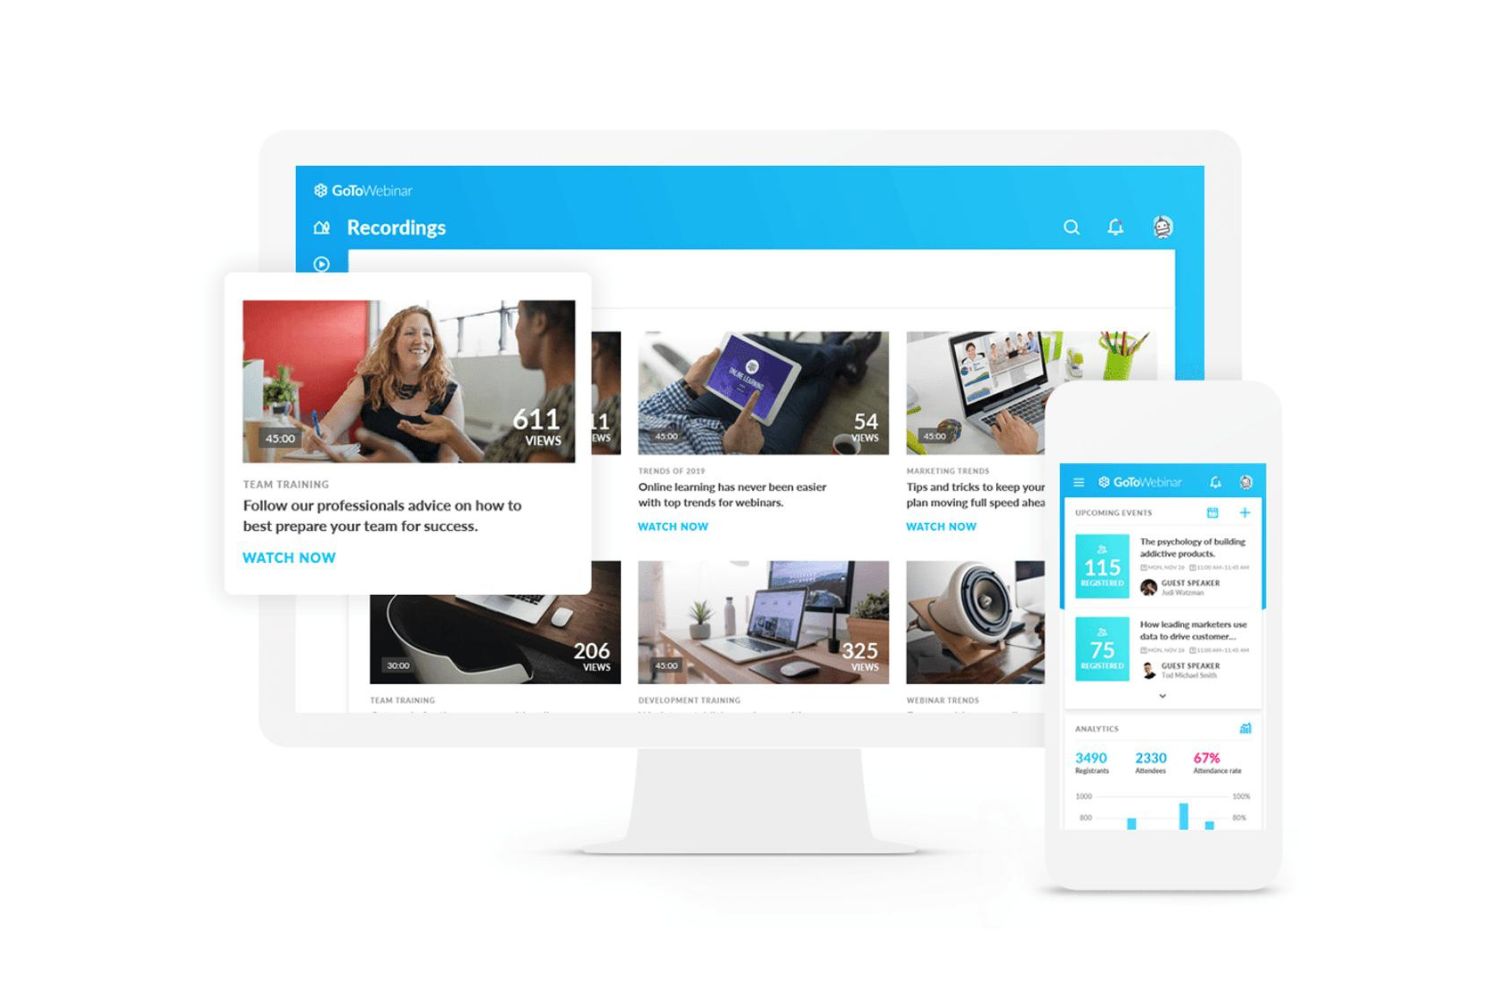
To begin the process of downloading a GoToWebinar recording, you first need to access the recording itself. This can typically be done through the email invitation you received or by logging into your GoToWebinar account.
If you received an email invitation with a link to the webinar recording, simply click on the provided link. This will take you directly to the recording in your web browser. If you don’t have the email invitation, or if you are a webinar host trying to download your own recording, you will need to log into your GoToWebinar account.
To access the recording through your GoToWebinar account, follow these steps:
- Go to the GoToWebinar website and log in using your credentials.
- Once logged in, you will be taken to the GoToWebinar dashboard.
- Navigate to the “My Webinars” section, where a list of your past webinars will be displayed.
- Locate the webinar for which you want to download the recording and click on its title or the “View Recording” button, if available.
After completing these steps, you should now be on the recording’s playback page, where you can watch the webinar and access the download option.
Please note that the availability and location of the download option may vary depending on the version of GoToWebinar you are using and the settings chosen by the webinar host. In the next step, we will guide you through locating the download option for the recording.
Step 2: Locating the Download Option
Once you have accessed the GoToWebinar recording, the next step is to locate the download option. This will allow you to save the recording to your device for offline viewing or future reference.
The location of the download option may vary depending on the version of GoToWebinar and the settings chosen by the webinar host. Here are some common places where you can find the download option:
- Below the video player: In some cases, the download option may be directly visible below the video player on the recording’s playback page. Look for a button or link that is labeled “Download” or has a similar indication.
- In the options menu: On the recording’s playback page, there is often an options menu represented by three dots or lines. Clicking on this menu will reveal a drop-down list of additional actions, which may include the option to download the recording.
- In the “More actions” menu: Another common location for the download option is in the “More actions” menu. This menu is usually accessible through an icon or text link near the video player. Clicking on it will expand a menu with various actions, including the ability to download the recording.
- In the webinar settings: If you are the webinar host, you may need to access the webinar’s settings to find the download option. This can usually be done by navigating to the webinar’s management page or settings section. Look for a specific setting related to recording downloads or a download button within the settings interface.
It’s essential to note that the availability of the download option may be restricted by the webinar host. If you don’t see a download option, it’s possible that the host has disabled downloads for that particular recording.
Once you have located the download option, you are ready to proceed to the next step, where we will discuss choosing the download format.
Step 3: Choosing the Download Format
After locating the download option for the GoToWebinar recording, the next step is to choose the desired download format. GoToWebinar typically provides multiple format options to accommodate different preferences and device compatibility.
When you click on the download option, a dialog box or a download menu will appear, presenting you with the available format choices. These options may include:
- MP4: This is the most common video format and is widely supported by various devices and media players. It’s a versatile format that provides a good balance between file size and video quality.
- WMV: Windows Media Video is a format commonly used on Windows-based systems. If you are using a Windows device or prefer this format, selecting WMV is a suitable choice.
- FLV: Flash Video is another format often used for web-based videos. While it may not be as popular as MP4 or WMV, it can still be a useful option if you have a device or media player that supports FLV files.
When choosing the download format, consider the compatibility with your devices and the software you plan to use for playback. MP4 is generally a safe and widely supported choice across different platforms.
In addition to the video formats, GoToWebinar may also offer a separate option to download the audio-only version of the recording. This can be useful if you prefer to listen to the webinar content without the video component.
Once you have selected the desired format or audio option, proceed to the next step where we will initiate the download process.
Step 4: Initiating the Download
Now that you have chosen the desired download format for your GoToWebinar recording, it’s time to initiate the download process. By following these simple steps, you will be able to save the recording to your device for offline viewing or future reference.
- Click on the download option or button that corresponds to your chosen format. This will usually be labeled as “Download” or will specify the format, such as “Download MP4” or “Download Audio.”
- A file download prompt will appear, asking you to specify the location where you want to save the recording. Choose a location on your device’s storage that is easily accessible and where you can locate the file later.
- Click “Save” or “OK” to start the download. The file will begin transferring from the GoToWebinar server to your device. The download time will depend on the size of the recording and your internet connection speed. Please be patient during the downloading process.
- Once the download is complete, you will have successfully saved the GoToWebinar recording to your device. You can now access it at any time, even without an internet connection.
Please note that the downloaded file will be in the format you selected in the previous step (MP4, WMV, FLV, or audio-only). Depending on your device’s settings, the file may open with the default media player or require you to manually open it with a specific application.
With the download process successfully initiated, you can now move on to the final step, where we will discuss saving the recorded webinar on your device.
Step 5: Saving the Recorded Webinar
After successfully downloading the GoToWebinar recording to your device, the final step is to make sure it is saved in a safe and easily accessible location. This will allow you to locate the recording whenever you need it and ensure its long-term preservation.
When saving the recorded webinar, consider the following tips:
- Create a dedicated folder: To keep your downloaded recordings organized, it’s a good idea to create a specific folder on your device where you can store all your GoToWebinar recordings. Choose a name that is descriptive and easy to remember.
- Give the recording a clear and recognizable name: By renaming the file, you can easily identify the webinar topic or date without having to open it. This will save you time when searching for a specific recording in the future.
- Consider creating subfolders: If you have a large number of recordings or want to further categorize them, you can create subfolders within your main GoToWebinar folder. This can be based on the webinar theme, date, or any other relevant criteria.
- Back up your recordings: It’s always a good practice to create a backup of your downloaded recordings. Consider copying them to an external hard drive, cloud storage, or another device to ensure their safety in case of any data loss or device malfunction.
By following these tips, you can maintain a well-organized and accessible collection of your downloaded GoToWebinar recordings.
Now that you have successfully saved the recorded webinar on your device, you can enjoy the flexibility of accessing it at any time, even without an internet connection. Whether you use it for personal reference, share it with colleagues, or revisit the valuable content presented during the webinar, having the recording readily available can be a valuable resource.
Congratulations! You have completed the process of downloading and saving a GoToWebinar recording. Now you can make the most out of the knowledge and insights shared in the webinar, enhancing your learning and professional development.
Conclusion
Downloading a GoToWebinar recording is a simple and effective way to ensure you have access to valuable webinar content whenever you need it. By following the step-by-step process outlined in this guide, you can easily retrieve and save recordings for offline viewing or future reference.
Remember, accessing the GoToWebinar recording is the first step, which can be done through the email invitation or by logging into your GoToWebinar account. From there, you will need to locate the download option, which can typically be found below the video player, in the options menu, or in the webinar settings. Once you have found the download option, you can choose the desired format, such as MP4, WMV, FLV, or audio-only.
After selecting the format, initiating the download is a simple process of clicking the download button, specifying the save location on your device, and waiting for the download to complete. Finally, ensure the recorded webinar is saved in a dedicated folder with a clear and recognizable name for easy access in the future.
With your GoToWebinar recording successfully downloaded and saved, you can now benefit from the flexibility of watching the webinar at your convenience, without worrying about internet connectivity. Whether it’s to review the content, share it with colleagues, or enhance your professional knowledge, having the recording readily available is a valuable resource.
By following these steps, you can make the most out of your GoToWebinar experience and maximize the value of the knowledge shared during the webinars you attend. So, start downloading those recordings and embark on your continuous learning journey!


