Introduction
Google Docs is a widely used online document editing and sharing platform. It offers a collaborative environment for users to work on documents together. While working on a Google Doc, you may come across a situation where you need to download or save a photo from the document. Whether it’s a picture you inserted or an image someone else added, downloading photos from a Google Doc is a straightforward process that can be done in just a few steps.
In this article, we will guide you through the process of downloading a photo from a Google Doc, allowing you to easily save and use the image for your personal or professional needs. Whether you want to use the photo in a presentation, share it with others, or simply keep it for future reference, we’ve got you covered.
Downloading a photo from a Google Doc is particularly useful when you need to access the image offline, share it outside of the document, or use it in a different file or application. So, whether you’re a student, professional, or just someone who frequently works with Google Docs, learning how to download photos will undoubtedly come in handy.
Now, let’s dive into the step-by-step process of how you can download a photo from a Google Doc and get started with saving those precious images!
Step 1: Open the Google Doc
To begin the process of downloading a photo from a Google Doc, you first need to open the document that contains the image you want to save. Open your web browser and navigate to docs.google.com. Enter your Google account credentials if prompted to log in.
Once you’re logged in, you will be redirected to the Google Docs homepage. Here, you will see a list of your recent documents. If the document you’re looking for is listed, simply click on it to open it. If the document is not listed, you can either search for it using the search bar at the top of the page or browse your Google Drive folders to find it.
Once you have located the Google Doc, click on it to open it in the Google Docs editor. The document will load, and you will be able to see its contents, including any photos or images that have been added to it.
It’s important to note that you can only download a photo from a Google Doc that you have access to, either as the document owner or as someone who has been given editing or viewing rights. If you don’t have the necessary permissions to access the document, you won’t be able to download the photo. Make sure you have the appropriate access before proceeding to the next step.
Step 2: Locate the photo in the document
Once you have opened the Google Doc, you need to locate the photo or image that you want to download. Look through the document and find the section containing the image.
Google Docs allows you to insert images in various ways. The image may have been added directly to the document, or it could be an image from an external source that was linked or embedded. Regardless of how the image was added, you can easily locate it within the document.
To locate the photo, scroll through the document, paying attention to any visual elements such as pictures, logos, or illustrations. You can also use the search function within the Google Docs editor to find specific keywords related to the photo. Simply click on the magnifying glass icon at the top right corner of the screen, type in a relevant keyword, and press Enter.
If the document is lengthy or has multiple images, it may take a moment to find the specific photo you’re looking for. Take your time, scroll through the document, and inspect each section until you find the desired image.
Upon finding the photo, it’s a good idea to take note of its position within the document. This will help you locate it easily in the next steps when downloading and saving the image.
Once you have located the photo in the document, you are ready to proceed to the next step and download the image.
Step 3: Right-click on the photo
After locating the photo in the Google Doc, the next step is to right-click on the image. Right-clicking will bring up a context menu with various options, including the option to download or save the photo to your computer.
Position your cursor on the photo and right-click on it. A dropdown menu will appear, providing you with several actions you can take regarding the image.
In the context menu, you will see options like “Save image as,” “Download,” or variations of these phrases. The exact wording of the option may vary depending on your browser and operating system, but the function remains the same.
Take a moment to inspect the context menu and locate the option that allows you to save or download the photo. It is usually near the top of the menu and is specifically related to saving or downloading the image.
If you’re using a touch-enabled device or a device without a right-click button, such as a smartphone or tablet, you may need to tap and hold on the photo to trigger a similar action menu. Look for options like “Download” or “Save” in the popup menu that appears.
Keep in mind that the availability of the right-click option and the specific wording may differ depending on the browser and operating system you are using. However, the general concept remains the same: right-clicking or tapping and holding on the photo will allow you to access the menu that contains the option to save or download the image.
Once you have located the appropriate option, you’re ready to move on to the next step and proceed with saving the photo from the Google Doc.
Step 4: Select “Save image as” or “Download”
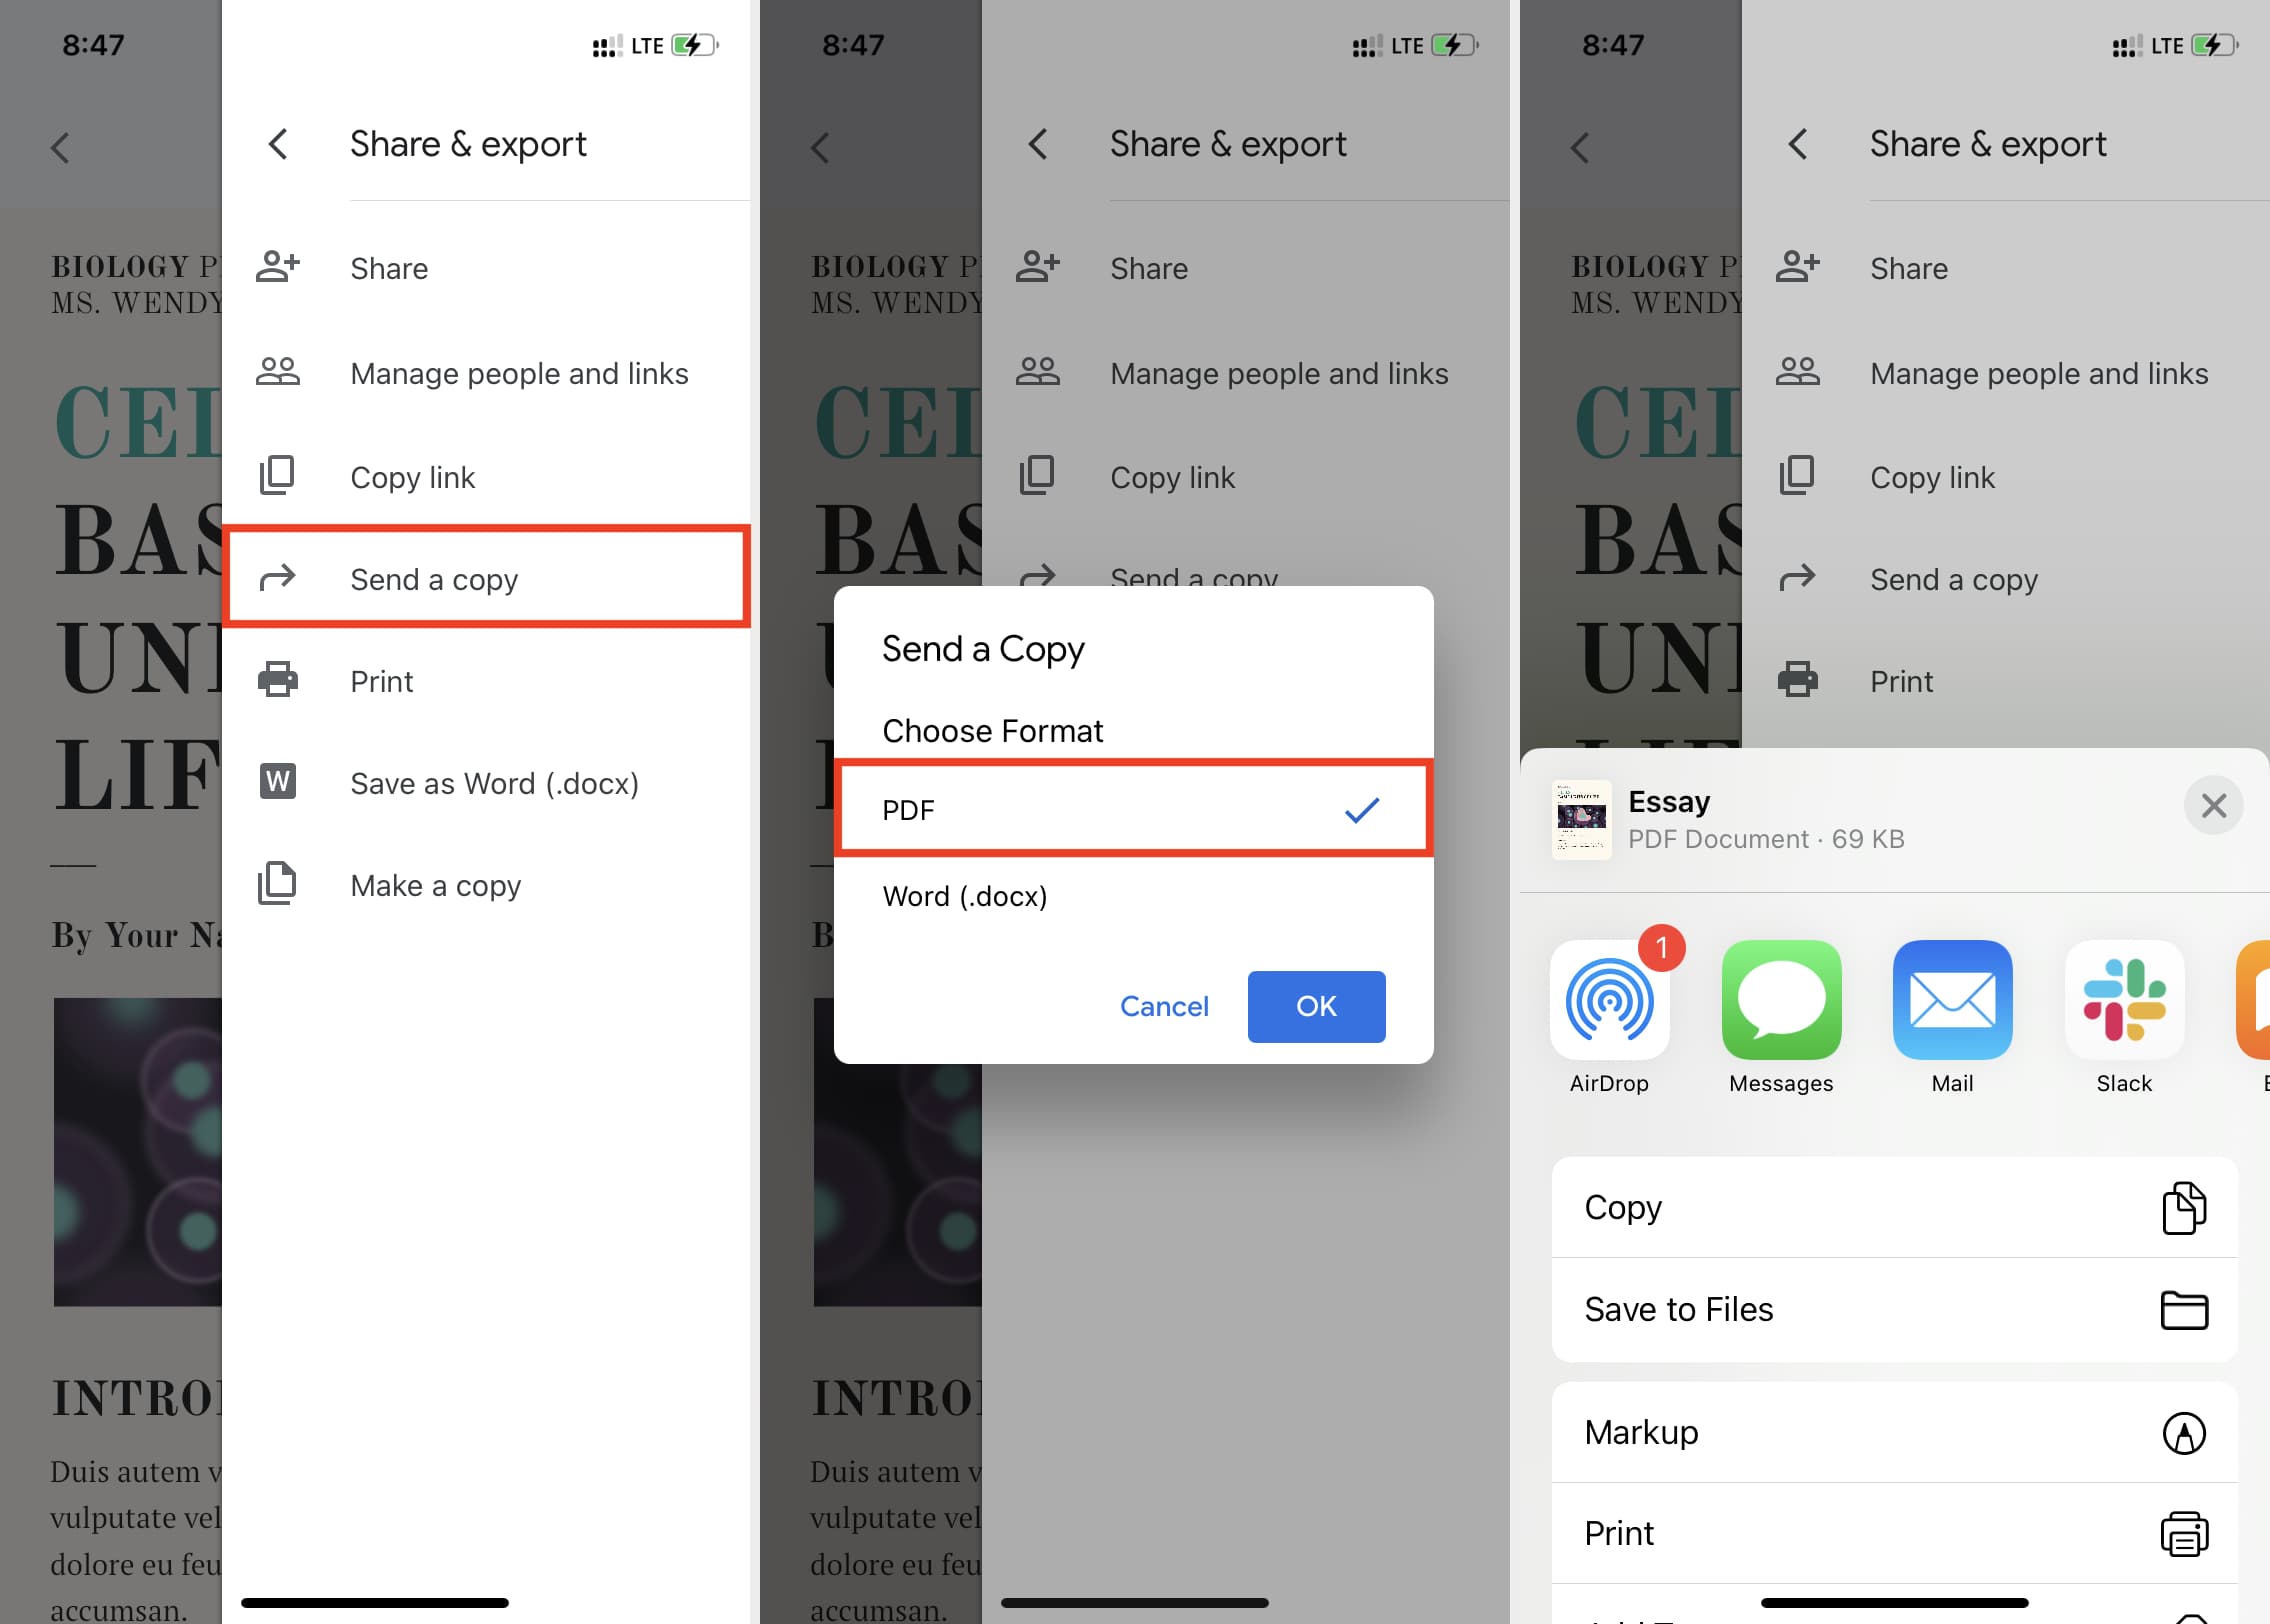
After right-clicking on the photo in the Google Doc, a context menu will appear with various options. Look for the option that allows you to save or download the image. This option is typically labeled as “Save image as” or “Download,” but it may vary slightly depending on your browser and operating system.
Click on the option in the context menu that corresponds to saving or downloading the image. This action will initiate the process of saving the photo from the Google Doc to your computer.
If you’re using a touch-enabled device or a device without a right-click button, such as a smartphone or tablet, the option to save or download the image may be presented as a button or an icon within the image viewer. Look for a button labeled “Save” or an icon resembling a floppy disk or a downward arrow.
By selecting the “Save image as” or “Download” option, you’re indicating to the browser that you want to save the image file to your computer’s storage.
It’s important to note that some browser extensions or settings may affect the availability or functionality of the “Save image as” or “Download” option in the context menu. If you encounter any issues, try disabling any related extensions or adjusting your browser settings to allow the download.
Now that you have selected the appropriate option, you’re ready to proceed to the next step and choose the destination folder for the saved photo.
Step 5: Choose the destination folder
After selecting the “Save image as” or “Download” option in the previous step, a file explorer window will appear, prompting you to choose the destination folder where you want to save the downloaded photo from the Google Doc.
The file explorer window allows you to navigate through your computer’s folders and drives to select the desired location for saving the image. Take your time to browse through the folders and locate the folder where you want to store the downloaded photo.
You can select an existing folder by clicking on it in the file explorer window. Alternatively, you can create a new folder by clicking on the “New Folder” or “Create” button, usually located in the file explorer’s toolbar. Name the new folder appropriately to help you identify and organize the saved photo.
It’s important to choose a destination folder that you can easily remember and access later. Consider creating a dedicated folder specifically for downloaded images or organize them within relevant project folders to keep your files well-structured.
Once you have selected the destination folder, click on the “Save” or “Download” button in the file explorer window to save the photo from the Google Doc to your chosen location.
Keep in mind that the specifics of the file explorer window and saving process may vary depending on your operating system and browser. However, the general concept remains the same: choose a destination folder where you want to save the downloaded photo, and click on the appropriate button to finalize the saving process.
Now that you have chosen the destination folder, you’re ready to move on to the next step and, if desired, rename the downloaded photo.
Step 6: Rename the photo (optional)
After choosing the destination folder and saving the downloaded photo from the Google Doc, you may have the option to rename the image. Renaming the photo can be particularly helpful if you want to give it a more descriptive or specific name that aligns with its content or purpose.
By default, the downloaded photo may retain its original filename, which could be a generic name assigned by the Google Doc or a string of random characters. Renaming the image allows you to personalize the file and make it easier to identify and organize.
To rename the photo, navigate to the location where you saved it on your computer. Locate the saved image within the destination folder. Right-click on the photo and select the “Rename” option from the context menu.
A text field or an editable filename should appear, allowing you to type in a new name for the photo. Enter a descriptive name that reflects the content or purpose of the image. Avoid using special characters or symbols that could cause compatibility issues with certain applications or operating systems.
Once you’ve entered the desired filename, press Enter or select a blank space outside of the text field to save the changes. The photo will now be saved with the new name.
Renaming the photo is an optional step, but it can help you keep your files organized and easily searchable in the future. If you prefer to keep the original filename or if the saved photo already has a meaningful name, you can skip this step and move on to the final step.
With the photo saved and, if desired, renamed, you’re ready to conclude the process by clicking “Save” or “Download.”
Step 7: Click “Save” or “Download”
After choosing the destination folder and, if desired, renaming the downloaded photo, you are now ready to finalize the process by clicking the “Save” or “Download” button.
Ensure that you have the desired destination folder selected and that the filename, if you chose to rename the photo, is correct.
Once you have reviewed and confirmed the appropriate settings, click on the “Save” or “Download” button. This action will initiate the final stage of downloading and saving the photo from the Google Doc to your computer.
The browser will begin the process of saving the image file to the specified location. The time it takes to complete the download will depend on the size of the photo and your internet connection speed. During this process, you may see a progress bar indicating the download status.
After the download is complete, you will receive a notification or a prompt confirming that the photo has been successfully saved to your computer. At this point, you can close the file explorer window or continue working with the Google Doc as needed.
Now that you have successfully clicked “Save” or “Download,” the photo from the Google Doc is saved to your computer. You can access it from the chosen destination folder and use it as desired, whether it’s for personal projects, professional presentations, or sharing with others.
Remember to keep the downloaded photo and its associated rights and permissions in mind. If you plan on using the image in a public setting or beyond personal use, ensure that you have the necessary rights and permissions to do so, either by creating the image yourself, obtaining appropriate licenses, or adhering to copyright and fair usage policies.
By following these seven steps, you can easily download and save photos from a Google Doc, expanding your options for using and sharing visual content outside of the document itself.
Conclusion
Downloading a photo from a Google Doc is a simple process that allows you to save and use images for various purposes. Whether you need to access the image offline, share it with others, or use it in a different file or application, following the step-by-step guide outlined in this article will enable you to download photos from Google Docs effortlessly.
By opening the Google Doc and locating the photo within the document, you can then right-click on the image and select the “Save image as” or “Download” option. Choosing the destination folder and, if desired, renaming the photo are additional steps that further personalize and organize the saved image. Finally, clicking the “Save” or “Download” button completes the process, saving the photo to your computer.
Remember to always respect the rights and permissions associated with the downloaded photo. Ensure that you have the necessary rights or licenses to use the image as required and adhere to copyright and fair usage policies.
With the ability to download and save photos from Google Docs, you gain greater flexibility and control over your visual content. Whether you’re a student, professional, or simply someone who frequently works with Google Docs, knowing how to download photos can be a valuable skill to have.
So, the next time you come across a photo in a Google Doc that you want to save or use elsewhere, follow these steps and enjoy the convenience of having the image readily available on your computer. Harness the power of visual content to enhance your projects, presentations, and collaborations, all thanks to the ability to download photos from Google Docs.