Introduction
GIFs, short for Graphics Interchange Format, have become a popular form of online communication and entertainment. These animated images are often shared on social media, websites, and messaging platforms to convey emotions, add humor, or simply entertain. If you’re a Mac user and want to download a GIF to save it for later use or share it with others, you’re in the right place.
In this guide, we will explore three methods to download GIFs on a Mac. Whether you want to save a GIF from a website, a specific GIF platform, or even from social media, we’ve got you covered. So, grab your Mac and let’s dive in!
Before we proceed, it’s essential to note that while GIFs can be a fun addition to online content, it’s always crucial to respect copyright laws and the terms of usage of the GIFs you intend to download. As a responsible user, it’s best to ensure that you have the necessary permissions or are downloading GIFs from platforms that allow free usage or sharing.
Now that we’ve covered the legal aspect, let’s explore the various methods to download GIFs on your Mac.
Method 1: Saving a GIF from a Website
One of the most common ways to find and download GIFs is by saving them directly from a website. Many websites feature GIFs for various purposes, including entertainment, news, or tutorials. Here’s how you can save a GIF from a website on your Mac:
- Locate the GIF: Visit the website that has the GIF you want to download. Browse through the content until you find the specific GIF you’re interested in.
- Right-click on the GIF: Once you’ve found the GIF, right-click on it with your mouse or trackpad. This will bring up a menu of options.
- Select “Save Image As”: From the options menu, click on “Save Image As.” This will open a new window where you can choose the location on your computer to save the GIF.
- Choose a destination folder: In the “Save As” window, navigate to the folder on your Mac where you want to save the GIF. You can create a new folder specifically for GIFs if you prefer.
- Enter a file name: Give the GIF a descriptive name in the “Save As” window. This will make it easier to find and identify later.
- Save the GIF: Once you’ve chosen the destination folder and given the GIF a name, click “Save” to download the GIF to your Mac.
And there you have it! You’ve successfully saved a GIF from a website to your Mac. Now you can access it anytime you want, whether to share it with others or use it for your own projects.
Remember, not all websites permit downloading their GIFs. It’s important to stay within the bounds of copyright laws and respect the terms of usage provided by the website before downloading any GIF.
Method 2: Downloading a GIF from a GIF Website
If you’re looking for a wider range of GIFs or more specific categories, dedicated GIF websites are a great resource. These platforms are specifically designed to host and provide access to a vast collection of GIFs. Here’s how you can download a GIF from a GIF website on your Mac:
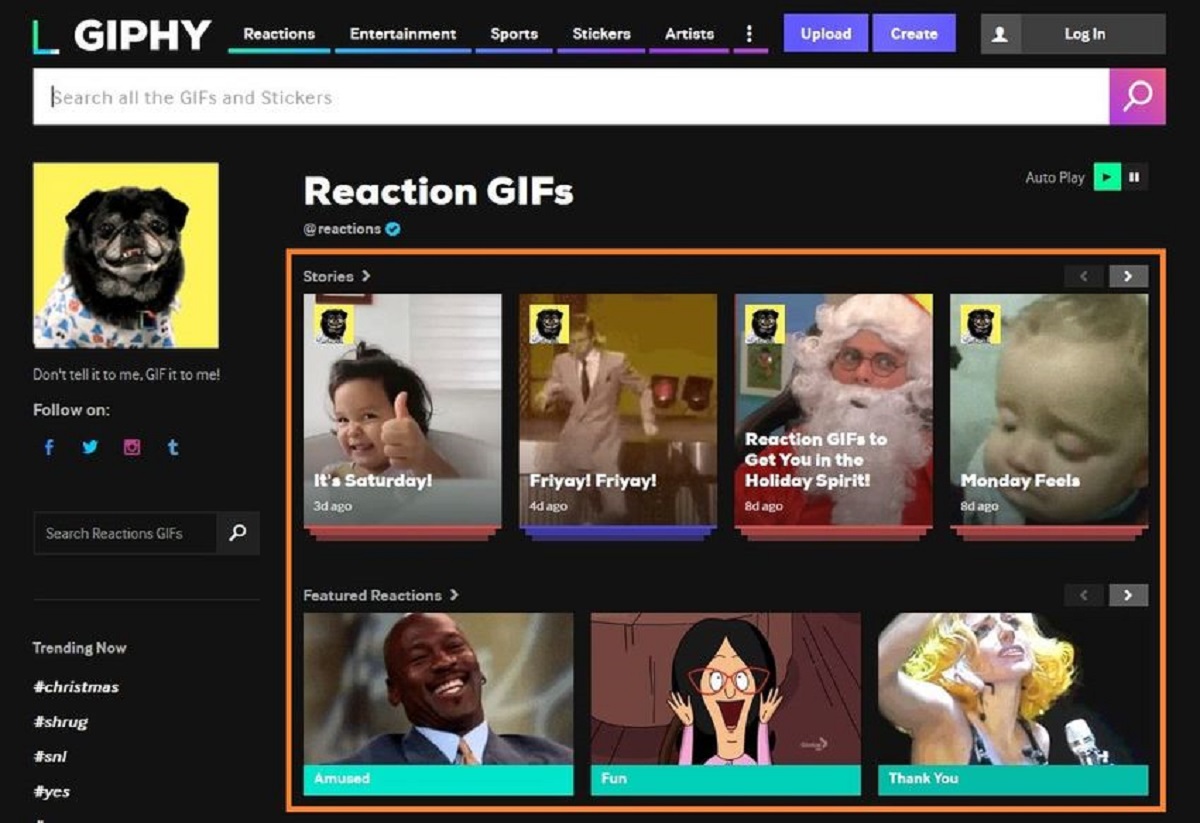
- Visit a GIF website: Start by visiting a GIF website of your choice. Some popular GIF websites include GIPHY, Tenor, and GIFs.com.
- Search for a GIF: Use the search bar provided on the website to find the specific GIF you’re looking for. You can search by keywords, categories, or even browse through trending GIFs.
- Select the desired GIF: Once you’ve found the GIF you want to download, click on it to open the detailed view.
- Download the GIF: On the GIF detail view, look for the download button. It is usually represented by an arrow pointing downwards or a cloud icon with an arrow. Click on the download button to start the download process.
- Choose a destination folder: A window will appear asking you to choose the destination folder on your Mac where you want to save the GIF. Navigate to the desired folder or create a new one specifically for GIFs.
- Click “Save”: After selecting the destination folder, click the “Save” button to download the GIF to your Mac.
That’s it! You’ve successfully downloaded a GIF from a GIF website to your Mac. The GIF is now ready for you to use in your social media posts, chats, or any other creative project you have in mind.
Keep in mind that different GIF websites may have slight variations in their user interface and download process. However, the general steps mentioned above should apply to most GIF websites.
Also, remember to check the website’s terms of usage and respect any copyright restrictions associated with the GIF before downloading and using it.
Method 3: Saving a GIF from Social Media
Social media platforms like Facebook, Twitter, and Instagram are often filled with engaging and entertaining GIFs. If you come across a GIF on social media that you’d like to save, here’s how you can do it on your Mac:
- Locate the GIF on social media: Browse through your social media feed until you find the specific post containing the GIF you want to save. It could be a funny tweet, a viral Facebook post, or an Instagram story.
- Right-click on the GIF: Once you’ve found the GIF, right-click on it with your mouse or trackpad. This will bring up a menu of options.
- Choose “Save Image As”: From the menu, select the option that says “Save Image As” or similar. This will open a new window where you can choose the location on your Mac to save the GIF.
- Select a destination folder: In the “Save As” window, navigate to the folder on your Mac where you want to save the GIF. You can also create a new folder specifically for social media GIFs if you prefer.
- Assign a file name: Give the GIF a descriptive name in the “Save As” window. This will make it easier to find and identify later.
- Save the GIF: Once you’ve chosen the destination folder and assigned a name, click the “Save” button to download the GIF to your Mac.
That’s it! You’ve successfully saved a GIF from social media to your Mac. Now you can use it whenever you want, whether it’s for sharing with friends or incorporating it into your own content.
Keep in mind that social media platforms may have different policies regarding GIF downloads. Ensure that you are complying with the platform’s terms of service and respect any copyright restrictions associated with the GIF you download.
Additionally, some social media platforms may have a different process for saving GIFs. If the right-click option doesn’t work, you can also try using browser extensions or online tools specifically designed for downloading media content from social media platforms.
Conclusion
Downloading GIFs on your Mac can be a fun and straightforward process, allowing you to enrich your conversations, social media posts, or creative projects with animated visual content. In this guide, we explored three methods to download GIFs on a Mac: saving GIFs from websites, downloading GIFs from GIF websites, and saving GIFs from social media.
When saving a GIF from a website, you can simply right-click on the GIF and choose the “Save Image As” option to save it to your desired location. GIF websites provide an extensive collection of GIFs, allowing you to search, select, and download the desired GIFs for various purposes. On social media platforms, right-clicking on the GIF and selecting “Save Image As” also allows you to save the GIF to your Mac.
Throughout the process, it’s crucial to respect copyright laws and the terms of usage of the GIFs you intend to download. Always ensure that you have the necessary permissions or are downloading GIFs from platforms that allow free usage or sharing.
By following these methods, you can easily build a collection of GIFs on your Mac for personal entertainment or professional use. Whether you want to add some humor to your messages, spark engagement on social media, or enhance your creative projects, GIFs can be a great visual tool to express yourself.
So, fire up your browser, visit your favorite websites or GIF platforms, and start downloading those captivating GIFs to make your online interactions more exciting and enjoyable!