Introduction
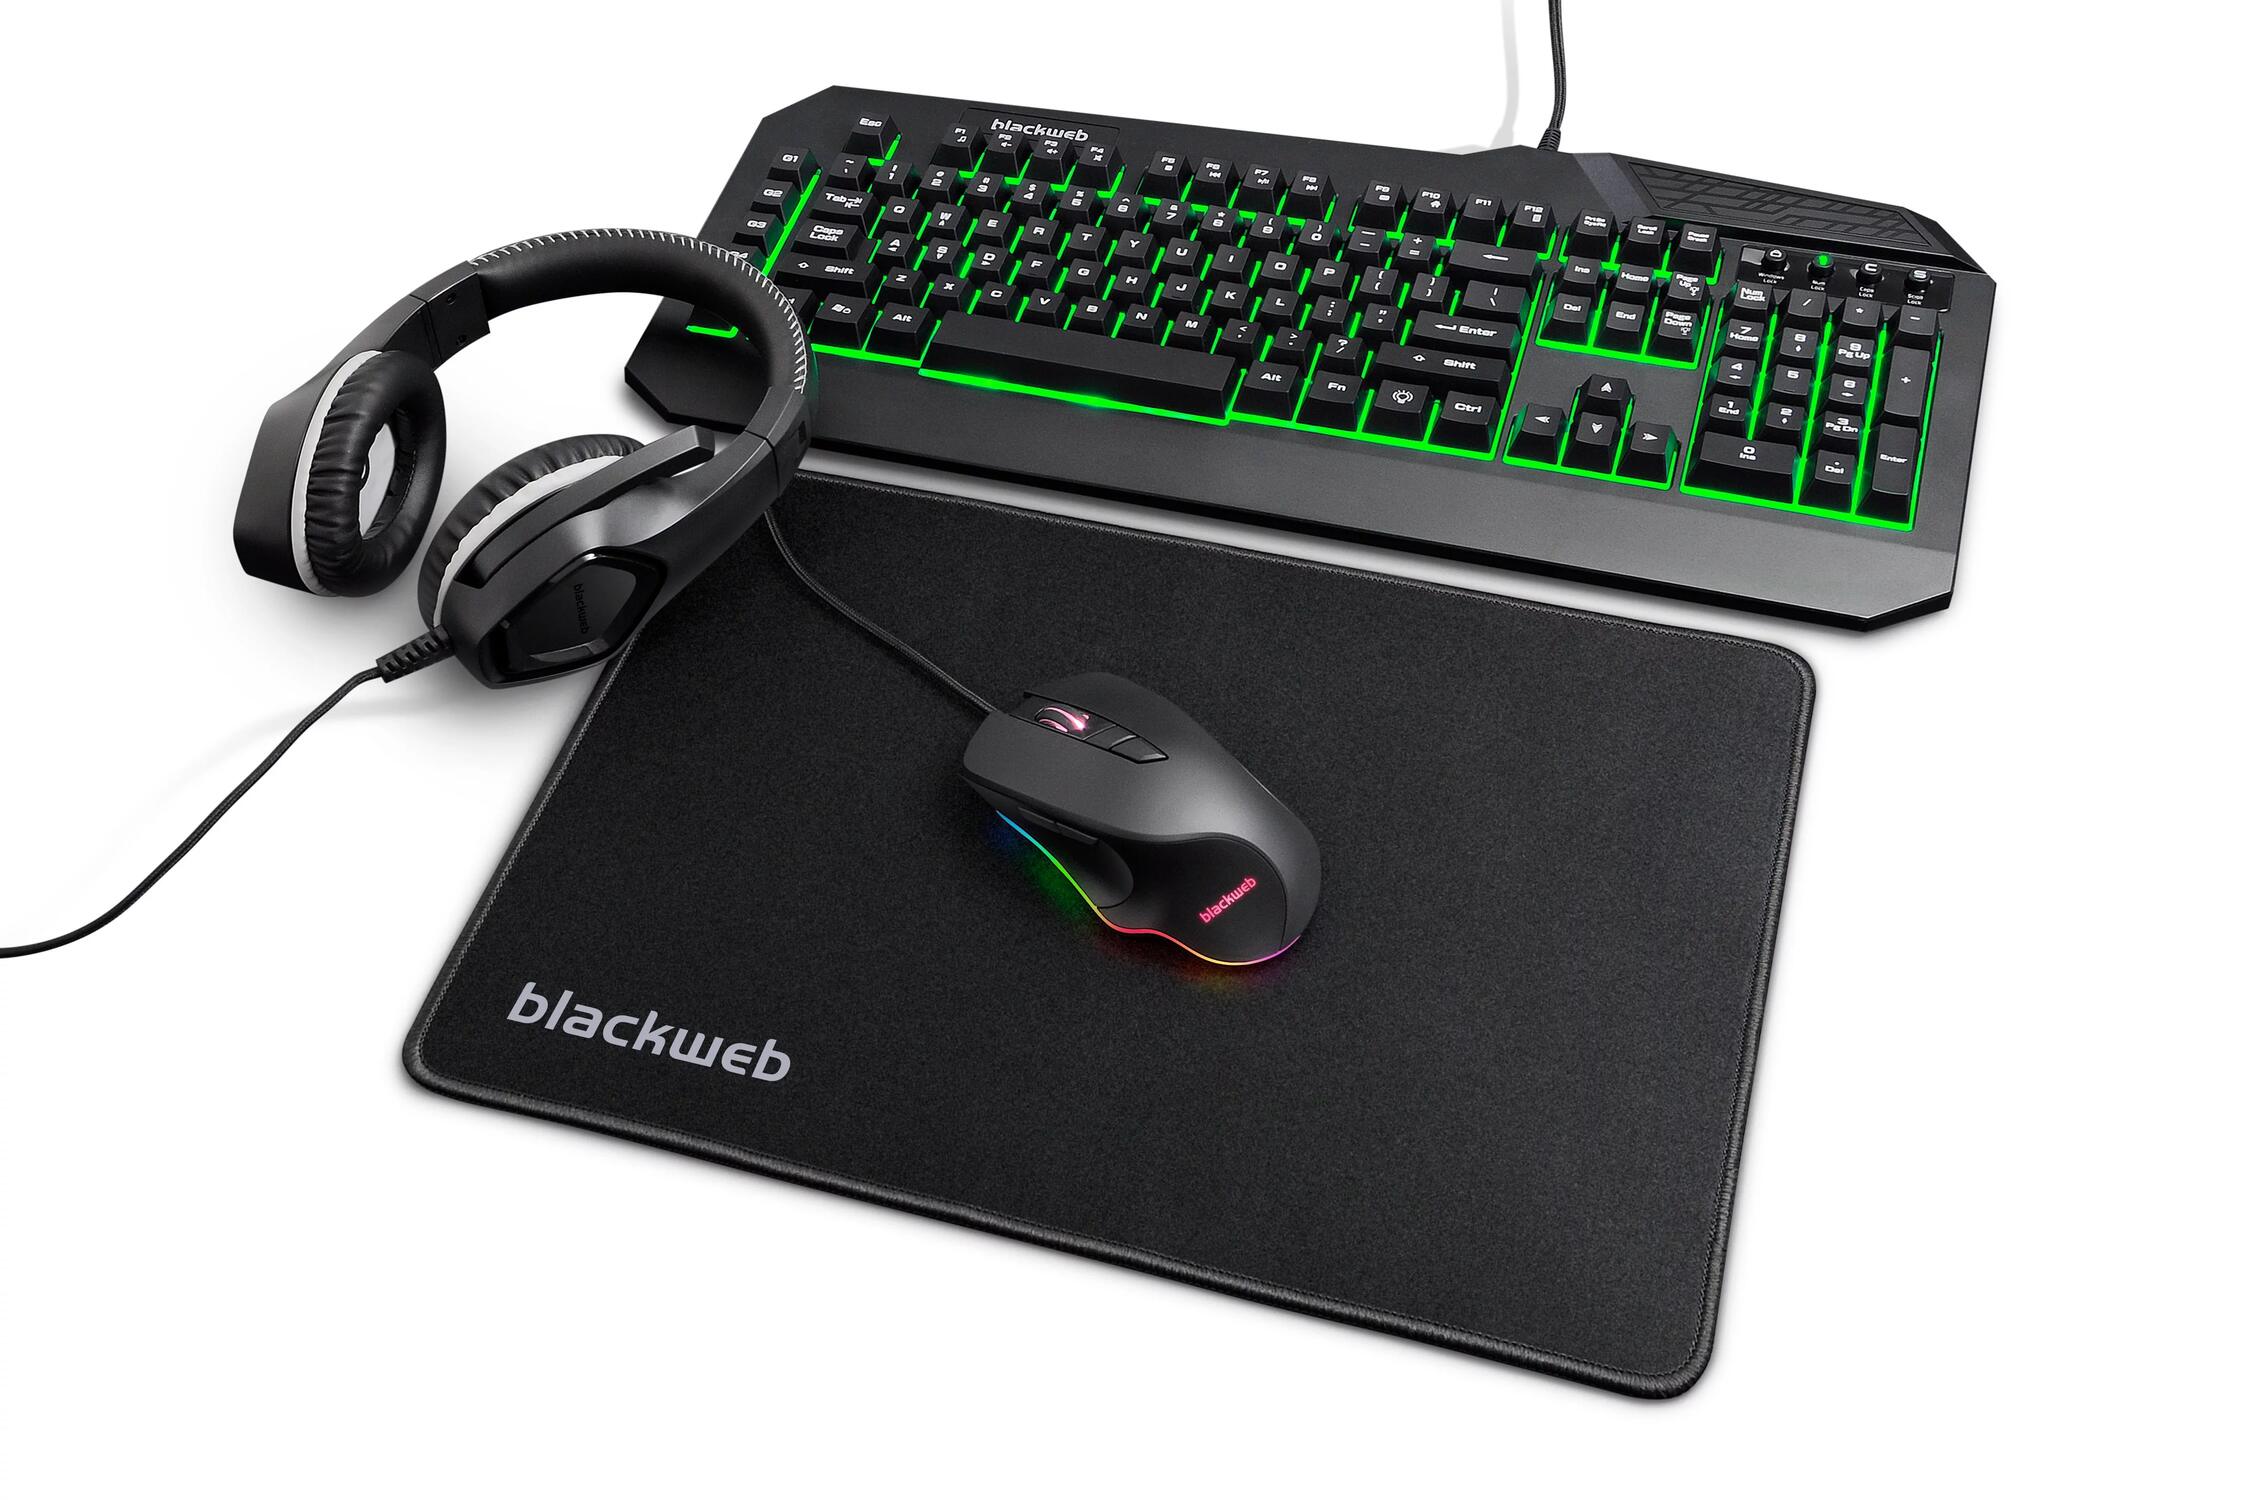
Are you ready to embark on a thrilling journey through the inner workings of the Grim Gaming Mouse by Blackweb? This step-by-step guide is designed to equip you with the knowledge and skills needed to confidently disassemble and reassemble this cutting-edge gaming peripheral. Whether you're seeking to troubleshoot technical issues, customize the mouse with vibrant LEDs, or simply satisfy your curiosity, this tutorial has got you covered.
By delving into the intricate process of dismantling the Grim Gaming Mouse, you'll gain valuable insights into its construction and functionality. Additionally, you'll have the opportunity to perform essential maintenance to ensure optimal performance and longevity. So, roll up your sleeves and get ready to explore the inner sanctum of this formidable gaming mouse.
Throughout this guide, we'll highlight the essential tools required for the disassembly process, provide detailed instructions for each step, and offer valuable tips for cleaning and reassembling the components. By the end of this journey, you'll emerge with a newfound understanding of the Grim Gaming Mouse and the confidence to tackle similar projects in the future.
Let's dive into the fascinating world of gaming mouse disassembly and discover the inner workings of the Grim Gaming Mouse by Blackweb.
Tools Needed
Before embarking on the disassembly of the Grim Gaming Mouse by Blackweb, it’s crucial to gather the necessary tools to ensure a smooth and efficient process. Here’s a comprehensive list of tools you’ll need:
- Phillips Head Screwdriver: This tool is essential for removing the screws securing the mouse casing. Ensure that the screwdriver head fits snugly into the screw heads to prevent stripping.
- Plastic Opening Tools: These non-conductive tools are ideal for prying open the mouse casing without causing damage. They help to safely release the clips holding the casing together.
- Cotton Swabs: These are handy for delicate cleaning tasks, such as removing dust and debris from intricate components.
- Isopropyl Alcohol: A high-purity alcohol solution is perfect for cleaning electronic components without leaving behind residue. It aids in dissolving grime and ensuring a thorough clean.
- Clean Cloth: Use a lint-free cloth to wipe down components and remove any remaining alcohol or debris after cleaning.
- Tweezers: Precision tweezers are useful for handling small components and reaching into tight spaces within the mouse.
- Compressed Air Canister: This tool is effective for blasting away dust and debris from intricate areas that are challenging to reach with other tools.
- Container for Screws: It’s essential to have a small container to store the screws and small components removed from the mouse. This prevents loss and facilitates easy reassembly.
By ensuring you have these tools at your disposal, you’ll be well-prepared to tackle the disassembly process with confidence and precision. With the right tools in hand, you can navigate the intricate components of the Grim Gaming Mouse and perform maintenance or customization tasks effectively.
Removing the Screws
To begin the disassembly process of the Grim Gaming Mouse by Blackweb, the first step is to locate and remove the screws securing the mouse casing. This step requires precision and care to avoid damaging the casing or the internal components. Here’s a detailed guide on how to remove the screws:
- Prepare Your Workspace: Find a well-lit and spacious area to work in. Ensure that the surface is clean and free of any clutter that could obstruct your work. Having a clear workspace will help prevent the loss of small components and make the process more organized.
- Identify the Screws: Inspect the mouse casing to locate the screws holding it together. The screws are typically situated at the base of the mouse and may be concealed beneath glide pads or stickers. Use a magnifying glass if necessary to ensure no screws are overlooked.
- Use the Phillips Head Screwdriver: Select the appropriate size of the Phillips head screwdriver and insert it into the screw head. Apply gentle pressure while turning the screwdriver in a counterclockwise direction to loosen and remove the screws. It’s crucial to maintain a steady hand and avoid applying excessive force to prevent stripping the screw heads.
- Keep Screws Organized: As you remove each screw, place it in the designated container to prevent misplacement. It’s advisable to label or separate the screws according to their respective locations in the mouse to simplify reassembly later.
- Inspect for Hidden Screws: Some mouse casings may have hidden screws beneath stickers or warranty labels. Carefully inspect the entire surface of the casing to ensure all screws are accounted for before attempting to open the casing.
By following these steps, you’ll successfully remove the screws securing the Grim Gaming Mouse’s casing, paving the way for the next phase of disassembly. Proceed with caution and attention to detail to ensure a seamless transition to the subsequent steps.
Opening the Mouse Casing
With the screws removed, the next critical step in disassembling the Grim Gaming Mouse by Blackweb is to carefully open the mouse casing. This process requires finesse and precision to avoid damaging the casing or the internal components. Here’s a systematic approach to opening the mouse casing:
- Identify Casing Clips: Examine the edges of the mouse casing to locate the clips holding it together. These clips are designed to secure the casing and may require gentle manipulation to release them. Take note of the locations of the clips to guide your opening strategy.
- Use Plastic Opening Tools: Select a non-conductive plastic opening tool and insert it into the seam between the top and bottom halves of the mouse casing. Apply gentle pressure to pry the casing open, starting from a corner and gradually working your way around the perimeter. Be cautious to avoid using excessive force that could lead to breakage.
- Work Methodically: As you progress around the casing, listen and feel for the clicks as the clips release. Take your time and ensure that all clips are disengaged before attempting to fully separate the casing. It’s essential to maintain a steady and even pressure to prevent uneven stress on the casing.
- Inspect for Resistance: If you encounter resistance while separating the casing, pause and reassess the clips’ status. Avoid forcing the casing open if resistance persists, as it may indicate that clips are still engaged. Carefully backtrack and release any remaining clips before proceeding.
- Handle with Care: Once the casing is partially open, handle it with care to prevent any sudden movements that could damage the internal components or the casing itself. Maintain a firm grip on the casing and avoid placing strain on any delicate components protruding from the interior.
By following these steps, you’ll successfully open the mouse casing without causing damage, granting access to the internal components for further disassembly and maintenance. Exercise patience and precision throughout this process to ensure a seamless transition to the subsequent steps.
Removing the Internal Components
With the mouse casing open, the next phase of disassembling the Grim Gaming Mouse by Blackweb involves the careful removal of its internal components. This step demands precision and attention to detail to prevent damage to the components and ensure a smooth reassembly process. Here’s a systematic guide to removing the internal components:
- Observe Component Placement: Take a moment to observe and familiarize yourself with the arrangement of the internal components within the mouse. Note the positioning of the circuit board, switches, scroll wheel, LED modules, and any other visible components. This observation will aid in understanding how the components fit together and their respective connections.
- Disconnect Cables and Ribbons: Carefully identify any cables or ribbons connecting the internal components to the circuit board. Using precision and caution, detach these connections by gently releasing any securing mechanisms and pulling the connectors straight out of their sockets. Exercise care to avoid bending or damaging the cables and ribbons.
- Remove Screws and Mounts: Inspect the internal components for any screws or mounts securing them to the casing or framework. Utilize the Phillips head screwdriver to carefully remove these fasteners, ensuring they are safely stored in the designated container to prevent loss.
- Handle Components with Care: When lifting out the internal components, maintain a delicate touch to prevent accidental damage. Avoid placing undue pressure on sensitive electronic parts and handle the components by their edges or designated handling areas, if applicable.
- Organize and Label Components: As each component is removed, consider labeling or organizing them according to their positions and functions. This practice will streamline the reassembly process and mitigate confusion when reattaching the components later.
By meticulously following these steps, you’ll successfully remove the internal components of the Grim Gaming Mouse, setting the stage for thorough cleaning, inspection, and any necessary maintenance. Exercise patience and precision to ensure a seamless transition to the subsequent phases of the disassembly process.
Cleaning the Components
Once the internal components of the Grim Gaming Mouse by Blackweb have been carefully removed, the next crucial phase involves thorough cleaning to eliminate dust, debris, and any buildup that may affect the mouse’s performance. It’s essential to approach this step with meticulous care to ensure the components are pristine and free from contaminants. Here’s a comprehensive guide to cleaning the components:
- Inspect for Debris: Carefully examine each component for the presence of dust, dirt, or any foreign particles that may have accumulated over time. Pay close attention to crevices, connectors, and circuitry, as these areas are prone to collecting debris.
- Use Compressed Air: Employ a canister of compressed air to gently blow away loose dust and debris from the components. Ensure the airflow is directed away from delicate components and connectors to prevent damage from excessive pressure.
- Clean with Isopropyl Alcohol: Dampen a clean, lint-free cloth or a cotton swab with isopropyl alcohol and carefully wipe down the surfaces of the components. This method effectively dissolves grime and ensures thorough cleaning without leaving behind residue. Exercise caution to avoid saturating the components with alcohol.
- Detail Cleaning: For intricate areas and connectors, utilize precision cotton swabs lightly moistened with isopropyl alcohol to meticulously remove stubborn debris. Take care to avoid snagging any cotton fibers on the components.
- Drying Period: Allow the components to air-dry completely before proceeding with reassembly. This ensures that any residual alcohol evaporates, leaving the components clean and ready for inspection and reinstallation.
By diligently following these cleaning procedures, you’ll effectively restore the internal components of the Grim Gaming Mouse to a pristine condition, promoting optimal performance and longevity. Exercise patience and precision throughout the cleaning process to ensure the components are thoroughly revitalized for reassembly and testing.
Reassembling the Mouse
After meticulously cleaning the internal components of the Grim Gaming Mouse by Blackweb, the reassembly process is a critical phase that demands precision and attention to detail. Ensuring that each component is correctly positioned and securely fastened is essential for the mouse to function optimally. Here’s a systematic guide to reassembling the mouse:
- Reference Disassembly Notes: If you made notes or labeled the components during disassembly, refer to them to guide the reassembly process. This will help ensure that each component is returned to its correct position and orientation.
- Position Internal Components: Carefully place the cleaned internal components back into the mouse casing, aligning them with their respective mounting points and connectors. Exercise caution to avoid forcing any components into position, as this could lead to damage or misalignment.
- Secure Screws and Mounts: Utilize the Phillips head screwdriver to reattach any screws and mounts that secure the internal components to the casing or framework. Ensure that each fastener is tightened to the appropriate torque to prevent shifting or instability.
- Reconnect Cables and Ribbons: Gently reconnect any cables or ribbons that were detached during the disassembly process. Align the connectors properly and apply gentle pressure to seat them securely, ensuring that they are fully engaged without excessive force.
- Closing the Mouse Casing: Carefully align the top and bottom halves of the mouse casing, ensuring that the internal components are positioned correctly and no cables are pinched or obstructed. Apply even pressure around the perimeter of the casing to snap the clips securely into place.
By methodically following these steps, you’ll successfully reassemble the Grim Gaming Mouse, bringing together its internal components with precision and care. Exercise patience and attention to detail throughout the reassembly process to ensure that the mouse is restored to its original state, ready for testing and use.
Testing the Mouse
Upon completing the reassembly of the Grim Gaming Mouse by Blackweb, it’s crucial to conduct comprehensive testing to ensure that the mouse functions seamlessly and that all components are operating as intended. This phase allows you to verify the success of the disassembly and reassembly process while ensuring that the mouse is ready for regular use. Here’s a systematic approach to testing the mouse:
- Physical Inspection: Conduct a visual examination of the mouse, ensuring that all external components, such as buttons, scroll wheel, and LED indicators, are in their correct positions and exhibit no signs of damage or misalignment.
- Connectivity Test: Connect the mouse to a compatible computer or gaming device and verify that it is recognized and responsive. Test the primary buttons, scroll wheel, and any additional features to ascertain that they function as expected.
- Tracking and Sensitivity: Evaluate the mouse’s tracking accuracy and sensitivity by navigating the cursor across the screen. Test the mouse on various surfaces to ensure consistent tracking performance without erratic behavior or cursor drift.
- Button Response: Test the responsiveness of all buttons, including primary and secondary buttons, side buttons, and any programmable buttons. Verify that each button registers clicks accurately and consistently.
- Customization and Software: If the mouse features customizable settings or software integration, verify that these functions operate as intended. Test any lighting effects, DPI adjustments, or macro commands to ensure that they are functional.
By methodically conducting these tests, you’ll ascertain the successful reassembly of the Grim Gaming Mouse and confirm that it is fully operational. This comprehensive testing phase provides assurance that the mouse has been restored to its optimal state and is ready to deliver a seamless gaming experience.