Introduction
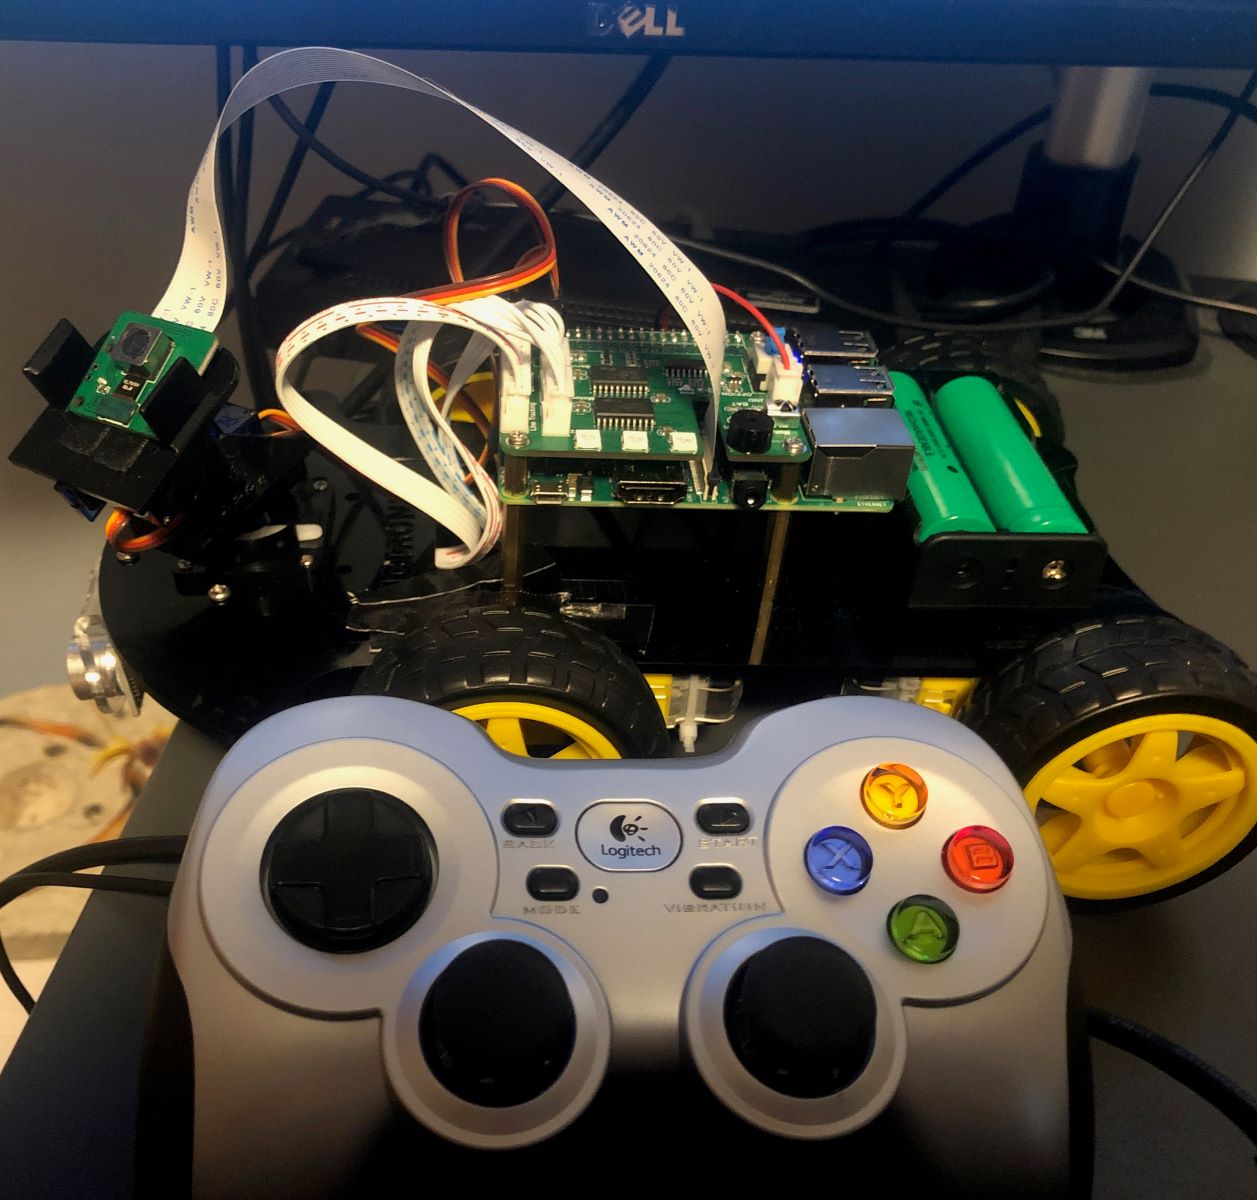
Are you ready to breathe new life into an old game controller and rev up your remote-controlled (RC) car experience? With a touch of creativity and a dash of technical know-how, you can repurpose an outdated game controller into a fully functional RC car controller. This DIY project not only offers a fun and budget-friendly way to upgrade your RC car setup but also provides an opportunity to delve into the world of electronics and engineering.
In this step-by-step guide, we will walk you through the process of transforming an old game controller into a customized RC car controller. By repurposing the game controller's buttons and joysticks, you can take full control of your RC car's movements, adding a personalized touch to your hobby. Whether you're a seasoned RC car enthusiast or a curious tinkerer looking for a hands-on project, this endeavor is sure to ignite your creativity and technical prowess.
As we embark on this DIY journey, we'll explore the art of disassembling the game controller, preparing the RC car components, and seamlessly connecting the two to create a unified control system. Additionally, we'll delve into testing and troubleshooting, ensuring that your newly crafted RC car controller operates smoothly and efficiently.
So, gather your tools, unleash your imagination, and let's dive into the exhilarating world of transforming an old game controller into a powerful RC car controller. Get ready to experience the thrill of controlling your RC car with a customized controller that reflects your unique style and technical ingenuity. Let's embark on this electrifying adventure together!
Gather Your Materials
Before diving into the exhilarating process of repurposing an old game controller into an RC car controller, it’s essential to gather the necessary materials and tools. By assembling these items, you’ll set the stage for a seamless and enjoyable DIY experience. Here’s a comprehensive list of the materials and tools you’ll need:
- Old game controller (preferably with joysticks and buttons)
- Remote-controlled (RC) car with compatible receiver and electronic speed controller (ESC)
- Soldering iron and solder
- Wire strippers and cutters
- Small Phillips and flathead screwdrivers
- Electrical tape
- Heat shrink tubing
- Wire of various colors and gauges
- Hot glue gun and glue sticks
- Small wire nuts or connectors
- Multi-meter for testing electrical connections
- Scissors
- Small container for organizing screws and small parts
- Workbench or a clear, well-lit workspace
By ensuring that you have all the required materials and tools at your disposal, you’ll be well-prepared to embark on this engaging DIY endeavor. Additionally, having a clean and organized workspace will contribute to a smooth and enjoyable crafting experience.
Now that you’ve gathered your materials, it’s time to roll up your sleeves and prepare to breathe new life into your old game controller by transforming it into a powerful RC car controller. Let’s dive into the next steps and unlock the potential of these seemingly disparate components, bringing them together in a harmonious fusion of creativity and technical innovation.
Disassemble the Game Controller
With your materials at the ready, it’s time to embark on the first crucial step: disassembling the old game controller. This process will unveil the inner workings of the controller, allowing you to identify and repurpose its components for the RC car controller conversion. Here’s a step-by-step guide to disassembling the game controller:
- Gather the Necessary Tools: Before diving into disassembly, ensure that you have the appropriate tools on hand. A small Phillips screwdriver is typically suitable for most game controllers, but some may require additional tools. Refer to the controller’s user manual or online resources for specific instructions.
- Remove the Screws: Carefully flip the game controller over and locate the screws securing the outer casing. Use the Phillips screwdriver to remove these screws, keeping them in a safe place for reassembly later.
- Open the Casing: Once the screws are removed, gently separate the controller’s casing, taking care not to damage any internal components or cables. Some controllers may have clips or additional screws inside, so proceed with caution and refer to any available disassembly guides if needed.
- Identify the Internal Components: As the controller’s internals are revealed, take note of the circuit board, buttons, joysticks, and any other relevant components. Each of these elements will play a crucial role in the subsequent steps of repurposing the controller for RC car control.
- Disconnect the Components: If necessary, disconnect the buttons, joysticks, and any other modular components from the circuit board. Take note of their original placement and orientation, as this information will be valuable during the integration process with the RC car’s electronics.
- Secure the Screws and Casing: To prevent misplacement, place the removed screws in a designated container and set aside the controller’s casing in a safe location. These components will be reassembled later, ensuring the controller retains its structural integrity.
By methodically disassembling the game controller, you’ve laid the groundwork for repurposing its components in the creation of an RC car controller. With the controller’s inner workings exposed, you’re now prepared to move on to the next phase of this exciting DIY project: preparing the RC car components for integration.
Prepare the RC Car Components
As you transition from disassembling the game controller to preparing the RC car components, you’re poised to integrate these distinct elements into a unified control system. This phase involves readying the RC car’s receiver and electronic speed controller (ESC) to interface with the repurposed components from the game controller. Here’s a comprehensive guide to preparing the RC car components for this innovative transformation:
- Identify the RC Car’s Receiver and ESC: Locate the receiver and ESC within the RC car’s chassis. These components are pivotal in receiving and translating the signals from the repurposed game controller, facilitating seamless control over the car’s movements.
- Understand the Wiring Configuration: Familiarize yourself with the wiring configuration of the receiver and ESC. Take note of the input channels and their corresponding functions, as this knowledge will inform the integration of the game controller’s components.
- Assess Compatibility: Ensure that the game controller’s buttons and joysticks align with the input channels on the receiver and ESC. This compatibility check is essential for establishing a coherent control scheme that accurately translates your commands to the RC car’s actions.
- Prepare for Integration: If necessary, make any adjustments to the wiring or connectors on the receiver and ESC to accommodate the integration of the game controller’s components. This may involve soldering, using wire nuts, or employing compatible connectors to establish secure and reliable connections.
- Organize and Label Connections: As you prepare the wiring for integration, organize and label the connections to maintain clarity and prevent confusion during the subsequent phases of the project. Clear labeling will streamline the process of connecting the game controller’s components to the RC car’s electronics.
- Ensure Secure Mounting: Confirm that the receiver and ESC are securely mounted within the RC car’s chassis, minimizing the risk of disconnection or damage during operation. A stable and well-organized setup will contribute to the overall functionality and longevity of the RC car controller.
By meticulously preparing the RC car’s receiver and ESC for integration with the repurposed game controller components, you’re laying the groundwork for a seamless fusion of electronics and ingenuity. With the RC car components primed for the next phase, you’re ready to embark on the exhilarating process of connecting the game controller to the RC car, bringing your customized controller to life.
Connect the Game Controller to the RC Car
With the game controller and RC car components prepared, it’s time to embark on the pivotal phase of connecting the repurposed game controller to the RC car, creating a cohesive control system that empowers you to steer and maneuver the car with precision. This integration process involves establishing electrical connections and ensuring seamless communication between the game controller’s components and the RC car’s receiver and electronic speed controller (ESC). Here’s a detailed guide to connecting the game controller to the RC car:
- Identify Corresponding Functions: Match the functions of the game controller’s buttons and joysticks with the intended movements and actions of the RC car. This alignment is crucial for mapping the controller’s inputs to the car’s responses, ensuring intuitive and responsive control.
- Establish Electrical Connections: Using the wire strippers and soldering iron, carefully connect the game controller’s components to the input channels on the receiver and ESC. Pay close attention to the polarity and orientation of the connections, ensuring precision and accuracy in the wiring process.
- Utilize Secure Connectors: If preferred, employ secure connectors such as wire nuts or compatible terminal blocks to establish the electrical connections between the game controller and the RC car’s electronics. This approach offers flexibility and facilitates future modifications or troubleshooting.
- Insulate and Secure Wiring: After making the electrical connections, insulate the exposed conductors with electrical tape or heat shrink tubing to prevent short circuits and ensure the integrity of the connections. Additionally, secure the wiring to prevent strain or interference with the RC car’s moving components.
- Test the Control Inputs: With the connections established, power on the RC car and game controller to test the functionality of the integrated control system. Verify that each button and joystick on the game controller accurately corresponds to the intended movements and actions of the RC car, making any necessary adjustments as needed.
- Refine and Optimize Control Mapping: Fine-tune the control mapping and sensitivity settings on the RC car’s ESC or transmitter, optimizing the responsiveness and precision of the integrated control system. This iterative process ensures an intuitive and tailored control experience.
By seamlessly connecting the game controller to the RC car and refining the control mapping, you’ve bridged the gap between these distinct components, forging a unified and personalized RC car controller. With the integrated system operational, you’re poised to embark on the exhilarating phase of testing and troubleshooting, ensuring that your customized controller operates seamlessly and reliably.
Testing and Troubleshooting
As you approach the culmination of this transformative DIY endeavor, thorough testing and meticulous troubleshooting are essential to ensure the seamless operation of your customized RC car controller. This phase encompasses comprehensive testing of the integrated control system, followed by the identification and resolution of any potential issues that may arise. Here’s a detailed guide to testing and troubleshooting your newly crafted RC car controller:
- Functional Testing: Begin by conducting comprehensive functional testing of the integrated control system. Verify that each button and joystick on the game controller accurately corresponds to the intended movements and actions of the RC car, encompassing forward and reverse motion, steering, and any additional functionalities.
- Range and Responsiveness: Assess the range and responsiveness of the RC car controller, ensuring that commands are promptly and accurately translated to the car’s actions. Test the controller’s operational range and responsiveness across various distances and orientations to gauge its reliability and precision.
- Battery Performance: Evaluate the battery performance of both the game controller and the RC car, ensuring that they provide sustained power for prolonged operation. Verify that the batteries are adequately charged and capable of supporting the demands of the integrated control system.
- Signal Interference: Mitigate potential signal interference by testing the RC car controller in diverse environments and conditions. Identify and address any instances of signal disruption or erratic behavior, implementing measures to minimize interference and maintain consistent control.
- Dynamic Maneuver Testing: Put the RC car through dynamic maneuver testing, simulating various driving scenarios and challenges to assess the controller’s performance under diverse conditions. This comprehensive testing approach ensures that the integrated control system excels in real-world RC car operations.
- Iterative Refinement: Iterate on the control mapping and sensitivity settings, refining the responsiveness and precision of the integrated control system based on the insights gathered during testing. This iterative refinement process optimizes the controller’s performance to align with your preferences and driving style.
Throughout the testing phase, meticulous attention to detail and a methodical approach are paramount in identifying and addressing any potential issues or areas for refinement. By conducting thorough testing and troubleshooting, you’ll elevate the performance and reliability of your customized RC car controller, ensuring an immersive and captivating driving experience.
Conclusion
Congratulations on successfully transforming an old game controller into a powerful and personalized RC car controller! This exhilarating DIY journey has empowered you to repurpose outdated technology, infusing new life and functionality into your remote-controlled (RC) car setup. By seamlessly integrating the game controller’s components with the RC car’s electronics, you’ve unlocked a world of customized control, tailored to your preferences and driving style.
Throughout this transformative process, you’ve exercised creativity, technical ingenuity, and a passion for hands-on experimentation. From meticulously disassembling the game controller to preparing the RC car components and seamlessly connecting the two, each step has been a testament to your dedication and resourcefulness. The comprehensive testing and troubleshooting phase further exemplified your commitment to ensuring the seamless operation and reliability of your customized RC car controller.
As you embark on future RC car adventures, the personalized controller crafted through this DIY project will serve as a testament to your innovation and technical prowess. The intuitive control scheme, responsive inputs, and tailored settings reflect your unique vision for an enhanced RC car experience, setting the stage for countless thrilling driving escapades.
Beyond the tangible outcome of a customized RC car controller, this DIY endeavor has fostered a deeper understanding of electronics, control systems, and the art of repurposing technology. The skills and insights gained throughout this project will undoubtedly fuel future creative endeavors and technical explorations, enriching your journey as a hobbyist and innovator.
As you revel in the joy of controlling your RC car with a controller born from ingenuity and craftsmanship, remember the boundless potential that lies within repurposing and reimagining technology. This project is a testament to the transformative power of DIY innovation and the limitless possibilities that unfold when creativity and technical acumen converge.
With your customized RC car controller at the helm, embrace the thrill of the open road, the excitement of precision maneuvers, and the endless possibilities that await in the world of RC car exploration. Your journey as a DIY trailblazer has only just begun, and the road ahead is brimming with opportunities to innovate, create, and craft transformative solutions from the unexpected.


