Introduction
Video game controllers are essential tools for gaming enthusiasts, providing a means to interact with virtual worlds and characters. However, over time, the buttons on these controllers can become unresponsive or malfunction, impacting the gaming experience. Fortunately, with the right tools and a basic understanding of controller mechanics, it’s possible to fix a button on a video game controller at home. This guide will walk you through the process, providing step-by-step instructions to help you restore functionality to your controller.
Whether it’s a sticky button, unresponsive trigger, or a directional pad issue, addressing these problems can breathe new life into your gaming experience. By taking the time to troubleshoot and repair your controller, you can save money on costly replacements and gain a deeper understanding of the inner workings of these essential gaming accessories.
Before embarking on this repair journey, it’s important to gather the necessary tools and materials to ensure a smooth and successful process. With the right equipment and a methodical approach, you can effectively diagnose and remedy button issues, allowing you to get back to your favorite games without the frustration of a faulty controller.
Tools and Materials Needed
Before delving into the process of fixing a button on a video game controller, it’s essential to gather the appropriate tools and materials. Having these items on hand will streamline the repair process and ensure that you can address the issue effectively. Here’s a list of the essential tools and materials you’ll need:
- Small Phillips Head Screwdriver: This tool will be used to remove the screws securing the controller’s casing, allowing you to access the internal components.
- Flathead Screwdriver: A small flathead screwdriver may be necessary for prying open the controller’s casing or manipulating internal components.
- Cotton Swabs: These are useful for applying cleaning solutions to the controller’s buttons and contacts, addressing any issues related to dirt or grime buildup.
- Isopropyl Alcohol: Used in conjunction with the cotton swabs, isopropyl alcohol is effective for cleaning the button contacts and removing any residue that may be hindering their functionality.
- Replacement Button (if necessary): Depending on the nature of the button issue, you may need a replacement button. Ensure that it is compatible with your specific controller model.
- Tweezers: Precision tweezers can be helpful for manipulating small components within the controller, particularly when addressing intricate button mechanisms.
- Clean Cloth: A soft, lint-free cloth will be useful for wiping down the controller’s exterior and ensuring a clean working environment during the repair process.
- Work Area: Set up a well-lit, organized work area where you can comfortably disassemble and work on the controller without the risk of losing small components.
By ensuring that you have these tools and materials at your disposal, you’ll be well-prepared to address a variety of button-related issues that may arise with your video game controller.
Opening the Controller
Before delving into the intricate repair process, the initial step involves opening the video game controller to gain access to its internal components. This process will vary slightly depending on the specific model of the controller, but the general steps remain consistent. Here’s a guide to opening a typical video game controller:
- Prepare the Work Area: Select a clean, well-lit work area and gather all the necessary tools and materials. Ensure that there is ample space to lay out the controller and its components without the risk of misplacing small parts.
- Locate and Remove Screws: Using a small Phillips head screwdriver, carefully locate and remove the screws securing the controller’s casing. These screws are typically found on the back of the controller and may be concealed beneath labels or warranty stickers.
- Pry Open the Casing: Once the screws have been removed, gently pry open the controller’s casing using a flathead screwdriver. Exercise caution to avoid damaging the casing or internal components.
- Separate the Casing: Carefully separate the two halves of the controller’s casing, taking note of any cables or ribbon connectors that may still be attached. These connectors will need to be detached before the casing can be fully separated.
- Handle Internal Components with Care: With the casing removed, take care when handling the internal components of the controller. Avoid touching sensitive electronic parts and be mindful of the controller’s layout to facilitate reassembly.
By following these steps, you can safely open the controller and gain access to its internal mechanisms, setting the stage for a thorough examination and potential repair of the button-related issues.
Identifying the Issue
Once the video game controller is opened, the next crucial step in the repair process involves identifying the specific issue affecting the button’s functionality. Several common problems can lead to button malfunctions, and a systematic approach can help pinpoint the root cause of the issue. Here are the key steps for identifying the problem:
- Visual Inspection: Begin by visually examining the button and its surrounding components. Look for any visible signs of damage, wear, or debris that may be impeding the button’s movement or contact with the controller’s circuitry.
- Button Actuation Test: Press the problematic button and assess its responsiveness. Note any irregularities in its behavior, such as sticking, delayed response, or lack of feedback, which can provide valuable clues about the underlying issue.
- Check Button Contacts: Inspect the button’s contacts and the corresponding circuitry on the controller’s circuit board. Look for signs of corrosion, dirt, or damage that may be interfering with the electrical connection, leading to button dysfunction.
- Test Adjacent Buttons: Evaluate the functionality of adjacent buttons to determine if the issue is isolated to the specific button or if it extends to the surrounding controls. This comparison can help narrow down the source of the problem.
- Review Controller Schematics (if available): If schematics or technical documentation for the controller are accessible, refer to them to gain a deeper understanding of the button’s internal workings and potential points of failure.
By systematically assessing the button’s condition and behavior, you can effectively identify the underlying issue, whether it’s related to physical damage, electrical connectivity, or other factors. This diagnostic process lays the groundwork for the subsequent repair steps, enabling targeted and effective solutions to restore the button’s functionality.
Repairing the Button
Once the issue affecting the video game controller’s button has been identified, the repair process can commence, addressing the specific problem to restore the button’s functionality. Depending on the nature of the issue, several methods can be employed to rectify the problem. Here are the key steps involved in repairing the button:
- Cleaning the Button and Contacts: If the button’s malfunction is attributed to dirt, grime, or residue buildup, gently clean the button and its contacts using isopropyl alcohol and cotton swabs. Thoroughly remove any contaminants that may be impeding the button’s movement or electrical connectivity.
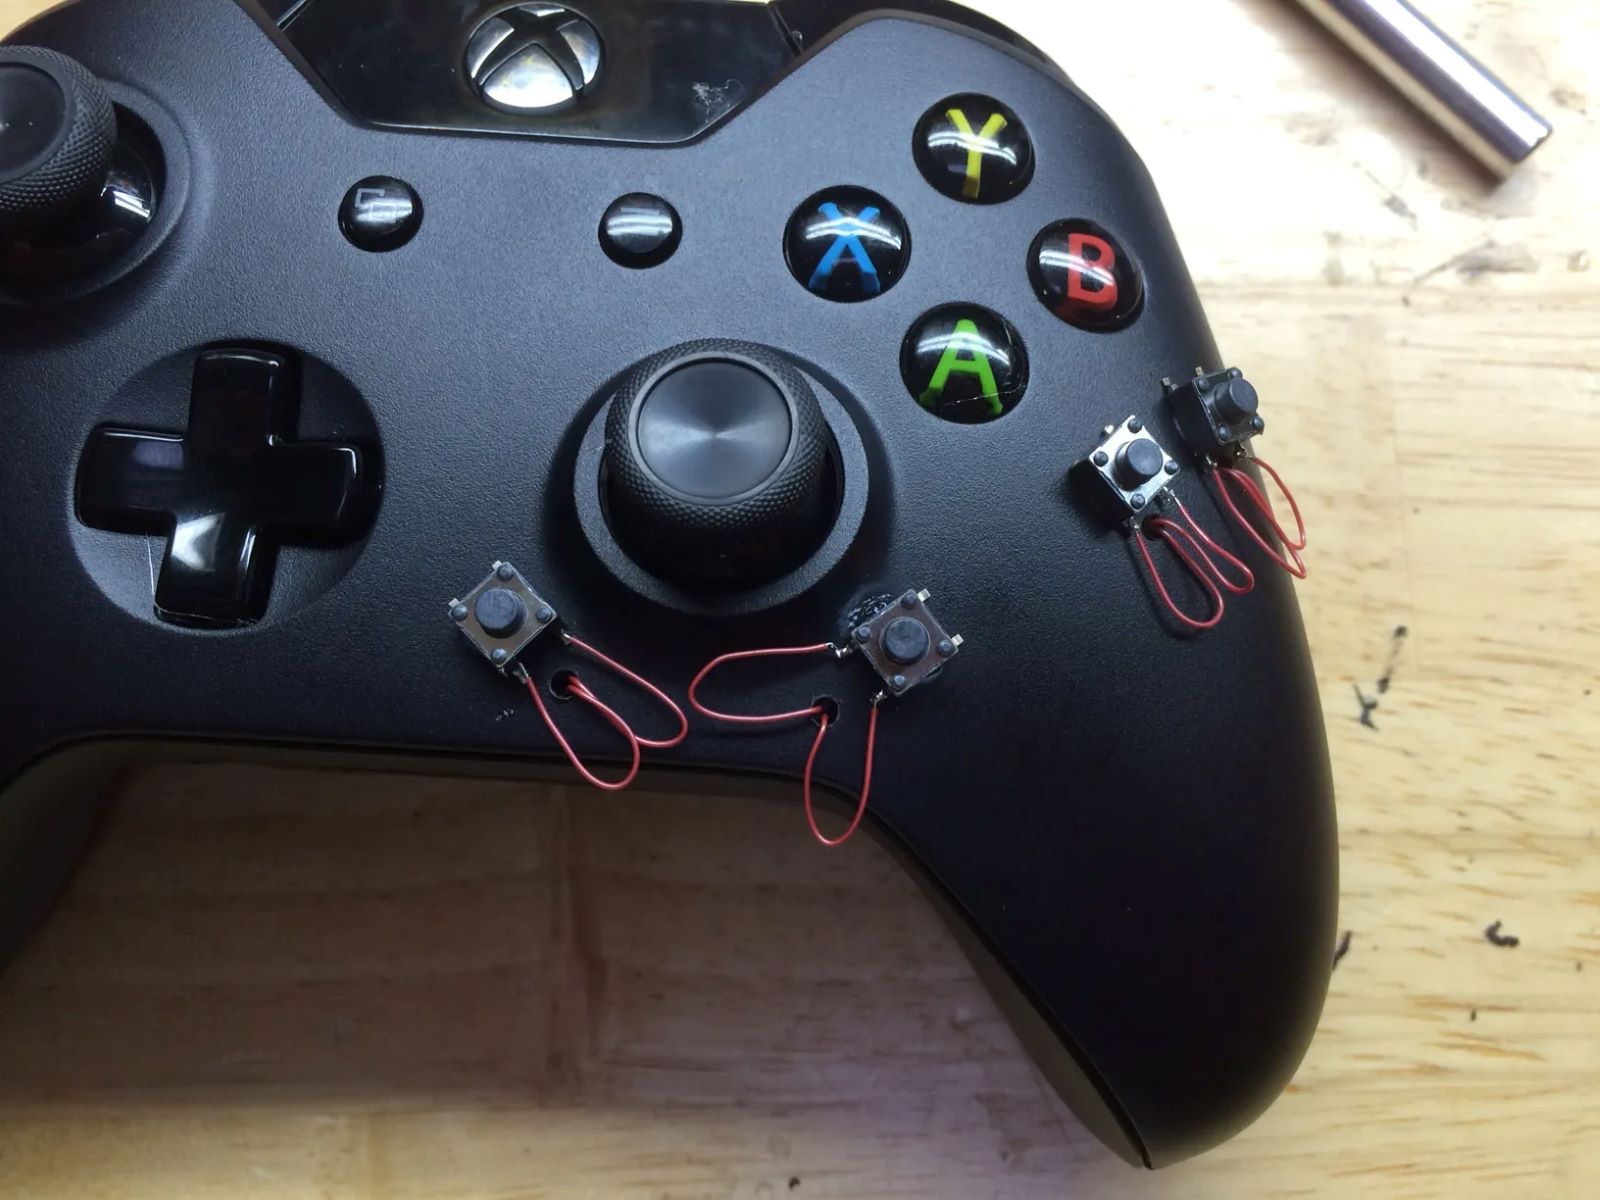
- Inspecting and Adjusting Button Mechanism: Examine the button’s internal mechanism to ensure that it moves freely and makes proper contact with the underlying circuitry. If necessary, make adjustments to the button’s positioning or spring mechanism to optimize its functionality.
- Replacing the Button (if required): In cases where the button is damaged beyond repair or exhibits irreparable electrical issues, consider replacing it with a compatible replacement button. Carefully install the new button, ensuring that it aligns correctly with the controller’s circuit board.
- Testing the Button: After cleaning, adjusting, or replacing the button, perform a series of tests to evaluate its responsiveness and functionality. Press the button multiple times to ensure consistent actuation and reliable performance.
- Addressing Surrounding Components: While repairing the button, take the opportunity to inspect and, if necessary, clean or adjust the surrounding components and contacts to preemptively address potential future issues.
By systematically executing these repair steps, you can effectively address the underlying problem affecting the button and take proactive measures to optimize its performance. Whether it involves meticulous cleaning, precise adjustments, or component replacement, these actions aim to restore the button to its optimal working condition, ensuring a seamless gaming experience.
Reassembling the Controller
After successfully repairing the button on the video game controller, the reassembly process is a critical phase that requires care and precision to ensure the controller functions properly. Reversing the steps taken to open the controller, the reassembly process involves carefully putting the components back together in the correct order. Here’s a guide to reassembling the controller:
- Reconnecting Internal Components: Begin by reattaching any cables or ribbon connectors that were detached during the disassembly process. Ensure that these connections are secure and aligned correctly to avoid potential issues with the controller’s functionality.
- Aligning and Securing Casing: Position the controller’s casing halves together, aligning them meticulously to ensure a proper fit. Once aligned, secure the casing by reinserting and tightening the screws using a small Phillips head screwdriver.
- Testing Button Functionality: Before fully securing the controller’s casing, perform a preliminary test of the repaired button’s functionality. Press the button and verify its responsiveness to confirm that the repair was successful.
- Final Inspection: Conduct a visual inspection of the reassembled controller to ensure that all components are properly aligned and that no cables or connectors are pinched or obstructed. This step helps prevent potential issues that may arise from improper reassembly.
By following these steps, you can successfully reassemble the video game controller, ensuring that the repaired button functions optimally and that all internal components are correctly positioned. This meticulous approach sets the stage for the final phase of the repair process: testing the controller to confirm its restored functionality.
Testing the Controller
With the video game controller successfully reassembled after the button repair, the final crucial step is to thoroughly test the controller to ensure that the repaired button functions as intended and that the overall functionality of the controller remains intact. Here’s a detailed guide to testing the controller:
- Functional Testing: Test each button, trigger, and directional pad on the controller to ensure that all components are responsive and function correctly. Verify the tactile feedback and responsiveness of each control to confirm that the repair did not inadvertently affect other areas of the controller.
- Gameplay Testing: Connect the controller to a gaming console or computer and engage in gameplay to assess its performance in a real gaming environment. Pay attention to the repaired button’s responsiveness during gameplay scenarios that require its use.
- Extended Testing Period: Use the controller over an extended period to evaluate its reliability and ensure that the repaired button continues to function without any issues. This extended testing period provides a comprehensive assessment of the controller’s overall functionality.
- Feedback and Adjustment: Solicit feedback from other users or fellow gamers who can provide additional perspectives on the controller’s performance. If any issues are identified during testing, make necessary adjustments to address them effectively.
By conducting thorough testing, you can verify that the repaired button operates seamlessly within the context of gaming sessions and that the controller’s overall functionality remains uncompromised. This comprehensive approach ensures that the repair process has successfully restored the controller to its optimal working condition, allowing you to enjoy uninterrupted gaming experiences.