Introduction
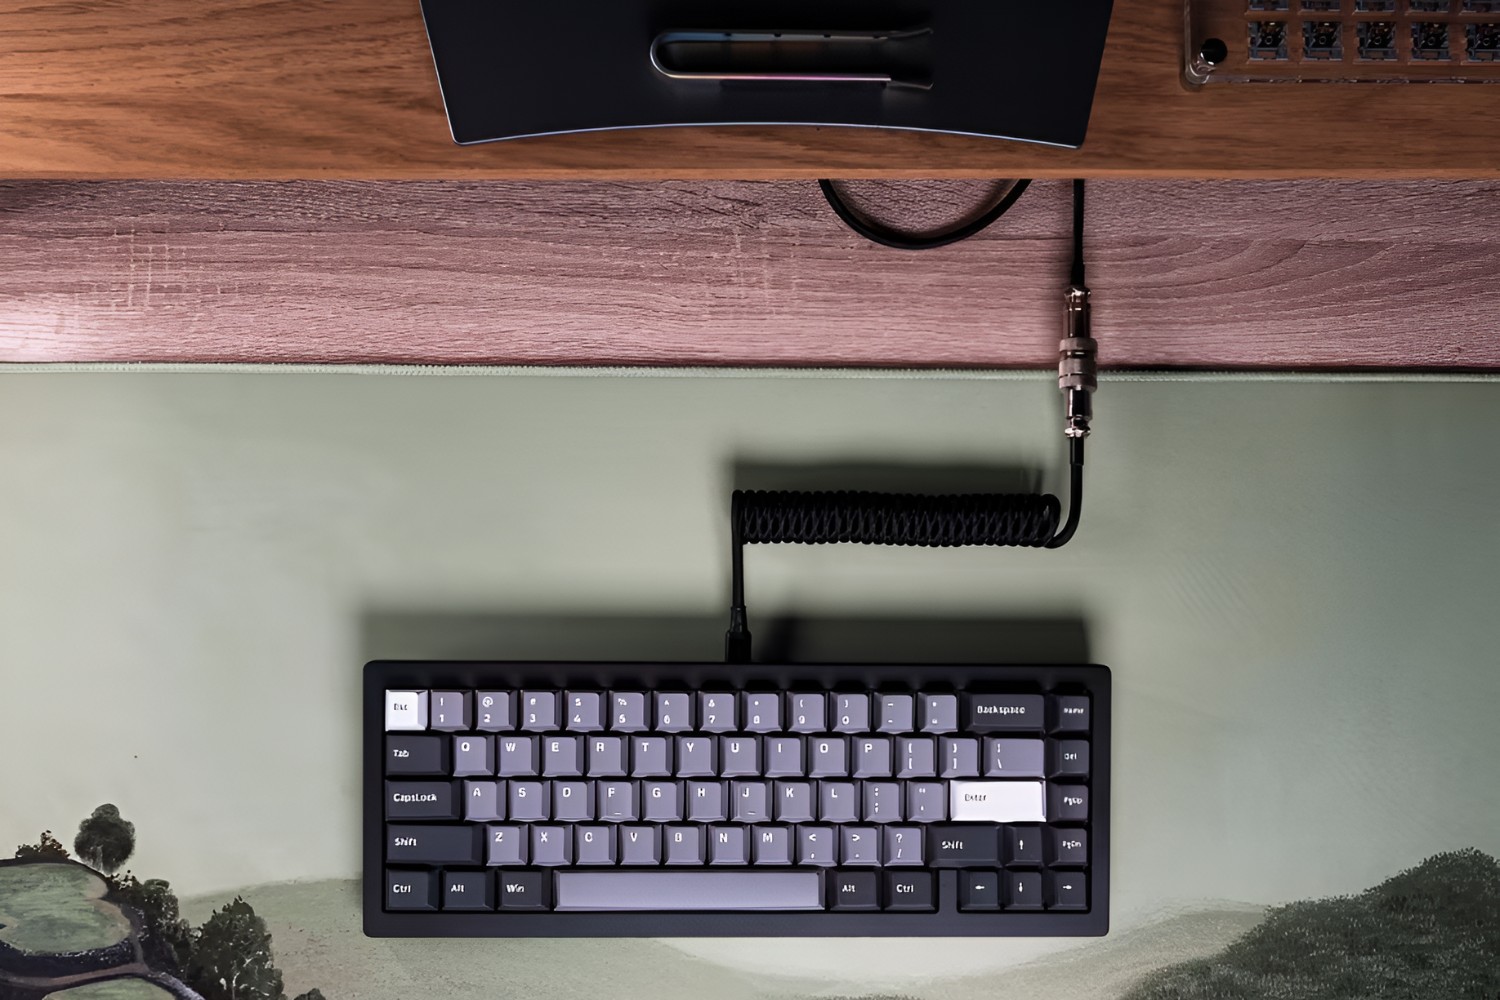
Coiling a cable on a mechanical keyboard is not only a practical way to manage the cable's length but also adds a touch of style to your setup. Whether you're a gaming enthusiast, a programmer, or a writer, having a neatly coiled cable can enhance the overall aesthetics of your workspace. It's a simple yet effective way to keep your desk organized and free from tangled wires, allowing for a more seamless and enjoyable typing experience.
A coiled cable not only looks visually appealing but also serves a functional purpose. By coiling the cable, you can prevent it from getting tangled or caught on objects, reducing the risk of damage and ensuring a longer lifespan for your keyboard. Additionally, a neatly coiled cable can make it easier to transport your keyboard, as it takes up less space and is less prone to tangling during transit.
In this guide, we will explore the importance of coiling a cable on a mechanical keyboard and provide a step-by-step tutorial on how to achieve the perfect coil. We'll also share some tips for maintaining a coiled cable to ensure it stays in top condition. Whether you're a beginner looking to add a personal touch to your keyboard setup or a seasoned enthusiast aiming for a professional-looking coil, this guide will equip you with the knowledge and skills to master the art of cable coiling. So, let's dive in and discover the art of coiling a cable on a mechanical keyboard!
Why Coiling a Cable is Important
Coiling a cable on a mechanical keyboard serves both practical and aesthetic purposes. Here are several reasons why coiling a cable is important:
- Organization: A coiled cable helps to keep your workspace tidy and free from clutter. By neatly arranging the cable, you can minimize the risk of tripping over loose wires or having them get tangled with other items on your desk.
- Prevention of Damage: Coiling the cable can prevent it from being pinched, stretched, or caught on objects, reducing the likelihood of wear and tear. This can ultimately prolong the lifespan of the cable and maintain its functionality over time.
- Enhanced Portability: A neatly coiled cable makes it easier to transport your keyboard. Whether you’re heading to a LAN party, a coffee shop, or simply relocating within your home, a coiled cable takes up less space and is less prone to tangling during transit.
- Visual Appeal: Beyond its practical benefits, a well-coiled cable adds a touch of style to your keyboard setup. It can complement the overall aesthetics of your workspace, creating a more polished and professional look.
- Personalization: Coiling a cable allows you to personalize your keyboard setup. You can choose from various coiling styles and colors to match your preferences and create a unique visual statement.
By understanding the importance of coiling a cable, you can appreciate the multifaceted benefits it offers. From maintaining a tidy workspace to expressing your personal style, coiling a cable on a mechanical keyboard is an essential practice that enhances both form and function.
Step-by-Step Guide to Coiling a Cable on a Mechanical Keyboard
Coiling a cable on a mechanical keyboard may seem daunting at first, but with the right technique and a bit of patience, you can achieve a professional-looking coil. Follow these step-by-step instructions to master the art of cable coiling:
- Prepare the Cable: Start by straightening the cable to remove any kinks or twists. Lay it out on a flat surface, ensuring that it is free from tangles and bends.
- Identify the Starting Point: Choose a suitable starting point for the coil, such as the connection point to the keyboard. Hold the cable firmly at this point to maintain control throughout the coiling process.
- Create the First Loop: Begin coiling the cable by forming a small loop, ensuring that it is neat and tight. Hold the loop in place with your fingers to prevent it from unraveling.
- Continue Coiling: Gradually wrap the cable around the initial loop, maintaining a consistent and even coil. Keep the coils close together to achieve a uniform appearance.
- Adjust Tension: As you continue coiling, pay attention to the tension of the cable. Ensure that it is neither too loose nor too tight, as this can affect the overall look and functionality of the coil.
- Secure the End: Once you have coiled the desired length of the cable, secure the end by gently holding it in place. You can use cable ties or Velcro straps to keep the coil intact and prevent it from unraveling.
- Test the Coil: After coiling the cable, test the keyboard to ensure that the coil does not interfere with its functionality. Check for any restrictions in movement or connectivity issues.
By following these steps, you can achieve a neatly coiled cable that enhances the overall aesthetics of your mechanical keyboard while maintaining its functionality. Practice and patience are key to mastering the art of cable coiling, so don’t be discouraged if your first attempt isn’t perfect. With time and experience, you’ll be able to create professional-looking coils with ease.
Tips for Maintaining a Coiled Cable
Once you’ve successfully coiled the cable on your mechanical keyboard, it’s essential to maintain its condition to ensure longevity and optimal performance. Here are some valuable tips for preserving and caring for your coiled cable:
- Regular Inspection: Periodically inspect the coil for any signs of wear, fraying, or damage. Address any issues promptly to prevent them from worsening and affecting the cable’s functionality.
- Gentle Handling: Handle the coiled cable with care, avoiding excessive tugging or bending that could strain the coil or its connectors. When transporting the keyboard, secure the coiled cable to prevent it from being snagged or caught on objects.
- Cleanliness: Keep the coiled cable clean and free from dust and debris. Use a soft, dry cloth to gently wipe the cable, avoiding harsh chemicals or abrasive materials that could damage its surface.
- Proper Storage: When not in use, store the keyboard with the coiled cable in a safe and secure location. Avoid placing heavy objects on the cable, as this could distort the coil and lead to deformation.
- Avoid Extreme Temperatures: Protect the coiled cable from exposure to extreme temperatures, as prolonged heat or cold can affect its material and structural integrity. Store the keyboard in a moderate environment to maintain the cable’s condition.
- Use Cable Management Tools: Consider using cable management tools, such as clips or cable organizers, to keep the coiled cable neatly arranged and prevent it from becoming tangled with other wires or peripherals on your desk.
- Retain Flexibility: While the coil adds structure to the cable, it’s important to retain its flexibility. Avoid over-tightening the coil, as this could lead to strain on the cable and impact its ability to move freely without restrictions.
By implementing these maintenance tips, you can ensure that your coiled cable remains in top condition, preserving its visual appeal and functionality over time. Caring for the cable is an integral part of maintaining your mechanical keyboard setup, and with proper attention, you can enjoy the benefits of a well-coiled cable for an extended period.
Conclusion
Coiling a cable on a mechanical keyboard is more than just a practical solution for managing cable length; it’s a creative endeavor that adds a personalized touch to your setup. By understanding the importance of cable coiling and mastering the technique, you can elevate the aesthetics of your workspace while ensuring the longevity of your keyboard’s cable.
Through this guide, you’ve gained insight into the significance of cable coiling, the step-by-step process of achieving the perfect coil, and valuable tips for maintaining a coiled cable. Whether you’re a novice enthusiast or a seasoned keyboard aficionado, the art of cable coiling offers a rewarding opportunity to express your individuality and enhance the functionality of your mechanical keyboard.
As you embark on your cable coiling journey, remember that practice and patience are key. Experiment with different coiling styles, colors, and techniques to find the perfect fit for your keyboard setup. With each coil, you’ll refine your skills and develop a deeper appreciation for the artistry of cable management.
Ultimately, coiling a cable on a mechanical keyboard is a reflection of your attention to detail and commitment to creating a workspace that is both visually appealing and organized. Embrace the process, enjoy the creative freedom it offers, and take pride in the professional-looking coil you’ve crafted for your keyboard.
So, go ahead, unleash your creativity, and embark on the journey of coiling a cable on your mechanical keyboard. With the knowledge and skills you’ve acquired, you’re well-equipped to transform your keyboard setup into a personalized, organized, and visually stunning work of art.


