Introduction
Splitwise is a popular expense-sharing app that simplifies the process of splitting bills and expenses among friends, roommates, or travel companions. It allows users to keep track of shared expenses, settle debts, and maintain financial transparency. While Splitwise makes it easy to settle up and close debts, there may be times when you need to undo a settle up transaction due to various reasons, such as incorrect calculations, overlooked expenses, or changes in circumstances.
Fortunately, Splitwise provides a straightforward method to undo a settle up and reopen a previously settled debt. By following a few simple steps, you can easily reverse the transaction and make necessary adjustments. Whether you accidentally settled up too early or realized that you missed including an expense, the process of undoing a settle up allows you to rectify any errors and ensure that everyone’s debts are accurately recorded and settled.
In this article, we will guide you through the step-by-step process to undo a Splitwise settle up. We’ll show you how to access the settled debts, select the one you want to reopen, and confirm the undo action. Additionally, we’ll provide tips on reviewing the reopened debt, recalculating and adjusting the debt as needed, and informing the other users involved. By the end of this article, you will have a clear understanding of how to effectively undo a Splitwise settle up and maintain accurate financial records.
Step 1: Log in to your Splitwise account
To begin the process of undoing a settled debt in Splitwise, the first step is to log in to your Splitwise account. Open your preferred web browser and navigate to the Splitwise website (www.splitwise.com).
If you don’t already have an account, you can quickly create one by clicking on the “Sign Up” button and following the prompts. Once you have successfully logged in to your account, you can proceed to the next step.
It is worth mentioning that Splitwise also offers a user-friendly mobile app for both iOS and Android devices. If you prefer to use the app, you can download it from the App Store or Google Play Store and log in to your account using the same credentials.
By signing in to your Splitwise account, you gain access to all the features and functionalities offered by the platform, allowing you to manage your expenses, track balances, and settle debts with ease. Once you are logged in, you can move on to the next step and proceed with undoing a settled debt in Splitwise.
Step 2: Go to the “Your account” page
After logging in to your Splitwise account, the next step to undo a settled debt is to navigate to the “Your account” page. This page contains all the important account-related information and settings that you can access to manage your Splitwise account effectively.
To navigate to the “Your account” page, look for the account or profile icon usually located in the top-right corner of the Splitwise interface. It may be represented by a silhouette or an image that you have chosen for your profile. Click on this icon to open a drop-down menu of options.
Within the drop-down menu, you will typically find a “Your account” or “My account” option. Click on this option to be redirected to the dedicated account page where you can view and manage various aspects of your Splitwise account, including settings, notifications, and personal information.
It’s important to note that the location and terminology of the account page may vary slightly depending on the version of Splitwise you are using, whether it’s the desktop website or the mobile app. However, the general process remains the same. Look for the account or profile icon and select the appropriate option to access the “Your account” page.
Once you have successfully navigated to the “Your account” page, you are one step closer to undoing a settled debt in Splitwise. In the next step, we will guide you through the process of accessing the “View all settled debts” section to proceed with the undo action.
Step 3: Click on “View all settled debts”
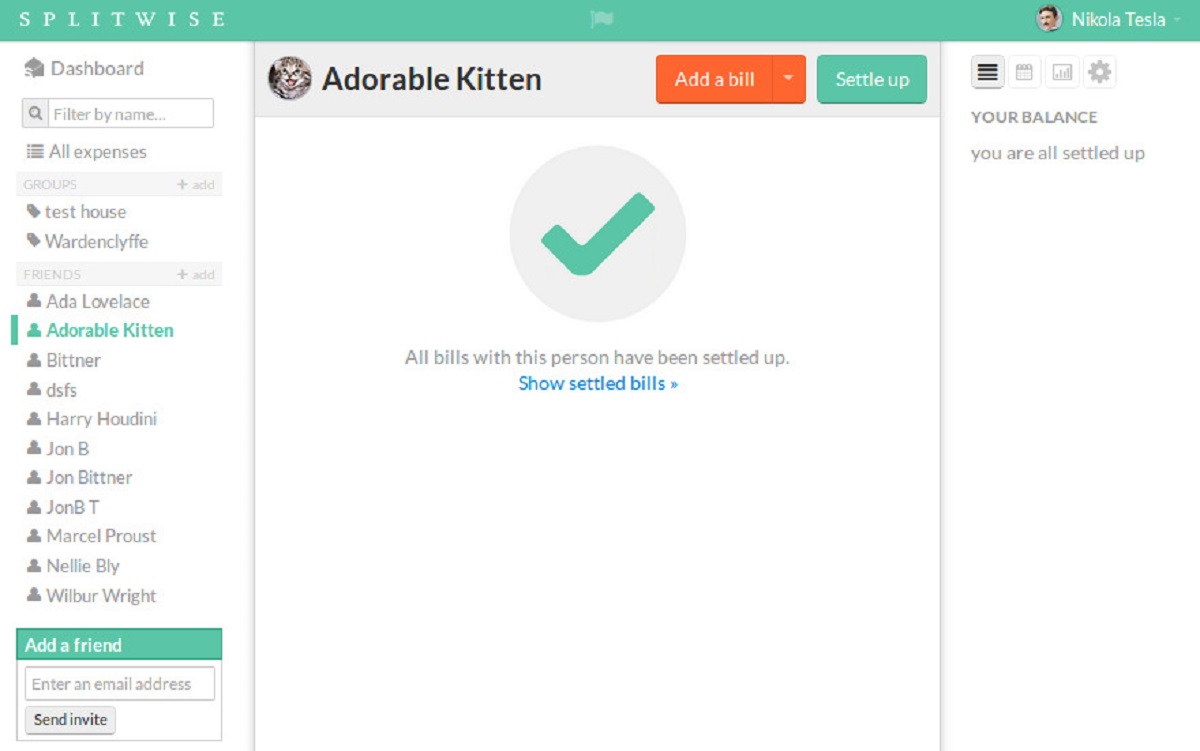
Once you are on the “Your account” page in Splitwise, the next step to undo a settled debt is to click on the “View all settled debts” option. This option allows you to access the list of debts that have been previously settled, giving you the ability to choose the specific debt that you want to reopen and undo the settle up.
On the “Your account” page, look for a section or tab that is dedicated to settled debts. It might be labeled as “Settled debts” or “Settle up history”. This section is where you can find a comprehensive list of all the debts that have been settled in the past.
Click on the “View all settled debts” option within the settled debts section to proceed. This action will open a new page or window displaying the complete list of settled debts. Depending on the number of settled debts you have, the list may be organized chronologically or in another order for easier navigation.
Once you have successfully accessed the list of settled debts, you can move on to the next step and select the specific debt that you want to undo. Remember to prioritize accuracy and review the debts carefully to ensure you choose the correct one for reopening.
By clicking on the “View all settled debts” option, you gain an overview of the previous transactions and find the settled debt you need to undo. In the following step, we will guide you through the process of selecting and undoing a settled debt in Splitwise.
Step 4: Select the settled debt you want to undo
Now that you have accessed the list of settled debts in Splitwise, it’s time to select the specific debt that you want to undo. This step is crucial as it allows you to pinpoint the exact transaction that needs to be reopened and adjusted.
Take a moment to review the list of settled debts on the designated page or window. Look for the debt that corresponds to the transaction you wish to undo. You can navigate through the list using scrolling or search functions, depending on the interface provided by Splitwise.
Once you have located the settled debt you want to undo, click on it to enter the details and options related to that specific transaction. This action will open a new page or expand the details of the debt, providing you with a comprehensive overview of the expense, the users involved, and the settle up status.
Within the page or expanded view of the settled debt, you may find additional information such as the date of the settle up, the total amount settled, and a breakdown of the individual amounts shared. Carefully examine these details to ensure that you have chosen the correct debt for undoing.
If you are unable to locate the specific settled debt you wish to undo, double-check the settled debts list to ensure that you have not overlooked any entries. It’s important to be thorough in your search to avoid undoing the wrong debt or making unnecessary adjustments.
By selecting the settled debt you want to undo, you are one step closer to rectifying any errors or omissions. In the following step, we will guide you through the process of clicking on the “Undo settle up” option to initiate the undo action and reopen the debt in Splitwise.
Step 5: Click on “Undo settle up”
After selecting the settled debt you want to undo in Splitwise, the next step is to click on the “Undo settle up” option. This action will initiate the process of reversing the settle up transaction and reopening the debt for further adjustments.
Within the page or expanded view of the settled debt, you should be able to locate the “Undo settle up” button or a similar option. It may be positioned at the top or bottom of the page, or displayed prominently as a clickable element.
Clicking on the “Undo settle up” button will activate the undo action, signaling to Splitwise that you want to reverse the settle up transaction for the selected debt. It is important to note that once the undo action is initiated, the debt will be reopened and the balances will be recalculated based on the changes made.
Before proceeding with clicking on the “Undo settle up” option, ensure that you have selected the correct settled debt and reviewed the information carefully. Confirm that you want to undo the settle up for this particular debt and check that it aligns with your intentions.
Once you have clicked on the “Undo settle up” button, Splitwise will process the request and revert the settle up transaction. This will allow you to make any necessary adjustments, update the debt, and maintain accurate records of the expenses shared among the users involved.
By clicking on the “Undo settle up” option, you have successfully initiated the undo process and reopened the selected debt. In the following step, we will guide you through confirming the undo settle up action and ensuring that the necessary changes have been made in Splitwise.
Step 6: Confirm the undo settle up action
After clicking on the “Undo settle up” option in Splitwise, the next step is to confirm the undo action and ensure that the necessary changes have been made. This step gives you the opportunity to review and validate the reopening of the debt, ensuring accuracy in the adjustment process.
Upon initiating the undo settle up action, Splitwise will typically prompt you to confirm the action before proceeding. This confirmation step acts as a safeguard to prevent accidental reversals and ensures that you are intentionally undoing the settle up for the selected debt.
Review the details and information presented on the confirmation screen. Confirm that the debt being reopened aligns with your intention and that all the necessary adjustments will be made accordingly. Take the time to double-check the amounts, users involved, and any other relevant details to ensure accuracy.
If, upon review, you notice any discrepancies or changes that need to be made, consider revisiting the previous steps or consult the other users involved to ensure the accuracy of the debt reopening. It’s essential to maintain clear communication and collaboration to ensure everyone’s understanding and agreement.
Once you are confident that the undo settle up action is accurate and aligns with your intentions, proceed with confirming the action as prompted by Splitwise. This confirms the reversal of the settle up transaction and reopens the debt for further adjustments.
By confirming the undo settle up action, you have successfully validated the reopening of the debt. In the next step, we will guide you through the process of reviewing the reopened debt and making any necessary recalculations and adjustments.
Step 7: Review the reopened debt
Once you have confirmed the undo settle up action in Splitwise, the next step is to carefully review the reopened debt. This step is crucial to ensure that all the pertinent information is accurate, the balances are properly adjusted, and any necessary changes are made to reflect the reopened debt.
Take the time to thoroughly examine the details of the reopened debt. Check the amounts, the users involved, and any additional notes or descriptions related to the expense. Confirm that the debt reflects the correct transactions and accurately accounts for any adjustments or corrections made during the undo process.
If you notice any discrepancies or errors in the reopened debt, consider reaching out to the other users involved to discuss and resolve the issues. Open communication and collaboration are key to ensuring that everyone’s contributions and expenses are appropriately captured and recorded.
Additionally, take the opportunity to review the overall debt balances and individual balances within the group. Confirm that the adjustments made during the reopening of the debt are reflected accurately in the updated balance calculations. This helps maintain financial transparency and ensures that everyone’s obligations are properly accounted for.
If further adjustments are needed, such as splitting expenses differently or adding new expenses that were previously overlooked, proceed to the next step to recalculate and make the necessary adjustments to the reopened debt in Splitwise.
By carefully reviewing the reopened debt, you are able to ensure its accuracy and make any necessary corrections or amendments. In the following step, we will guide you through recalculating and adjusting the debt as needed to reflect the changes made during the undo process.
Step 8: Recalculate and adjust the debt as needed
After reviewing the reopened debt in Splitwise, the next step is to recalculate and make any necessary adjustments to ensure the accuracy of the debt. This step allows you to reflect any changes or corrections made during the undo process and ensure that the debt balances are updated accordingly.
Start by reassessing the expenses and contributions associated with the debt. If there are any new expenses that need to be added or existing expenses that require modification, make the necessary adjustments. Splitwise provides various options to update the debt, such as editing the amounts, adding new expenses, or modifying the percentages or shares among the users involved.
It is important to accurately capture all the relevant information to ensure that the debt balances reflect the current state of the expenses. Take the time to input the correct amounts, identify the correct users involved, and update any additional details that may affect the debt calculation.
Consider reaching out to the other users involved in the debt to discuss and confirm the changes made. Open communication and collaboration are crucial in ensuring that everyone is on the same page and that all parties agree on the adjusted debt amounts and calculations.
Once the necessary adjustments have been made, recalculate the debt using the available functions or tools in Splitwise. These functions help to automatically update the balances and distribute the expenses among the users based on the adjustments made.
Finally, take the time to review the recalculated debt to confirm that the balances and amounts align with the expectations and agreements of all parties involved. Double-check that the adjustments have been accurately reflected and that the debt now represents the updated state of the expenses.
By recalculating and adjusting the debt as needed, you ensure the accuracy and fairness in the distribution of expenses. In the next step, we will guide you through the process of notifying the other users involved about the adjustments made to the reopened debt.
Step 9: Notify the other users involved
After recalculating and adjusting the debt in Splitwise, the final step is to notify the other users involved about the changes made to the reopened debt. This step ensures transparency and allows everyone to stay informed about the updated state of the expenses and their corresponding balances.
Start by identifying all the users who are part of the debt and need to be notified. This may include friends, roommates, colleagues, or travel companions with whom you share expenses. Consider the best method of communication, whether it’s through Splitwise’s messaging feature, email, or other preferred means of contact.
Compose a clear and concise message, explaining the changes that have been made to the debt. Include details on the adjustments, such as the modified amounts, updated expenses, or any other pertinent information that may impact the debt calculation. Provide a brief overview of the reasons for the changes to ensure understanding.
Encourage open communication and address any concerns or questions that may arise from the adjustments made. It is important to maintain a positive and collaborative tone throughout the notification process, fostering understanding and cooperation among all parties involved.
If there are any outstanding payments or actions required from the other users, clearly communicate these requirements in the notification. Make sure that everyone is aware of their responsibilities and obligations to avoid any misunderstandings or confusion moving forward.
Finally, be responsive and open to further discussions or clarifications that may arise from the notification. It is essential to engage in ongoing communication to ensure that everyone is on the same page and in agreement with the updated state of the debt.
By notifying the other users involved about the adjustments made to the reopened debt, you promote transparency and maintain clear communication channels. This final step ensures that all parties are aware of the changes and can move forward with an accurate understanding of their financial obligations within the group.
Conclusion
Undoing a settled debt in Splitwise can be a straightforward process if you follow the necessary steps. By logging in to your Splitwise account, accessing the “Your account” page, and clicking on “View all settled debts,” you can select the specific debt you want to undo. Then, by clicking on “Undo settle up” and confirming the action, you initiate the process of reopening the debt.
Once the debt is reopened, it’s crucial to review the details carefully and make any necessary adjustments. Recalculating and adjusting the debt will ensure accuracy and fairness among all parties. Finally, notify the other users involved about the changes made to keep everyone informed and facilitate open communication.
Undoing a settled debt in Splitwise allows you to rectify errors, update expenses, and maintain accurate financial records. It ensures that everyone’s contributions and obligations are properly recorded and accounted for. By following the step-by-step process outlined in this article, you can navigate the Undo Settle Up feature with ease and confidence.
Remember, clear communication and collaboration are essential when undoing settled debts. By keeping everyone informed and addressing any questions or concerns, you can maintain a harmonious financial relationship within your group.
Whether you need to undo a settle up due to incorrect calculations, missed expenses, or changes in circumstances, Splitwise provides a user-friendly platform to help you rectify and adjust your shared expenses. By utilizing the Undo Settle Up feature effectively, you can ensure accurate records and financial transparency among all users involved.


