Introduction
With the development of technology, Near Field Communication (NFC) has become a common feature in many smartphones, including Android devices. NFC allows for seamless interaction between devices by simply bringing them close together. It enables convenient features like contactless payments, sharing files, and connecting to Bluetooth devices with just a tap.
While NFC offers a variety of useful functionalities, there may be times when you want to turn it off on your Android device. Whether it’s to save battery life, enhance privacy, or avoid accidental interactions, being able to disable NFC can be beneficial.
In this article, we will explore different methods to turn off NFC on Android devices. We will cover built-in options like Quick Settings and the Settings menu, as well as third-party alternatives like NFC toggle widgets and automation apps.
By the end of this article, you will have a clear understanding of how to disable NFC on your Android device, allowing you to have more control over its functionality and conserving battery life when needed.
What is NFC?
Near Field Communication (NFC) is a technology that allows two devices to communicate with each other when they are in close proximity. It involves the use of electromagnetic radio fields to enable wireless communication between devices.
NFC is similar to other wireless communication technologies like Bluetooth and Wi-Fi, but with a shorter and more limited range. Typically, NFC operates within a range of a few centimeters, which means the devices need to be very close to each other to establish a connection. This close range makes NFC a secure method of communication, as it is less susceptible to unauthorized access or interference.
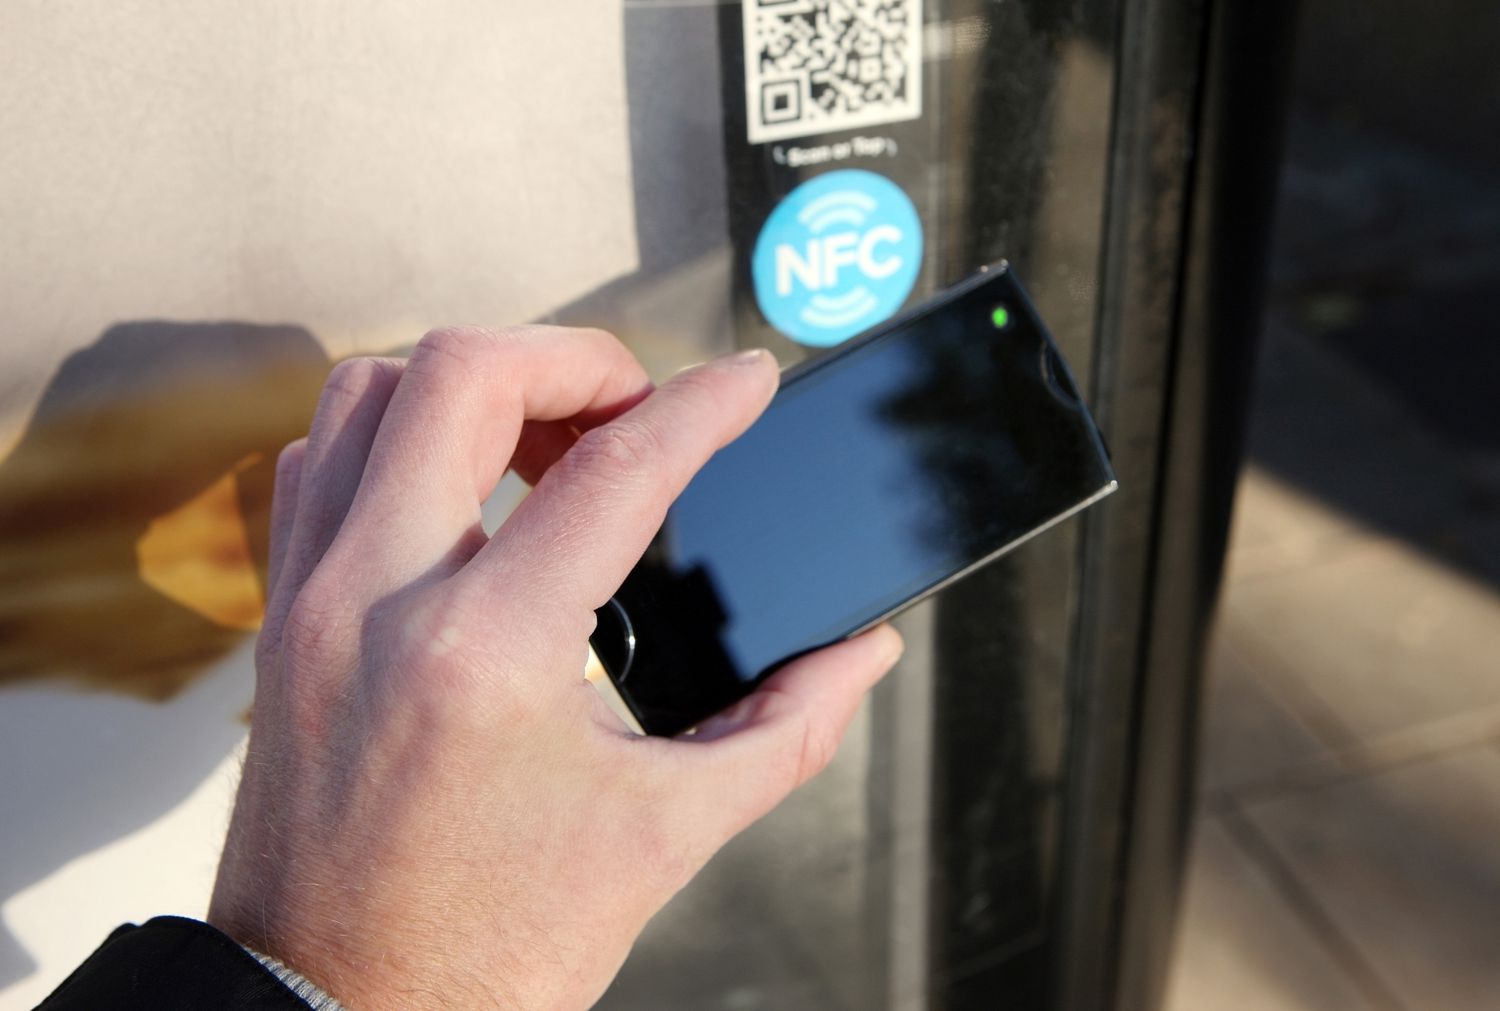
One of the primary applications of NFC is contactless payments. Many smartphones today are equipped with NFC technology, enabling users to make tap-and-go payments via mobile payment systems such as Google Pay, Samsung Pay, or Apple Pay. By simply tapping their phone on a compatible payment terminal, users can securely complete transactions without the need for physical cards or cash.
Besides mobile payments, NFC can also be used for various other purposes. It allows for easy pairing of Bluetooth devices by bringing them close together, simplifies the process of sharing files, contacts, or URLs between devices, and even enables access control systems for secure entry into buildings or events.
Overall, NFC offers a convenient and efficient way to connect and interact with other devices. However, there may be situations where you prefer to turn off NFC on your Android device, either to conserve battery life, enhance privacy, or prevent any unintended interactions.
Why would you want to turn off NFC?
While NFC technology provides numerous benefits and conveniences, there are several reasons why you might want to turn off NFC on your Android device:
- Battery life: NFC consumes battery power, even when not actively in use. If you are trying to maximize your device’s battery life, disabling NFC can help conserve energy.
- Privacy concerns: Some individuals may have concerns regarding the security and privacy risks associated with NFC. By turning off NFC, you can mitigate the risk of unauthorized access to your device or data.
- Avoiding interference: In certain situations, NFC may interfere with other wireless technologies or signals. For example, NFC and Bluetooth can sometimes conflict with each other. Disabling NFC can prevent potential connectivity issues or interference with other devices.
- Avoiding accidental interactions: If you often find yourself inadvertently triggering NFC actions, such as making unintentional payments or sharing files, disabling NFC can prevent these accidental interactions.
- Security concerns: While NFC is generally secure, there have been rare instances of vulnerabilities found in NFC-enabled devices. If you have concerns about the security of your device or want to minimize potential risks, you may choose to disable NFC.
It’s important to note that the decision to turn off NFC is a personal preference and depends on your specific needs and concerns. If you don’t frequently use NFC features and want to optimize your device’s battery life or ensure privacy, disabling NFC may be the right choice for you.
How to turn off NFC on Android devices
There are several methods to turn off NFC on Android devices. Here are a few options:
Option 1: Quick Settings
One of the easiest ways to disable NFC on your Android device is through the Quick Settings panel. To access Quick Settings, swipe down from the top of your screen to open the notification shade, and then swipe down again to reveal the full Quick Settings panel. Look for the NFC icon, which is usually represented by an “N” symbol, and tap on it to toggle NFC off. The icon should change to indicate that NFC is now disabled.
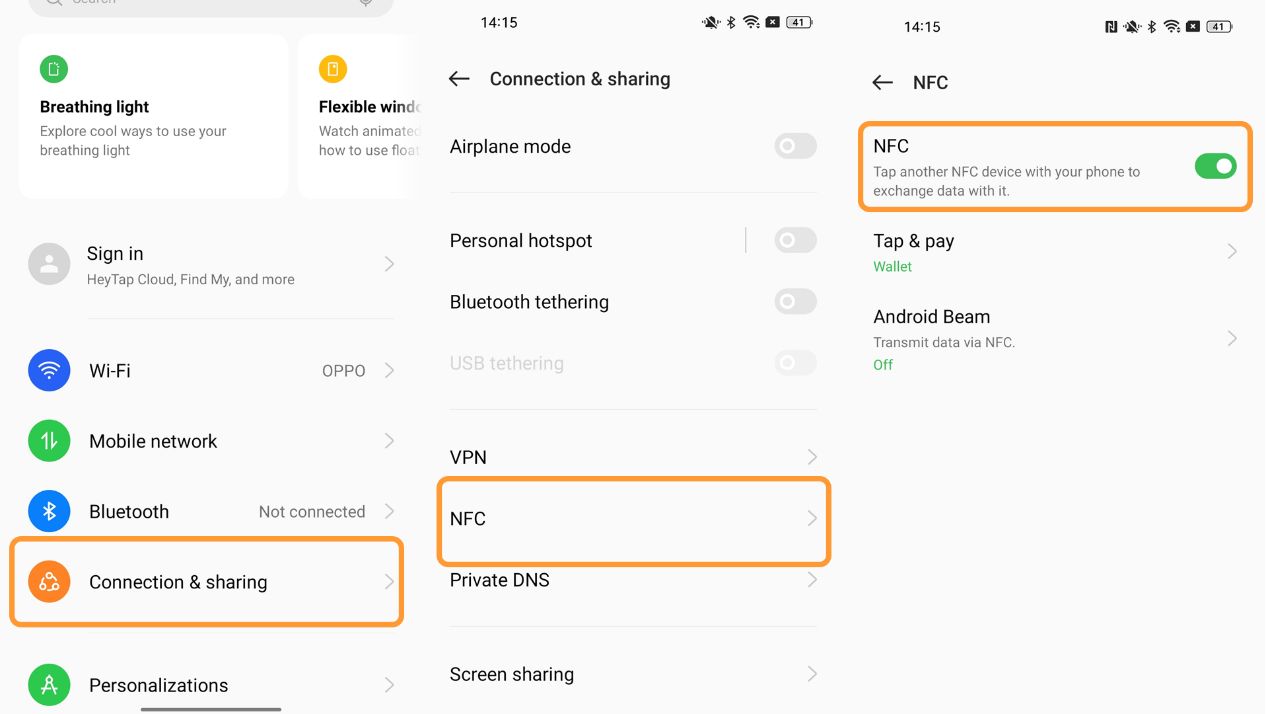
Option 2: Settings Menu
Another method to turn off NFC is through the Settings menu on your Android device. Navigate to the Settings app, then look for the “Connected devices” or “Wireless & networks” section, depending on your device’s manufacturer and Android version. Inside this section, you should find an option labeled “NFC” or “Tap and pay.” Tap on it, and you will be presented with a switch to enable or disable NFC. Simply toggle the switch to the off position to disable NFC.
Option 3: NFC Toggle Widget
If you prefer more convenient access to NFC toggling, you can add an NFC toggle widget to your home screen. To do this, long-press on an empty space on your home screen, select “Widgets” or “Shortcut,” depending on your device, and scroll through the available options until you find the “NFC” widget. Drag and drop it onto your home screen, and you will now have a widget that allows you to easily turn NFC on or off with a single tap.
Option 4: Using Tasker or Automation Apps
If you’re comfortable with more advanced methods, you can use automation apps like Tasker to create custom actions based on triggers or conditions. With Tasker, for example, you could create a task that automatically disables NFC when you connect to a specific Wi-Fi network or at specific times of the day.
Other automation apps like Automate or MacroDroid can also accomplish similar tasks. These apps allow you to automate various actions on your Android device, including toggling NFC on or off based on specific events or conditions.
By utilizing any of these methods, you can easily disable NFC on your Android device whenever you need to.
Option 1: Quick Settings
The Quick Settings panel provides a simple and efficient way to toggle NFC on or off on your Android device. Here’s how to use the Quick Settings method to disable NFC:
- Start by swiping down from the top of your screen to open the notification shade.
- Once the notification shade is open, swipe down again to reveal the full Quick Settings panel.
- Look for the NFC icon, which is typically represented by a stylized “N” symbol or “NFC” text. The position of the NFC icon may vary depending on your device and Android version, but it is usually located among the other quick toggle options.
- Tap on the NFC icon to toggle NFC off. The icon should change to indicate that NFC is now disabled.
Once you have completed these steps, NFC will be turned off on your Android device. To enable NFC using the Quick Settings panel, simply repeat the steps mentioned above and tap on the NFC icon again to toggle it on.
The Quick Settings method is a quick and convenient way to disable or enable NFC without the need to navigate through the Settings menu. It provides instant access to NFC toggling, making it suitable for situations where you need to disable or enable NFC on the go.
It’s worth noting that the appearance and functionality of the Quick Settings panel may vary slightly depending on your device’s manufacturer and Android version. However, the general process of accessing and using the Quick Settings panel to disable or enable NFC remains the same.
Option 2: Settings Menu
If you prefer a more comprehensive method to disable NFC on your Android device, you can use the Settings menu. Here’s how to disable NFC through the Settings menu:
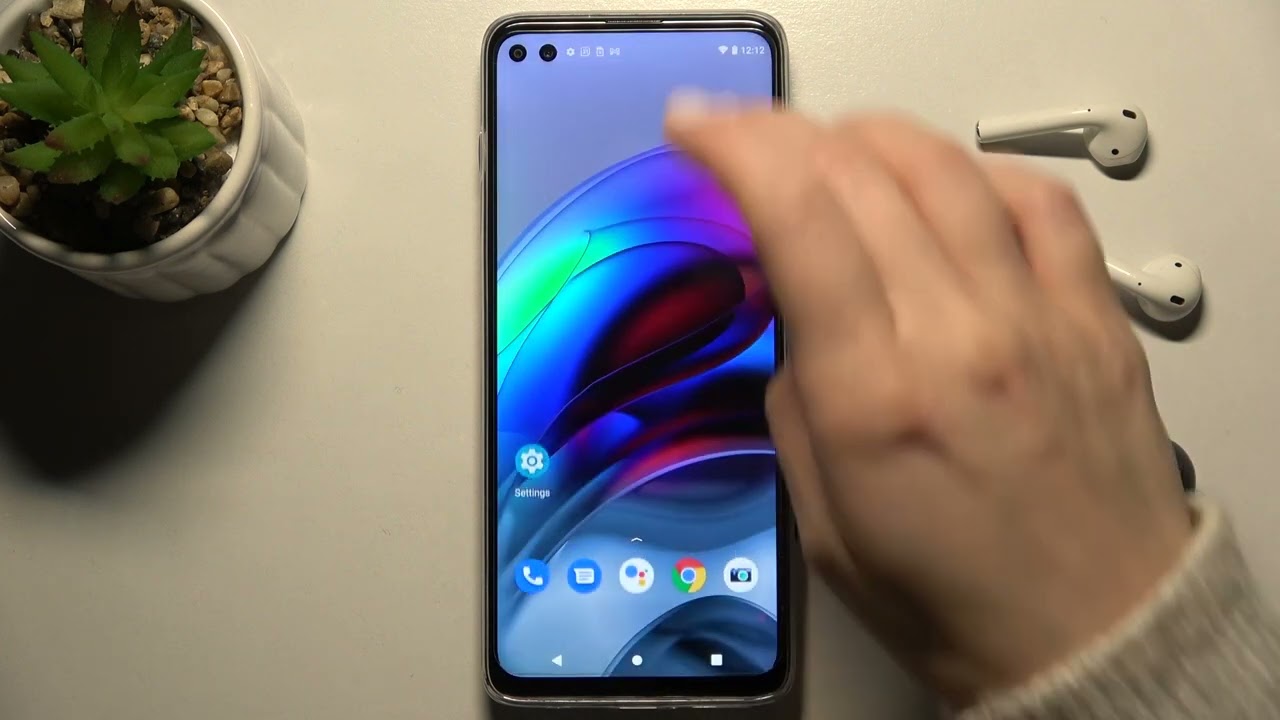
- Start by opening the Settings app on your Android device. You can usually find the Settings app represented by a gear icon in your app drawer or by swiping down from the top of your screen and tapping on the gear icon in the top-right corner of the notification shade.
- Once you are in the Settings app, scroll down or search for the section named “Connected devices” or “Wireless & networks.” The location and labeling of this section may vary depending on your device’s manufacturer and Android version.
- Tap on “Connected devices” or “Wireless & networks” to access the relevant settings.
- Within this section, you should see an option labeled “NFC” or “Tap and pay.” Tap on it to access the NFC settings.
- On the NFC settings screen, you should see a switch that allows you to enable or disable NFC. Simply toggle the switch to the off position to disable NFC on your device.
Once you have disabled NFC using the Settings menu, the NFC functionality will be turned off on your Android device. To re-enable NFC, follow the same steps mentioned above and toggle the NFC switch to the on position.
The Settings menu method provides a more detailed approach to managing your Android device’s settings, allowing you to access various connectivity options, including NFC. It is particularly useful if you want to explore additional NFC settings or customize your device’s NFC behavior.
Keep in mind that the exact location and terminology of the NFC settings may differ slightly depending on your device. However, the general process of navigating through the Settings menu to disable or enable NFC remains consistent across most Android devices.
Option 3: NFC Toggle Widget
If you would like to have quick and convenient access to toggle NFC on or off on your Android device, you can utilize an NFC toggle widget. Here’s how to set up and use an NFC toggle widget:
- Start by long-pressing on an empty space on your Android device’s home screen. This action will typically bring up options to customize your home screen or add widgets, depending on your device and launcher.
- In the available options, look for “Widgets” or “Shortcut.” Tap on it to proceed.
- In the widgets or shortcut menu, scroll through the available options until you find the “NFC” widget.
- Once you have located the “NFC” widget, press and hold it, then drag and drop it onto your home screen.
Now, you will have an NFC toggle widget added to your home screen. Whenever you want to enable or disable NFC, simply tap on the widget. This action will toggle the NFC functionality accordingly, effectively turning it on or off with just a single tap.
The NFC toggle widget provides a convenient and easily accessible method to control the NFC functionality on your Android device. Placing the widget on your home screen allows you to enable or disable NFC without needing to navigate through menus or quick settings.
It’s worth noting that the appearance and functionality of widgets can vary depending on your device’s manufacturer and Android version. However, the overall process of adding an NFC toggle widget and using it to control NFC remains consistent across most Android devices.
By utilizing an NFC toggle widget, you can quickly manage NFC functionality on your Android device, ensuring that it is readily available when you need it and disabled when you don’t.
Option 4: Using Tasker or Automation Apps
If you prefer more advanced customization and automation options, you can use task automation apps like Tasker, Automate, or MacroDroid to disable NFC on your Android device based on specific triggers or conditions. Here’s how you can use these apps to automate NFC toggling:
- Start by downloading and installing a task automation app of your choice from the Google Play Store. Some popular options include Tasker, Automate, and MacroDroid.
- Once you have installed the app, open it and follow the initial setup instructions, if any. These instructions may vary depending on the app you have chosen.
- Once you are in the app’s interface, you will need to create a new task or automation flow that will disable NFC. The specific steps to create a task or automation flow may differ between apps, but typically involve selecting the trigger or condition that will activate the task.
- For example, with Tasker, you can create a task that triggers when you connect to a specific Wi-Fi network or at certain times of the day. In the task, you would include an action to disable NFC.
- Alternatively, you can use Automate or MacroDroid to create a flow or macro that enables or disables NFC based on various conditions or events.
- After setting up the task, flow, or macro, save and activate it within the automation app.
Now, whenever the specified trigger or condition is met, the task or automation flow will be executed, and NFC will be disabled based on your configuration.
Using task automation apps provides advanced flexibility and customization options for managing NFC on your Android device. You can create intricate automation scenarios that automatically disable NFC based on specific events, locations, or time-based triggers.
These automation apps allow you to take control of various aspects of your device’s functionality, including NFC, and customize them to suit your preferences and needs. By automating NFC toggling, you can ensure that it is disabled or enabled at the appropriate times without manually intervening.
Keep in mind that the process of setting up tasks or automation flows may require some familiarity with the specific automation app’s interface and features. However, once you have configured the automation, it will run in the background, taking care of NFC toggling according to your predefined conditions or triggers.
Conclusion
Turning off NFC on your Android device can be beneficial in conserving battery life, enhancing privacy, avoiding interference, preventing accidental interactions, and addressing security concerns. Fortunately, there are multiple methods to disable NFC, each offering its own advantages and ease of use.
The Quick Settings method provides a convenient way to toggle NFC on or off directly from the notification shade. It requires minimal effort and allows for quick access to NFC settings. On the other hand, using the Settings menu offers more comprehensive control over NFC settings, including additional customization options.
If you prefer even quicker access, the NFC toggle widget can be added to your home screen for easy one-tap disabling or enabling of NFC. This widget eliminates the need to navigate through menus, providing instant control at your fingertips.
For advanced users, task automation apps like Tasker, Automate, or MacroDroid allow for more advanced control and customization of NFC toggling. You can create personalized automation flows that disable or enable NFC based on specific triggers or conditions, offering a high level of flexibility and automation.
In conclusion, by utilizing any of these methods, you can easily disable NFC on your Android device when needed, providing you with enhanced control over your device’s functionality, privacy, and battery life. Consider your specific requirements and preferences to choose the method that suits you best. Whether you want quick control, in-depth customization, or automation, turning off NFC can be a valuable option to optimize your Android device usage.