Introduction
Transferring your Litecoin to a secure hardware wallet like Trezor is a smart move to protect your digital assets. Trezor provides a user-friendly interface and robust security features, making it an ideal choice for storing cryptocurrencies like Litecoin.
In this guide, we will walk you through the step-by-step process of transferring Litecoin to your Trezor hardware wallet. By following these instructions, you can have peace of mind knowing that your Litecoins are stored in a safe and secure offline environment, away from the vulnerabilities of online exchanges.
Before we dive into the details, it’s important to note that the exact steps may vary depending on the device and software versions you are using. However, the general principles remain the same, and we will provide clear instructions to help you navigate through the process.
We recommend that you have your Trezor hardware wallet set up and ready to use before proceeding with the transfer. If you haven’t used Trezor before or need assistance with setting it up, don’t worry! We’ll guide you through the process, ensuring a smooth and seamless experience.
Now, without further ado, let’s get started on transferring your Litecoin to your Trezor hardware wallet!
Step 1: Setting up your Trezor Wallet
The first step in transferring Litecoin to your Trezor hardware wallet is to set up the wallet itself. If you haven’t done so already, follow these instructions to get started:
- Visit the official Trezor website and navigate to the “Get Started” page.
- Choose the Trezor model that you have or plan to purchase – Trezor One or Trezor Model T.
- Download the Trezor Bridge, which is a communication interface between your Trezor device and your computer. This is necessary for securely accessing and managing your wallet.
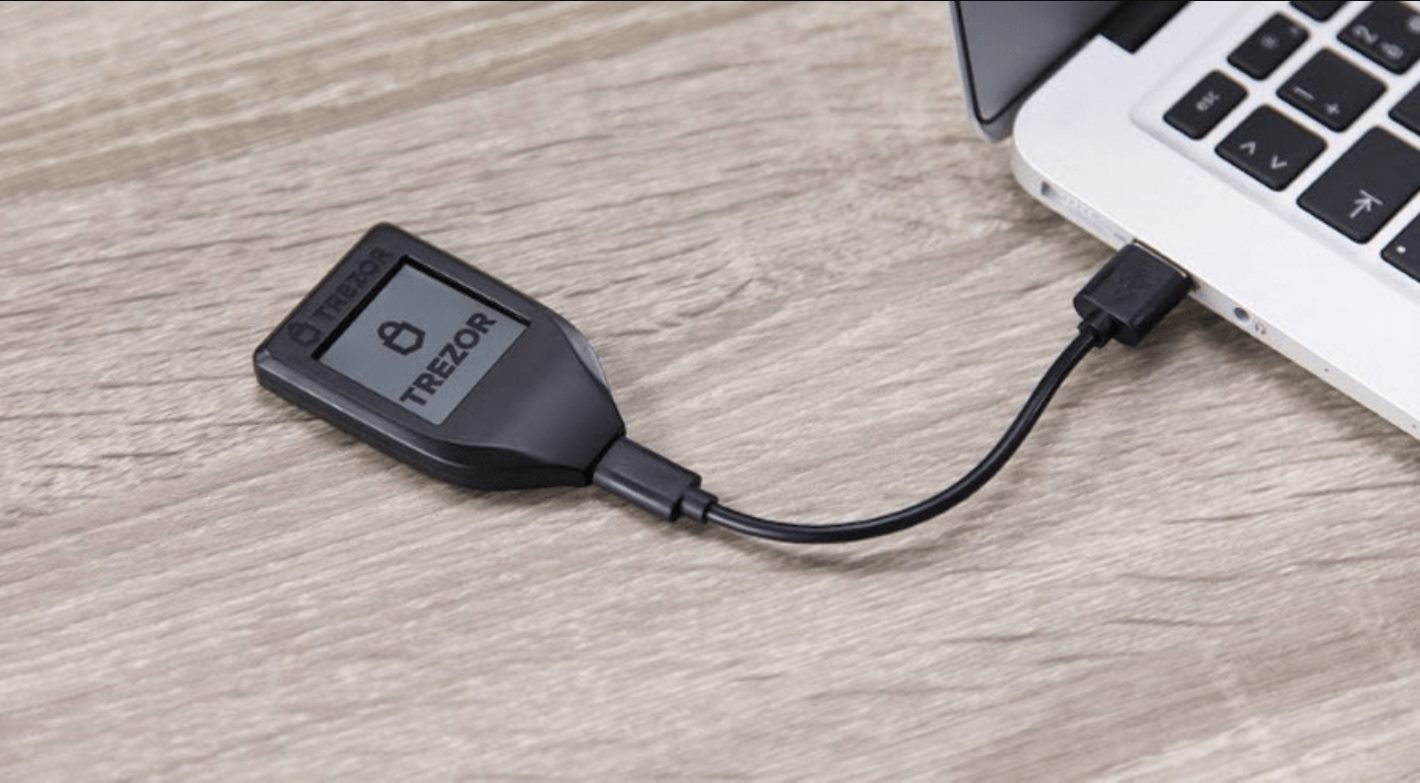
- Connect your Trezor device to your computer using the provided USB cable.
- Follow the on-screen prompts to complete the firmware installation. Make sure to carefully read and verify the instructions to ensure correct installation.
- Create a strong and unique PIN for your Trezor wallet. This PIN will be required every time you want to access your wallet.
- Generate and securely store your recovery seed. This seed acts as a backup and can be used to recover your wallet in case your Trezor device is lost or damaged.
- Once you have completed these steps, your Trezor wallet is now set up and ready to use!
It’s important to remember that the security of your wallet depends not only on the hardware device itself but also on the precautions you take. Make sure to keep your PIN and recovery seed in a secure location and never share them with anyone.
In the next step, we will guide you through the process of installing the Trezor Bridge on your computer, which is necessary for accessing your Trezor wallet.
Step 2: Installing the Trezor Bridge
To securely connect your Trezor hardware wallet to your computer, you need to install the Trezor Bridge. This software acts as a communication channel between your device and your computer, ensuring a secure connection.
Follow these simple steps to install the Trezor Bridge:
- Visit the official Trezor website and navigate to the “Downloads” or “Support” section.
- Choose the appropriate version of the Trezor Bridge for your operating system (Windows, macOS, or Linux).
- Download the installation file to your computer.
- Once the download is complete, locate the installation file and run it.
- Follow the on-screen prompts to complete the installation process.
- After a successful installation, you will see the Trezor Bridge icon on your computer’s taskbar or system tray.
With the Trezor Bridge installed, you now have the necessary software to securely connect and communicate with your Trezor hardware wallet. Make sure to keep the Trezor Bridge software up to date by regularly checking for updates on the official Trezor website.
In the next step, we will guide you through the process of accessing your Trezor wallet on your computer.
Step 3: Accessing your Trezor Wallet on your computer
Now that you have your Trezor hardware wallet set up and the Trezor Bridge installed on your computer, it’s time to access your wallet and manage your Litecoins. Follow these steps to access your Trezor wallet on your computer:
- Ensure that your Trezor device is connected to your computer via the USB cable.
- Open your preferred web browser and navigate to the Trezor Wallet website.
- Click on the “Login” button to proceed.
- Choose the appropriate option based on whether you want to access your wallet using the Trezor Wallet software or an external wallet provider.
- If you choose to use the Trezor Wallet software, select “Trezor Wallet” and click on “Connect Trezor”.
- If you prefer to use an external wallet provider, click on “Continue with external wallet”.
- If you selected the Trezor Wallet software, you will be prompted to install the Trezor Password Manager browser extension. Follow the on-screen instructions to complete the installation.
- Once the extension is installed, click on “Connect Trezor” again to establish a connection to your device.
- Enter your wallet’s PIN using the computer screen instead of your device.
- After entering the PIN, your Trezor wallet will be successfully connected to your computer and you will have access to your Litecoins.
It’s important to note that the Trezor Wallet interface may vary slightly depending on the version you are using. However, the steps outlined above should provide a general guideline for accessing your wallet.
Now that you have accessed your Trezor wallet on your computer, you are ready to proceed with creating a Litecoin wallet on your Trezor device, which we will cover in the next step.
Step 4: Creating a Litecoin Wallet on your Trezor
If you want to store Litecoin on your Trezor hardware wallet, you first need to create a dedicated Litecoin wallet on your device. Follow these steps to create a Litecoin wallet on your Trezor:
- Ensure that your Trezor device is connected to your computer via the USB cable.
- Access your Trezor wallet on your computer following the steps outlined in the previous section.
- Once you are in your Trezor wallet interface, click on the “Add Account” or “Create New Wallet” option.
- Choose “Litecoin” from the list of available cryptocurrencies.
- Confirm the action on your Trezor device by using the physical buttons to navigate and press the confirmation button when “Litecoin” is displayed.
- Follow the on-screen instructions to verify and confirm the creation of your Litecoin wallet.
- Once the wallet is created, you will see the Litecoin account listed in your Trezor wallet interface.
Congratulations! You have successfully created a Litecoin wallet on your Trezor device. This wallet is now ready to receive and store your Litecoins securely.
It’s important to note that you can create multiple wallets for different cryptocurrencies on your Trezor device. This allows you to manage and store various cryptocurrencies conveniently in one place.
In the next step, we will guide you through the process of getting the Litecoin receiving address from your Trezor wallet.
Step 5: Getting the Litecoin Receiving Address from your Trezor Wallet
After creating a Litecoin wallet on your Trezor device, the next step is to obtain the receiving address. This address is unique to your wallet and is where you will send your Litecoins. Follow these steps to get the Litecoin receiving address from your Trezor wallet:
- Ensure that your Trezor device is connected to your computer via the USB cable.
- Access your Trezor wallet on your computer using the steps mentioned earlier.
- In your Trezor wallet interface, select the Litecoin account you want to use to receive Litecoins.
- Click on the “Receive” tab or button, which is usually located at the top of the screen.
- On the “Receive” screen, you will find your Litecoin receiving address. This address is a long string of letters and numbers.
- Click on the “Copy” button next to the address to copy it to your clipboard.
Once you have copied the receiving address, you can share it with the sender or use it to initiate a transfer from your external wallet or exchange platform. It’s crucial to double-check that you have copied the correct address to avoid any errors in the transaction.
It’s worth mentioning that each time you receive Litecoins, it’s recommended to use a new receiving address. This practice enhances privacy and security by preventing the public tracking of your transactions.
In the next step, we will guide you through the process of sending Litecoin to your Trezor wallet.
Step 6: Sending Litecoin to your Trezor Wallet
Now that you have your Trezor wallet set up and the receiving address ready, you can proceed to send Litecoin to your Trezor wallet. Follow these steps to send Litecoin to your Trezor wallet:
- Log in to your external wallet or exchange platform that holds your Litecoin.
- Navigate to the “Send” or “Withdraw” section to initiate a transfer.
- Paste the Litecoin receiving address from your Trezor wallet into the designated field.
- Double-check and verify that the receiving address is correct to avoid any mistakes.
- Enter the amount of Litecoin you want to send to your Trezor wallet.
- Review the transaction details, including the fee and any additional information required by the platform or wallet.
- If everything looks correct, proceed to confirm and authorize the transaction.
- Wait for the transaction to be processed and confirmed on the Litecoin network. This may take some time, depending on network congestion and transaction fees.
- Once the transaction is confirmed, you will be able to see the transferred Litecoin in your Trezor wallet interface.
It’s crucial to exercise caution when sending Litecoin and always double-check the receiving address. Transactions made on the blockchain are irreversible, meaning that if you send Litecoin to an incorrect address, it may not be recoverable.
After successfully sending Litecoin to your Trezor wallet, you can rest assured that your Litecoins are securely stored in your hardware wallet, away from the vulnerabilities of online exchanges or wallets.
In the next step, we will guide you through the process of verifying the transaction on your Trezor wallet.
Step 7: Verifying the Transaction on your Trezor Wallet
Once you have sent Litecoin to your Trezor wallet, it’s essential to verify the transaction to ensure its successful completion. Follow these steps to verify the transaction on your Trezor wallet:
- Ensure that your Trezor device is connected to your computer via the USB cable.
- Access your Trezor wallet on your computer using the steps mentioned earlier.
- In your Trezor wallet interface, navigate to the section that displays your Litecoin account’s transaction history.
- Search for the recent transaction that corresponds to the Litecoin transfer you made.
- Click on the transaction to view the transaction details, such as the sender’s address, receiving address, amount, and confirmation status.
- Verify that the transaction details match the information of the transaction you initiated.
- Check the confirmation status to ensure that the transaction has been successfully processed on the Litecoin network.
Verifying the transaction on your Trezor wallet provides peace of mind and allows you to confirm that the Litecoin has been securely received and stored in your wallet. It also helps detect any potential issues or discrepancies that may require further attention.
If you encounter any irregularities or discrepancies during the verification process or have any concerns about the transaction, it is recommended to contact the support team of your wallet or exchange platform for assistance.
Congratulations! By following these steps, you have successfully transferred and verified Litecoin on your Trezor hardware wallet, ensuring the security and protection of your digital assets.
Now that you are familiar with the process, you can confidently manage and store Litecoin on your Trezor wallet, knowing that your funds are kept safe from potential threats.
Conclusion
Transferring Litecoin to your Trezor hardware wallet is a crucial step in securing your digital assets. By following the steps outlined in this guide, you have learned how to set up your Trezor wallet, install the Trezor Bridge, access your wallet on your computer, create a Litecoin wallet, obtain the receiving address, send Litecoin to your Trezor wallet, and verify the transaction.
Storing your Litecoins on a hardware wallet like Trezor provides an added layer of security, as it keeps your private keys offline and away from potential online vulnerabilities. Additionally, using a hardware wallet allows you to have full control and ownership of your cryptocurrency, without relying on third-party platforms.
Remember to always exercise caution when handling your cryptocurrencies and follow best practices for security. Keep your Trezor device and recovery seed in a safe place, and beware of phishing attempts and malicious software.
With your Litecoins securely stored in your Trezor wallet, you can confidently navigate the world of cryptocurrency, knowing that your assets are protected and under your control.
Should you encounter any difficulties or have further questions, refer to the official Trezor resources and support channels for assistance. Stay informed about updates and new features, as the cryptocurrency landscape is always evolving.
Now that you have successfully transferred and secured your Litecoins on your Trezor hardware wallet, you can explore other opportunities in the world of cryptocurrencies, whether it’s investing, trading, or participating in blockchain projects, with the peace of mind that your funds are safe and protected.


