Introduction
Welcome to the world of online payments and financial transactions! In today’s interconnected world, setting up a secure and convenient payment method is crucial for individuals and businesses alike. Payoneer is a popular online platform that provides a seamless and efficient way to send and receive payments globally.
Whether you are a freelancer, an entrepreneur, or an e-commerce store owner, Payoneer offers a range of benefits that can simplify your financial transactions and help you grow your business. This article will guide you through the process of setting up a Payoneer account, verifying your identity, adding a bank account, and linking your Payoneer account to an online platform. We’ll also cover how to receive payments, withdraw funds, and provide some valuable tips and tricks for using Payoneer effectively.
Payoneer is essentially a digital wallet that allows you to receive and make payments in multiple currencies. By connecting your Payoneer account to different marketplaces, freelance platforms, or e-commerce websites, you can easily receive payments from clients or customers around the world. Payoneer also provides you with a prepaid Mastercard that lets you make purchases or withdraw funds from ATMs.
One of the key advantages of Payoneer is its global reach. With Payoneer, you can transact in over 150 currencies, making it an ideal solution for international payments. Whether you are receiving payments from U.S. clients, European customers, or Asian partners, Payoneer eliminates the need for complex currency conversions and high transaction fees.
Furthermore, setting up a Payoneer account is quick and straightforward. You can enjoy the benefits of this platform without the hassle of lengthy approval processes or extensive documentation. With just a few simple steps, you’ll be on your way to managing your international payments efficiently and securely.
In the following sections, we will dive into the detailed process of setting up a Payoneer account and utilizing its features to enhance your payment experience. By the end of this article, you’ll have all the necessary information to seamlessly integrate Payoneer into your online payment workflow.
What is Payoneer?
Payoneer is a leading global payment platform that allows individuals and businesses to send and receive payments across borders. It provides a secure, convenient, and cost-effective solution for managing cross-border transactions. With Payoneer, users can receive payments from clients, customers, or marketplaces worldwide, convert currencies, and withdraw funds easily.
Started in 2005, Payoneer has grown to become a trusted name in the online payments industry. It serves over 4 million users in more than 200 countries and territories, making it a truly global platform. Whether you’re a freelancer, an e-commerce seller, or a digital nomad, Payoneer offers a wide range of tools and features designed to cater to your specific needs.
One of the key features of Payoneer is its ability to facilitate seamless cross-border transactions. By leveraging Payoneer’s network, users can receive payments in multiple currencies, eliminating the need for complicated currency conversions. This allows businesses and individuals to expand their reach and easily transact with clients and partners from different countries.
Additionally, Payoneer provides users with a secure and convenient way to access their funds. Users can choose to receive payments directly into their Payoneer account, which can then be transferred to their linked bank accounts or withdrawn through a Payoneer Mastercard. The Payoneer Mastercard can be used at ATMs or for making purchases online or at physical stores where Mastercard is accepted.
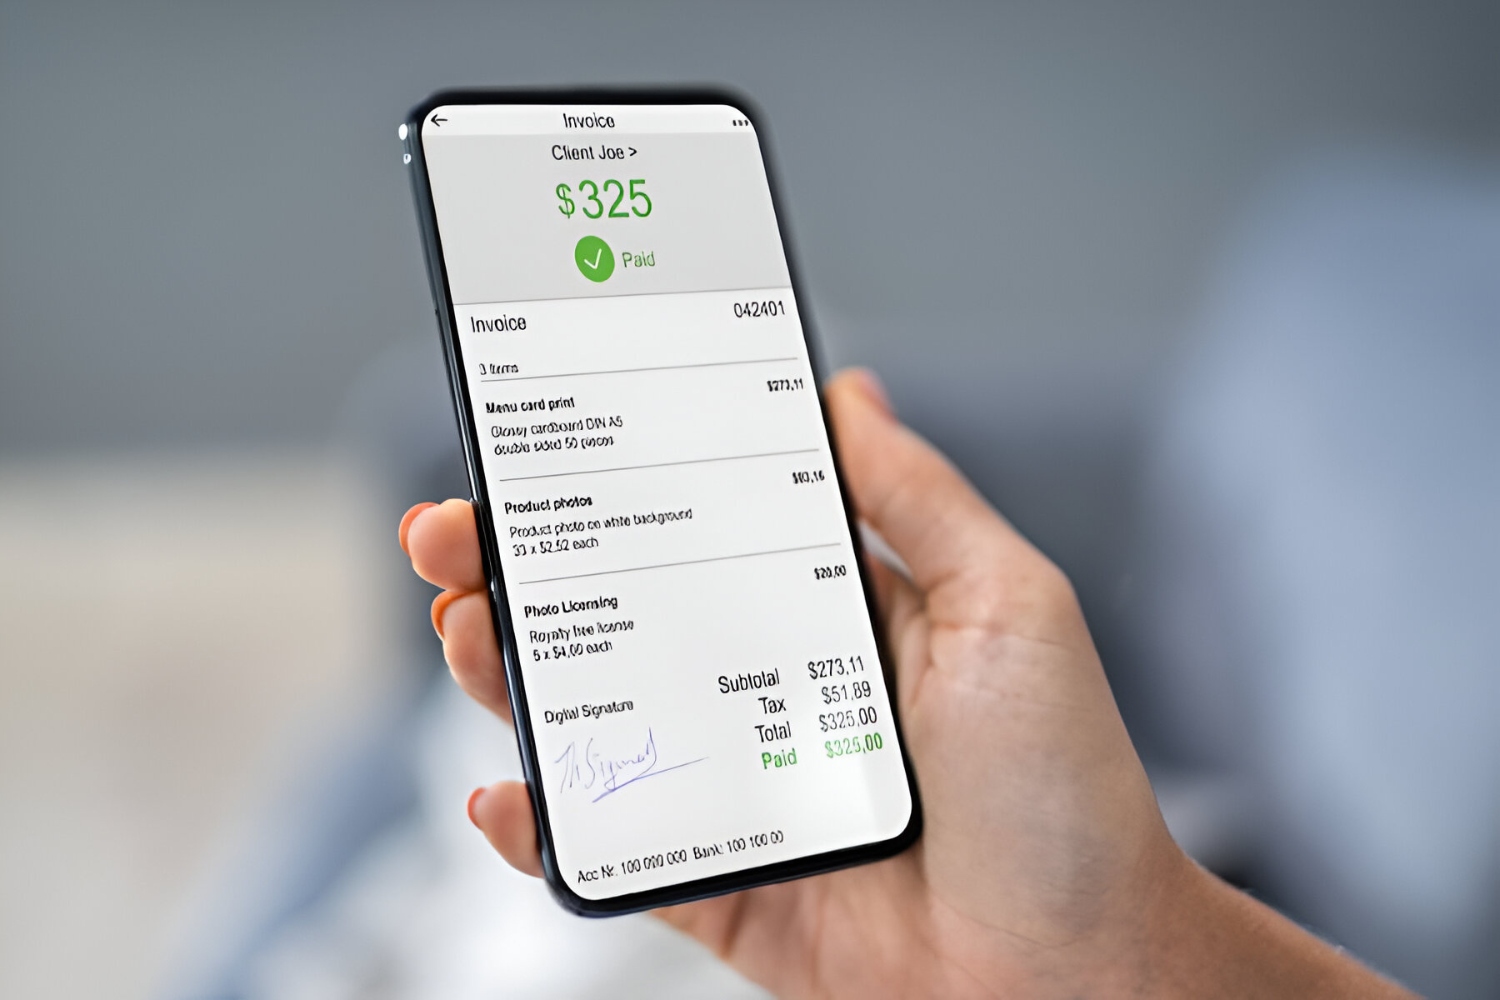
Payoneer also offers robust tools and resources to help users manage their finances effectively. The platform provides detailed transaction history, real-time notifications, and various reporting features to track and analyze payment activity. Users can also generate invoices, request payments, and set up automatic transfers to streamline their payment processes.
Furthermore, Payoneer has a strong focus on security, implementing advanced encryption and fraud detection measures to ensure the safety of users’ funds and personal information. Payoneer is regulated by financial authorities in multiple jurisdictions, adding an extra layer of trust and accountability.
Overall, Payoneer stands out as a reliable and user-friendly solution for anyone involved in cross-border payments. With its wide-reaching network, competitive exchange rates, and comprehensive set of features, Payoneer empowers individuals and businesses to conquer the global marketplace.
Benefits of using Payoneer
Payoneer offers a plethora of benefits that make it an attractive choice for individuals and businesses in the global marketplace. Whether you’re a freelancer, an e-commerce seller, or a digital entrepreneur, here are some key advantages of using Payoneer:
- Global Payments Made Easy: Payoneer allows you to receive payments from clients, customers, or marketplaces in multiple currencies, eliminating the need for complex currency conversions. This streamlines your payment process and enables you to expand your business globally.
- Fast and Secure Transactions: Payoneer ensures quick and secure transactions, protecting your funds and personal information. With advanced encryption and fraud detection measures, you can have peace of mind when sending or receiving money.
- Convenient Withdrawal Options: Payoneer gives you the flexibility to withdraw funds in multiple ways. You can transfer money directly to your bank account or use the Payoneer Mastercard to withdraw cash from ATMs worldwide.
- Competitive Exchange Rates: Payoneer offers competitive exchange rates, minimizing the impact of currency conversions on your earnings. This allows you to maximize your profits and save on unnecessary fees.
- Integrations with Popular Platforms: Payoneer integrates seamlessly with renowned marketplaces, freelance platforms, and e-commerce websites. This simplifies the process of receiving payments from these platforms directly into your Payoneer account.
- Flexible Payment Solutions: Payoneer provides a range of payment solutions tailored to your needs. Whether it’s one-time payments, recurring billing, or mass payouts, Payoneer offers customizable options to suit your business requirements.
- Enhanced Financial Management: Payoneer offers robust tools and resources to help you manage your finances effectively. You can access real-time transaction history, generate invoices, and analyze payment activity through their user-friendly platform.
- 24/7 Customer Support: Payoneer understands the importance of reliable customer support. Their dedicated support team is available 24/7 to assist you with any queries or issues you may encounter.
These are just a few of the many benefits that Payoneer brings to the table. By leveraging Payoneer’s services, you can streamline your global payments, expand your business horizons, and take your financial transactions to new heights.
How to Sign Up for a Payoneer Account
Signing up for a Payoneer account is a straightforward process that can be completed in a few simple steps. Follow the guide below to get started:
- Visit the Payoneer Website: Go to the official Payoneer website at www.payoneer.com and click on the “Sign Up” or “Register” button to begin the sign-up process.
- Create Your Account: Fill out the required information in the registration form, including your full name, email address, date of birth, and desired password. Make sure to provide accurate information to ensure a smooth account setup.
- Enter Contact Information: Provide your contact information, including your phone number, address, and preferred language. Ensure that the address you provide is accurate, as this will be used for account verification and card delivery.
- Choose an Account Type: Select the type of account you require based on your needs. Payoneer offers options for individuals, businesses, and professionals. Choose the most appropriate account type for your specific situation.
- Verify Your Identity: Payoneer requires identity verification to ensure the security of your account. Follow the prompts to upload a valid government-issued photo ID, such as a passport or driver’s license, to complete the verification process.
- Provide Additional Details: Depending on your account type and the nature of your business, you may be required to provide additional details such as your business name, website, or relevant tax information. Fill in the necessary details accurately.
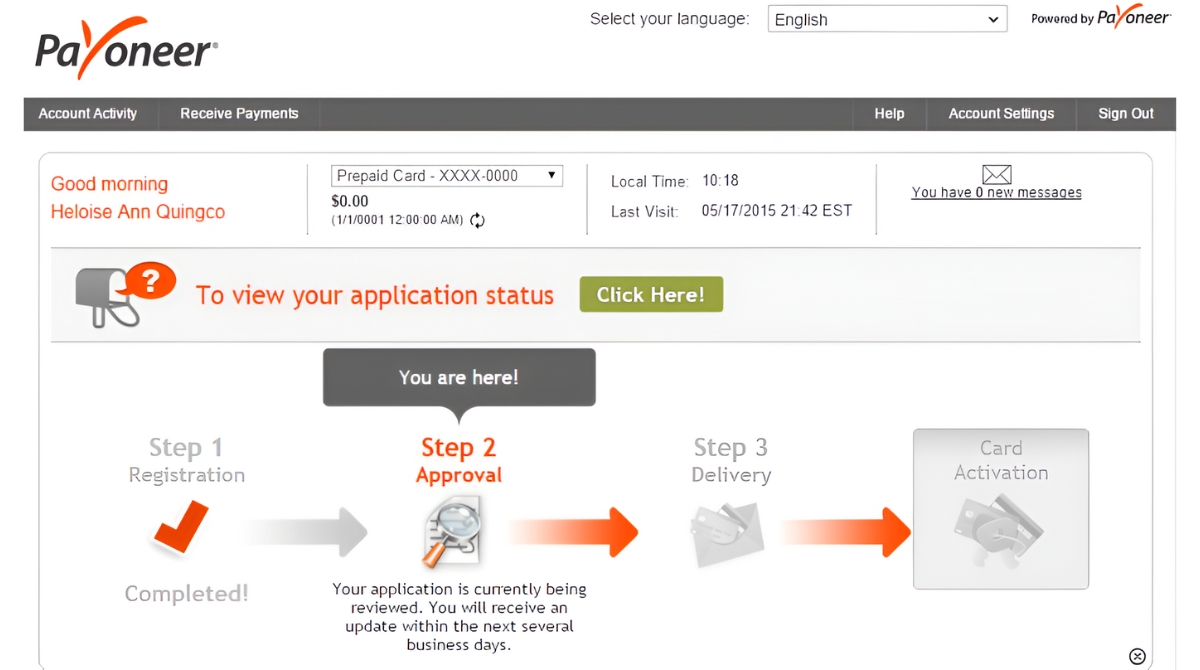
- Review and Submit: Once all the required information is provided, review the terms and conditions, privacy policy, and other relevant agreements. If you agree with the terms, click on the “Submit” or “Sign Up” button to complete the registration process.
- Account Approval and Activation: After submitting your application, Payoneer will review your information. If everything checks out, you will receive an email notification confirming the approval and activation of your Payoneer account.
- Ordering Payoneer Mastercard (Optional): As part of the sign-up process, you have the option to order a Payoneer Mastercard. The card can be linked to your Payoneer account and used for online or offline transactions, as well as ATM withdrawals.
Once you have successfully signed up for a Payoneer account and completed all the necessary steps, you can start exploring the various features and capabilities of the platform. Link your bank account, connect to marketplaces or platforms, and begin receiving payments around the globe.
Remember, providing accurate and up-to-date information during the sign-up process is crucial to ensure a smooth experience with Payoneer. Follow the instructions carefully, and if you have any questions or issues, don’t hesitate to reach out to Payoneer’s customer support for assistance.
Providing Personal Information
When signing up for a Payoneer account, providing accurate personal information is essential to ensure the security and compliance of your account. Payoneer follows strict regulatory guidelines and takes privacy seriously. Here are the key details you will need to provide when providing personal information:
- Full Name: Enter your full legal name as it appears on your government-issued identification documents. This is important for identity verification purposes and ensuring the accuracy of your account details.
- Email Address: Provide a valid email address that you have regular access to. This will be used for communication, account notifications, and password recovery.
- Date of Birth: Enter your date of birth accurately. Payoneer requires this information for identity verification and compliance with applicable laws and regulations.
- Address: Input your current residential address. Ensure that the address is correct and up to date, as it will be used for account verification purposes and the delivery of your Payoneer Mastercard (if applicable).
- Phone Number: Provide a valid phone number that you can be reached at. This is important for account security and communication purposes.
- Preferred Language: Choose your preferred language for communication with Payoneer. Select the language that you are most comfortable with to ensure clear and effective communication.
In addition to these basic personal details, you may also be required to provide additional information depending on your account type and the nature of your business. This may include details such as your business name, website, industry, tax identification number, and purpose of receiving payments.
It’s crucial to provide accurate and up-to-date information to ensure the smooth processing and approval of your Payoneer account. Any discrepancies or inconsistencies in the provided information may result in delays or account verification issues.
Rest assured that Payoneer values your privacy and takes appropriate measures to protect your personal information. They comply with industry standards and regulatory requirements to ensure the confidentiality and security of your data.
Make sure to double-check the accuracy of the information you provide before submitting your application. Any mistakes or inaccuracies could potentially cause issues with your account setup or verification process.
By providing your personal information accurately and honestly, you can establish a secure connection with Payoneer and enjoy the benefits of their global payment platform.
Verifying Your Identity
In order to ensure the security and compliance of Payoneer accounts, the process of verifying your identity is an important step. By verifying your identity, you not only protect yourself from fraudulent activities, but you also comply with legal and regulatory requirements. Here’s how the identity verification process typically works:
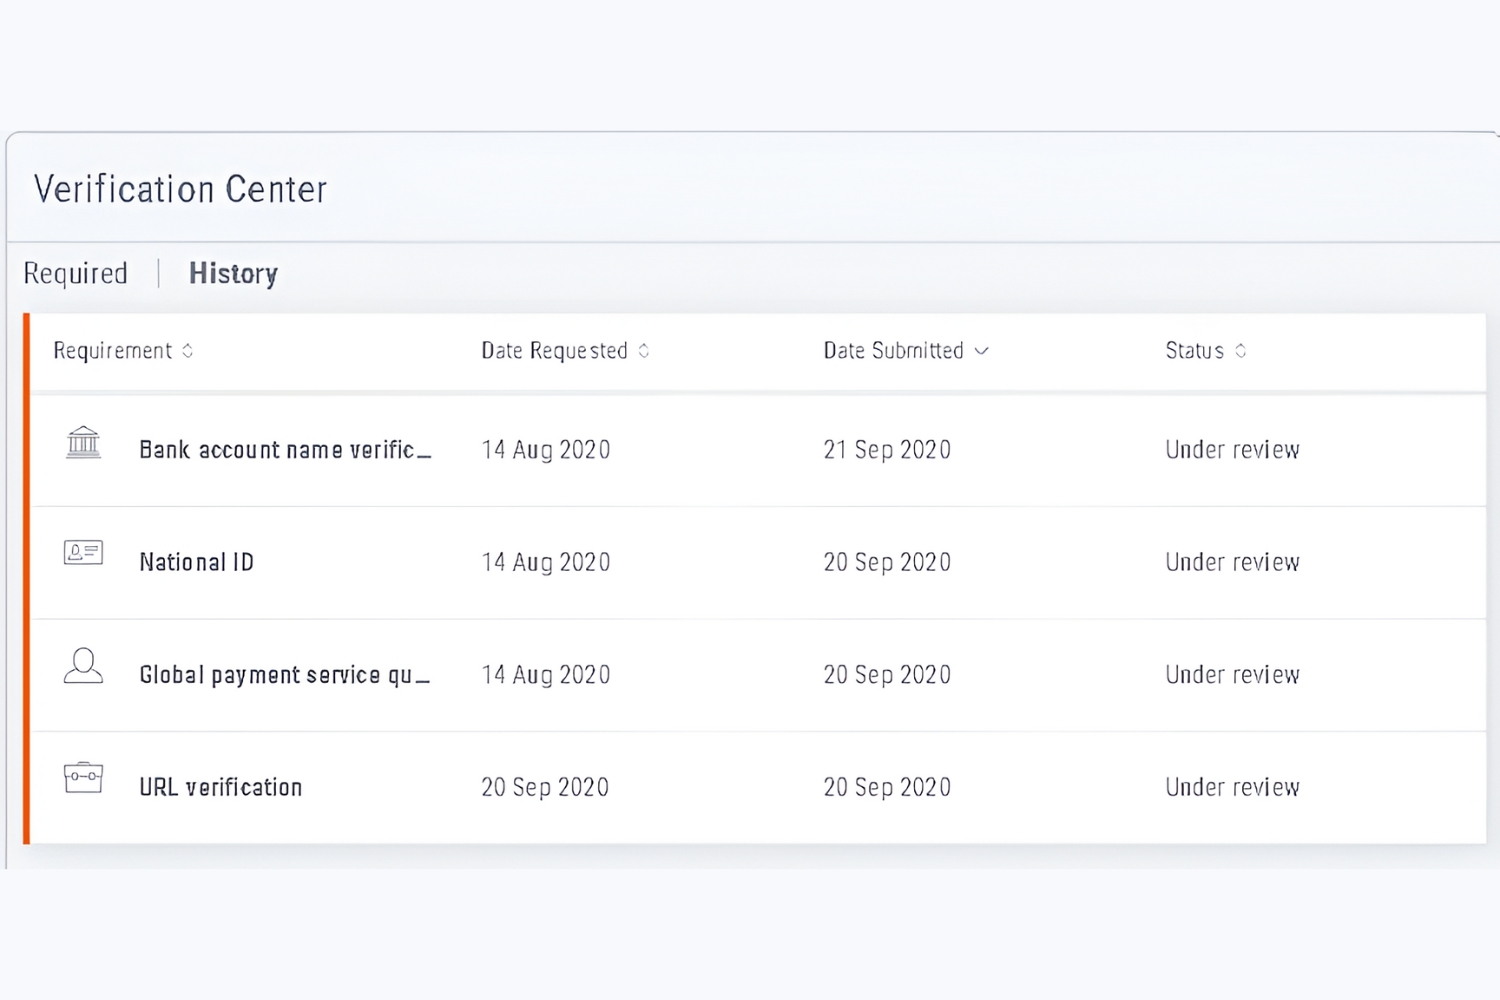
- Submitting Required Documents: Once you have completed the initial account sign-up process, you will be asked to provide certain identification documents. These may include a scanned copy or a clear photograph of your government-issued identification, such as a passport, national identity card, or driver’s license.
- Document Validation: Payoneer’s verification team will carefully review the documents you submit to ensure they are valid, legible, and accurate. Any inconsistencies or errors may result in delays in the verification process.
- Extra Security Measures: To enhance security, Payoneer may implement additional verification steps. This may include phone verification, where you receive a code via SMS or a phone call to confirm your identity.
- Keeping Your Information Secure: Payoneer takes the security of your personal information seriously. The documents you submit for verification are treated with strict confidentiality and stored securely.
- Verification Approval: Once your documents have been successfully reviewed and verified, you will receive a notification confirming the approval of your account verification. At this stage, you can fully access and utilize the features of your Payoneer account.
It’s important to note that the verification process may differ based on your country of residence, account type, and other factors. Payoneer may also request additional documentation or information if needed for further verification.
Verifying your identity with Payoneer is essential, as it helps prevent fraudulent activities and ensures that the platform remains compliant with anti-money laundering (AML) and know your customer (KYC) regulations. By providing accurate identification documents and going through the verification process, you build trust and credibility with Payoneer, as well as with partners and clients who may engage in transactions with you.
Be sure to carefully follow Payoneer’s instructions and provide all necessary documents to expedite the verification process. Should you encounter any issues or have any concerns during the verification process, don’t hesitate to reach out to Payoneer’s customer support for assistance.
Once your identity is successfully verified, you can confidently and securely conduct cross-border transactions with peace of mind, knowing that you’ve taken the necessary steps to protect your account and comply with regulatory requirements.
Adding a Bank Account to Payoneer
Linking your bank account to your Payoneer account is a crucial step in fully utilizing the capabilities of the platform. With a linked bank account, you can easily transfer funds between your Payoneer account and your bank, as well as make withdrawals directly to your bank account. Here’s how to add a bank account to Payoneer:
- Log in to Your Payoneer Account: Visit the Payoneer website and log in to your account using your registered email address and password.
- Navigate to the “Settings” Tab: Once logged in, navigate to the “Settings” tab, where you can manage your account details and preferences.
- Select “Bank Accounts & Cards”: Within the settings menu, locate and click on the “Bank Accounts & Cards” option. This will take you to the bank account management page.
- Click on “Add New Bank Account”: On the bank account management page, you will see an option to “Add New Bank Account.” Click on this button to begin the process of adding your bank account.
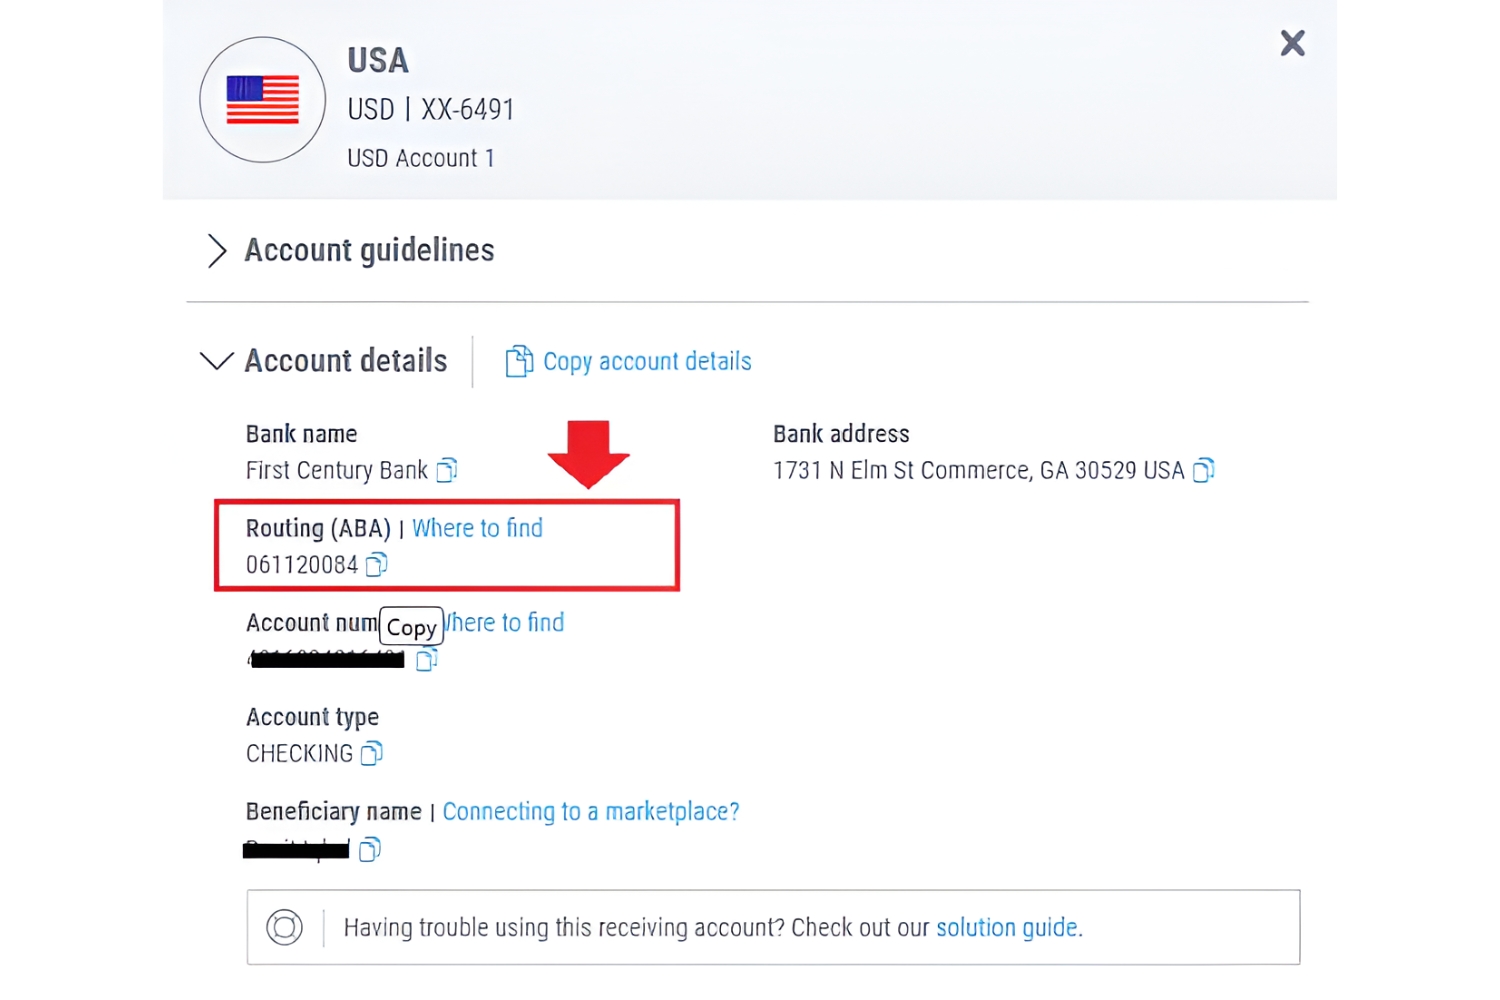
- Choose Your Bank Details: Fill in the required details of your bank account, including the name of your bank, the branch or routing code, and your bank account number. Double-check the accuracy of the information before proceeding.
- Verify Your Bank Account: Payoneer may require you to verify your bank account to ensure its legitimacy. This may involve providing additional information, such as a bank statement or a copy of a voided check, to confirm the ownership of the account.
- Submit the Bank Account Details: Once you have entered all the necessary information and completed any required verification steps, review the details and click on the “Submit” or “Save” button to add your bank account to Payoneer.
- Confirmation and Approval: After submitting your bank account details, Payoneer will review the information provided. You will receive a confirmation email once your bank account has been successfully added and approved.
It’s important to note that Payoneer’s bank account linking process may vary depending on the specific requirements and regulations of your country and banking institution. Follow the prompts and instructions provided by Payoneer to ensure a successful bank account linking process.
By adding your bank account to Payoneer, you gain the ability to transfer funds between Payoneer and your bank seamlessly. This allows you to easily withdraw funds to your bank account, as well as make deposits or transfers from your bank to your Payoneer account, making your financial management more efficient and streamlined.
Remember to keep your bank account information secure and up to date. If you change your bank or account details, make sure to update the information in your Payoneer account to avoid any disruptions or issues with your financial transactions.
With a linked bank account, you can fully enjoy the benefits of Payoneer and make the most of your international payment experiences.
Linking Your Payoneer Account to an Online Platform
Once you have set up your Payoneer account, one of the key steps to fully utilize its capabilities is linking it to an online platform. By connecting your Payoneer account to the platform where you receive payments, you can easily and directly receive funds into your Payoneer account. Here’s how you can link your Payoneer account to an online platform:
- Log in to Your Payoneer Account: Visit the Payoneer website and log in to your account using your registered email address and password.
- Navigate to the “Settings” Tab: Once logged in, navigate to the “Settings” tab, where you can manage various settings related to your Payoneer account.
- Find the “Linked Accounts” Section: Within the settings menu, locate and click on the “Linked Accounts” or “Linked Platforms” option. This section will allow you to manage the online platforms connected to your Payoneer account.
- Select the Online Platform: Choose the online platform or marketplace that you want to link to your Payoneer account. Payoneer has partnerships with a wide range of platforms, including freelancing websites, e-commerce stores, and more.
- Follow the Platform’s Instructions: Each platform may have its own specific process for linking your Payoneer account. Follow the instructions provided by the platform to initiate the linkage process.
- Provide the Required Information: The platform may request certain information to establish the link between your Payoneer account and the platform. This may include your Payoneer account details, such as your email address associated with Payoneer, and sometimes an API key or other authentication details.
- Confirm and Verify the Linkage: Once you have provided the necessary information, confirm and verify the linkage between your Payoneer account and the online platform. This could involve email verification, API integration, or other authentication methods specified by the platform.
- Receive Payments Directly to Payoneer: After successfully linking your Payoneer account to the online platform, you can now receive payments directly into your Payoneer account. Payments made by clients or customers on the platform will be deposited into your Payoneer balance, which you can then manage and withdraw as needed.
It’s important to note that the process of linking platforms may vary depending on the specific platform’s requirements and integration capabilities with Payoneer. If you encounter any difficulties during the linking process, reach out to Payoneer’s customer support or consult the help resources provided by the platform for assistance.
By linking your Payoneer account to the online platform where you conduct your business, you can streamline your payment processes, receive funds efficiently, and ensure a seamless integration between your online platform and Payoneer’s global payment system.
Take advantage of Payoneer’s partnerships with various platforms to enhance your payment experience and expand your reach in the ever-growing world of online business.
Receiving Payments Through Payoneer
Once your Payoneer account is set up and linked to the platforms you use, you can start receiving payments seamlessly. Payoneer simplifies the process of receiving funds from clients, customers, or marketplaces all around the world. Here’s how you can receive payments through Payoneer:
- Payment Options Provided by the Platform: When conducting business on different platforms, check if Payoneer is listed as a payment option. Some platforms may offer Payoneer as a supported payment method, allowing you to receive funds directly into your Payoneer account.
- Select Payoneer as Your Payout Method: During the payment setup process on the platform, choose Payoneer as your preferred payout method. This typically involves selecting Payoneer from a list of available payment options provided by the platform.
- Enter Your Payoneer Account Details: Provide the necessary details from your Payoneer account, such as your email associated with Payoneer or your Payoneer ID. This information is required by the platform to initiate the payment transfer to your Payoneer account.
- Payment Confirmation and Processing: Once you have provided your Payoneer account details, the platform will process the payment and initiate the transfer to your Payoneer account. The payment processing time may vary depending on the platform and the payment method selected.
- Notification and Deposit into Payoneer Account: After the payment has been processed, you will receive a notification from Payoneer confirming the deposit of the funds into your Payoneer account. The funds will be added to your Payoneer balance.
It’s important to note that the specific steps and processes for receiving payments through Payoneer may vary depending on the platform you are using. Some platforms may require additional verification or authentication steps before initiating the payment transfer. It is recommended to carefully follow the instructions provided by the platform to ensure a smooth payment experience.
Once the funds are added to your Payoneer balance, you have the flexibility to manage and use the funds as per your requirements. You can withdraw the funds to your linked bank account, use the Payoneer Mastercard for purchases or ATM withdrawals, or hold the funds in your Payoneer account for future transactions.
Payoneer provides detailed transaction history and real-time notifications to keep you informed about the inflow of funds into your account. This allows you to easily track and manage your payments, enabling better financial control and record-keeping.
By leveraging Payoneer’s global payment capabilities, you can effortlessly receive payments from various platforms, clients, or marketplaces, regardless of their location. Payoneer’s comprehensive payment solutions help you simplify your financial management, enhance your cash flow, and expand your business opportunities.
Withdrawing Funds from Your Payoneer Account
With Payoneer, you have multiple options for withdrawing funds from your account, allowing you to easily access and utilize your funds in a way that suits your needs. Here are the different methods available for withdrawing funds from your Payoneer account:
- Bank Transfer: One of the most common and convenient methods is withdrawing funds via bank transfer. To initiate a bank transfer, simply select the bank account you have linked to your Payoneer account and enter the amount you wish to withdraw. The funds will be transferred to your bank account, typically within a few business days.
- Payoneer Mastercard: If you have ordered and received a Payoneer Mastercard, you can withdraw funds directly from your account using ATMs that accept Mastercard. Insert your Payoneer Mastercard, enter your PIN, and select the withdrawal option. Remember that the withdrawal amount may be subject to any applicable ATM fees.
- Make Online Payments: You can also use your Payoneer funds to make online payments directly. Various platforms, merchants, and service providers accept Payoneer as a payment method. Simply select Payoneer as the payment option during checkout and authorize the payment to complete the transaction.
- Currency Exchange: Payoneer allows you to convert funds between different currencies within your account. If you have received funds in a currency different from your desired currency, you can use Payoneer’s currency exchange service to convert the funds at competitive rates. This enables you to manage your funds efficiently and minimize currency conversion costs.
While Payoneer offers multiple withdrawal options, it’s important to note that there may be certain fees associated with each withdrawal method. Payoneer provides transparent fee schedules, which you can review on their website or in your Payoneer account dashboard. It’s recommended to familiarize yourself with these fees to understand the cost implications of each withdrawal method.
Additionally, some withdrawal methods may have minimum or maximum amount restrictions, depending on the country and the specific regulations of the withdrawal method. It’s important to check these details in your Payoneer account or consult Payoneer’s customer support for any limitations or restrictions that may apply to your particular situation.
Payoneer’s user-friendly platform provides you with the necessary tools and information to manage your funds and make withdrawals efficiently. Keep track of your account balance, transaction history, and withdrawal requests to ensure proper financial management and control.
By utilizing the various withdrawal methods offered by Payoneer, you can easily access your funds, meet your financial needs, and make the most of your Payoneer account.
Payoneer Fees and Charges
When using Payoneer’s services, it’s important to be aware of the fees and charges associated with various transactions and activities. Payoneer provides transparency by offering clear fee schedules that outline the costs involved. Here are some key fees and charges to consider:
- Annual Account Maintenance Fee: Payoneer charges an annual account maintenance fee, which helps cover the costs of maintaining and supporting your Payoneer account. The exact amount may vary depending on your country and account type.
- Withdrawal Fees: Fees may apply when withdrawing funds from your Payoneer account. These fees depend on the withdrawal method chosen. Bank transfers and ATM withdrawals using the Payoneer Mastercard may have associated fees, which can vary based on the location and currency involved.
- Currency Conversion Fees: If you receive payments in a different currency than your account’s currency, Payoneer applies a currency conversion fee when converting the funds. The fee is based on prevailing exchange rates and may vary depending on the currencies involved.
- Inbound and Outbound Payment Fees: Payoneer charges fees for receiving payments from clients or marketplaces, as well as for making payments to others using your Payoneer account. The fees are typically based on a percentage or fixed amount of the transaction value.
- Card Replacement Fee: If you need a replacement for a lost or damaged Payoneer Mastercard, a card replacement fee may be applied to cover the costs associated with issuing a new card.
- Inactivity Fee: Payoneer may impose an inactivity fee if your account remains dormant for an extended period of time. This fee encourages account activity and helps cover the administrative costs of maintaining inactive accounts.
- Additional Services: Payoneer may offer additional value-added services, such as currency holding accounts or payment integration services, which may involve separate fees. These fees are typically disclosed at the time of using these services.
It’s important to review the detailed fee schedules provided by Payoneer on their website or within your Payoneer account. Familiarize yourself with the specific fees applicable to your account and transactions to make informed decisions about your financial activities.
Keep in mind that fees and charges can vary depending on your country, account type, and specific transaction details. Payoneer maintains transparency by providing a comprehensive breakdown of fees, ensuring that you have a clear understanding of the costs associated with using their services.
To avoid any surprises or unexpected charges, regularly monitor your Payoneer account, review your transaction history, and refer to the fee schedule to understand the cost implications of your activities.
Remember that it’s always a good practice to compare fees and charges when considering different payment providers to ensure you’re selecting the option that best aligns with your financial needs and goals.
Tips and Tricks for Using Payoneer Effectively
As you navigate the world of online payments with Payoneer, here are some helpful tips and tricks to maximize your experience and make the most out of this global payment platform:
- Explore Payoneer’s Partner Network: Payoneer partners with various platforms and marketplaces. Take advantage of these partnerships by linking your Payoneer account to the platforms you use. This allows you to receive payments seamlessly and expand your business opportunities.
- Utilize Currency Conversion Options: If you frequently receive payments in different currencies, use Payoneer’s currency conversion feature to convert funds at competitive rates. This helps you avoid excessive conversion fees and manage your funds efficiently.
- Monitor Your Account Regularly: Stay on top of your Payoneer account by regularly checking your transaction history, account balance, and notifications. This helps you spot any discrepancies, track payments, and maintain control over your finances.
- Consider Withdrawal Fees and Timing: Take into account the fees associated with different withdrawal methods and plan your withdrawals strategically. If possible, consolidate your withdrawals to minimize fees and optimize your funds utilization.
- Stay Informed About Exchange Rates: Keep an eye on currency exchange rates, especially if you frequently receive payments in different currencies. Monitor exchange rate fluctuations to make informed decisions regarding fund conversions and withdrawals.
- Engage with Payoneer’s Support Team: If you have any questions or encounter issues, reach out to Payoneer’s customer support. They can provide guidance, resolve concerns, and offer assistance tailored to your specific needs.
- Utilize Payoneer for Business Expenses: Consider using your Payoneer account for business expenses, such as purchasing supplies or paying freelancers. This can help streamline your financial management and consolidate your business expenses in one place.
- Build Relationships with Global Clients: With Payoneer’s global reach, you can easily transact with clients or customers worldwide. Use this advantage to establish relationships, expand your network, and tap into new markets.
- Stay Updated with Payoneer’s Resources: Payoneer provides educational resources, blogs, and webinars to keep you informed about the latest industry trends, regulatory updates, and tips for optimizing your online payments.
- Keep Your Account Secure: Pay attention to account security by using strong passwords, enabling two-factor authentication, and following best practices to protect your Payoneer account from unauthorized access.
By following these tips and tricks, you can streamline your payment processes, optimize your funds utilization, and leverage the power of Payoneer’s global payment capabilities to grow your business and enhance your financial management.
Conclusion
Payoneer is a powerful and flexible payment platform that empowers individuals and businesses to transact globally with ease. Whether you’re a freelancer, an e-commerce store owner, or an international business, Payoneer offers a range of features and benefits that simplify your financial management and enhance your payment experiences.
In this article, we explored the process of setting up a Payoneer account, including providing personal information, verifying your identity, and linking your bank account. We also discussed the benefits of using Payoneer, such as its global reach, competitive exchange rates, and secure payment processing.
Furthermore, we covered how to receive payments through Payoneer, withdraw funds from your account, and manage fees and charges associated with the platform. We also provided tips and tricks to help you make the most out of your Payoneer account and optimize your financial activities.
By utilizing Payoneer’s services effectively, you can expand your business reach, simplify cross-border transactions, and enhance your financial control. Payoneer’s comprehensive range of features, secure infrastructure, and transparent fee structures make it a trusted choice for individuals and businesses navigating the world of online payments.
Remember to familiarize yourself with Payoneer’s guidelines, stay informed about any updates or changes to their services, and always prioritize the security of your account. Payoneer’s customer support is available to assist you, so don’t hesitate to reach out if you need any assistance or have any questions.
Embrace the convenience and power of Payoneer to unlock new opportunities and propel your business forward in the ever-expanding global marketplace.