Introduction
When it comes to sending invoices for your products or services, PayPal offers a convenient and efficient solution. As a trusted and widely-used online payment system, PayPal has integrated invoicing features into its platform, making it easy for businesses of all sizes to create and send professional invoices to their clients and customers.
With PayPal, you can streamline your invoicing process, saving valuable time and ensuring a smooth payment experience for both you and your clients. Whether you’re a freelancer, an eCommerce business owner, or a service provider, PayPal’s invoicing tools can help you maintain organized records, track payments, and receive payments securely.
In this guide, we will walk you through the step-by-step process of sending an invoice through PayPal. From signing in to your PayPal account to customizing the invoice template, we will cover everything you need to know to get started. So, let’s dive in and learn how to send invoices effectively using PayPal.
Prerequisites
Before you start sending invoices through PayPal, there are a few prerequisites that you need to have in place:
- A PayPal Business Account: To use PayPal’s invoicing features, you will need to have a PayPal Business account. If you don’t have one, you can easily upgrade your existing personal account or create a new business account on PayPal’s website.
- Verified PayPal Account: Make sure that your PayPal account is verified. This involves linking and confirming your bank account or adding and confirming your credit or debit card.
- Clients’ Email Addresses: You will need your clients’ or customers’ email addresses to send them the invoices. Ensure that you have their correct and up-to-date email information.
- Product or Service Details: Gather all the necessary information about the products or services you are invoicing for. This includes item descriptions, quantities, prices, and any applicable taxes or discounts.
By ensuring that you have a PayPal Business account, a verified PayPal account, your clients’ email addresses, and the details of your products or services, you will be ready to start sending invoices through PayPal. Having these prerequisites in place will help you streamline the invoicing process and ensure a seamless payment experience for both you and your clients.
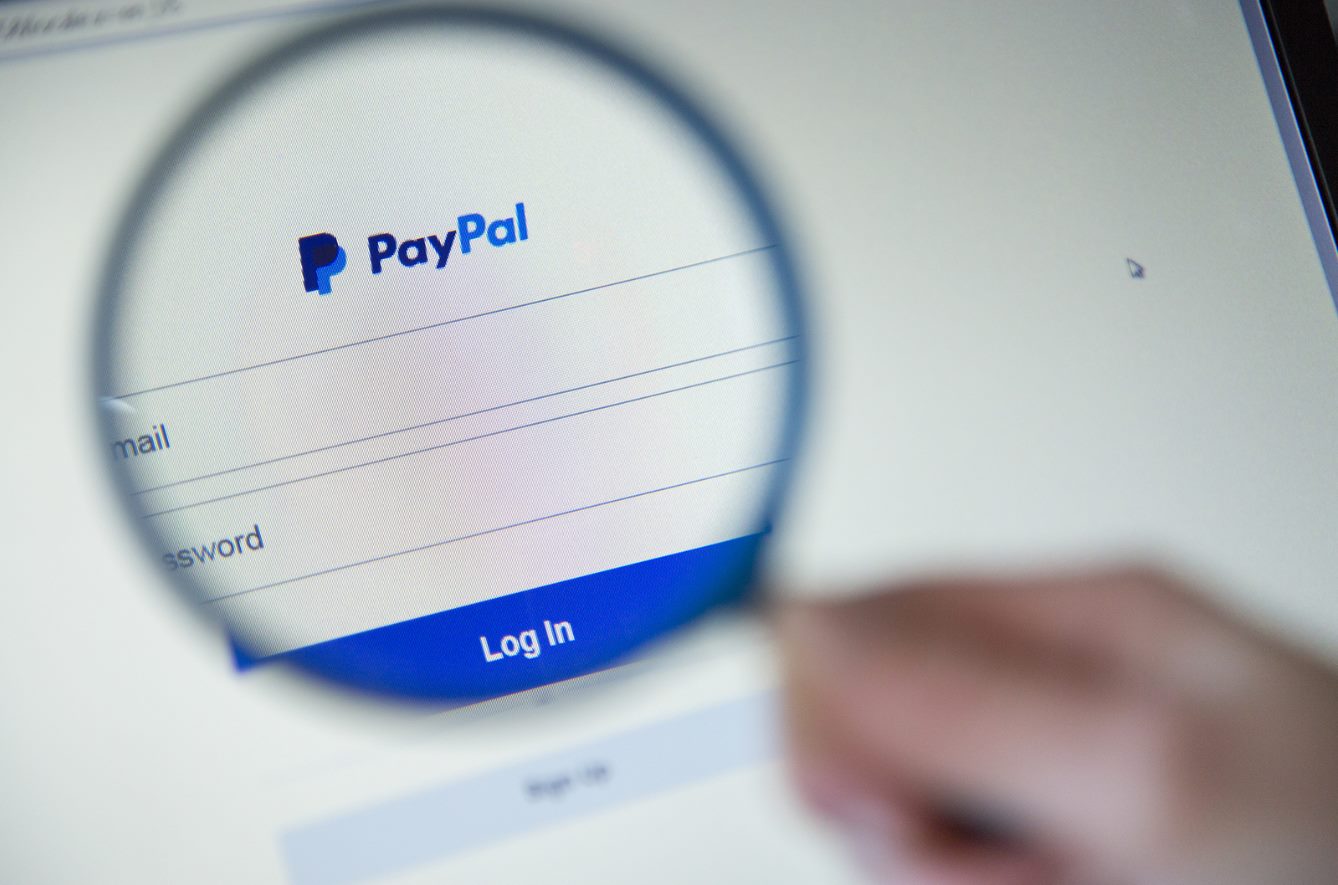
Step 1: Sign in to your PayPal account
The first step to sending an invoice through PayPal is to sign in to your PayPal account. If you don’t have an account yet, you can easily create one by visiting the PayPal website and following the registration process.
Once you have a PayPal account, follow these steps to sign in:
- Go to the PayPal website and click on “Log In” at the top-right corner of the page.
- Enter your email address and password associated with your PayPal account.
- Click on the “Log In” button to access your PayPal account.
If you have enabled two-factor authentication for your account, you may need to enter an additional code sent to your registered mobile device or email address.
After successfully signing in, you will be directed to your PayPal account dashboard, where you can manage your transactions, invoices, and other account settings.
It is important to ensure the security of your PayPal account by using a strong password and keeping your login credentials confidential. Enabling two-factor authentication can also provide an extra layer of security for your account.
Now that you have signed in to your PayPal account, you are ready to proceed to the next step of sending an invoice through PayPal.
Step 2: Navigate to the Tools section
Once you have signed in to your PayPal account, the next step is to navigate to the Tools section, where you can access the invoicing feature.
Follow these steps to find the Tools section:
- On your PayPal account dashboard, look for the menu bar at the top of the page. It typically includes options such as “Summary,” “Activity,” “Wallet,” etc.
- Locate the “More” option in the menu bar and click on it.
- In the dropdown menu that appears, scroll down and find the “Tools” section.
- Click on the “Tools” section to expand it and reveal the available options.
By navigating to the Tools section, you will gain access to various useful features that PayPal offers, including the invoicing feature.
It’s worth exploring other tools and features offered by PayPal as well, as they can assist you in managing your finances, processing payments, and optimizing your business operations.
Once you have successfully located the Tools section in your PayPal account, you are ready to proceed to the next step of sending an invoice through PayPal.
Step 3: Click on “Invoicing” under Tools
After navigating to the Tools section in your PayPal account, the next step is to click on “Invoicing” to access the invoicing feature. This is where you can create, manage, and send your invoices.
Follow these steps to find the Invoicing option:
- In the Tools section, locate the “Invoicing” option.
- Click on “Invoicing” to enter the invoicing dashboard.
By clicking on “Invoicing,” you will be redirected to the invoicing dashboard, which provides a comprehensive interface for creating, editing, and sending invoices.
PayPal’s invoicing feature allows you to streamline your invoicing process and customize your invoices to align with your branding and business needs. From here, you can create new invoices, view existing ones, keep track of the status and payment history of your invoices, and perform various invoicing-related tasks.
It’s important to note that PayPal provides both free and paid invoicing options. While the free basic invoicing features are suitable for most small businesses, there are also paid plans available that offer additional functionalities such as recurring invoicing and advanced reporting.
By clicking on “Invoicing” under Tools, you will have access to the main hub for managing your invoices on PayPal. This brings you one step closer to sending your first invoice through PayPal.
Step 4: Create a new invoice
Once you have entered the invoicing dashboard in your PayPal account, it’s time to create a new invoice. This step involves filling in the necessary details and settings to generate a professional and accurate invoice for your client.
Follow these steps to create a new invoice:
- Click on the “Create New Invoice” or “New Invoice” button. This will usually be prominently displayed on the invoicing dashboard.
- You will be presented with a form where you can customize the invoice details.
- Enter the recipient’s email address in the designated field. This is the email address to which the invoice will be sent.
- Choose the currency for the invoice. PayPal supports multiple currencies, so select the appropriate one for your transaction.
- Specify the invoice date, which is the date the invoice is issued.
- Optionally, you can add a reference number or any notes you want to include on the invoice.
By following these steps, you will have successfully created a new invoice in your PayPal account. However, the invoice is not complete yet. In the next steps, customizing the invoice template and adding items and quantities will give the invoice its final shape.
Creating a new invoice in PayPal is a straightforward process that allows you to streamline your billing procedure and present professional-looking invoices to your clients. Once you click the “Create” or “Save” button, you will be ready to input the invoice details and set the payment terms and due date.
Step 5: Fill in the invoice details
After creating a new invoice in your PayPal account, the next step is to fill in the necessary details of the invoice. This includes information about the product or service, the quantity, the price, and any additional charges or discounts.
Follow these steps to fill in the invoice details:
- Start by providing a clear and concise description of the product or service you are invoicing for. This helps your client easily recognize what they are being billed for.
- Enter the quantity of the product or service being invoiced. If multiple items are included, ensure that you specify the quantity for each item.
- Next, input the unit price or the amount you charge per item or service. Be sure to enter the price accurately to avoid any discrepancies.
- Include any additional charges or discounts, if applicable. This may include taxes, shipping fees, or promotional discounts.
- PayPal provides a subtotal field that automatically calculates the total amount based on the quantity and price you have entered.
By providing accurate and detailed information in the invoice, you ensure transparency and clarity between you and your client. This helps in expediting the payment process and avoids any misunderstandings in the future.
Furthermore, PayPal’s invoicing system allows you to preview the invoice as you fill in the details. This gives you the opportunity to review the invoice and make any necessary adjustments before sending it to the client.
Filling in the invoice details effectively helps streamline your invoicing process, ensuring accuracy and professionalism in your transactions. Once you have completed filling in the details, proceed to the next step of setting the payment terms and due date.
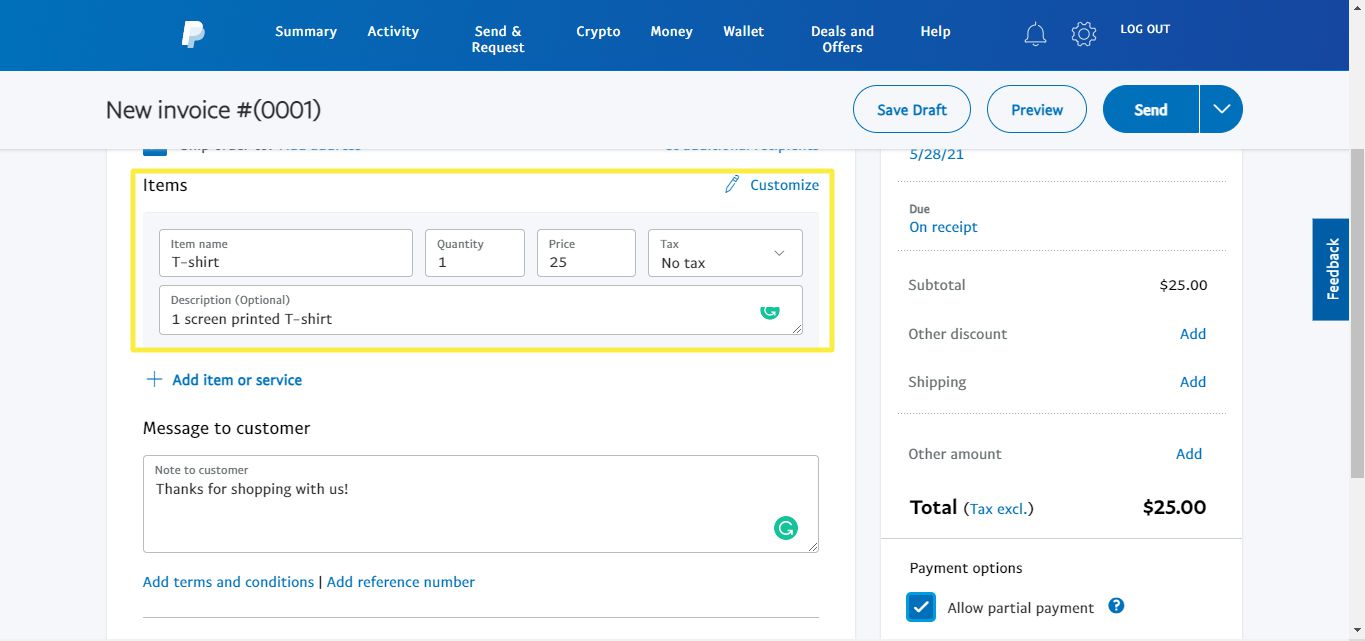
Step 6: Add items and quantities
As you continue to create your invoice in PayPal, the next step is to add items and quantities. This step allows you to provide a comprehensive breakdown of the products or services you are invoicing for, making it easier for your client to understand and verify the charges.
Follow these steps to add items and quantities to your invoice:
- Look for the “Items” section or a similar option on the invoice form. This is typically located below the invoice details section.
- Click on the “Add Item” or “+ Add” button to include a new line item on the invoice.
- In each line item, enter a description of the product or service being invoiced for. Be specific and concise to avoid any confusion.
- Specify the quantity of each item being invoiced. If there are multiple items, make sure to enter the quantity for each line item.
- Repeat these steps for each additional item you want to include on the invoice.
By adding items and quantities to your invoice, you provide a clear breakdown of the charges for each product or service. This helps your client verify the invoice and ensures transparency in your billing process.
PayPal’s invoicing system allows you to easily add, edit, or remove items as needed. This flexibility enables you to adjust the invoice details according to any changes or special requests from your client.
Remember to double-check the accuracy of the descriptions and quantities before proceeding to set the payment terms and due date. Once you have added all the items and quantities, you are one step closer to completing your invoice in PayPal.
Step 7: Set the payment terms and due date
In order to establish clear expectations with your client regarding payment, it is important to set the payment terms and due date for your invoice. This step ensures that both parties are aware of when the payment is expected and any additional details related to the payment process.
Follow these steps to set the payment terms and due date on your PayPal invoice:
- Locate the section on the invoice form that allows you to specify the payment terms and due date. This is typically found below the invoice details and items sections.
- In the payment terms field, indicate the payment timeframe or any specific payment conditions. For example, you can specify “Net 30” to indicate that payment is due within 30 days of the invoice date.
- Choose a due date for the payment. This is the deadline by which the client should complete the payment. You can select a specific date or choose a certain number of days from the invoice date.
By setting the payment terms and due date, you establish a clear understanding of when the payment is expected and any specific conditions that apply. This helps both you and your client stay on the same page and ensures a smoother payment process.
PayPal’s invoicing system allows you to easily customize the payment terms and due date based on your agreement with the client. You can also provide any additional instructions or details related to the payment, ensuring that everything is communicated clearly.
Once you have set the payment terms and due date, you are ready to move on to the next step of customizing the invoice template to align with your branding and business identity.
Step 8: Customize the invoice template
To provide a professional and branded image, PayPal offers customization options for your invoice template. This step allows you to personalize the appearance of your invoice, adding your business logo, contact information, and other relevant details that align with your branding and business identity.
Follow these steps to customize the invoice template in PayPal:
- Look for the “Customize” or “Customization” option on the invoice form. This is typically located near the top or bottom of the invoice.
- Click on the customization option to access the various design and layout settings for your invoice.
- Upload your business logo. This helps reinforce your brand and adds a professional touch to the invoice.
- Enter your business contact information, including your company name, address, phone number, and email address. This ensures that your client has the necessary information to reach out to you.
- Choose a color scheme or template that reflects your brand’s visual identity. PayPal offers a range of options to choose from, allowing you to select the one that best suits your business.
- Review the preview of your customized invoice to ensure that it accurately represents your business and displays all the necessary details.
By customizing the invoice template, you are projecting a professional image to your clients. This enhances your credibility and creates a cohesive branding experience throughout your business interactions.
PayPal’s invoicing system provides a user-friendly interface that allows you to easily update and modify the customization settings of your invoice template. You can make changes at any time to adapt to your evolving branding needs or business requirements.
Once you have customized the invoice template to your satisfaction, you are ready to review the invoice and proceed to the final step of sending it to your client.
Step 9: Review and send the invoice
Before sending the invoice to your client, it is crucial to review it for accuracy and completeness. This step allows you to double-check all the details, ensure that calculations are correct, and verify that the invoice reflects the agreed-upon terms.
Follow these steps to review and send the invoice in PayPal:
- Take a moment to carefully review the entire invoice, including the invoice details, items, quantities, payment terms, and due date.
- Verify that all the information is accurate, including contact details, pricing, and any additional charges or discounts.
- Ensure that the invoice is formatted correctly, and the customization settings align with your branding and business identity.
- If necessary, make any final adjustments or edits to the invoice to address any errors or changes.
- Once you are confident that the invoice is accurate and complete, click on the “Send” or “Send Invoice” button to send it to your client.
- PayPal will automatically generate an email containing the invoice details and a link for your client to view and pay the invoice.
By carefully reviewing the invoice before sending, you minimize the risk of errors or misunderstandings. This professionalism enhances the overall customer experience and improves the likelihood of prompt payment.
PayPal’s invoicing system also provides the option to save the invoice as a draft or preview it before sending. Utilize these features to ensure that the invoice appears as intended and contains all the necessary information.
After sending the invoice, keep track of its status in your PayPal account. You can monitor whether the client has viewed or paid the invoice, making it easier to follow up as needed.
By reviewing and sending the invoice in PayPal, you take the final step towards receiving payment for your products or services.
Conclusion
Sending invoices through PayPal offers a convenient and efficient solution for businesses of all sizes. With the ability to create, customize, and send professional invoices, PayPal’s invoicing features streamline the billing process and ensure a smooth payment experience for both you and your clients.
In this guide, we have covered the step-by-step process of sending an invoice through PayPal. From signing in to your PayPal account to customizing the invoice template, each step is designed to help you effectively manage your invoices and maintain organized records.
By following these steps, you can send invoices with ease:
- Sign in to your PayPal account.
- Navigate to the Tools section and select “Invoicing”.
- Create a new invoice and fill in the necessary details.
- Add items and quantities to provide a breakdown of the charges.
- Set the payment terms and due date for clear expectations.
- Customize the invoice template to reflect your branding.
- Review the invoice for accuracy and completeness.
- Send the invoice to your client.
Remember to keep track of your invoices in your PayPal account and follow up on any outstanding payments as necessary. PayPal provides various reporting and management tools to simplify these tasks and ensure efficient financial management.
With PayPal’s invoicing features, you can optimize your billing process, maintain professional communication with your clients, and ensure timely payments. Utilize the customization options available to present a branded and professional image to your clients, enhancing your business’s credibility and reputation.
Now that you have learned how to send invoices through PayPal, you can take advantage of the platform’s capabilities to streamline your invoicing process and focus on growing your business.