Introduction
Welcome to the world of Cash App, a popular mobile payment service that allows you to send, receive, and manage money effortlessly. With its user-friendly interface and convenient features, Cash App has quickly gained popularity among individuals and businesses alike.
Logging into your Cash App account is essential to access its various functionalities. Whether you’re a new user eager to explore the platform or an existing user looking to manage your finances, this guide will walk you through the step-by-step process.
Before we dive into the details, it’s important to note that Cash App is primarily available for mobile devices, including smartphones and tablets. The app is compatible with both iOS and Android operating systems, making it accessible to a wide range of users.
In this guide, we’ll cover everything you need to know about logging into your Cash App account, including downloading the app, setting up your account, and linking your bank account or debit card.
So, if you’re ready to take control of your financial transactions and enjoy the seamless experience offered by Cash App, let’s get started on the login process.
Step 1: Download the Cash App
The first step in logging into your Cash App account is to download the app on your mobile device. Follow these instructions:
- Open the App Store if you have an iOS device, or Google Play Store if you’re using an Android device.
- Search for “Cash App” in the search bar.
- Tap on the Cash App icon to open the app’s page.
- Click on the “Install” or “Get” button to download the app.
- Wait for the app to download and install on your device.
Once the app is successfully installed, you’ll find the Cash App icon on your home screen or app drawer. Tap on the icon to launch the app and move on to the next step.
Note: The Cash App is completely free to download and use. Ensure that you’re downloading the official app developed by Square, Inc., to guarantee the security and authenticity of your transactions.
Step 2: Open the Cash App
Now that you have downloaded the Cash App on your mobile device, it’s time to open the app and start the login process. Here’s how:
- Locate the Cash App icon on your home screen or app drawer.
- Tap on the Cash App icon to launch the app.
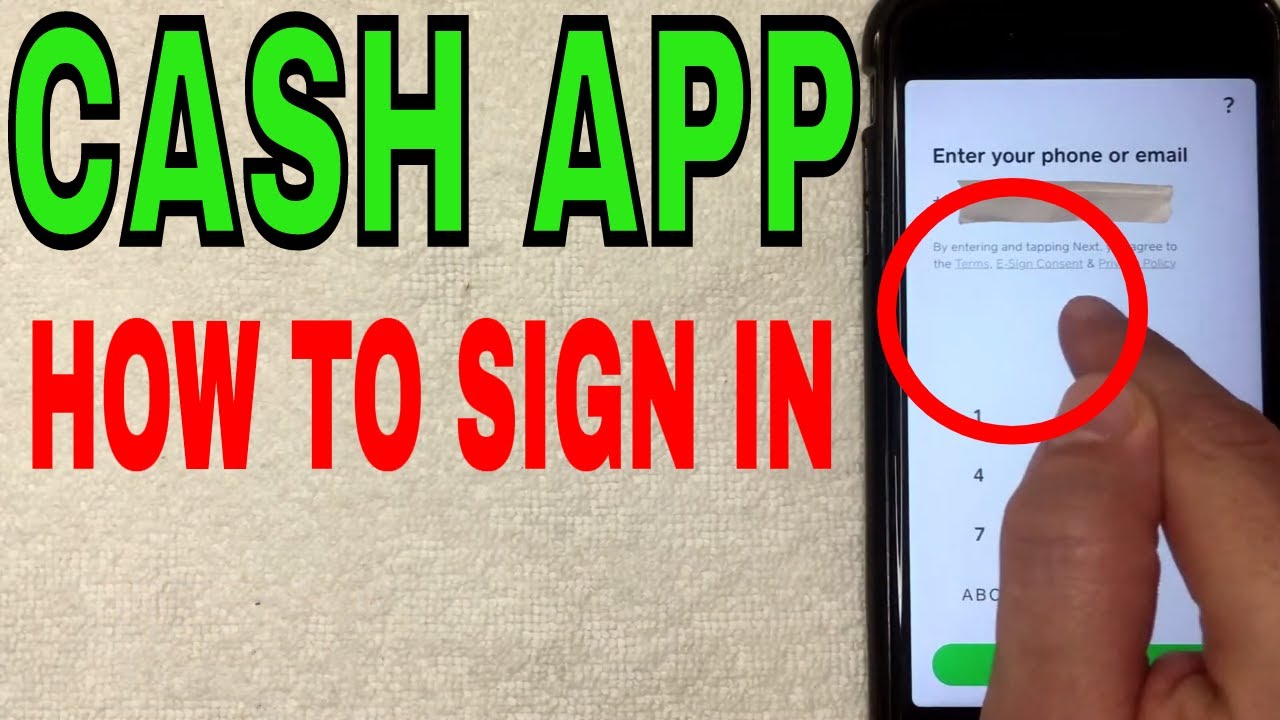
Once the app is open, you should see the Cash App login screen. This is where you’ll enter your phone number or email address to proceed with logging into your account.
If you’re a new user, you’ll need to sign up for a Cash App account by tapping on the “Sign Up” or “Create Account” option. Follow the prompts to provide the required information and set up your account. Once you have completed the sign-up process, you can proceed to log in using the credentials you provided during the registration.
If you’re an existing user who already has a Cash App account, simply enter your phone number or email address associated with your account on the login screen.
Remember to double-check the information you enter to ensure accuracy. Small typing errors can hinder your ability to successfully log in to your Cash App account.
Once you have entered your phone number or email address, it’s time to move on to the next step: verifying your phone number or email.
Step 3: Enter your Phone Number or Email
After opening the Cash App on your mobile device, you’ll be prompted to enter your phone number or email address. Follow these steps to proceed:
- On the Cash App login screen, you’ll find the field for entering your phone number or email address. Tap on the respective field to activate the keyboard.
- Type in your phone number or email address associated with your Cash App account.
- Double-check the entered information for accuracy, ensuring that there are no typos or errors.
- If you’re confident that the phone number or email address you entered is correct, proceed to the next step.
Entering your correct phone number or email address is crucial, as this information is used to link your Cash App account and ensure the security of your transactions. Make sure you are using an active phone number or email address that you have access to.
If you are a new user signing up for a Cash App account, make sure to provide a valid phone number or email address during the registration process. This is important for account verification and future communication with Cash App support if needed.
Once you have successfully entered your phone number or email address, it’s time to move on to the next step: verifying your phone number or email.
Step 4: Verify your Phone Number or Email
After entering your phone number or email address in the Cash App login screen, the next step is to verify that information. Verification helps ensure the security and authenticity of your Cash App account. Follow these steps to complete the verification process:
- Upon entering your phone number or email address, Cash App will send you a verification code via SMS or email.
- Check your phone’s SMS inbox or email inbox for the verification code.
- Enter the verification code in the designated field on the Cash App login screen.
- Double-check the code to ensure it matches the one received, as mistyping the code can result in an unsuccessful verification attempt.
Once you have successfully entered the verification code, Cash App will verify your phone number or email address. This step helps confirm that you have access to the provided contact information and adds an extra layer of security to your account.
If you didn’t receive a verification code, you can request a new one by tapping on the “Resend Code” or “Send Again” option. In case you encounter any issues with receiving the code, ensure that you have a stable internet or cellular connection and that your phone number or email address is correct and active.
Once your phone number or email address is successfully verified, you can proceed to the next step: entering the confirmation code.
Step 5: Enter the Confirmation Code
After verifying your phone number or email address, Cash App will prompt you to enter the confirmation code. This code is an additional security measure to ensure that you are the rightful owner of the verified contact information. Follow these steps to enter the confirmation code:
- Check your SMS inbox or email inbox for the confirmation code sent by Cash App.
- On the Cash App login screen, enter the confirmation code in the designated field.
- Take care to accurately enter the confirmation code to avoid any errors that might prevent you from successfully logging in.
Verification codes are time-sensitive and usually have an expiration time. Ensure that you enter the confirmation code promptly after receiving it to minimize the chance of it expiring. If the code does expire, you can request a new confirmation code by tapping on the “Resend Code” or “Send Again” option on the login screen.
If you encounter any issues with receiving the confirmation code, make sure you have a stable internet or cellular connection. Additionally, confirm that your phone number or email address is accurate and active. If the problem persists, you can reach out to Cash App support for assistance.
Once you have entered the correct confirmation code, Cash App will validate it, and if successful, you will proceed to the next steps in the login process. Congratulations! You’re one step closer to accessing your Cash App account.
Step 6: Create a $Cashtag (optional)
Creating a $Cashtag is an optional step in the Cash App login process, but it can add a personalized touch to your account and make it easier for others to send you money. Follow these steps to create your $Cashtag:
- After entering and confirming your phone number or email address, Cash App will give you the option to create a $Cashtag.
- A $Cashtag is a unique username that starts with a dollar sign ($) followed by your chosen name or keyword. It helps others to easily identify and send you money.
- Tap on the “Create $Cashtag” or “Set $Cashtag” option.
- Enter your desired $Cashtag in the provided field.
- Choose a $Cashtag that is easy to remember and related to your name, brand, or business.
- Keep in mind that $Cashtags are unique, so if your desired $Cashtag is already taken, you will need to choose a different one.
- Confirm your $Cashtag selection, and it will be linked to your Cash App account.
Once you have created your $Cashtag, you can share it with others to receive payments easily. It acts as a unique identifier for your Cash App account and allows people to send you money by simply entering your $Cashtag.
However, if you choose not to create a $Cashtag during the login process, you can always do so later by accessing the settings in your Cash App account. Just keep in mind that having a $Cashtag can enhance your Cash App experience and simplify money transfers.
Now that you have the option to create a $Cashtag, let’s move on to the next step: linking a bank account or debit card to your Cash App account.
Step 7: Link a Bank Account or Debit Card
Linking a bank account or debit card to your Cash App account is an important step that enables you to send, receive, and move money seamlessly. Follow these steps to link your bank account or debit card:
- After creating your $Cashtag (if you chose to), Cash App will prompt you to link a bank account or debit card.
- Tap on the “Link Bank” or “Link Card” option.
- Choose the method you prefer based on the available options.
- If linking a bank account:
- Enter the required information, including your bank’s name, your account number, and routing number.
- Follow the prompts to complete the verification process, which may involve confirming small transactions or providing additional information.
- If linking a debit card:
- Enter your debit card information, including the card number, expiration date, and CVV.
- Confirm the card information and follow any additional steps, such as verifying your identity through a one-time password or security code.
Linking a bank account or debit card to your Cash App account is a secure process. Cash App encrypts your personal information and employs industry-standard security measures to protect your financial data.
Once your bank account or debit card is successfully linked, you can use it to send or receive money, fund your Cash App balance, or make purchases using your Cash Card (a customizable debit card provided by Cash App).
Having a linked bank account or debit card gives you the flexibility to manage your finances conveniently within the Cash App ecosystem.
Now that you’ve successfully linked your bank account or debit card, let’s proceed to the next step: setting up your security features.
Step 8: Set up Your Security Features
Ensuring the security of your Cash App account is crucial to protect your personal and financial information. Cash App offers various security features that you can set up to enhance the safety of your account. Follow these steps to set up your security features:
- Open the Cash App on your mobile device and log in to your account using your verified phone number or email address.
- Once logged in, tap on your profile icon or navigate to the settings menu in the app.
- Select the “Security” or “Privacy & Security” option.
- Review and enable the available security features based on your preferences. Some common security features include:
- Two-Factor Authentication (2FA): Enable this feature to add an extra layer of security to your account. With 2FA, you’ll need to provide a unique verification code in addition to your password when logging in.
- Touch ID or Face ID: If your mobile device supports biometric authentication, you can enable Touch ID or Face ID to securely access your Cash App account without entering your password.
- Notification Alerts: Enable notifications to receive real-time updates about your account activity, transaction status, and security alerts.
- Passcode Lock: Set up a unique passcode that you’ll need to enter whenever you open the Cash App on your device. This adds an additional level of protection, even if someone else gains access to your phone.
By setting up these security features, you can significantly enhance the protection of your Cash App account and reduce the risk of unauthorized access or fraudulent activities.
Remember to regularly review and update your security settings to stay ahead of potential threats. Additionally, ensure that your device’s operating system and the Cash App itself are up to date with the latest security patches and updates.
Now that you’ve successfully set up your security features, let’s move on to the final step: logging in to your Cash App account.
Step 9: Log in to Your Cash App Account
After completing the necessary steps of downloading the app, entering your phone number or email, verifying your contact information, creating a $Cashtag (optional), linking a bank account or debit card, and setting up your security features, you are now ready to log in to your Cash App account. Follow these final steps:
- Open the Cash App on your mobile device.
- If you had previously logged out of your account, you’ll be taken to the Cash App login screen.
- Enter your verified phone number or email address in the provided field.
- Double-check that you have entered the correct information to ensure a successful login.
- Tap on the “Next” or “Log In” button.
- If you have enabled two-factor authentication (2FA), you’ll be prompted to enter a unique verification code. Enter the code to proceed.
- If you have enabled biometric authentication (Touch ID or Face ID), use your fingerprint or facial recognition to access your Cash App account.
Upon successful login, you’ll be directed to the Cash App home screen, where you can access your balance, send or receive money, view your transaction history, and explore other features and services offered by Cash App.
Remember to keep your login information secure and confidential. Avoid sharing your login credentials and be cautious of phishing attempts or suspicious links that may compromise your account’s security.
If you encounter any issues during the login process, such as a forgotten password or difficulties verifying your information, you can reach out to Cash App support for assistance. They are available to help you resolve any login-related concerns and ensure a smooth experience on the platform.
Now that you have successfully logged in to your Cash App account, you can enjoy the convenience and versatility of managing your finances, sending money, and making transactions at your fingertips.
Conclusion
Congratulations! You have successfully learned how to log in to your Cash App account. With the step-by-step guide provided, you should now be able to navigate the login process with ease.
Remember, the key steps include downloading the Cash App, opening the app, entering your phone number or email, verifying your contact information, creating a $Cashtag (optional), linking a bank account or debit card, setting up your security features, and finally, logging in to your Cash App account.
By following these steps, you can access the various features of Cash App, including sending and receiving money, managing your balance, and using your personalized $Cashtag to simplify transactions. Additionally, the security features will help ensure the safety of your account and protect your financial information.
It’s important to keep your login credentials and personal information secure to prevent unauthorized access to your Cash App account. Be cautious while using public Wi-Fi networks and avoid sharing your login information with anyone.
If you encounter any issues during the login process or have any questions about using Cash App, don’t hesitate to reach out to their support team. They are available to assist you and provide solutions to any concerns you may have.
Now that you are logged into your Cash App account, explore the various features and functionalities to make the most of this convenient mobile payment service. Whether you’re splitting bills with friends, paying for goods and services, or managing your personal finances, Cash App makes it quick and easy.
Enjoy the convenience, security, and simplicity of Cash App as you navigate the world of digital payments. Happy transacting!