Introduction
Welcome to the world of e-wallets on your Mac! E-wallets have revolutionized the way we manage our finances, offering a convenient and secure way to store and access our digital assets. If you’re new to using e-wallets or simply want to clean up your digital space, deleting unnecessary wallets is a necessary step. In this guide, we’ll walk you through the process of deleting wallets in e-wallet on your Mac.
Whether you’ve stopped using a particular wallet or want to declutter your e-wallet application, deleting wallets can help streamline your financial management. It’s important to note that deleting a wallet is a permanent action, so make sure you’re certain about the deletion before proceeding.
With e-wallets becoming increasingly popular, it’s essential to have a clear understanding of how to manage your wallets effectively. By deleting unused or redundant wallets, you can enhance the efficiency and organization of your e-wallet application, ensuring that you only have the wallets you actively use and need.
In this step-by-step guide, we’ll show you how to delete wallets in e-wallet on your Mac, providing you with the necessary instructions and tips to complete the process seamlessly. So, let’s dive in and learn how to declutter your digital finances by deleting wallets in e-wallet on your Mac!
Step 1: Launch the E-wallet Application
The first step in deleting wallets in e-wallet on your Mac is to open the e-wallet application. Locate the e-wallet icon either in your Mac’s dock or in the Applications folder. Once you’ve found it, simply click on the icon to launch the e-wallet application.
If you’re unsure about which e-wallet application you’re using or haven’t installed one yet, there are several popular options available for Mac users. Some of the most widely used e-wallet applications include Apple Pay, Google Wallet, PayPal, and Samsung Pay. Choose the e-wallet application that you have wallets stored in and proceed with opening it.
Once the e-wallet application is open, you may be prompted to enter your credentials or use biometric authentication, such as Touch ID or Face ID, to log in. This step ensures the security of your wallets and prevents unauthorized access to your digital assets. Follow the on-screen instructions to provide the necessary authentication and gain access to your e-wallet.
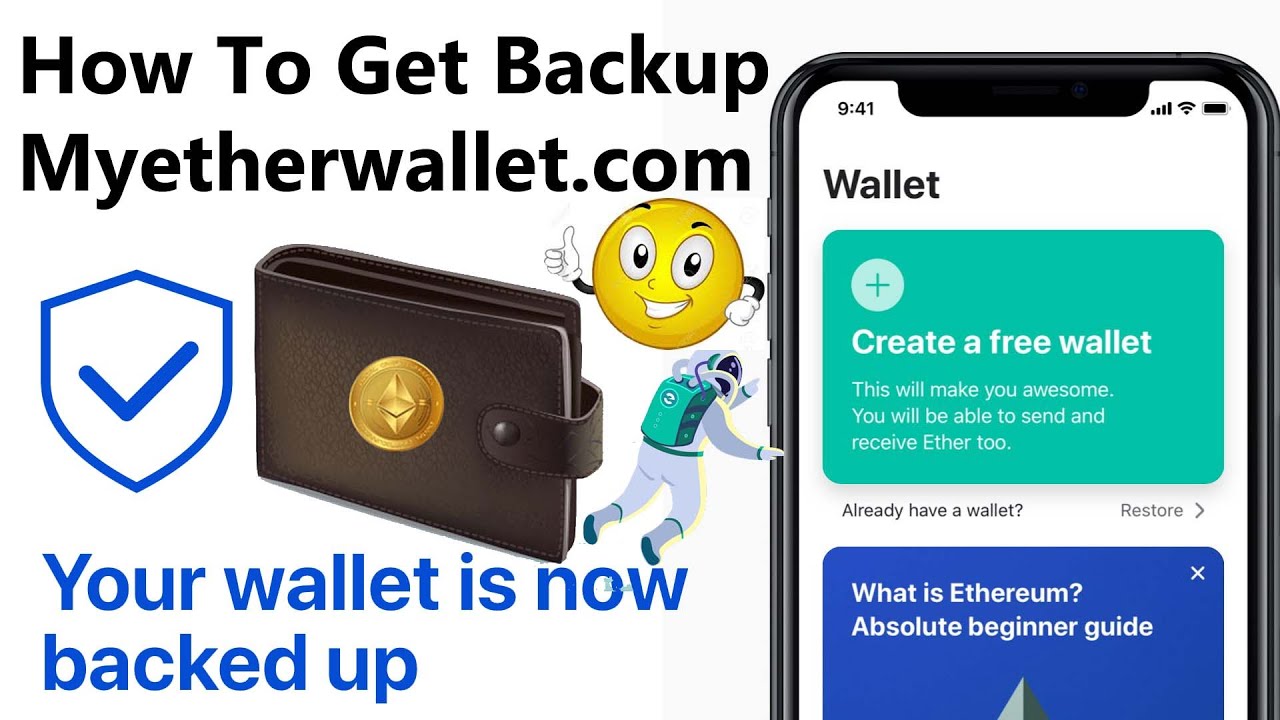
After successfully logging in, you should see the main interface of your e-wallet application, displaying the available wallets and other relevant options. Each e-wallet application may have a slightly different layout and design, but the overall process of deleting wallets remains similar across applications.
Now that you’ve launched the e-wallet application and have access to your wallets, let’s move on to the next step: navigating to the “Wallets” section.
Step 2: Go to the “Wallets” Section
Once you have opened the e-wallet application on your Mac, the next step is to navigate to the “Wallets” section. This section houses all the wallets you have set up in your e-wallet application and allows you to manage and make changes to them, including deleting wallets.
The location of the “Wallets” section may vary depending on the e-wallet application you’re using, but it is typically accessible either from the main menu or through a designated tab or icon. Look for options or tabs labeled “Wallets,” “My Wallets,” or something similar.
Clicking on the designated “Wallets” section will take you to a page or screen where you can view a list or grid of all the wallets you have created or added. This section provides an overview of your wallets and allows you to perform various actions on them, such as adding funds, making transactions, and, of course, deleting wallets.
Take a moment to familiarize yourself with the layout and design of the “Wallets” section in your e-wallet application. Look for any options or buttons that indicate the ability to delete or manage wallets. Different applications may have different icons or labels for deleting wallets, so keep an eye out for anything that indicates the action you’re looking to perform.
If you’re having trouble finding the “Wallets” section or need additional guidance, consult the help documentation or support resources provided by the e-wallet application. They can offer specific instructions and screenshots to assist you in locating the “Wallets” section within the application.
Now that you’re in the “Wallets” section of your e-wallet application, you’re ready to move on to the next step: selecting the wallet you want to delete.
Step 3: Select the Wallet You Want to Delete
With the “Wallets” section open in your e-wallet application, it’s time to select the specific wallet that you wish to delete. This step allows you to pinpoint the wallet you no longer need or want to remove from your e-wallet.
Scan through the list or grid of wallets displayed in the “Wallets” section of your e-wallet application. Take note of the names, logos, or other identifying information associated with each wallet to ensure you select the correct one for deletion.
Click on the wallet you want to delete to highlight or select it. This action typically triggers additional options or settings specific to the selected wallet, enabling you to make changes or perform actions on that particular wallet.
Some e-wallet applications may require you to right-click or use a long-press gesture on the selected wallet to access a contextual menu with various options, including the option to delete the wallet. If you’re unsure how to bring up the menu, refer to the application’s user manual or help resources for guidance.
By selecting the wallet you want to delete, you’re setting the stage for the next step: navigating to the wallet settings.
It’s important to pause and double-check your selection before proceeding to ensure you have chosen the correct wallet for deletion. Deleting a wallet is irreversible, and any funds or information associated with the wallet will be permanently lost. Taking a moment to verify your choice helps prevent any unintended deletions and ensures you maintain the wallets you still need and want.
Once you’re confident in your selection, it’s time to move forward and access the settings of the chosen wallet to proceed with the deletion process.
Step 4: Navigate to the Wallet Settings
After selecting the wallet you want to delete in the previous step, you need to navigate to the wallet settings. This section of your e-wallet application allows you to access specific options and actions related to the selected wallet, including the deletion functionality.
Depending on the design and layout of your e-wallet application, the wallet settings can typically be accessed through a gear or cog icon, a three-dot menu, or a dedicated “Settings” tab. Look for any indicators that signify the presence of wallet-related settings.
Click on the appropriate icon or tab to access the wallet settings. This action will bring up a new screen or overlay that displays various options, preferences, and actions related specifically to the selected wallet.
Take a moment to review the available settings and familiarize yourself with the layout and options provided. Look for any specific options or buttons that pertain to deleting the wallet. Some e-wallet applications may label this option as “Delete,” “Remove,” or “Close Wallet.” Others may have an icon that represents the deletion action.
If you’re having trouble finding the wallet settings or the delete option, consult the application’s user guide or help documentation for specific instructions or screenshots that will guide you through the process.
At this stage, you’re just a few steps away from deleting the selected wallet. The next step involves executing the deletion process, so make sure you’re prepared and confident in your decision to permanently remove the wallet from your e-wallet application.
Once you have successfully accessed the wallet settings, you can proceed to the next step and delete the chosen wallet with confidence!
Step 5: Delete the Wallet
Now that you have successfully navigated to the wallet settings of the selected wallet, it’s time to proceed with the deletion process. Deleting the wallet will permanently remove it from your e-wallet application, so exercise caution and ensure you have selected the correct wallet for deletion.
Look for the specific option or button that indicates the ability to delete the wallet. Depending on the e-wallet application you’re using, this option may be labeled as “Delete,” “Remove,” or “Close Wallet.” Alternatively, there may be an icon or symbol representing the deletion action.
Click on the delete button or select the delete option to initiate the wallet deletion process. Some e-wallet applications may prompt you with a confirmation message or warning before proceeding. Read the message carefully to ensure you understand the consequences of deleting the wallet.
Confirm your decision to delete the wallet by following the on-screen prompts or clicking the appropriate confirmation button. Keep in mind that once the wallet is deleted, any funds or information associated with it will be permanently erased. This action cannot be undone, so double-check your decision before proceeding.
Depending on the size of the wallet or the amount of data associated with it, the deletion process may take a few seconds or longer. Be patient and allow the e-wallet application to complete the deletion process. You may see a progress indicator or loading animation while the application removes the wallet from your account.
Once the deletion process is complete, you should receive a confirmation message indicating the successful removal of the wallet. Take a moment to review this message and ensure that the correct wallet has been deleted. It is a good practice to confirm the deletion in your e-wallet interface or review any updated wallet lists to verify that the selected wallet is no longer present.
With the successful deletion of the wallet, you have cleared out unnecessary or unused wallets from your e-wallet application. This helps streamline your financial management and ensures that you only have the wallets you actively use and need.
Now that you have completed the wallet deletion process, you can move on to other tasks within your e-wallet application or explore additional features that can further enhance your digital financial experience.
Step 6: Confirm the Deletion
After deleting the wallet, it is essential to confirm the deletion to ensure that it was successful and that the selected wallet has been permanently removed from your e-wallet application. Confirming the deletion provides peace of mind and helps you ensure that your wallet management is accurate and up to date.
Once you receive the confirmation message indicating the successful deletion of the wallet, take a moment to review the message and any accompanying information. This message typically appears on the screen or within a notification, depending on the e-wallet application you’re using.
Be sure to read the confirmation message carefully to verify that the correct wallet has been deleted. Double-check for any specific details or identifiers associated with the deleted wallet to ensure accuracy.
Next, you can cross-reference this deletion confirmation within your e-wallet application. Navigate back to the “Wallets” section or the main interface of the application and check if the deleted wallet is no longer visible. A deleted wallet should no longer appear in your list of wallets or be accessible in any other way.
If you find that the wallet still appears in your e-wallet application or if you receive an error message during the deletion process, it is recommended to reach out to the support team or consult the application’s help resources. They can provide guidance and assistance in resolving any issues or verifying the deletion status of the wallet.
By confirming the deletion of the wallet, you can ensure that your e-wallet application reflects accurate and up-to-date information. This helps prevent any confusion or unnecessary clutter in your digital wallet management.
With the confirmation of the deletion complete, you have successfully followed all the necessary steps to delete a wallet in your e-wallet application on your Mac. Take a moment to appreciate your streamlined digital finances and enjoy the enhanced efficiency that comes with removing unnecessary wallets.
Now that you have mastered the skill of deleting wallets, you can confidently manage your e-wallet application and ensure that it remains organized and tailored to your specific financial needs.
Conclusion
Congratulations! You have successfully learned how to delete wallets in your e-wallet application on your Mac. By following the step-by-step guide provided, you can efficiently declutter your digital finances and ensure that your e-wallet contains only the necessary and actively used wallets.
Deleting wallets helps improve the organization and efficiency of your e-wallet application, making it easier to manage your digital assets. It also provides a sense of security by removing any unused or unnecessary wallets that may pose a potential risk.
Remember, when deleting a wallet, it’s crucial to double-check your selection and confirm the deletion to avoid any unintended loss of funds or data. Take the time to review the confirmation message and cross-reference the deleted wallet in your e-wallet application to ensure the deletion was successful.
As with any financial management action, it’s essential to exercise caution and make informed decisions. If you have any concerns or doubts while deleting wallets, always refer to the help documentation or contact the support team of your e-wallet application for assistance.
Now that you have acquired the skills to delete wallets, you can take control of your digital finances, keeping your e-wallet application organized and optimized for your needs.
So, go ahead and declutter your e-wallet, remove unnecessary wallets, and enjoy a simplified and efficient digital financial experience on your Mac!