Introduction
Welcome to this step-by-step guide on how to change your Cash App from a business account to a personal account. Cash App is a popular money transfer app that allows users to send and receive money quickly and conveniently. While many individuals use Cash App for personal transactions, some may initially set up their accounts as business accounts for various reasons.
However, if you no longer need the features and functionality of a business account and prefer to use Cash App for personal purposes only, you can easily switch to a personal account. By following the simple steps outlined in this guide, you’ll be able to navigate the necessary settings and update your Cash App account in no time.
Switching from a business account to a personal account offers several advantages. Not only does it streamline your Cash App experience, but it also ensures that you have access to all the personal features and functionalities of the app. This includes sending and receiving money from friends and family, making payments at merchants that accept Cash App, and withdrawing funds to your linked bank account.
So, if you’re ready to make the switch and enjoy the benefits of a personal Cash App account, let’s dive into the step-by-step process. Follow along as we guide you through the necessary actions to change your Cash App from a business account to a personal account. With just a few clicks, you’ll have your account updated and ready to use for all your personal financial transactions.
Step 1: Log in to Cash App
The first step to changing your Cash App from a business account to a personal account is logging in to your Cash App account. If you already have the Cash App installed on your mobile device, simply open the app and enter your login credentials. If you don’t have the app installed, you can easily download it from the App Store or Google Play Store.
Once you have launched the Cash App, you will be directed to the login page. Here, you’ll need to enter your registered mobile number or email address and the password associated with your account. Double-check that you have entered the correct information to ensure a successful login. If you have forgotten your password, you can follow the password recovery process provided within the app.
After entering your login credentials, tap on the “Sign In” button. Cash App will verify your information and log you into your account. Upon successful login, you will be directed to your Cash App home screen, where you can access various features and settings.
It’s important to ensure that the login information you provide is accurate and up-to-date. This will help to maintain the security of your account and prevent unauthorized access. Remember to keep your login credentials confidential and avoid sharing them with anyone.
Now that you’re logged in to your Cash App account, we can proceed to the next step, which involves accessing your profile settings to make the necessary changes. Let’s move on to Step 2 to learn how to navigate to the profile settings section.
Step 2: Access your profile settings
Once you are logged in to your Cash App account, you need to navigate to the profile settings section to initiate the process of changing your account from a business account to a personal account. Accessing your profile settings is a straightforward process that can be done within a few taps on your mobile device.
To access your profile settings, look for the “Profile” icon on the bottom right corner of your Cash App home screen. This icon typically resembles a person’s silhouette. Tap on the icon to proceed.
Upon tapping on the “Profile” icon, you will be redirected to your profile page, where you can view and modify various aspects of your account. This includes your personal information, linked bank accounts, and other settings.
On your profile page, you may see different tabs or sections that contain specific account settings. Look for the tab or section labelled “Settings” or “Account Settings”. The naming may slightly vary depending on the version of the Cash App you are using.
Once you have located the “Settings” or “Account Settings” tab, tap on it to access a list of options and configurations related to your Cash App account. This is where you can make the desired changes to convert your account from a business account to a personal account.
Now that you have successfully accessed your profile settings, you can proceed to the next step, where we will discuss how to navigate to the specific “Business” tab within the settings to continue with the account conversion process. Follow along as we guide you through each step to ensure a smooth transition to a personal Cash App account.
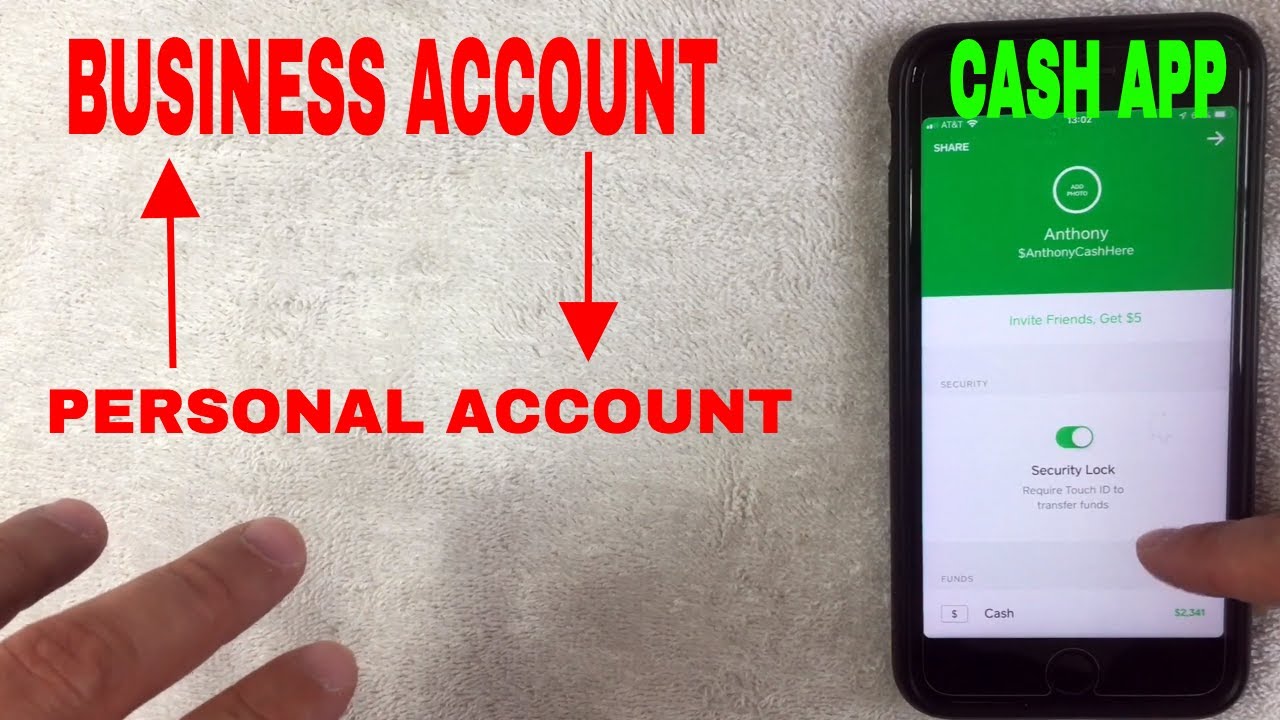
Step 3: Click on the “Business” tab
Once you have accessed your profile settings in the Cash App, the next step is to locate and click on the “Business” tab. This tab houses specific settings related to your Cash App business account, and changing its configuration will allow you to switch to a personal account.
On the settings page, browse through the list of available options and look for the tab labelled “Business”. It is usually located towards the top of the settings page, alongside other tabs such as “Personal”, “Notifications”, “Security”, and more.
Tap on the “Business” tab to access the settings specific to your Cash App business account. This tab will open up a new page or panel where you can view and modify various business-related settings, such as business name, business email, tax information, and more.
While on the “Business” tab, take a moment to review and familiarize yourself with the business settings displayed. This will give you an overview of the current configuration of your Cash App business account and help you make informed decisions as you proceed with the conversion process.
By clicking on the “Business” tab, you are one step closer to converting your Cash App account from a business account to a personal account. The next step will involve verifying your personal account details so that Cash App can properly associate your account with your personal information. Let’s move on to Step 4 to learn how to complete this verification process.
Step 4: Verify your personal account
After clicking on the “Business” tab in your Cash App settings, the next step is to verify your personal account details. This verification process is essential to ensure that your Cash App account is associated with your personal information accurately.
On the “Business” settings page, you will likely see an option or button labelled “Verify Personal Account” or something similar. Tap on this option to initiate the verification process.
Cash App may prompt you to provide certain personal details for verification purposes. This could include information such as your legal name, address, date of birth, and social security number.
Make sure to enter the requested information accurately and truthfully. It’s important to provide valid details as this will help Cash App verify your personal account successfully.
It’s worth noting that Cash App takes security and privacy seriously. Your personal information will be protected and used strictly for the purpose of verifying your account and ensuring compliance with financial regulations.
Once you have entered all the required personal details, review the information to confirm its accuracy. Double-check for any typos or errors before proceeding to the next step.
After verifying your personal account, Cash App will process the information provided and link it to your account. This will allow you to use Cash App as a personal account and access all the features and functionalities available for individual users.
Now that you have successfully verified your personal account, we can move on to the next step, where you will be required to provide any additional information as per Cash App’s guidelines. Let’s proceed to Step 5 to learn more about this process.
Step 5: Provide required information
After verifying your personal account in Cash App, the next step is to provide any additional required information. This step may involve submitting documents or filling out forms to comply with Cash App’s guidelines and regulations.
Upon completing the verification process in Step 4, Cash App may prompt you to provide specific documentation or details to confirm your identity or comply with Know Your Customer (KYC) requirements. These documents may include a copy of your government-issued identification, proof of address, or any other documents requested by Cash App.
Follow the prompts provided by Cash App and carefully read through the requirements to understand what is expected. Make sure to have the necessary documents readily available so that you can easily provide them when prompted.
If you are required to upload documents, Cash App will provide an option to do so within the app. You can typically take photos of the required documents using your device’s camera or upload them from your photo gallery. Ensure that the documents are clear, legible, and meet the specified requirements.
In addition to documents, Cash App may also ask for specific information, such as your occupation, source of income, or other relevant details. This is standard procedure to ensure compliance with financial regulations and prevent fraudulent activities.
Take your time to accurately provide the requested information and double-check for any errors or omissions. It’s crucial to provide truthful and accurate information to avoid any complications or issues with your Cash App account.
Once you have provided all the required information, Cash App will review your submission and process the updates to your account. This typically takes some time, so it’s important to be patient during the review process.
Now that you have provided the required information, we can proceed to the next step, where you will confirm the changes made to your Cash App account. Let’s move on to Step 6 to learn how to complete this final step.
Step 6: Confirm your changes
After providing the necessary information and documents, the next step is to confirm the changes made to your Cash App account. This is an important step to ensure that the conversion from a business account to a personal account is completed successfully.
Once Cash App has reviewed the information you provided in Step 5, you will receive a notification or message within the app regarding the status of your account update. This message will inform you if any additional action is required, or if your changes have been approved.
If additional action is required, carefully follow the instructions provided by Cash App to fulfill any outstanding requirements or provide any additional information that may be necessary for the account update.
If your changes have been approved, Cash App will notify you and confirm the successful conversion of your account from a business account to a personal account. You may be prompted to review and accept any updated terms and conditions or agreements associated with the personal account.
Take the time to review these terms and conditions to familiarize yourself with any changes that may have been made. If you agree to the updated terms, proceed with accepting them as directed by Cash App.
By confirming your changes, you are acknowledging that you understand and agree to the new account configuration and the terms and conditions associated with a personal Cash App account.
Once you have confirmed your changes, Cash App will finalize the update to your account and you will have successfully converted your Cash App account from a business account to a personal account.
Now that you have confirmed your changes, you can start using Cash App as a personal account for all your transactions and financial needs.
Congratulations! You have completed the step-by-step process of changing your Cash App from a business account to a personal account. Enjoy the seamless experience of using Cash App for personal transactions and money management.
Step 7: Use Cash App as a personal account
Now that you have successfully converted your Cash App account to a personal account, it’s time to start using it for all your personal financial transactions. As a personal Cash App user, you have access to a range of features and functionalities that can streamline your money management and make payments more convenient.
With your personal Cash App account, you can send and receive money from friends and family with just a few taps on your mobile device. Simply enter the recipient’s Cash App username or mobile number and the amount you want to send. You can also add a note or description to accompany the transaction.
In addition to person-to-person transactions, Cash App allows you to make payments at various merchants that accept Cash App. Simply look for the Cash App logo or ask the merchant if they accept payments through the app. You can easily scan the merchant’s QR code or enter a unique “Cashtag” to complete the transaction.
Furthermore, you can link your bank account to your Cash App to easily deposit or withdraw funds. This provides a seamless way to manage your funds, including transferring money between your Cash App balance and your bank account.
Remember to keep an eye on your account activity and review transactions on a regular basis. Cash App provides detailed transaction history and statements that can help you track your expenses, monitor incoming and outgoing payments, and stay organized.
It’s also important to take advantage of Cash App’s security features. Enable features such as two-factor authentication, PIN lock, or fingerprint/face recognition login to add an extra layer of security to your account and protect against unauthorized access.
Lastly, stay updated with Cash App’s notifications and any new features or updates they may release. They often introduce new functionalities that can enhance your experience and make managing your finances even easier.
Enjoy the convenience and versatility of using Cash App as a personal account, and make the most of its features to simplify your financial transactions and stay connected with friends and family.
With this final step, you have completed the entire process of changing your Cash App from a business account to a personal account. Congratulations on successfully making the switch and enjoy the benefits of a personalized Cash App experience!
Conclusion
Changing your Cash App from a business account to a personal account is a simple and straightforward process. By following the step-by-step guide outlined in this article, you can seamlessly transition your Cash App account to better suit your personal financial needs.
We began by logging in to Cash App and accessing the profile settings. From there, we clicked on the “Business” tab and verified our personal account details. Next, we provided any required information and documents to comply with Cash App’s guidelines. After that, we confirmed the changes made to our account and accepted any updated terms and conditions.
With our Cash App now converted to a personal account, we can fully utilize its range of features and functionalities. Whether it’s sending money to friends and family, making payments at merchants, or managing our funds through linked bank accounts, Cash App offers a convenient and efficient platform for personal financial transactions.
Remember to take advantage of Cash App’s security features to protect your account, review your transaction history regularly, and stay informed about any new updates or features introduced by Cash App.
By successfully changing your Cash App to a personal account, you have taken control of your financial transactions and can enjoy the simplicity and convenience of this popular money transfer app. Make the most of your personal Cash App experience and experience effortless money management.
Thank you for following this step-by-step guide, and we hope that it has been helpful in assisting you with changing your Cash App from a business account to a personal account. Happy transferring!