Introduction
Welcome to our step-by-step guide on how to add Venmo to Splitwise! If you’re looking for a convenient way to split bills and expenses with friends, then you’ve come to the right place. Splitwise is a popular expense-sharing app that simplifies the process of splitting costs, while Venmo is a widely-used digital wallet that allows you to make payments and send money to friends seamlessly. By integrating Venmo with Splitwise, you can easily settle expenses without the hassle of keeping track of who owes what.
Whether you’re planning a group trip, splitting rent with roommates, or sharing the cost of a meal, adding Venmo as a payment option in Splitwise can save you time and make the process much smoother. In this guide, we’ll walk you through the steps to link your Venmo account to Splitwise, so you can make hassle-free payments and keep track of your balances on both platforms.
Before we dive into the process, it’s important to note that both Venmo and Splitwise are available as mobile apps for Android and iOS devices. Make sure you have the latest versions of each app installed on your smartphone to ensure a seamless integration experience.
Now, let’s get started and learn how to add Venmo to Splitwise!
Overview of Venmo and Splitwise
Before we delve into the steps of adding Venmo to Splitwise, let’s take a closer look at these two platforms.
Venmo
Venmo is a popular digital wallet and peer-to-peer payment service owned by PayPal. It allows you to make secure payments, split bills, and send money to friends effortlessly. With Venmo, you can connect your bank account, debit card, or credit card to fund your transactions. It also provides social features, such as the option to add friends, like or comment on transactions, and even share payment activity with others. Venmo simplifies the process of paying friends back, whether it’s for dining out, splitting rent, or any other shared expenses.
Splitwise
Splitwise is an expense-sharing app designed to simplify the process of splitting bills among friends, roommates, or groups. It eliminates the need for complex calculations and constant reminders by keeping track of who owes what. With Splitwise, you can create groups, add expenses, and allocate costs among participants. The app calculates each person’s share and provides a clear overview of who owes money to whom. Splitwise is particularly useful for situations like group trips, shared rent, or shared household expenses.
By integrating Venmo with Splitwise, you can seamlessly settle expenses within the Splitwise app. This integration enables you to make payments directly from Splitwise using your Venmo account, eliminating the need to switch between multiple apps or manually collect money from friends.
Now that you have a better understanding of Venmo and Splitwise, let’s move on to the step-by-step process of adding Venmo to Splitwise.
Step 1: Creating a Venmo Account
The first step in adding Venmo to Splitwise is to create a Venmo account. If you already have a Venmo account, you can skip this step and proceed to Step 2.
To create a Venmo account, follow these simple instructions:
- Download the Venmo app from the App Store (for iOS) or the Google Play Store (for Android).
- Open the app and tap on “Sign Up” to create a new account.
- Enter your email address or mobile number, and create a secure password for your account.
- Verify your email address or mobile number by following the instructions provided.
- Once your account is verified, you will be prompted to link a payment method. You have the option to link your bank account, debit card, or credit card to fund your Venmo transactions. If you prefer, you can skip this step and add a payment method later.
- Complete the setup process by entering your personal information, including your name and any additional details required.
Once you’ve successfully created your Venmo account, you’re ready to move on to the next step: adding friends on Venmo.
Step 2: Adding Friends on Venmo
Now that you have your Venmo account set up, it’s time to add your friends on Venmo. This will allow you to easily split expenses and make payments within the app. Here’s how you can add friends on Venmo:
- Open the Venmo app on your smartphone.
- Tap on the menu icon (usually represented by three horizontal lines) located in the top-left corner of the screen.
- From the menu options, select “Friends” or “Add Friends.”
- You will be presented with different options to add friends:
- If your friends are already on Venmo, you can search for their name, username, or phone number in the search bar and send them a friend request.
- You can also choose to link your contacts from your phone’s address book. Venmo will scan your contacts for people who are already on Venmo and allow you to easily send friend requests.
- If your friend doesn’t have a Venmo account, you can send them an invitation to join by tapping on the “Invite Friends” button and selecting your preferred method of invitation (email or SMS).
- Once you find and add your friends, they will receive a notification or invitation to connect on Venmo.
- Once your friend accepts your request or invitation, you will be able to see their name and profile in your list of Venmo friends.
By adding your friends on Venmo, you’ll be able to easily split expenses and make payments directly to them within the app. Now that you have your Venmo friends set up, let’s proceed to the next step: linking Venmo to Splitwise.
Step 3: Linking Venmo to Splitwise
Once you have your Venmo account and friends set up, it’s time to link Venmo to Splitwise. By linking the two platforms, you’ll be able to easily make payments through Venmo directly from Splitwise. Here’s how you can do it:
- Open the Splitwise app on your smartphone.
- Tap on the menu icon (usually represented by three horizontal lines) located in the top-left corner of the screen.
- From the menu options, select “Settings” or “Options.”
- Look for the “Payment” or “Connected Accounts” section.
- Select the option to add a payment method or connect your Venmo account.
- You will be redirected to the Venmo login page.
- Enter your Venmo login credentials (email or mobile number and password) and log in to your Venmo account.
- Allow permissions for Splitwise to access your Venmo account.
- Once the connection is established, you will receive a confirmation message in Splitwise that your Venmo account is now linked.
With Venmo successfully linked to Splitwise, you can now easily make payments to your friends directly through the Splitwise app. No need to switch between multiple apps or handle cash. Now, let’s move on to the next step: making payments with Venmo on Splitwise.
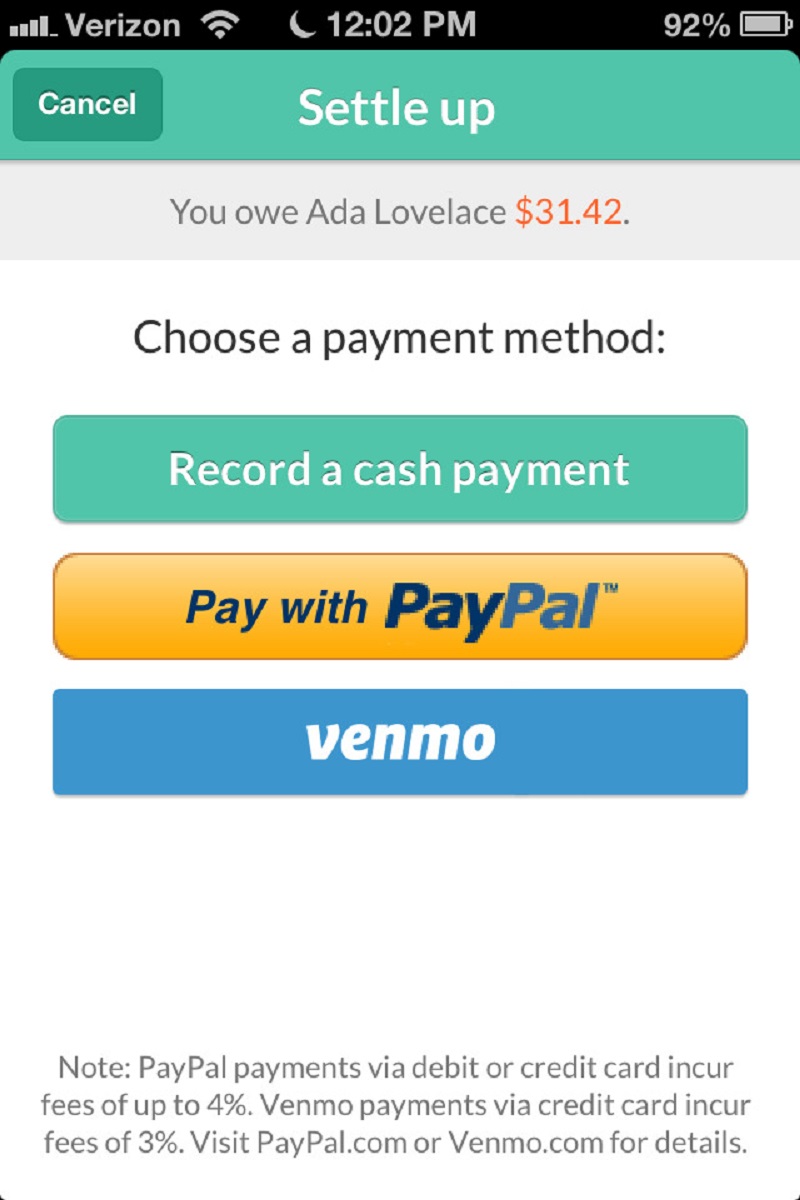
Step 4: Making Payments with Venmo on Splitwise
Now that you have Venmo linked to Splitwise, making payments to your friends becomes incredibly easy. Splitwise allows you to select a payment method, and with Venmo as an option, you can settle expenses seamlessly. Here’s how you can make payments with Venmo on Splitwise:
- Open the Splitwise app on your smartphone.
- Navigate to the expense or bill that you want to settle.
- Scroll down to find the payment options.
- Select Venmo as your preferred payment method.
- Enter the payment amount and any additional details if required.
- Tap on “Pay” or “Submit” to initiate the payment.
- You will be redirected to the Venmo app.
- Verify the payment details and confirm the transaction.
- Once the payment is successful, you will be redirected back to Splitwise and receive a confirmation of the payment.
By using Venmo as a payment method on Splitwise, you can easily settle your bills and expenses with friends. The integration ensures that the payment is accurately attributed to the specific expense, making it convenient for all parties involved.
Now that you know how to make payments with Venmo on Splitwise, let’s move on to the final step: tracking payments and balances.
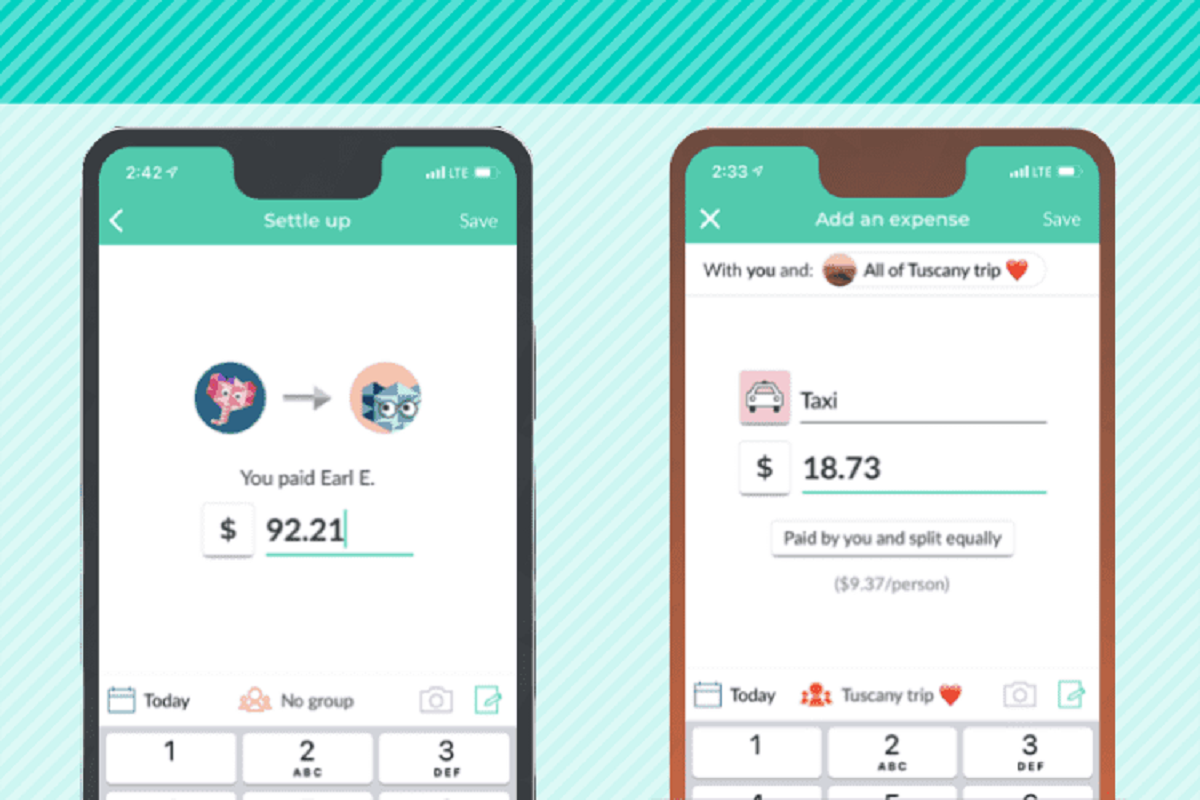
Step 5: Tracking Payments and Balances
Once you start using Venmo on Splitwise to make payments, it’s important to keep track of your payments and balances to ensure everything is properly accounted for. Splitwise provides various features and tools to help you monitor your expenses and stay on top of your financial obligations. Here’s how you can track payments and balances in Splitwise:
- Open the Splitwise app on your smartphone.
- Access the “Activity” or “History” section, which displays a record of all expenses, payments, and balance changes.
- Review the activity feed to see a chronological list of transactions, including payments made through Venmo.
- Use the filter or search options if necessary to locate specific transactions or expenses.
- Check the “Balances” tab to get a comprehensive view of who owes you money and who you owe money to.
- Splitwise displays the total balance for each friend or group, making it easy to reconcile expenses.
- If you have pending payments or unsettled expenses, Splitwise provides reminders and notifications to help you stay organized.
- If any inconsistencies or discrepancies are found, communicate with your friends and resolve them accordingly.
With Splitwise’s tracking features, you can easily monitor your expenses, keep a record of payments made through Venmo, and ensure that everyone is settling their debts accurately. This transparency and clarity reduce any confusion and make it easier to manage shared expenses.
Congratulations! You have successfully learned how to add Venmo to Splitwise and utilize the seamless integration to split bills and make payments effortlessly. Now you can enjoy the convenience of using Venmo directly within Splitwise to simplify the process of sharing expenses with friends.
Conclusion
Adding Venmo to Splitwise can greatly streamline the process of splitting bills and sharing expenses with friends. By integrating these two platforms, you can easily make payments through Venmo directly within the Splitwise app, eliminating the hassle of handling cash or transferring money through multiple platforms.
In this step-by-step guide, we covered the necessary steps to add Venmo to Splitwise. We started by creating a Venmo account and adding friends on the Venmo app. Then, we walked through the process of linking your Venmo account to Splitwise, enabling seamless transactions between the two platforms. With Venmo successfully linked, we explored how to make payments through Venmo on Splitwise, ensuring convenient and accurate expense settlement.
Finally, we highlighted the importance of tracking payments and balances in Splitwise to maintain a clear overview of your financial obligations. By using Splitwise’s activity feed and balance tab, you can easily monitor your expenses and reconcile any outstanding payments.
Now that you have completed this guide, you are well-equipped to leverage the power of Venmo and Splitwise to simplify the process of splitting bills and sharing expenses with friends. Whether it’s for group trips, shared rent, or any other shared expenses, integration with Venmo can save you time and make expense settlement a breeze.
So, why wait? Start linking your Venmo account to Splitwise today and enjoy hassle-free expense tracking and payment management!