Introduction
Welcome to this guide on how to see all your Zelle transactions! Zelle is a popular digital payment platform that allows users to conveniently send and receive money with just a few taps on their mobile device or clicks on their computer. Whether you use Zelle for personal or business transactions, keeping track of your payments is essential for financial management.
In this article, we will walk you through the process of setting up Zelle and show you how to view your transaction history both on the Zelle mobile app and the website. Additionally, we will explore how to access detailed transaction information, utilize the search functions to find specific transactions, download and print transaction history, and ensure the security of your Zelle account.
By following the steps and tips outlined in this guide, you will have a clear understanding of your Zelle transactions, allowing you to manage your finances efficiently and keep track of all your payments. So, let’s dive in and find out how you can easily view and monitor your Zelle transactions!
Setting Up Zelle
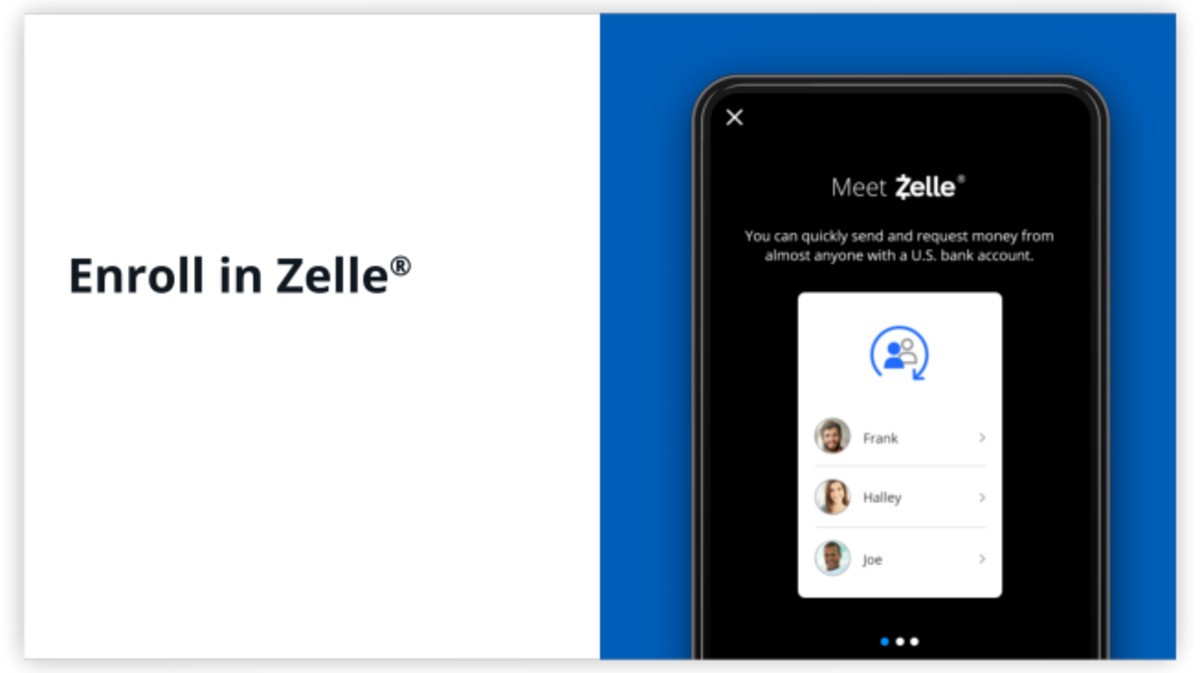
Before you can start viewing your Zelle transactions, you need to set up a Zelle account. Follow these steps to get started:
- Download the Zelle mobile app: Head to the App Store or Google Play Store on your smartphone and search for “Zelle.” Download and install the official Zelle app.
- Link your bank account: Once you have the app installed, open it and select your bank. If your bank is not listed, you can link a debit card to send and receive payments. Follow the prompts to link your bank account or debit card securely.
- Verify your identity: To ensure the security of your transactions, Zelle may require you to verify your identity. This can usually be done by confirming your mobile phone number or providing additional information.
- Create a Zelle profile: After your identity is verified, you’ll be prompted to create a Zelle profile. This includes providing your name and email address. You may also have the option to add a profile picture.
- Accept Zelle terms and conditions: Review and accept the Zelle terms and conditions to proceed.
Once you have completed these steps, your Zelle account will be set up and ready to use. You can now start sending and receiving payments and begin keeping track of your Zelle transactions.
Note: Setting up Zelle and linking your bank account may vary slightly depending on your bank’s integration with the Zelle platform. The process outlined above is a general guide, so please follow the specific instructions provided by your bank or the Zelle app during the setup process.
Checking Zelle Transactions on the Mobile App
Once you have set up your Zelle account, you can easily view your transaction history using the Zelle mobile app:
- Launch the Zelle app: Locate the Zelle app on your smartphone and open it.
- Log in to your account: Enter your Zelle username or registered email address and password to log in to your account.
- Access your transaction history: Once logged in, navigate to the transaction history section. This may be represented by an icon that resembles a clock or a list of recent transactions.
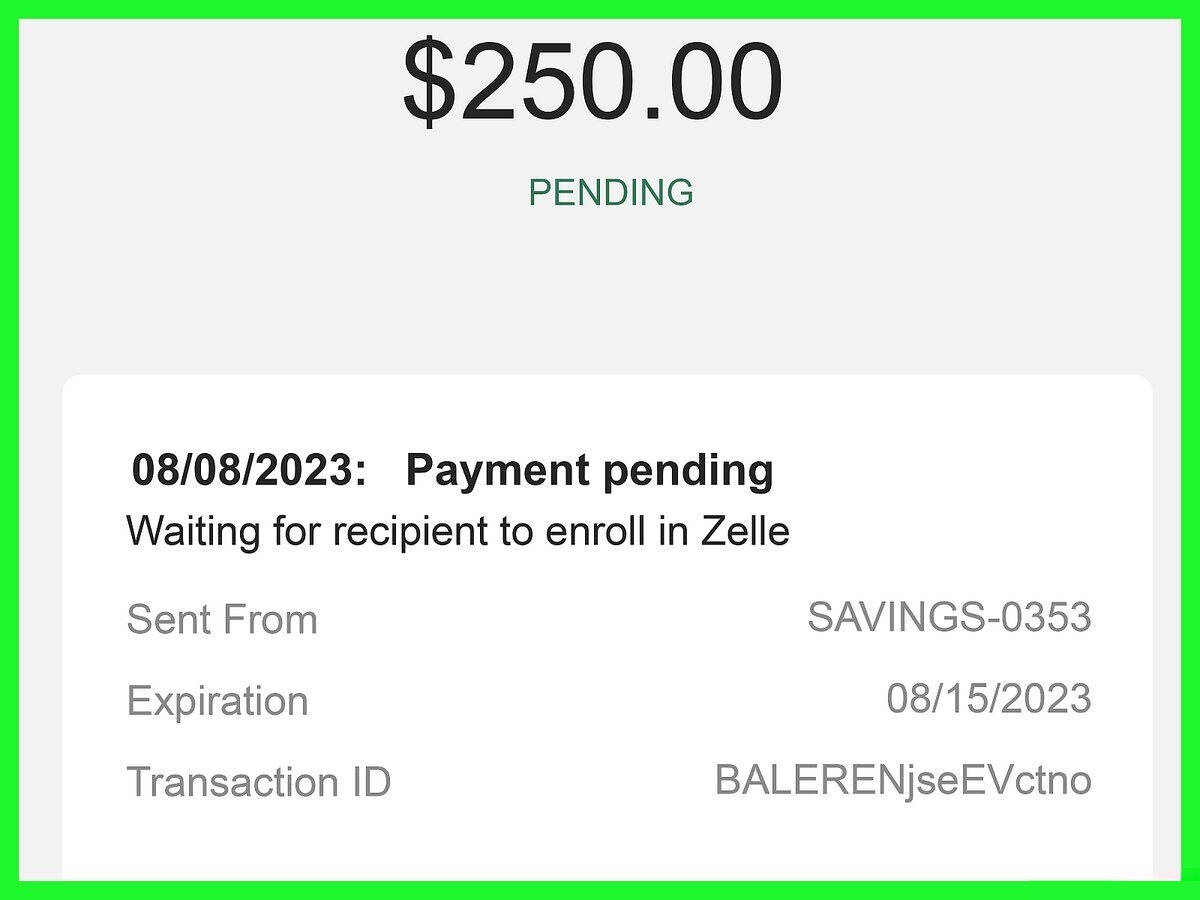
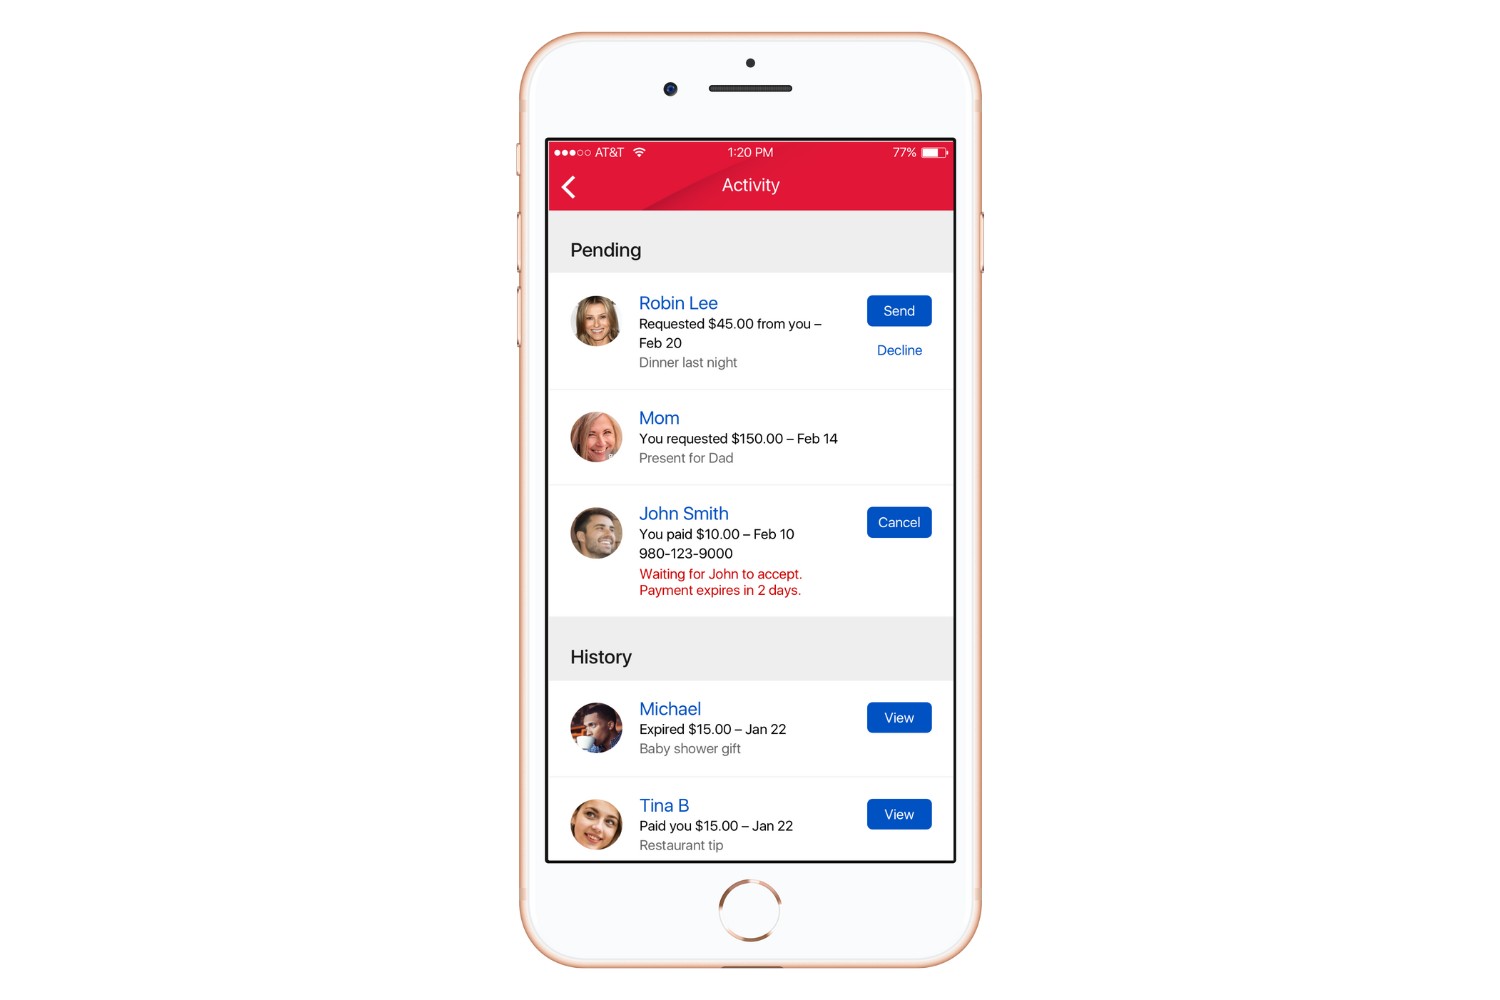
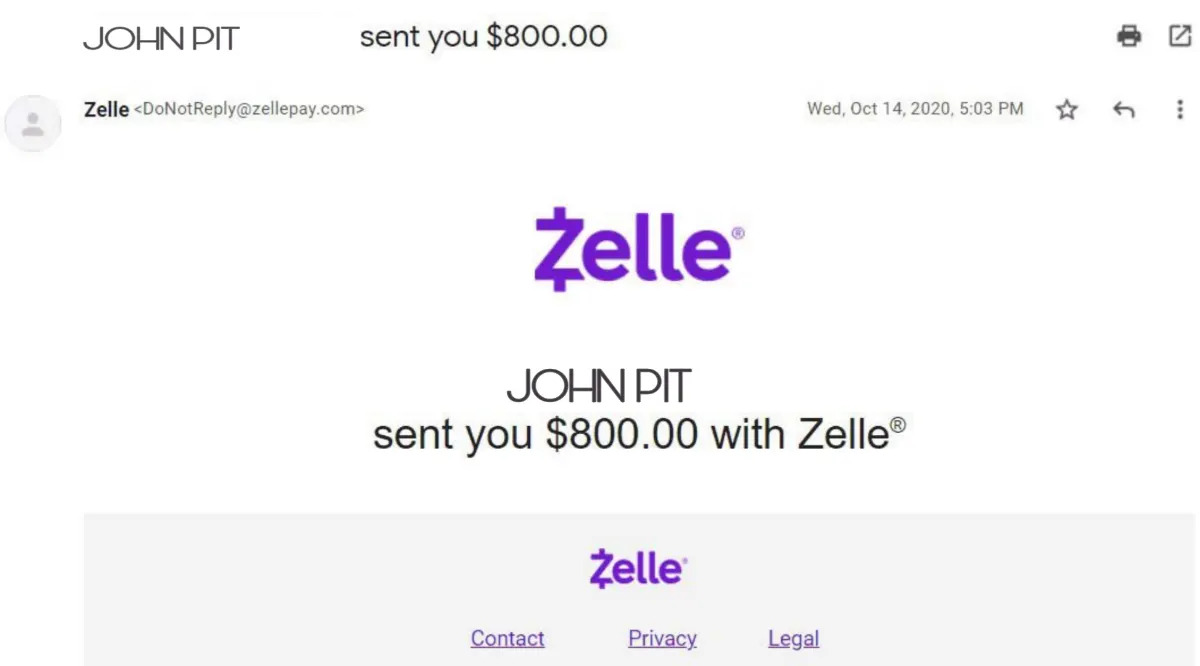
- View your transactions: On the transaction history page, you will see a list of your recent Zelle transactions. Each transaction will typically display the date, time, recipient’s name, and transaction amount.
You can scroll through the list to view older transactions. To see more details about a specific transaction, tap on it to expand the transaction details. This will display additional information, such as any associated notes or memos you may have added.
Keep in mind that the availability and features of the transaction history section may vary slightly depending on the version of the Zelle app you are using. However, the general process of accessing and viewing your Zelle transactions should remain consistent.
By regularly checking your Zelle transactions on the mobile app, you can stay up to date with your payment activity and easily monitor any incoming or outgoing payments.
Checking Zelle Transactions on the Website
In addition to the mobile app, you can also check your Zelle transactions on the Zelle website. Here’s how:
- Open your preferred web browser: Launch your preferred web browser on your computer or mobile device.
- Go to the Zelle website: Enter the Zelle website address (www.zellepay.com) in the address bar and press Enter.
- Log in to your account: On the Zelle homepage, click on the “Log In” button located in the top-right corner of the page.
- Enter your credentials: Enter your Zelle username or registered email address and password to log in to your account.
- Access your transaction history: Once logged in, look for a section or tab labeled “Transaction History” or similar. This is where you can view your Zelle transactions on the website.
- View and manage transactions: On the transaction history page, you will see a list of your recent Zelle transactions, similar to what you would see on the mobile app. Each transaction entry will include details such as the date, time, recipient’s name, and transaction amount.
Just like on the mobile app, you can click on individual transactions to view more information about them, such as any notes or memos associated with the transaction.
Remember to log out of your Zelle account and close the browser when finished, especially if you are using a shared or public computer.
Using the Zelle website to check your transaction history provides an alternative method for monitoring your Zelle payments, especially if you prefer to use a larger screen or don’t have access to the mobile app.
Viewing Zelle Transaction Details
When checking your Zelle transaction history, you may want to view more detailed information about a specific transaction. Here’s how you can do it:
- On the Zelle mobile app or website, navigate to your transaction history as mentioned in the previous sections.
- Find the transaction you want to view details for, and click or tap on it to expand the information.
- Once expanded, you will typically see additional details related to the transaction, such as any notes or memos you may have added at the time of the transaction.
- Some transactions may also provide options to review the recipient’s name, email address, or phone number associated with the transaction.
- Take note of any information you need or want to reference later, such as the transaction ID, which can be useful for customer support inquiries or record-keeping purposes.
By viewing the transaction details, you can easily review specific information about a payment, including any additional notes or messages you may have attached to the transaction. This can be helpful for tracking purposes or when you need to provide evidence of a payment.
Remember to keep personal information secure and avoid sharing transaction details with unauthorized individuals.
Now that you know how to view transaction details, you can access more information about your Zelle payments when needed.
Using Search Functions to Find Specific Zelle Transactions
Searching for specific Zelle transactions can be useful when you want to quickly locate a particular payment or filter transactions based on specific criteria. Both the Zelle mobile app and website provide search functions to help you find the transactions you’re looking for. Here’s how you can utilize these search functions:
- On the Zelle mobile app or website, navigate to the transaction history section.
- Look for a search bar or a magnifying glass icon, indicating the search function.
- Click or tap on the search bar or icon to activate the search function.
- Enter the details you want to search for, such as the recipient’s name, transaction amount, or date range.
- As you type your search query, the transaction history will dynamically update to display only the matching transactions.
- Review the search results to identify the specific transaction you’re looking for.
By utilizing the search function, you can quickly narrow down your transaction history and find specific payments based on your search criteria. This feature is especially useful if you have a long list of transactions or need to locate a specific payment quickly.
Remember to input accurate search criteria to ensure the most relevant results. If you’re not getting the desired results, double-check the details you entered or try refining your search query.
By effectively using the search function, you can save time and easily locate specific Zelle transactions when needed.
Downloading and Printing Zelle Transaction History
If you need a physical copy of your Zelle transaction history or prefer to save it for your records, you can download and print your transaction history. Follow these steps to do so:
- On the Zelle mobile app or website, navigate to the transaction history section.
- Look for an option or button labeled “Export,” “Download,” or similar, which allows you to download your transaction history.
- Click or tap on the export or download option to initiate the process.
- Choose the desired file format for the download, such as CSV, PDF, or Excel (if available).
- Specify the date range or any other filters you want to apply to the transaction history.
- Confirm your selection and initiate the download. The file will likely be saved to your device’s designated download folder.
- Locate the downloaded file and open it using the appropriate program.
- Once open, you can review, save, or print the transaction history as needed using the program’s printing functionality.
When printing, ensure that you have a printer connected and ready. Select the desired printer, adjust any printing settings if necessary, and proceed to print your Zelle transaction history.
Having a physical or digital copy of your transaction history can be helpful for record-keeping, budgeting, or reconciling payments with other financial statements.
Ensure that you securely store your downloaded transaction history to protect your sensitive financial information.
By following these steps, you can easily download and print your Zelle transaction history whenever you need a copy for reference or documentation purposes.
Protecting Your Zelle Account
Securing your Zelle account is crucial to safeguard your transactions and personal information. Here are some essential tips to protect your Zelle account from unauthorized access:
- Use a strong, unique password: Choose a password for your Zelle account that is complex, including a combination of letters, numbers, and symbols. Avoid using easily guessable information like your birthdate or name.
- Enable two-factor authentication: Two-factor authentication adds an extra layer of security to your account. Enable this feature, which typically requires you to provide a verification code sent to your mobile device or email when logging in or performing certain actions.
- Be cautious of phishing attempts: Be vigilant when clicking on links or providing personal information online. Avoid responding to unsolicited emails or messages asking for your Zelle account login credentials or sensitive information. Legitimate Zelle communications will never ask for this information.
- Update your contact information: Keep your email address and mobile phone number associated with your Zelle account up to date. This ensures you receive important notifications and can be contacted if any suspicious activity is detected.
- Use a secure network: Avoid accessing your Zelle account while connected to public Wi-Fi networks. These networks may be unsecured and make it easier for malicious actors to intercept your data. Instead, use a secure network or your mobile data connection.
- Monitor your account regularly: Regularly check your transaction history and balance to identify any unauthorized activity. If you notice any suspicious transactions, contact your bank and Zelle support immediately.
- Keep your device secure: Ensure your smartphone, tablet, or computer has the latest security updates and antivirus software installed. This helps protect against malware or other threats that could compromise your Zelle account.
- Be cautious with whom you share your account information: Avoid sharing your Zelle account login credentials with anyone. Only use your Zelle account for legitimate transactions with trusted individuals or businesses.
By following these best practices and taking proactive steps to protect your Zelle account, you can minimize the risk of unauthorized access and maintain the security of your transactions and personal information.
Common Issues and Troubleshooting
While using Zelle, you may encounter some common issues or face challenges. Here are a few common problems and troubleshooting steps to help resolve them:
- Transaction not received: If you sent a payment but the recipient didn’t receive it, confirm that you entered the correct email address or phone number associated with the recipient’s Zelle account. Double-check for any typos or errors. If the issue persists, contact Zelle customer support for further assistance.
- Payment declined: Sometimes, a payment may be declined by the recipient’s bank. This can occur due to various reasons, such as insufficient funds or restrictions on receiving payments. Ensure that the recipient’s account is active and can receive Zelle transfers. If necessary, contact the recipient’s bank or Zelle support for more information.
- App or website not working: If you’re experiencing issues with the Zelle mobile app or website, try closing and reopening the app or refreshing the webpage. Clearing the app’s cache or browser cache may also help resolve any temporary glitches. If the problem persists, check for any available app or system updates, or reach out to Zelle support for troubleshooting assistance.
- Forgot username or password: If you forget your Zelle account username or password, you can initiate the account recovery process by clicking on the “Forgot username?” or “Forgot password?” link on the login page. Follow the instructions provided to reset your login credentials.
- Limitations on sending or receiving amounts: Zelle may have certain limitations on the amount you can send or receive within a specific time frame. These limits can vary depending on factors like your bank’s policies and your account history. If you encounter sending or receiving limits, consider reaching out to your bank or Zelle support for guidance.
If you encounter any other issues or challenges while using Zelle, it’s recommended to consult the Zelle support documentation or contact customer support directly. They can provide specific troubleshooting steps or further assistance tailored to your situation.
Remember to provide detailed information about the problem you’re facing when reaching out to customer support. This will help expedite the resolution process and ensure accurate assistance.
By following the troubleshooting steps and reaching out for support when needed, you can overcome common issues and enjoy a smooth experience while using Zelle.
Conclusion
Managing and keeping track of your Zelle transactions is essential for maintaining control over your finances. With the convenience of the Zelle mobile app and website, it has never been easier to view, monitor, and track your payments.
In this guide, we discussed the process of setting up Zelle and provided step-by-step instructions for checking your Zelle transactions on both the mobile app and website. We also explored how you can view transaction details, utilize search functions to find specific transactions, and download and print your transaction history for record-keeping purposes.
Additionally, we highlighted the importance of protecting your Zelle account by using strong passwords, enabling two-factor authentication, and being vigilant against phishing attempts. By following best practices and keeping your account secure, you can ensure the safety of your transactions and personal information.
Lastly, we addressed common issues that Zelle users may encounter and provided troubleshooting steps to overcome these challenges. By familiarizing yourself with common problems and knowing how to resolve them, you can navigate any potential hurdles smoothly.
Remember to stay proactive in managing your Zelle transactions, regularly review your transaction history for accuracy, and promptly address any issues or concerns that arise.
We hope this guide has been helpful in guiding you through the process of viewing and monitoring your Zelle transactions. By utilizing the features and tools available to you, you can stay in control of your finances and simplify your payment experience with Zelle.