Introduction
Welcome to the world of digital payments! With the advent of technology, sending and receiving money has become quicker and more convenient than ever before. One of the popular platforms for transferring funds is Zelle.
Zelle is a user-friendly and secure money transfer service that allows you to send and receive money directly from your bank account. Whether you need to split a bill with friends, reimburse a family member, or simply receive funds from a client, Zelle makes the process fast and hassle-free.
In this article, we will guide you through the process of receiving money on Zelle. We will cover everything from setting up your account, linking your bank, adding contacts, requesting money, and confirming your email or phone number. We’ll also provide tips on verifying your identity, selecting a payment method, managing notifications, reviewing your transaction history, and troubleshooting any issues that may arise. By the end, you’ll be well-equipped to start receiving money effortlessly on Zelle.
Now, let’s dive into the steps you need to follow to get started with Zelle and start receiving money in no time!
Setting Up Zelle
Before you can start receiving money on Zelle, the first step is to set up your account. Here’s how:
- Download the Zelle mobile app or visit the Zelle website on your computer.
- Click on the option to sign up or create an account. You will be prompted to enter your basic information, such as your name, email address, and phone number.
- Next, you will need to verify your identity. This is an essential step to ensure the security of your account and transactions. You may be asked to provide additional information, such as your Social Security number or date of birth.
- Once your identity is verified, you will need to choose a password for your Zelle account. Make sure to select a strong and unique password to protect your account from unauthorized access.
- After setting up your password, you will be asked to add your bank account information. Zelle supports a wide range of banks, so you can easily link your existing bank account to Zelle. Follow the on-screen instructions to complete this step.
- Once your bank account is successfully linked, you’re all set to start receiving money on Zelle!
Setting up Zelle is a straightforward process that only takes a few minutes. Make sure to provide accurate information during the registration process to ensure a smooth experience. With your account set up, you can move on to the next steps of adding contacts and requesting money on Zelle.
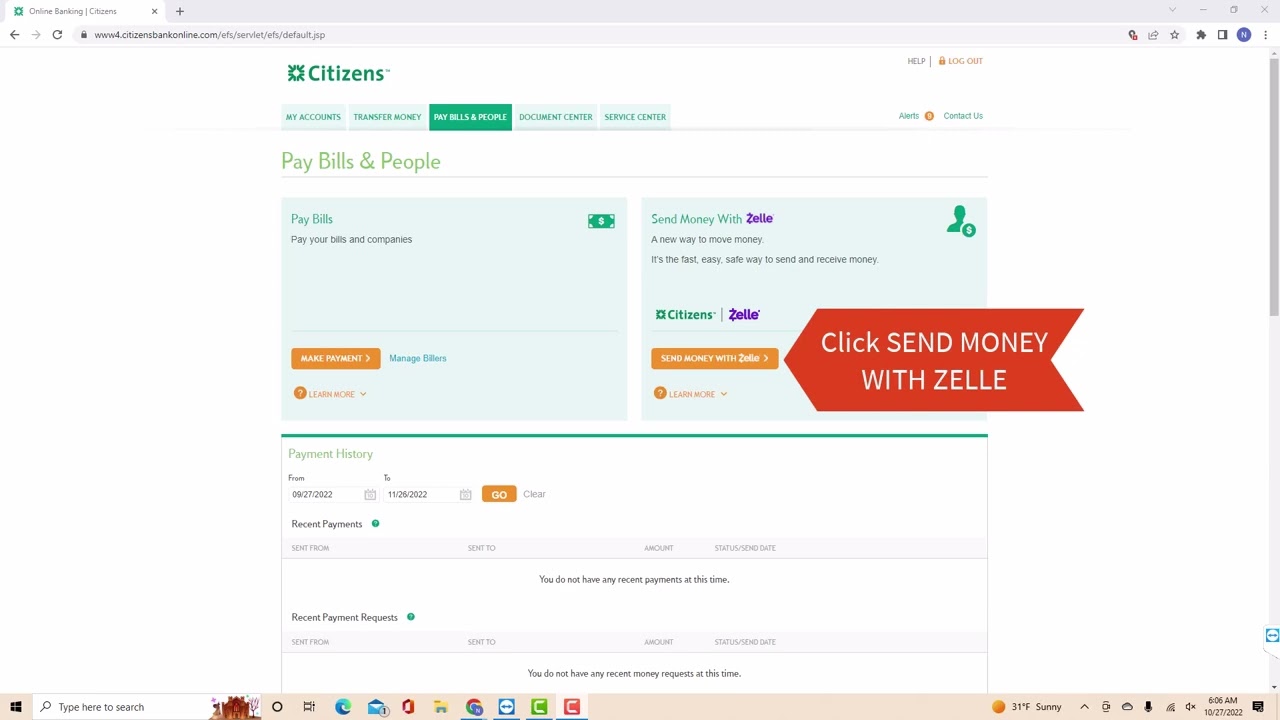
Linking Your Bank Account
Now that you have set up your Zelle account, the next step is to link your bank account. Linking your bank account allows you to securely send and receive money on Zelle. Here’s how you can do it:
- Open the Zelle mobile app or visit the Zelle website on your computer and log in to your account.
- Once logged in, navigate to the “Settings” or “Profile” section of your Zelle account.
- Look for the option to “Link Bank Account” or similar wording. Click on that option to begin the linking process.
- On the next screen, you will be prompted to select your bank from a list or search for it. Choose your bank from the options provided.
- Follow the on-screen instructions to securely link your bank account. This may involve entering your online banking credentials, verifying your identity through security questions, or receiving a one-time verification code via SMS or email.
- Once your bank account is successfully linked, you will receive a confirmation message. You can now use your linked bank account to send and receive money on Zelle.
It’s important to note that Zelle supports a wide range of banks, but not all banks are currently partnered with Zelle. If you don’t see your bank listed during the linking process, you may need to check with your bank to see if they offer Zelle integration or consider using an alternative bank account to link to Zelle.
By linking your bank account to Zelle, you can easily send and receive funds without the need to enter your bank account details every time. This adds an extra layer of convenience and security to your transactions.
Now that your bank account is linked, let’s move on to the next step of adding contacts to your Zelle account.
Adding Contacts
With Zelle, adding contacts is a breeze. Whether you want to send money to a friend, family member, or a client, you can quickly and easily add them to your Zelle contacts. Here’s how:
- Open the Zelle mobile app or log in to your Zelle account on the website.
- In the main menu or navigation bar, look for the option to “Add Contacts” or “Contacts”. Click on that option.
- On the next screen, you may have the option to search for contacts by their name, email address, or phone number. Enter the required information and click “Search” or “Add Contact”.
- If your contact is already using Zelle, their name and contact information will appear. Simply select their name from the search results and click “Add Contact”.
- If your contact is not already using Zelle, you can still add them as a contact by providing their email address or phone number. Once entered, click “Add Contact” and an invitation to join Zelle will be sent to them.
- After adding a contact, they will appear in your contacts list, making it easy for you to select them when you want to send them money.
Adding contacts to your Zelle account streamlines the process of sending and receiving money. Once you have added a contact, you can quickly select them from your contacts list without having to manually enter their information each time.
Remember, it’s important to only add contacts that you trust and have a legitimate reason to send money to. This helps to ensure the security and integrity of your Zelle transactions.
Now that you know how to add contacts, let’s move on to the next step of requesting money on Zelle.
Requesting Money
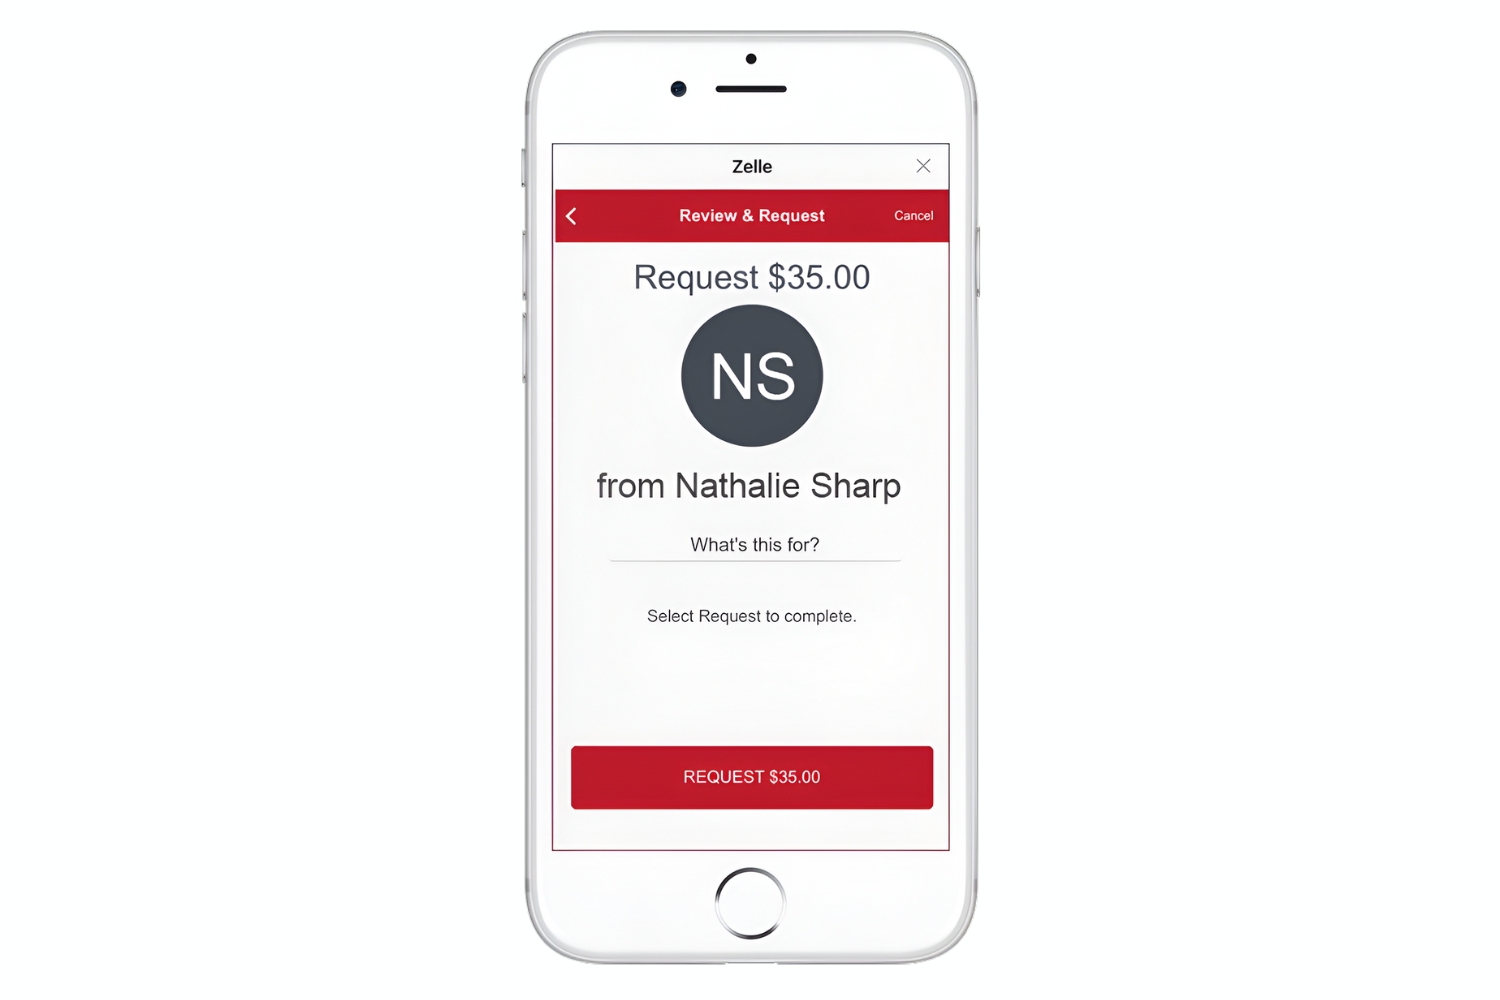
Need to request money from someone? Zelle makes it easy to send polite reminders and request funds from your contacts. Here’s how you can request money on Zelle:
- Open the Zelle mobile app or log in to your Zelle account on the website.
- In the main menu or navigation bar, look for the option to “Request” or “Request Money”. Click on that option.
- On the next screen, you will be prompted to select a contact from your contacts list. Choose the contact from whom you want to request money.
- Enter the specific amount you want to request from the contact. You can add a note or memo to provide additional information about the request if necessary.
- Once you have entered the necessary details, click “Send” or “Request” to send the money request to your contact.
- Your contact will receive a notification and can choose to accept or decline the money request directly through Zelle.
- If your contact accepts the request, the funds will be transferred from their account to yours.
Requesting money on Zelle is a simple and efficient way to remind contacts to send you the funds you need. It’s important to remember that requesting money should be done in a polite and respectful manner, and it’s always a good idea to provide a clear reason for your request, especially if it’s a business transaction.
Now that you know how to request money on Zelle, let’s move on to the next step of receiving money in your Zelle account.
Receiving Money
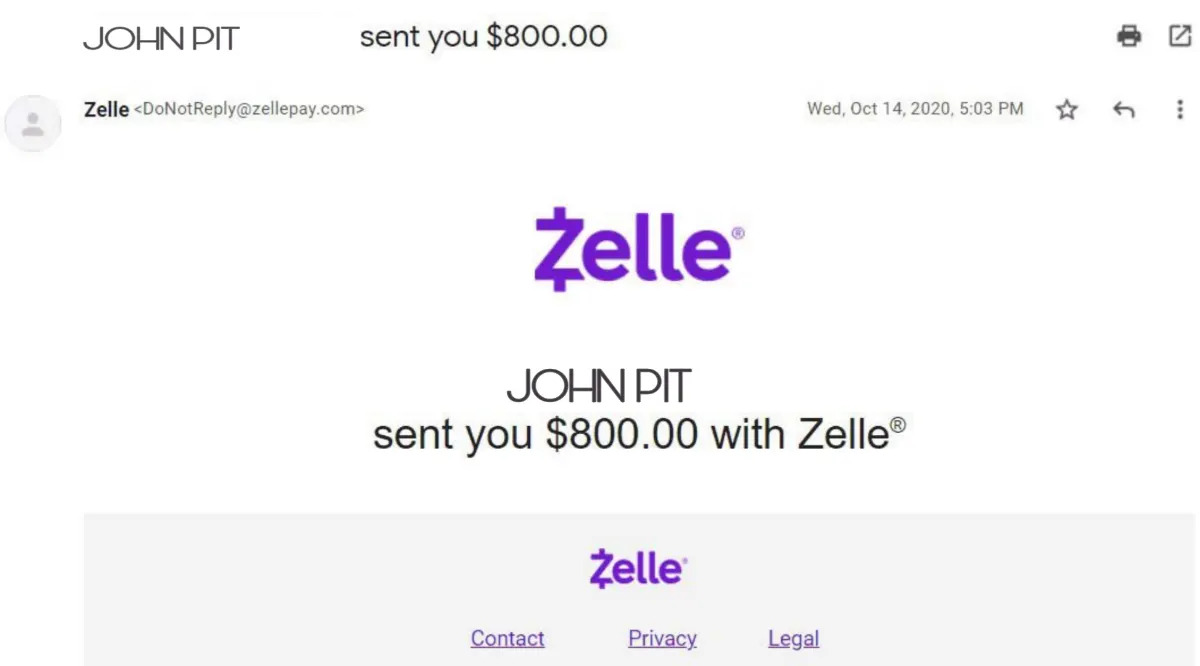
Receiving money on Zelle is quick and convenient. When someone sends you money through Zelle, the funds are deposited directly into your bank account. Here’s how you can receive money on Zelle:
- When someone initiates a payment to you through Zelle, you will receive a notification via email or text message. The notification will include the sender’s name and the amount of money being sent.
- Open the Zelle mobile app or log in to your Zelle account on the website to access your transactions.
- In your Zelle account, you will see a record of the money you have received. The transaction details will include the sender’s name, the amount received, and the date and time of the transaction.
- The funds will be deposited directly into your linked bank account. Depending on your bank’s processing time, you should see the funds reflected in your account within a few minutes to a few business days.
- Once the funds have been deposited into your bank account, you can use them as you would any other funds in your account. You can withdraw the money, make purchases, or transfer it to another account if needed.
It’s important to note that when someone sends you money on Zelle, they must have your correct email address or phone number associated with your Zelle account. Make sure to verify and update your contact information if necessary to ensure that you receive funds smoothly.
Receiving money on Zelle is secure and hassle-free, allowing you to easily access the funds sent to you and use them as needed.
Now that you know how to receive money on Zelle, let’s move on to the next step of confirming your email address or phone number on your Zelle account.
Confirming Your Email Address or Phone Number
Confirming your email address or phone number is an important step in ensuring the security and functionality of your Zelle account. Here’s how you can confirm your email address or phone number:
- Open the Zelle mobile app or log in to your Zelle account on the website.
- In the main menu or settings section of your Zelle account, look for the option to “Verify Email” or “Verify Phone Number”. Click on that option.
- You will receive a verification code either via email or text message, depending on the option you are verifying.
- Enter the verification code in the designated field in the Zelle app or website.
- Click “Verify” or “Submit” to confirm your email address or phone number.
- Once your email address or phone number is verified, you will receive a confirmation message. This confirms that the contact information associated with your Zelle account is accurate and up to date.
Verifying your email address or phone number adds an extra layer of security to your Zelle account. It helps to prevent unauthorized access and ensures that you receive important notifications regarding your Zelle transactions.
It’s important to note that if you change your email address or phone number, you will need to update and re-verify this information in your Zelle account to ensure that your account remains active and functional.
Now that you know how to confirm your email address or phone number, let’s move on to the next step of verifying your identity on Zelle.
Verifying Your Identity
Verifying your identity is an important step in ensuring the security and reliability of your Zelle account. By verifying your identity, you can have peace of mind knowing that your personal and financial information is protected. Here’s how you can verify your identity on Zelle:
- Open the Zelle mobile app or log in to your Zelle account on the website.
- In the main menu or settings section of your Zelle account, look for the option to “Verify Identity” or similar wording. Click on that option.
- You will be prompted to provide certain personal information for identity verification. This may include your full name, date of birth, Social Security number, or other identifying details.
- Follow the on-screen instructions and provide the required information accurately and honestly. Zelle takes privacy and security seriously and uses industry-standard measures to protect your information.
- Once you have submitted the necessary information, Zelle will verify your identity. This process may take a short time, and you may be contacted for additional information or documentation if needed.
- Once your identity is successfully verified, you will receive a notification confirming the completion of the process. You can now enjoy the full functionality of your Zelle account.
Verifying your identity on Zelle adds an extra layer of protection and helps to prevent fraudulent activity on your account. It also ensures compliance with regulatory requirements and enhances the overall security of the Zelle platform.
It’s important to note that Zelle treats your personal information with utmost confidentiality and uses it solely for identity verification purposes. Your information will not be shared with third parties without your consent.
Now that your identity is verified, let’s move on to the next step of choosing a payment method on Zelle.
Choosing a Payment Method
With Zelle, you have the flexibility to choose the payment method that works best for you. Whether you prefer using your bank account or a debit card, Zelle offers various options for making payments. Here’s how you can choose a payment method on Zelle:
- Open the Zelle mobile app or log in to your Zelle account on the website.
- In the main menu or settings section of your Zelle account, look for the option to “Payment Settings” or “Payment Method”. Click on that option.
- You will be presented with the available payment methods. These typically include your linked bank account and any debit cards associated with your Zelle account.
- Select the payment method you prefer by clicking on it.
- If you choose to link your bank account, you may be prompted to provide your online banking credentials or verify your account in some other way. Follow the on-screen instructions to complete the process.
- If you prefer using a debit card, you may need to enter the card details, such as the card number, expiration date, and CVV code.
- Once your payment method is successfully added and verified, it will be saved as your default option for future transactions.
Choosing a payment method on Zelle allows you to have control over how you fund your transactions. Whether you prefer to use your bank account for larger transfers or your debit card for smaller, more immediate payments, Zelle offers the flexibility to suit your needs.
Keep in mind that some payment methods may have transaction limits or fees associated with them. It’s important to review any applicable terms and conditions to ensure you understand the details of your chosen payment method.
Now that you know how to choose a payment method, let’s move on to the next step of setting up notifications for your Zelle account.
Setting Up Notifications
Zelle offers convenient notification settings that keep you updated on your account activity and transactions. By setting up notifications, you can stay informed about incoming payments, payment requests, and other important account updates. Here’s how you can set up notifications on Zelle:
- Open the Zelle mobile app or log in to your Zelle account on the website.
- In the main menu or settings section of your Zelle account, look for the option to “Settings” or “Notification Preferences”. Click on that option.
- You will see a list of notification options available. These may include email notifications, text message alerts, or push notifications through the Zelle mobile app.
- Select the types of notifications you want to receive by toggling the corresponding settings on or off.
- You may have the option to customize certain notification preferences, such as the frequency of email notifications or specific types of transactions you wish to be notified about.
- Once you have set up your notification preferences, click “Save” or “Submit” to apply the changes.
- Now, you will receive notifications based on your chosen preferences, keeping you informed about your Zelle account activity.
Setting up notifications enhances the user experience by providing real-time updates and important information related to your Zelle transactions. It allows you to promptly respond to payment requests, track incoming funds, and stay on top of any changes or updates in your account.
Keep in mind that your notification preferences can be adjusted at any time to suit your preferences. If you change your email address or phone number, make sure to update and verify this information to ensure the continuous delivery of notifications.
Now that you know how to set up notifications, let’s move on to the next step of reviewing your transaction history on Zelle.
Reviewing Your Transaction History
Keeping track of your transaction history is essential for monitoring your financial activity and staying organized. Thankfully, Zelle makes it easy to review your transaction history within your account. Here’s how you can do it:
- Open the Zelle mobile app or log in to your Zelle account on the website.
- In the main menu or navigation bar, look for the option to “Transaction History” or “Activity”. Click on that option.
- You will be presented with a list of your past transactions, including details such as the date, time, sender/receiver, and the amount of each transaction.
- You can choose to filter the transaction history by date, recipient/sender, or transaction type to easily locate specific transactions.
- If needed, you can click on a specific transaction to view more details, including any notes or memos associated with the transaction.
- Zelle also provides the option to export or download your transaction history in a convenient format, such as a CSV file, for record-keeping purposes.
- By reviewing your transaction history regularly, you can track your incoming and outgoing payments, reconcile your finances, and ensure accurate record-keeping.
Reviewing your transaction history on Zelle provides a comprehensive view of your financial activity, allowing you to identify any discrepancies, track payments made or received, and maintain a clear record for reference purposes.
It’s important to regularly review your transaction history and report any suspicious or unauthorized transactions to Zelle’s customer support. This helps to safeguard your account and resolve any potential issues in a timely manner.
Now that you know how to review your transaction history, let’s move on to the next section, where we’ll provide some troubleshooting tips for common issues you may encounter while using Zelle.
Troubleshooting Tips
While Zelle strives to provide a seamless and reliable money transfer experience, you may occasionally encounter technical issues or face challenges during your interactions with the platform. Here are some troubleshooting tips to help you navigate and resolve common issues:
- Double-check recipient information: Before sending money, make sure you have entered the correct email address or phone number associated with the recipient’s Zelle account. Confirming this information helps to avoid any payment delays or errors.
- Verify connectivity and device settings: Ensure that you have a stable internet connection and that your device’s settings, such as date, time, and location services, are appropriately configured. These factors can impact the performance and functionality of the Zelle app.
- Contact customer support: If you encounter any technical issues or have questions about specific transactions, don’t hesitate to reach out to Zelle’s customer support team. They are equipped to assist you with troubleshooting and offer guidance to resolve any concerns.
- Update your app: Keeping your Zelle app up to date ensures that you have access to the latest features and bug fixes. Check for app updates regularly through your device’s app store and install them when available.
- Review transaction limits and fees: Familiarize yourself with the transaction limits and any associated fees that may apply to your Zelle account. This knowledge helps you stay within the prescribed limits and understand any costs involved in certain transactions.
- Be cautious of phishing attempts: As with any online platform, it’s essential to remain vigilant against phishing attempts and fraudulent emails or messages. Be cautious of unsolicited messages asking for personal information or requesting funds and report any suspicious activity to Zelle’s customer support immediately.
By following these troubleshooting tips, you can address common issues effectively and enhance your experience while using Zelle for money transfers. Remember, Zelle’s customer support is available to assist you in resolving any technical or account-related concerns you may face.
Now that we’ve covered some troubleshooting tips, let’s conclude this article by summarizing the key points discussed.
Conclusion
Congratulations! You are now equipped with the knowledge and steps to start receiving money effortlessly on Zelle. We have covered everything from setting up your account, linking your bank, adding contacts, requesting money, and confirming your email or phone number. We also discussed verifying your identity, choosing a payment method, setting up notifications, reviewing your transaction history, and troubleshooting common issues.
With Zelle, sending and receiving money has never been easier. The user-friendly interface, secure transactions, and various features make Zelle a convenient choice for digital payments. Whether you need to split bills with friends, receive payments from clients, or reimburse family members, Zelle offers a seamless money transfer solution.
Remember to always verify the accuracy of recipient information, keep your account and device settings up to date, and be cautious of phishing attempts. Regularly reviewing your transaction history and contacting customer support for assistance will help ensure a smooth experience on the platform.
So, what are you waiting for? Get started with Zelle today and enjoy the convenience of quick and secure money transfers.
Happy receiving!