What is Zelle
Zelle is a convenient and secure digital payment platform that allows you to send and receive money directly from your bank account to another person’s bank account. With Zelle, you can quickly and easily split expenses, pay rent, send money to friends and family, or settle any other payments without the need for cash or checks.
Zelle is widely supported by many major banks and credit unions in the United States, making it accessible to a large number of users. It offers a seamless way to transfer funds between different financial institutions, enabling quick and hassle-free transactions.
One of the key advantages of Zelle is its real-time payment feature – funds are instantly transferred and made available in the recipient’s account. This eliminates the need for waiting for days for transactions to process or for checks to clear, providing a more efficient and convenient way to manage your finances.
Another great aspect of Zelle is its security measures. It utilizes industry-standard encryption and authentication protocols to ensure that your money is protected during the transfer process. Additionally, Zelle only allows money to be sent to and received from verified bank accounts, adding an extra layer of security and preventing unauthorized transactions.
Whether you need to split a bill among friends, repay a loan, or send a gift to a loved one, Zelle simplifies the process and saves you time. It eliminates the need for physical cash, checks, or third-party payment apps by directly connecting your bank account to the recipient’s account, resulting in a more streamlined payment experience.
In summary, Zelle is a convenient and secure digital payment platform that allows you to send and receive money directly from your bank account. With its real-time payment feature and robust security measures, Zelle provides a hassle-free way to handle financial transactions, making it an essential tool for modern-day banking and money transfers.
How does Zelle work
Zelle works by leveraging the existing infrastructure of participating banks and credit unions to facilitate seamless and secure money transfers between users. Here is a step-by-step breakdown of how Zelle operates:
- Enrollment: To use Zelle, you need to enroll in the service through your bank’s mobile app or online banking platform. Most major banks already offer Zelle as a built-in feature, allowing you to easily set up an account and link it to your bank account.
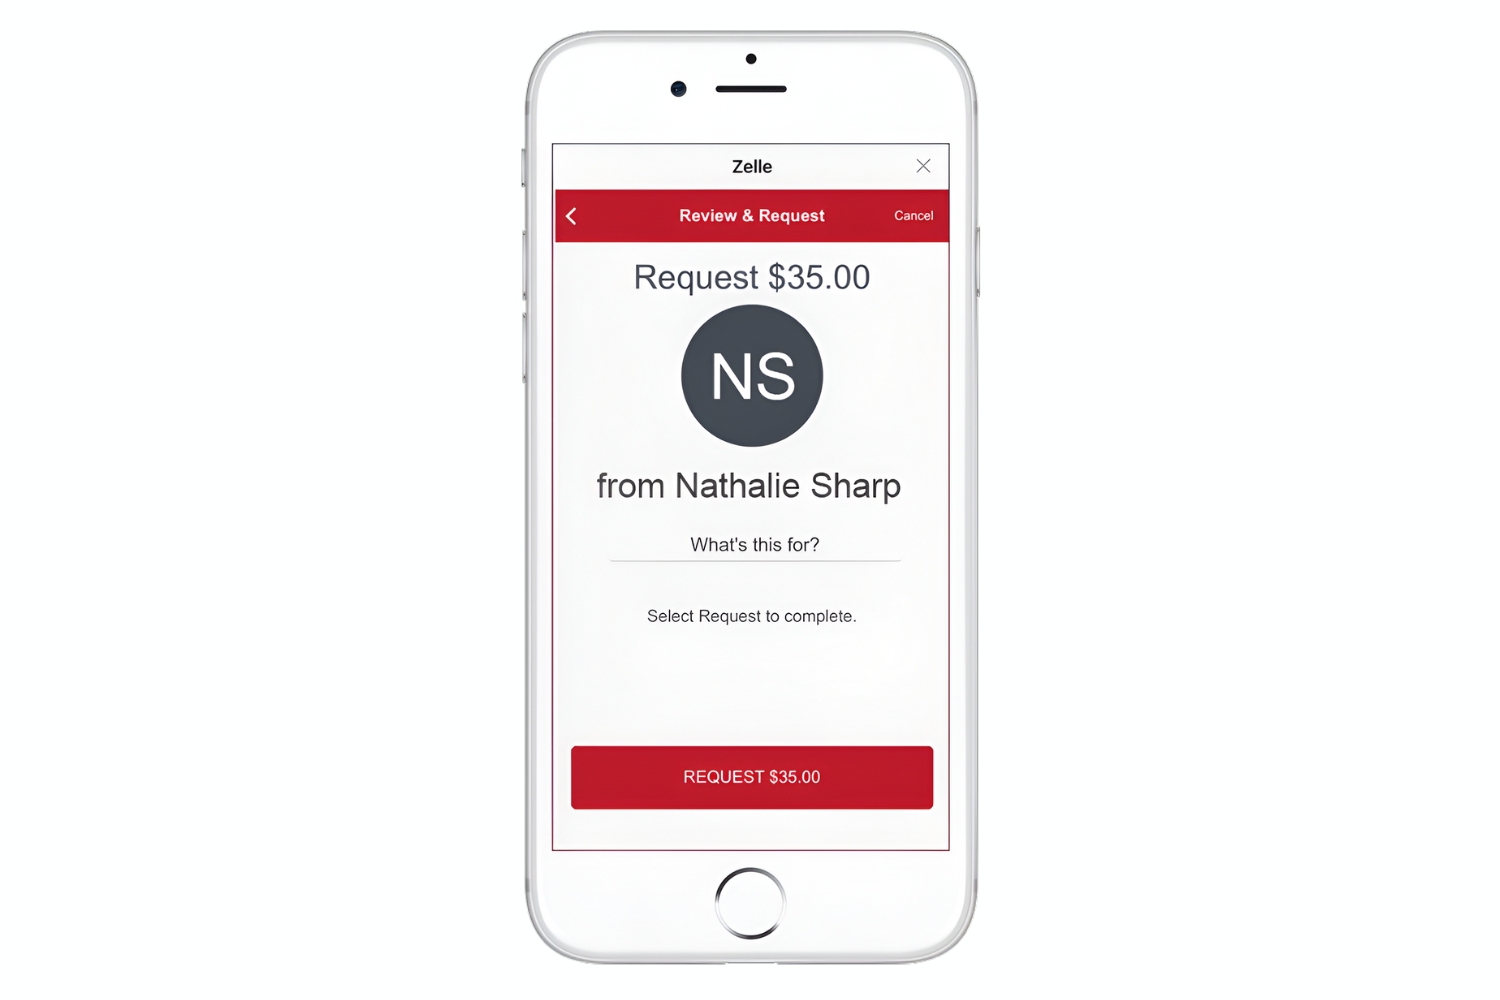
- Sending Money: Once you are enrolled in Zelle, you can initiate a payment by accessing the service through your bank’s mobile app or online banking platform. You will need to provide the recipient’s email address or mobile number associated with their bank account.
- Recipient Notification: After you confirm the payment details, the recipient will receive a notification via email or text message, depending on the contact information provided. The message will inform them that they have received a payment and provide instructions on how to claim the funds.
- Funds Availability: As soon as the recipient claims the payment, the funds will be instantly deposited into their bank account. Unlike traditional payment methods, there is no need to wait for checks to clear or funds to be transferred between banks.
- Security Measures: Zelle employs robust security measures to ensure the safety of your transactions. All transfers are encrypted, and both senders and recipients must have verified bank accounts to participate in the service, reducing the risk of fraud or unauthorized transactions.
- Banks and Credit Unions: Zelle works in partnership with various financial institutions, allowing users to send and receive money between different banks or credit unions. As long as both parties have enrolled in Zelle, the transfer can be completed seamlessly.
Overall, Zelle streamlines the money transfer process by leveraging the connectivity and established banking relationships of participating institutions. Its user-friendly interface and real-time transaction capabilities make it a convenient and efficient choice for sending and receiving money.
Eligibility requirements for Zelle enrollment
In order to enroll in Zelle and start using the service, there are a few eligibility requirements that you need to meet. These requirements may vary slightly depending on your specific bank, but generally, the following criteria apply:
- Bank Account: To enroll in Zelle, you must have an active bank account with a participating bank or credit union. Most major banks in the United States offer Zelle, so the chances are high that your bank is already a part of the network. If you’re unsure, you can check with your bank to confirm its compatibility with Zelle.
- Online or Mobile Banking: Zelle is primarily accessed through online banking platforms or mobile apps offered by participating banks. Hence, you need to have either online banking or mobile banking set up with your financial institution to enroll in and use Zelle. Fortunately, most banks provide these services to their customers.
- Contact Information: When enrolling in Zelle, you will need to provide your email address or phone number associated with your bank account. This information is crucial as it allows Zelle to send you notifications about payments, account verification, and other important updates regarding your transactions.
- Age Limit: While there is no specific age requirement for using Zelle itself, you must be at least 18 years old to open a bank account. Therefore, if you meet the age requirement to have a bank account, you will also be eligible to enroll in Zelle.
- Terms and Conditions: Before completing the enrollment process, you will be asked to review and accept the terms and conditions of Zelle. This includes agreeing to the privacy policy and understanding the responsibility and potential risks associated with using the service.
It’s important to note that while you might meet these eligibility requirements, your bank or credit union may have additional criteria or restrictions for enrolling in Zelle. Therefore, it’s always a good idea to reach out to your financial institution directly or visit their website for more specific enrollment information.
By meeting these eligibility requirements and enrolling in Zelle, you can take advantage of its convenient features and start sending and receiving money digitally with ease.
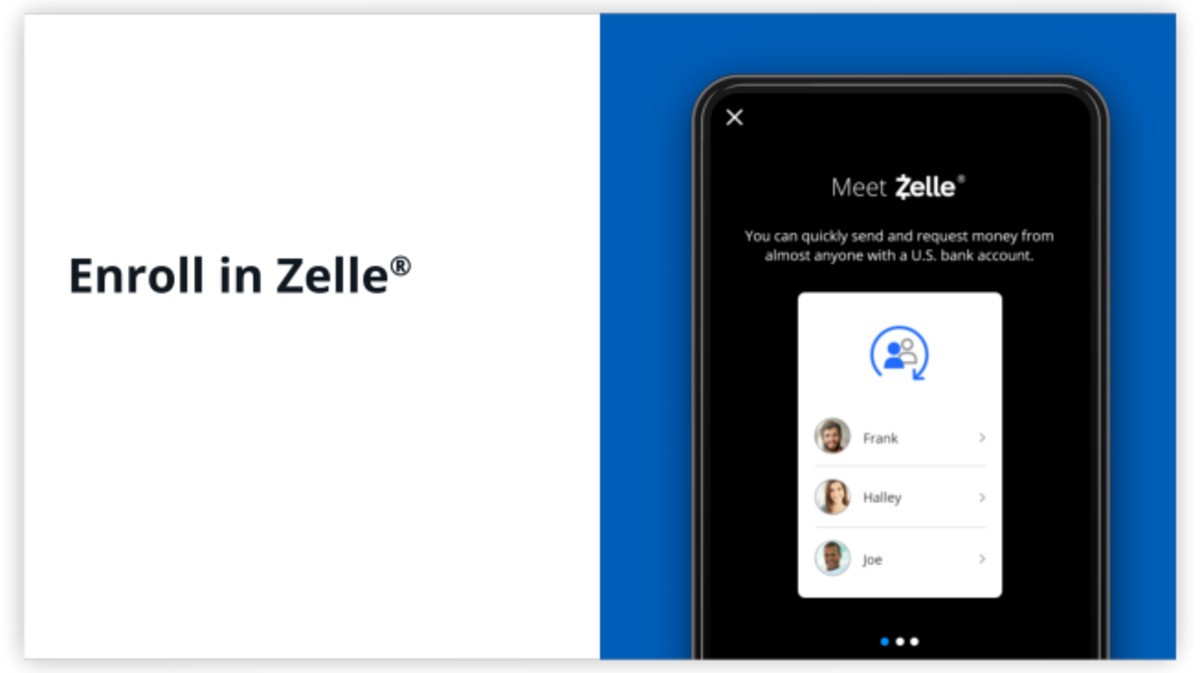
Step-by-step guide on how to enroll in Zelle
Enrolling in Zelle is a straightforward process that can be completed in just a few simple steps. Follow the guide below to get started with Zelle:
- Check your bank’s compatibility: First, you need to confirm whether your bank or credit union supports Zelle. Most major banks in the United States offer Zelle, but it’s always a good idea to double-check. You can visit your bank’s website or contact their customer service to see if Zelle is available.
- Access your online or mobile banking: Once you’ve confirmed that your bank supports Zelle, log in to your online banking account or open your bank’s mobile app. This is where you will find the option to enroll in Zelle.
- Locate the Zelle option: Within your online banking account or the mobile app, navigate to the section that deals with person-to-person payments or transfers. Look for the Zelle option or any mention of sending money to friends or family.
- Provide your contact information: Follow the prompts to enroll in Zelle. You’ll be asked to enter your email address or phone number associated with your bank account. Make sure to provide accurate information as this will be used to link your Zelle account.
- Accept the terms and conditions: Carefully review the terms and conditions of Zelle presented to you during the enrollment process. Ensure that you understand them before accepting and proceeding with the enrollment.
- Verify your identity: Depending on your bank’s requirements, you may need to go through an identity verification process. This could involve providing additional personal information, such as your social security number or answering security questions to protect your account.
- Create a Zelle profile: Once your identity is verified, you’ll have the opportunity to create a profile for your Zelle account. This may involve choosing a display name, setting a profile picture, or providing any other requested information to personalize your Zelle experience.
- Link your bank account: The final step is to link your bank account to Zelle. Follow the prompts to input the necessary banking details such as your account number and routing number. This will connect your bank account to Zelle, allowing you to send and receive money.
- Start using Zelle: Congratulations! You have successfully enrolled in Zelle. Now you can start sending and receiving money digitally with ease. Explore the various features and options available within Zelle to make the most out of this convenient payment platform.
Remember, the specific steps and details may vary slightly depending on your bank or credit union, but the general process of enrolling in Zelle remains similar. If you encounter any difficulties or have any questions during the enrollment process, reach out to your bank’s customer service for assistance.
Setting up your Zelle profile
Once you have enrolled in Zelle, you will have the opportunity to set up your profile to personalize your Zelle experience. This involves adding information and customizing certain aspects of your Zelle account. Here’s a step-by-step guide on setting up your Zelle profile:
- Access your Zelle account: Log in to your online banking account or open your bank’s mobile app, and navigate to the Zelle section. This is where you will find the options to manage your Zelle profile.
- Choose a display name: The display name will be visible to others when you send or receive money through Zelle. Select a name that you feel comfortable sharing with your contacts. It can be your real name, a nickname, or any other identifier you prefer.
- Add a profile picture (optional): If you wish to further personalize your Zelle profile, you can add a profile picture. This image will be displayed alongside your display name when you send or receive money. Choose an image that represents you or something that you prefer.
- Provide a personal message (optional): Another optional feature of Zelle’s profile setup is the ability to add a personal message. This message can be seen by your contacts when they receive money from you. It could be a simple greeting, a reminder, or any message you want to convey.
- Review and save your profile: Before finalizing your profile setup, review all the information you’ve provided. Make sure that your display name, profile picture (if added), and personal message (if included) are accurate and appropriate. Once satisfied, save your profile settings.
- Manage additional settings (if available): Depending on your bank, there may be additional options to manage your Zelle profile. This can include settings related to notifications, email preferences, privacy settings, and more. Take the time to explore and adjust these settings according to your preferences.
By setting up your Zelle profile, you can add a personal touch to your digital payments experience. Your display name, profile picture, and personal message help create a more personalized and recognizable presence when sending or receiving money through Zelle.
Remember to keep your profile information up-to-date to ensure accuracy and maintain a consistent identity across your Zelle transactions. If you ever want to make changes or update your profile details, simply revisit the Zelle profile settings within your online banking account or mobile app.
Verifying your identity for Zelle enrollment
As part of the Zelle enrollment process, many banks require individuals to verify their identity. Verifying your identity helps ensure the security and integrity of the Zelle network and protects against potential fraudulent activity. Below are the general steps involved in verifying your identity for Zelle enrollment:
- Personal information verification: During the enrollment process, you’ll be asked to provide personal information, such as your name, date of birth, and social security number. This information allows the bank to confirm your identity and ensure that you are the rightful owner of the account.
- Document submission: Depending on the bank’s requirements, you may need to provide supporting documents to verify your identity. This can include a copy of your government-issued identification, such as a driver’s license or passport, to confirm your legal name and age.
- Identity verification questions: Some banks may use additional security measures, such as asking identity verification questions, to confirm that you are the account holder. These questions might be based on your personal history or financial information and can help protect your account from unauthorized access.
- Biometric verification: In some cases, banks may utilize biometric verification methods, such as fingerprint or facial recognition, to ensure that you are the person enrolling in Zelle. This advanced technology adds an extra layer of security to the verification process.
- Confirmation and approval: After providing the necessary information and completing the identity verification process, your bank will review your details and approve your enrollment in Zelle. Once approved, you’ll be able to access and use Zelle to send and receive money.
It’s important to note that the specific identity verification requirements may vary depending on your bank’s policies and the regulations of your country or region. Some banks may have additional verification steps in place or may require you to visit a branch in person to complete the process.
By verifying your identity during the Zelle enrollment, you can contribute to a more secure and trustworthy environment for digital transactions. It helps protect your account from potential unauthorized access and ensures that you are the only person with control over your Zelle transactions.
If you have any questions or encounter any issues during the identity verification process, it’s recommended to reach out to your bank’s customer support for assistance. They can provide you with the specific instructions and guidance you need to successfully complete the verification process and enroll in Zelle.
Linking your bank account to Zelle
In order to use Zelle for sending and receiving money, you need to link your bank account to the platform. Linking your bank account allows for seamless and secure transactions. Here is a step-by-step guide on how to link your bank account to Zelle:
- Access your Zelle account: Log in to your online banking account or open your bank’s mobile app, and navigate to the Zelle section.
- Locate the “Link Account” option: Look for the option to link a bank account within the Zelle settings. It may be labeled as “Add Bank Account” or something similar.
- Enter your bank account details: Follow the prompts to input your bank account information. This typically includes your account number and routing number. Ensure that the information is accurate as any errors may result in failed transactions.
- Confirm ownership of the bank account: Depending on your bank’s verification process, you may be required to confirm ownership of the bank account. This can be done by verifying small deposits made to your account or by answering security questions related to your account.
- Review and save: Before finalizing the linking process, review the details you have provided. Double-check that the account number and routing number are correct. Once you are satisfied, save your bank account information.
- Activate your bank account: In some cases, you may need to activate your bank account for Zelle by following additional steps. This may involve signing an agreement or confirming your consent to use Zelle.
Once you have successfully linked your bank account to Zelle, you’ll be able to initiate and receive money transfers with ease. It’s important to note that the linking process may vary slightly depending on your bank or financial institution. Some banks may have additional security measures or specific requirements in place.
Keep in mind that Zelle typically requires you to link a checking or savings account. Credit card accounts are typically not eligible for linking with Zelle. Additionally, ensure that the bank account you link is in good standing and has sufficient funds to cover any transactions you initiate.
Remember to maintain the security of your linked bank account and treat your Zelle account information as confidential. Regularly review your bank account and transaction activity to ensure that all transactions made through Zelle are legitimate.
If you encounter any issues or have questions about linking your bank account to Zelle, reach out to your bank’s customer support for guidance and assistance. They can provide you with specific instructions or troubleshoot any problems you may be experiencing.
Zelle enrollment options for non-Zelle participating banks
If your bank is not currently a participant in the Zelle network, you may still have options for enrolling in Zelle and accessing its convenient money transfer services. Here are some alternatives to consider for Zelle enrollment if you have a non-Zelle participating bank:
- Third-party payment apps: Some third-party payment apps, such as Venmo or Cash App, offer similar features to Zelle. These apps allow you to link your bank account and send money digitally to friends, family, or anyone with a registered account on the platform. Check if these apps support your bank and meet your needs.
- Bank-to-bank transfers: Many banks offer their own bank-to-bank transfer services, allowing you to send money from your bank account to another person’s bank account. While these transfers may not have the real-time capabilities of Zelle, they can still provide a convenient way to transfer funds securely.
- Ask your bank about alternative options: If your bank does not offer Zelle or any other comparable service, it’s worth reaching out to them directly and inquiring about alternative options they may have available. They may have partnerships with other payment platforms or provide their own solutions that can meet your needs.
- Explore other peer-to-peer payment platforms: In addition to Zelle, there are several other peer-to-peer payment platforms available in the market. Platforms like PayPal, Google Pay, or Facebook Messenger Payments offer similar features that can enable you to send and receive money digitally, even if your bank does not support Zelle.
- Consider changing banks: If utilizing Zelle or a similar service is important to you, you may consider switching to a bank or credit union that supports Zelle enrollment. Research other financial institutions in your area and compare their features, services, and Zelle compatibility to determine if a bank switch is a viable option for you.
It’s important to note that the availability and suitability of alternative options may vary depending on your location and individual banking needs. Additionally, be mindful of any fees, transaction limits, and security measures associated with the alternative services you choose to utilize.
Regardless of the option you choose, ensure that you verify the legitimacy of the platform or service, and take necessary precautions to protect your personal and financial information during the enrollment and usage process.
Remember to stay informed about new developments and updates regarding Zelle enrollment, as more banks are continually being added to the Zelle network. Keep checking with your bank periodically to see if they have joined Zelle or if any new enrollment options become available.
If you have any specific questions or require assistance with Zelle enrollment for a non-Zelle participating bank, it is recommended to reach out to your bank’s customer support. They can provide you with the most accurate and up-to-date guidance based on their specific offerings and policies.
Troubleshooting tips for any issues during Zelle enrollment
While enrolling in Zelle is generally a seamless process, you may encounter some issues or difficulties along the way. Here are some common troubleshooting tips to help you overcome any obstacles you may face during Zelle enrollment:
- Double-check eligibility: Ensure that you meet the eligibility requirements for Zelle enrollment, such as having an active bank account with a participating bank and access to online or mobile banking.
- Verify your information: Make sure that the information you provided during the enrollment process, such as your email address or phone number, is accurate and matches the details associated with your bank account.
- Contact customer support: If you’re experiencing difficulties during the enrollment process, don’t hesitate to reach out to your bank’s customer support for assistance. They can provide guidance, troubleshoot any issues, and offer solutions tailored to your specific situation.
- Clear cache and cookies: If you’re encountering issues with the Zelle website or mobile app, trying clearing your browser cache and cookies. This can help resolve any temporary glitches or errors that may be affecting the enrollment process.
- Update your app: If you’re using the Zelle mobile app, ensure that you have the latest version installed. Outdated versions may have bugs or compatibility issues that could hinder the enrollment process. Update to the most recent version available.
- Disable VPN or proxy: If you’re using a virtual private network (VPN) or proxy server, try disabling them temporarily during the enrollment process. VPNs and proxies can sometimes interfere with the data transmission required for successful enrollment.
- Try a different device or network: If you’re encountering persistent issues during the enrollment process, consider using a different device or connecting to a different network. It’s possible that the issue may be specific to the device or network you’re currently using.
- Be patient: Sometimes, delays or technical glitches may occur during the enrollment process. If this happens, try to remain patient and retry the enrollment at a later time. In many cases, issues resolve themselves or are resolved on the server side.
If none of these troubleshooting tips resolve your issue, it’s important to remember that each situation is unique, and it’s best to consult with your bank’s customer support for personalized assistance. They have access to specific information about your account and can provide the most appropriate guidance.
By following these troubleshooting tips and seeking assistance when needed, you can increase your chances of successfully enrolling in Zelle and enjoying the convenience of digital money transfers.
Frequently asked questions about Zelle enrollment
Here are some commonly asked questions about Zelle enrollment, along with brief answers to help address any queries you may have:
- 1. What banks offer Zelle? Zelle is supported by a wide range of major banks and credit unions in the United States. Most national and regional banks are Zelle participants. Check with your bank to confirm if they offer Zelle enrollment.
- 2. Is there a fee to enroll in Zelle? No, enrolling in Zelle is typically free. However, it’s important to review your bank’s fee schedule for any charges related to specific Zelle transactions, such as sending or receiving money.
- 3. How long does it take to enroll in Zelle? The Zelle enrollment process can be completed fairly quickly. It usually takes just a few minutes to provide the necessary information and complete the identity verification process. The exact time may vary depending on your bank’s requirements.
- 4. Can I have multiple bank accounts linked to Zelle? It depends on your bank’s policies. Some banks may allow you to link multiple bank accounts to a single Zelle profile, while others may restrict you to linking one bank account. Review your bank’s guidelines or consult with their customer support for specific information.
- 5. Can I use Zelle if my bank doesn’t offer it? If your bank doesn’t offer Zelle enrollment, you may explore alternative payment platforms or ask your bank about other options they may provide for person-to-person money transfers. Additionally, you can consider switching to a bank that supports Zelle if it is essential for your needs.
- 6. Is Zelle secure to use? Yes, Zelle has numerous security measures in place to protect your transactions. These include encryption protocols and verification processes to ensure that only verified accounts can send and receive money through Zelle. However, it’s essential to practice basic security measures, such as safeguarding your login credentials and being cautious of potential scams or fraudulent activities.
- 7. Can I cancel my Zelle enrollment? Yes, you can typically cancel your Zelle enrollment by contacting your bank’s customer support. They will guide you through the process and ensure that your Zelle account is disabled. However, note that canceling your Zelle enrollment may lead to the loss of any ongoing transactions or pending payments.
- 8. Are there any transaction limits in Zelle? Transaction limits may vary depending on your bank’s policies. Most banks set limits to prevent potential fraud or misuse. Review your bank’s terms and conditions or consult their customer support to determine the specific transaction limits that apply to your Zelle account.
- 9. Can I use Zelle internationally? Zelle is primarily designed for domestic transfers within the United States. It may not be available for international transactions. However, some banks may have partnerships with international payment networks that allow for cross-border transfers. Consult your bank for options regarding international money transfers.
- 10. Can I use Zelle for business transactions? Zelle is primarily designed for personal transactions between individuals. Some banks offer specific services for business payments, so check with your bank to explore options tailored to business needs.
These answers are intended to provide a general understanding of Zelle enrollment, but it’s important to consult your bank for specific information related to their offerings and policies. Stay informed and regularly check for updates regarding Zelle’s features and availability.