Introduction
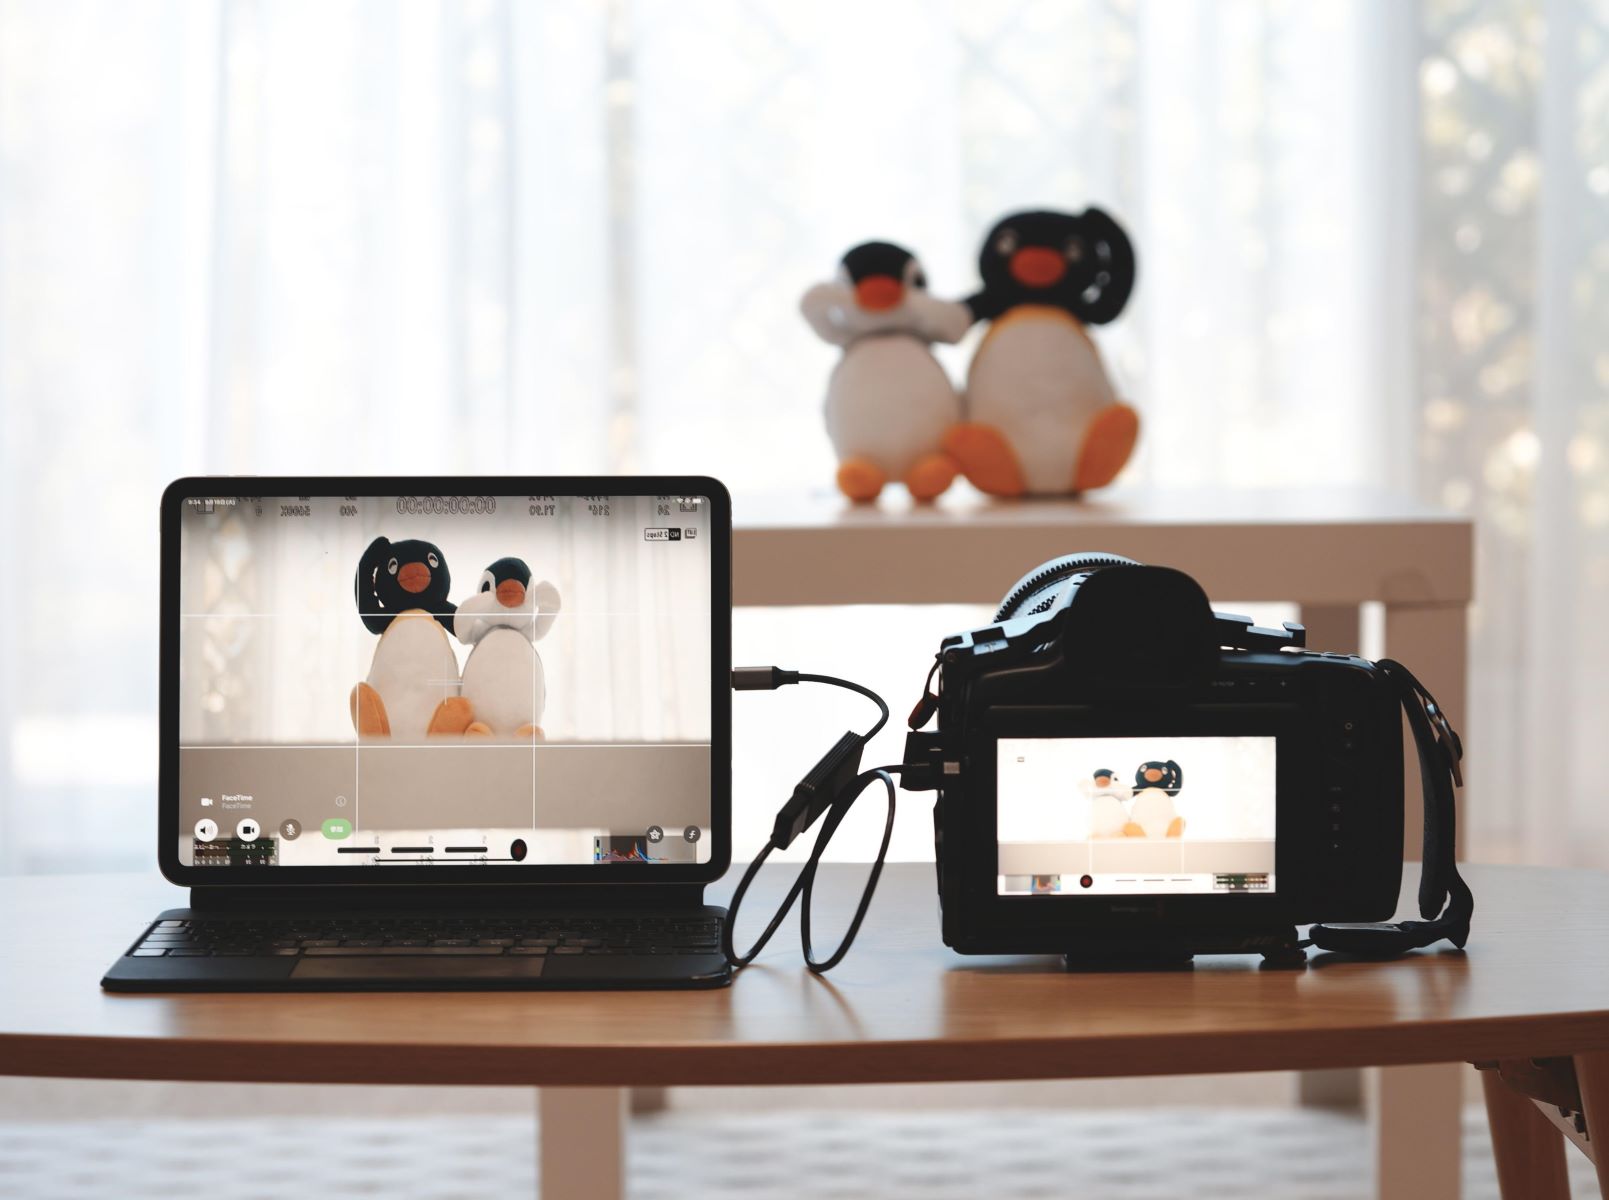
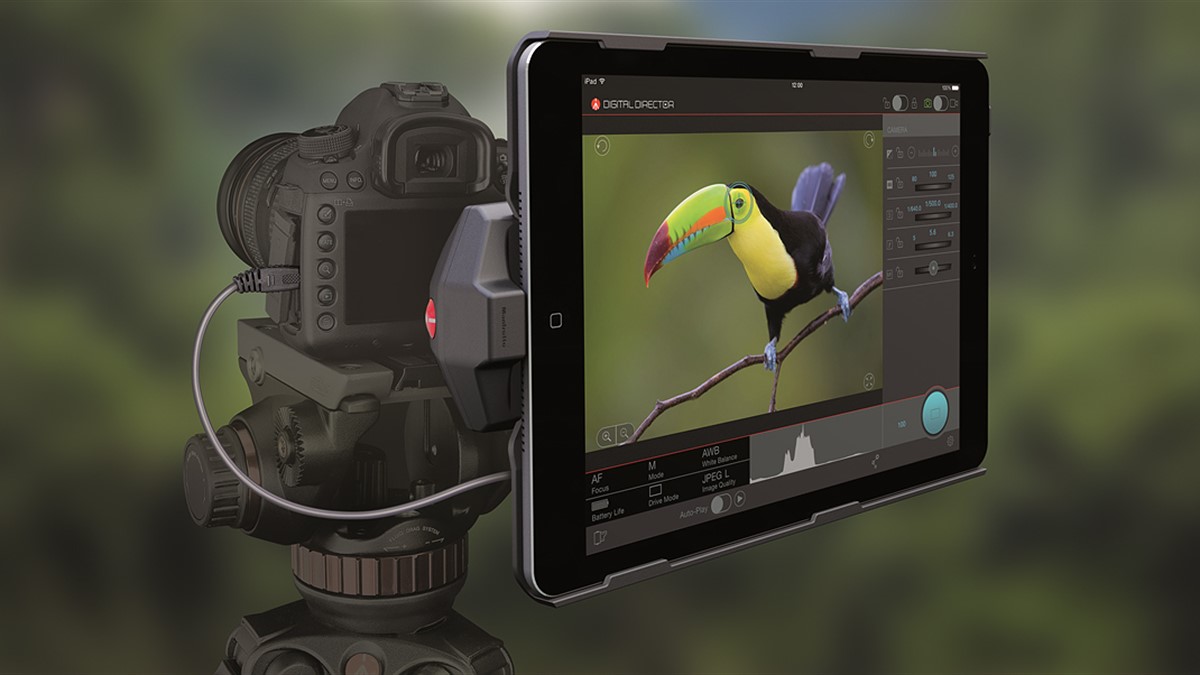
Using an iPad as a display for a DSLR camera can significantly enhance your photography and videography experience. This innovative approach allows you to leverage the iPad's large, high-resolution screen to frame shots, review images and videos in real-time, and make adjustments on the fly. Whether you're a professional photographer, a videographer, or an enthusiastic hobbyist, integrating your iPad into your camera setup can bring a new level of versatility and convenience to your creative process.
The process of using your iPad as a display for your DSLR camera involves setting up a connection between the two devices. There are different methods for achieving this, such as utilizing the Camera Connection Kit or establishing a Wi-Fi connection between the iPad and the camera. Each approach offers distinct advantages and may be better suited to specific shooting scenarios or personal preferences.
In this guide, we will explore the step-by-step process of setting up your iPad and DSLR camera for seamless integration. We will delve into the details of using the Camera Connection Kit and establishing a Wi-Fi connection, providing clear instructions to help you get started. Additionally, we will discuss how to adjust settings and display options to optimize the viewing experience on your iPad.
Furthermore, we will share valuable tips and insights to maximize the benefits of using your iPad as a display, empowering you to elevate your photography and videography endeavors. By the end of this guide, you will have a comprehensive understanding of how to effectively harness the capabilities of your iPad to enhance your DSLR camera usage, opening up a world of creative possibilities. Let's embark on this journey to unlock the full potential of your photography and videography setup.
Setting Up Your iPad and DSLR Camera
Before you can begin using your iPad as a display for your DSLR camera, it’s essential to ensure that both devices are properly set up and ready to establish a connection. The first step is to check the compatibility of your DSLR camera with the iPad, as different camera models may have varying connectivity options. Once you’ve confirmed compatibility, proceed with the following steps to set up your iPad and DSLR camera for seamless integration.
- Ensure that your iPad and DSLR camera are fully charged or have sufficient battery power to avoid interruptions during the setup and shooting process.
- Install the necessary apps on your iPad that support the functionality of using it as a display for your DSLR camera. These apps may vary depending on the camera brand and model, so it’s important to research and select the appropriate app for your specific camera.
- Power on your DSLR camera and access the settings menu to enable the necessary connectivity features. This may involve activating Wi-Fi or other wireless communication options, depending on the capabilities of your camera.
- On your iPad, ensure that the Wi-Fi or Bluetooth functionality is enabled to facilitate the connection with your DSLR camera. If you’re using the Camera Connection Kit, ensure that it is properly connected to the iPad’s charging port.
Once these initial setup steps are complete, you can proceed to the next stage of establishing a connection between your iPad and DSLR camera, which we will explore in detail in the following sections. By preparing your devices in advance and ensuring that they are equipped with the necessary software and connectivity options, you pave the way for a smooth and efficient integration that enhances your photography and videography workflow.
Using the Camera Connection Kit
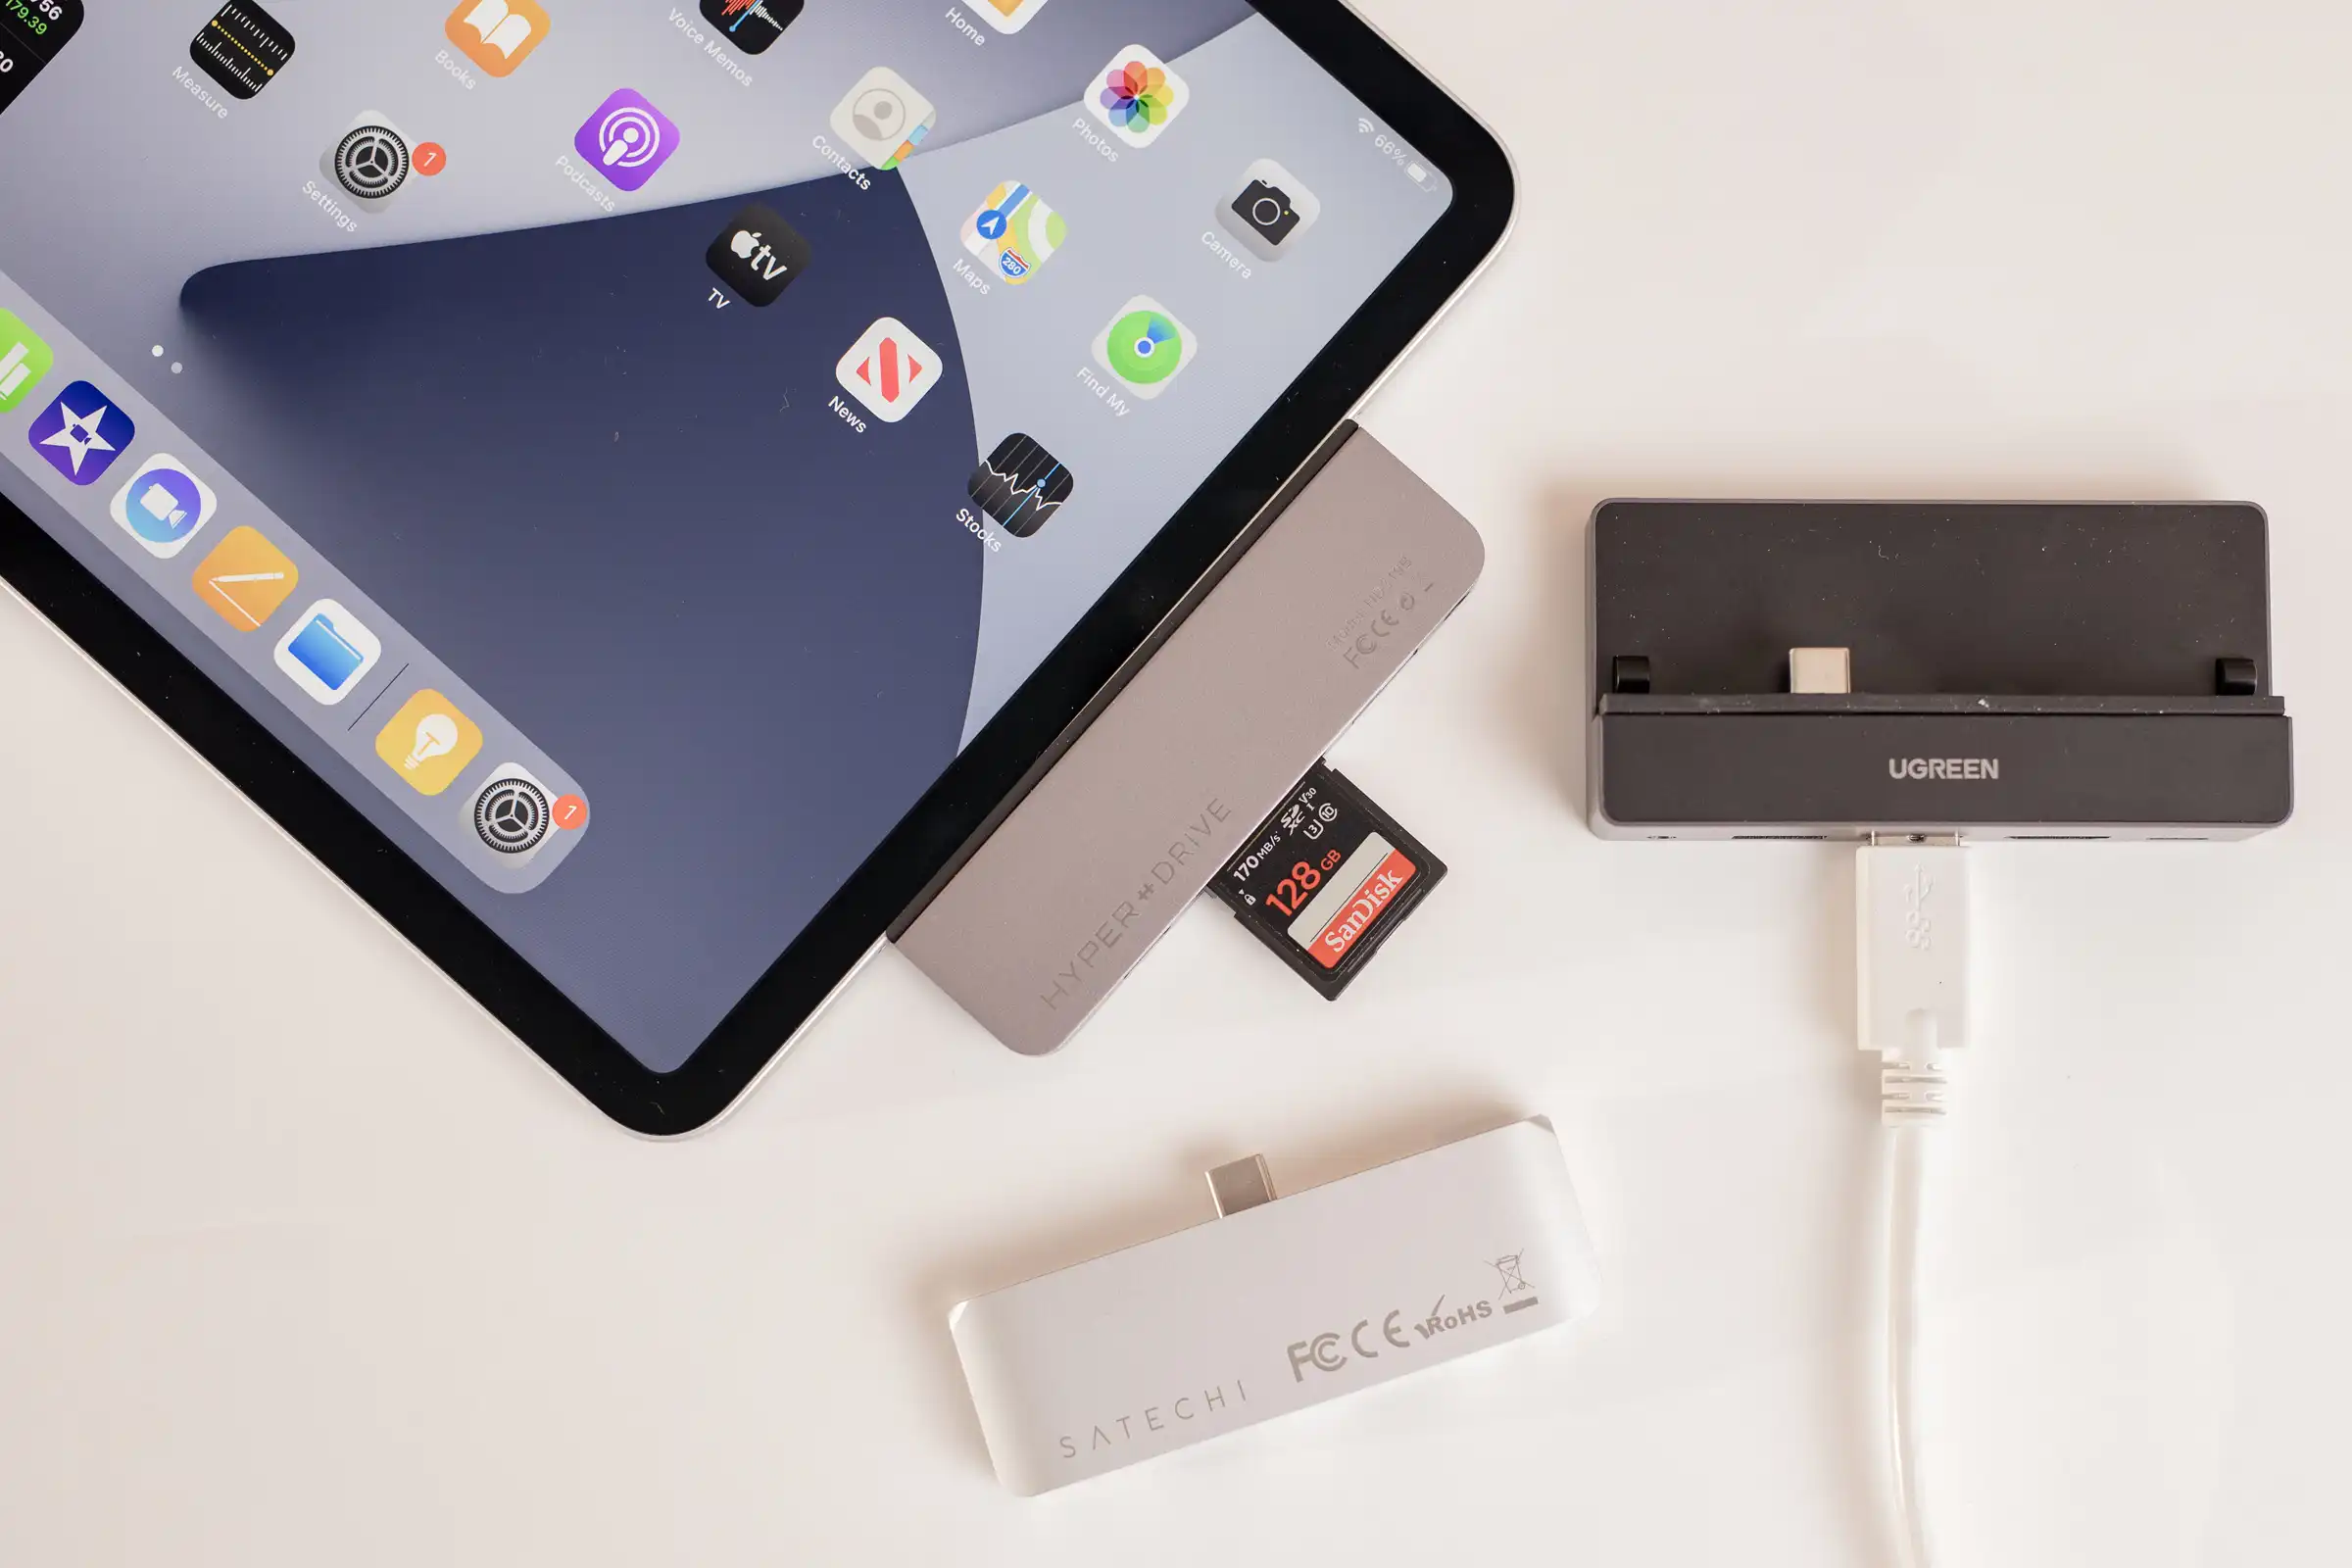
The Camera Connection Kit offers a direct and reliable method for connecting your iPad to your DSLR camera, allowing for real-time display and control of your camera’s viewfinder or live view screen on the iPad’s larger and more detailed display. This kit typically includes a USB adapter and an SD card reader, providing versatile connectivity options for a wide range of DSLR cameras. Here’s how to use the Camera Connection Kit to link your iPad and DSLR camera:
- Start by connecting the USB adapter from the Camera Connection Kit to your iPad’s charging port. Once connected, your iPad may prompt you to allow access to the connected device.
- Using the appropriate USB cable for your DSLR camera, connect the camera to the USB adapter of the Camera Connection Kit. Ensure that the camera is powered on and in the appropriate mode for live view or viewfinder display.
- Upon successful connection, your iPad should recognize the DSLR camera and launch the compatible app for camera control and display. Depending on the app’s features, you may be able to adjust camera settings, capture images, and review shots directly from the iPad’s screen.
- If your DSLR camera uses an SD card for image storage, you can also utilize the SD card reader included in the Camera Connection Kit to transfer images from the camera’s SD card to your iPad for immediate review and sharing.
Using the Camera Connection Kit provides a stable and direct connection between your iPad and DSLR camera, offering a seamless way to leverage the iPad’s display for framing and capturing shots. This method is particularly advantageous in situations where a reliable and consistent connection is crucial, such as studio photography or controlled shooting environments. By mastering the use of the Camera Connection Kit, you can harness the full potential of your iPad as a versatile and high-quality display for your DSLR camera, enhancing your creative capabilities and workflow efficiency.
Using a Wi-Fi Connection
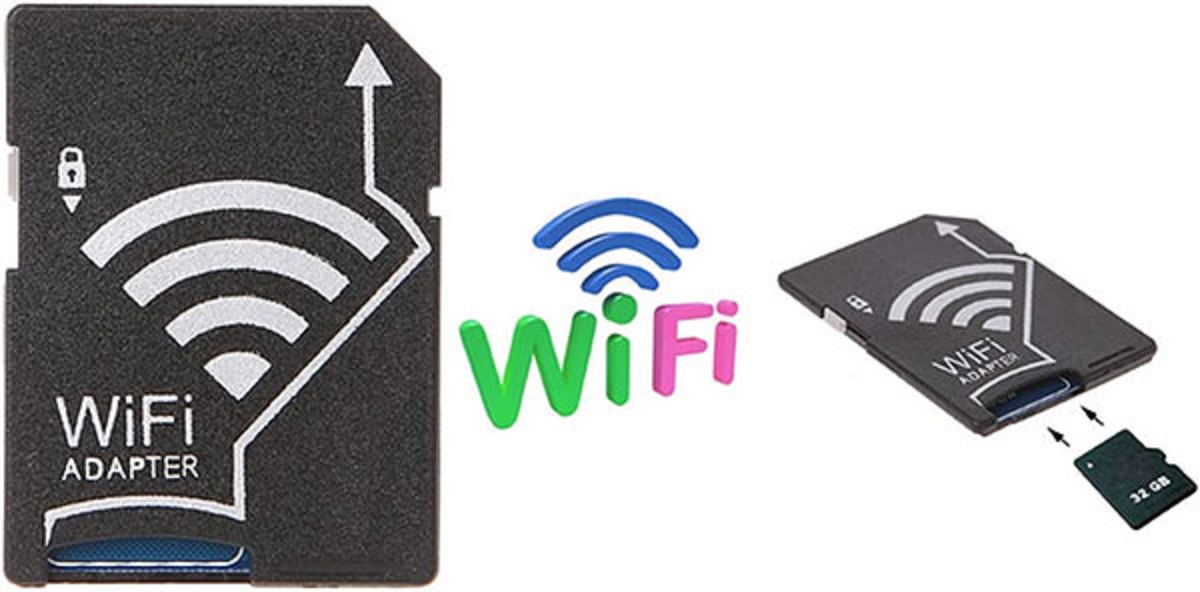
Another popular method for utilizing your iPad as a display for your DSLR camera involves establishing a Wi-Fi connection between the two devices. Many modern DSLR cameras offer built-in Wi-Fi capabilities or are compatible with Wi-Fi adapters, enabling seamless wireless communication with your iPad. Here’s how to set up and utilize a Wi-Fi connection for real-time display and control of your DSLR camera’s viewfinder or live view on your iPad:
- Start by enabling the Wi-Fi feature on your DSLR camera. Access the camera’s settings menu to configure the Wi-Fi network settings and establish a connection with your iPad. Depending on the camera model, you may need to download and install the corresponding app to facilitate the connection and control functionalities.
- On your iPad, navigate to the Wi-Fi settings and select the network broadcasted by your DSLR camera. Once connected, launch the compatible app that allows for camera control and live view display on your iPad.
- Upon successful connection, you should be able to view the camera’s live feed or viewfinder display directly on your iPad’s screen. Depending on the app’s capabilities, you may have access to various camera settings, remote shutter control, and the ability to review and transfer captured images wirelessly.
- Utilize the flexibility of the Wi-Fi connection to position your DSLR camera in unique or challenging shooting locations while maintaining a clear view of the live feed on your iPad, allowing for precise framing and composition adjustments.
Using a Wi-Fi connection to link your DSLR camera to your iPad offers the advantage of wireless flexibility and remote control, making it an ideal choice for dynamic and on-the-go shooting scenarios. Whether you’re capturing outdoor events, conducting on-location photo shoots, or exploring creative angles in challenging environments, the Wi-Fi connection empowers you to seamlessly integrate your iPad as a high-quality display for your DSLR camera, enhancing your creative vision and technical capabilities.
Adjusting Settings and Display Options
Once you have successfully established the connection between your iPad and DSLR camera, it’s essential to understand how to optimize the settings and display options to suit your specific shooting requirements and creative preferences. By fine-tuning these settings, you can maximize the functionality and visual clarity of your iPad as a display for your DSLR camera, ensuring a seamless and efficient workflow. Here are the key considerations for adjusting settings and display options:
- Display Quality: Explore the display quality settings within the app or camera interface to ensure that the live feed or viewfinder display on your iPad exhibits accurate colors, sharp details, and optimal brightness. Adjusting these settings can enhance the clarity and visual fidelity of the displayed images, allowing for precise composition and exposure evaluation.
- Grid and Overlays: Many camera control apps and DSLR cameras offer grid and overlay options to assist with composition and framing. Take advantage of these features to align your shots, maintain horizons, and implement creative composition techniques directly from the visual feedback on your iPad’s display.
- Remote Control Functions: Familiarize yourself with the remote control capabilities available through the app or camera interface. Depending on the features provided, you may be able to adjust focus, exposure settings, and capture images remotely, offering greater flexibility and creative control during the shooting process.
- Playback and Image Review: Utilize the iPad’s expansive screen to review captured images and videos with enhanced clarity and detail. Take advantage of the intuitive touch interface to zoom in, evaluate critical focus, and assess image quality directly on the iPad, streamlining the post-capture review process.
- Customization and Presets: Explore any customization options and preset configurations available within the app or camera settings. Tailoring these settings to align with your preferred shooting style and visual preferences can streamline your workflow and ensure a consistent and efficient shooting experience.
By mastering the adjustment of settings and display options, you can harness the full potential of your iPad as a dynamic and versatile display for your DSLR camera, empowering you to capture stunning images and videos with precision and creative finesse. Whether you’re honing your composition, fine-tuning exposure settings, or remotely controlling your camera, the seamless integration of your iPad enhances your technical capabilities and creative vision, opening up a world of possibilities in your photography and videography pursuits.
Tips for Using Your iPad as a Display
As you integrate your iPad as a display for your DSLR camera, incorporating the following tips and best practices can elevate your photography and videography experience, optimizing the functionality and creative potential of this innovative setup. These insights are designed to enhance your workflow, improve the quality of your shots, and streamline the process of using your iPad as a dynamic and versatile display for your DSLR camera:
- Utilize the Full Screen: Take advantage of the spacious and high-resolution display of your iPad to thoroughly examine the details of your composition and subjects. Zoom in on specific areas of the frame to ensure precise focus and evaluate critical elements with enhanced clarity.
- Experiment with Composition: Leverage the real-time display on your iPad to explore diverse composition techniques and framing options. Utilize grid overlays and alignment guides to create visually compelling and well-balanced shots, enhancing the overall impact of your images and videos.
- Monitor Exposure and Histogram: Use the iPad’s display to assess exposure levels and histogram data in real time, allowing for informed adjustments to achieve optimal tonal range and highlight detail retention in your captures.
- Remote Shooting Flexibility: Embrace the freedom of remote shooting enabled by your iPad, allowing you to explore unconventional angles, capture candid moments, and maintain a clear view of the live feed while adjusting your camera’s position or settings.
- Collaborative Review: Engage clients, collaborators, or subjects in the image review process by sharing the live feed or captured images directly from your iPad. This collaborative approach fosters real-time feedback and ensures that all stakeholders are involved in the creative decision-making process.
- Backup and Transfer Efficiency: Take advantage of the immediate image transfer capabilities of your iPad to create backups of your shots and expedite the sharing process. This can be particularly beneficial in fast-paced shooting environments or when working on location with limited resources.
- Customize and Personalize: Explore the customization options within the camera control app to tailor the display layout, control functions, and visual indicators to align with your specific preferences and shooting style, optimizing the usability of your iPad as a dedicated camera display.
By implementing these tips and integrating them into your photography and videography workflow, you can harness the full potential of your iPad as a powerful and intuitive display for your DSLR camera. This seamless integration not only enhances your technical capabilities but also fosters a dynamic and engaging creative process, allowing you to capture compelling and visually stunning imagery with precision and artistry.
Conclusion
Integrating your iPad as a display for your DSLR camera unlocks a realm of creative possibilities and technical advantages, revolutionizing the way you capture and visualize images and videos. Whether you opt for the direct connection facilitated by the Camera Connection Kit or the wireless flexibility of a Wi-Fi connection, the seamless integration of your iPad enhances your control, precision, and visual clarity during the shooting process.
By setting up your iPad and DSLR camera with careful consideration of compatibility and connectivity options, you pave the way for a streamlined and efficient workflow that empowers you to capture stunning imagery with confidence and finesse. Adjusting settings, display options, and utilizing the full potential of your iPad as a display enriches your creative vision and technical capabilities, allowing you to explore new perspectives and elevate the quality of your photographic and videographic endeavors.
Furthermore, the invaluable tips and best practices for using your iPad as a display serve as a guide to enhance your workflow, optimize composition, and facilitate collaborative engagement, fostering a dynamic and engaging creative process. The collaborative review process and immediate image transfer capabilities further streamline your workflow, ensuring that you can efficiently backup and share your captures in real time, enhancing your productivity and communication with clients and collaborators.
As you embrace the fusion of technology and creativity through the seamless integration of your iPad as a display for your DSLR camera, you embark on a journey of innovation and artistic expression. This integration not only enhances your technical capabilities but also fosters a dynamic and engaging creative process, allowing you to capture compelling and visually stunning imagery with precision and artistry. With your iPad as a versatile and high-quality display for your DSLR camera, you are well-equipped to explore new horizons, experiment with diverse shooting scenarios, and unleash your full creative potential in the realm of photography and videography.


