Introduction
If you"ve been capturing all the breathtaking moments of your adventures with your action camera, chances are you"ll need to remove the SD card at some point to transfer the footage to your computer or free up space for more thrilling escapades. However, the process of taking out an SD card from an action camera HD 1080P can be a bit tricky if you"re new to the world of action cameras. But fear not, as I"ll guide you through the step-by-step process to ensure that you can effortlessly remove the SD card without any hassle.
Whether you"re a seasoned action camera enthusiast or a newcomer eager to explore the world of action-packed photography and videography, understanding how to properly handle the SD card is essential for maintaining the integrity of your precious memories. By following these simple steps, you"ll be able to safely remove the SD card from your action camera, paving the way for seamless data transfer and continued adrenaline-pumping adventures.
So, let"s dive into the process of taking out an SD card from your action camera HD 1080P, ensuring that you can smoothly transition from capturing your thrilling moments to reliving them on your devices.
Step 1: Power Off the Action Camera
Before embarking on the task of removing the SD card from your action camera HD 1080P, it is crucial to ensure that the camera is powered off. This simple yet vital step serves to prevent any potential data corruption or damage to the SD card during the removal process.
To power off your action camera, locate the power button, typically situated on the top or side of the device. Press and hold the power button until the camera shuts down completely. It is important to allow the camera to power down fully to mitigate the risk of disrupting any ongoing data read/write operations to the SD card.
By turning off the action camera before proceeding, you are safeguarding the integrity of the data stored on the SD card, minimizing the likelihood of encountering errors or file corruption. Additionally, powering off the camera ensures a smoother removal process, reducing the chances of physical damage to the SD card or the camera”s internal components.
Remember, the safety of your data and hardware is paramount, and taking the time to power off your action camera before removing the SD card is a fundamental practice that contributes to the longevity and reliability of your equipment.
Step 2: Locate the SD Card Slot
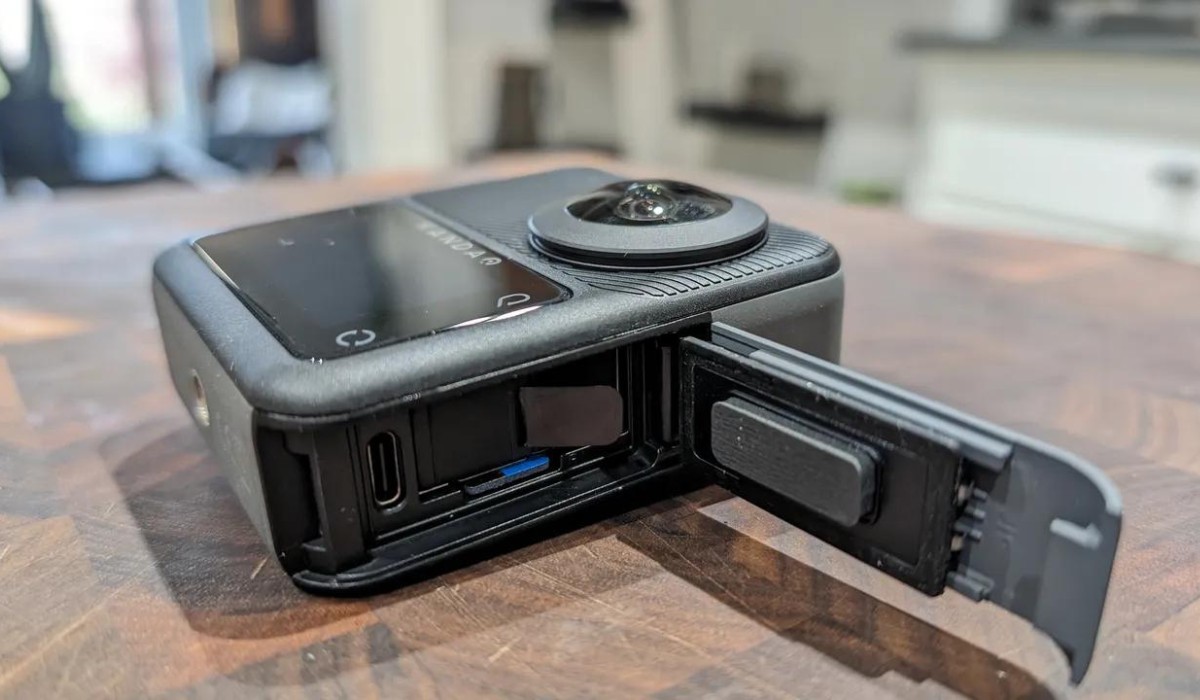
Once the action camera is powered off, the next step is to locate the SD card slot. The location of the slot may vary depending on the model of your action camera, but it is commonly found either on the side of the camera or within a compartment that can be accessed by opening a small cover.
Inspect the exterior of the camera for any markings or symbols indicating the presence of the SD card slot. Some cameras feature a dedicated icon resembling an SD card, while others may have a label indicating “SD” or “Memory Card.” If you are unable to locate the slot based on visual cues, referring to the camera”s user manual can provide precise guidance on the location of the SD card slot.
Once you have identified the SD card slot, take a moment to familiarize yourself with its positioning and any accompanying mechanisms, such as a spring-loaded door or a latch that secures the SD card in place. Understanding the design of the slot will facilitate a smoother removal process and reduce the likelihood of accidental damage to the SD card or the camera itself.
By taking the time to locate the SD card slot and acquainting yourself with its features, you are better equipped to proceed with confidence, ensuring that you can navigate the removal process with precision and care.
Step 3: Push the SD Card In
With the SD card slot located, the next step is to press the SD card inward to initiate the release mechanism. Depending on the design of the slot, you may encounter different methods for disengaging the SD card, such as a spring-loaded mechanism or a manual release latch.
Using your fingertip or a small tool, gently press the exposed edge of the SD card into the slot. You should feel a slight resistance as the card engages with the internal mechanism. If the slot features a spring-loaded design, continue applying gentle pressure until you sense the card being pushed back slightly into the slot.
For slots equipped with a manual release latch, the act of pushing the card in serves to disengage the latch, allowing the SD card to move into a position conducive to removal. Take care to exert only a moderate amount of pressure, ensuring that you do not force the card or cause any damage to the slot or the card itself.
By pushing the SD card in as per the design of the slot, you are activating the release mechanism, preparing the card for safe removal in the subsequent steps. This deliberate approach minimizes the risk of mishandling the card and promotes a smooth and controlled removal process.
Step 4: Release the SD Card
After pushing the SD card into the slot, the next crucial step is to release the card from its secured position. This action will vary depending on the specific mechanism employed by the SD card slot of your action camera HD 1080P.
If the slot features a spring-loaded mechanism, upon pushing the SD card in, you may notice a subtle outward movement of the card. At this point, carefully release the card and allow the spring to gently push it back out of the slot. It is essential to exercise patience and precision during this step, ensuring that the card is released smoothly without any abrupt movements.
For slots equipped with a manual release latch, pushing the SD card in will disengage the latch, allowing the card to move into a position ready for removal. Once the latch is released, maintain a firm grip on the SD card to prevent it from springing out unexpectedly, and proceed to the next step for safe extraction.
Regardless of the specific release mechanism, it is imperative to handle the SD card with care during this step, prioritizing a gentle and controlled approach to minimize the risk of damage to the card or the camera. By releasing the SD card in a deliberate and cautious manner, you are setting the stage for a seamless and trouble-free removal process.
Step 5: Remove the SD Card
With the SD card released from its secured position, the final step involves removing the card from the slot. Carefully grasp the exposed edge of the SD card, ensuring a firm yet gentle hold to facilitate its smooth extraction. Avoid applying excessive force or bending the card, as this could lead to damage or data corruption.
Slowly and steadily pull the SD card out of the slot, maintaining a consistent and even pressure to prevent any abrupt movements that may cause the card to dislodge unexpectedly. It is essential to proceed with caution, especially if the card encounters slight resistance during the removal process.
If the SD card does not slide out effortlessly, refrain from forcing its extraction. Instead, reassess the positioning of the card and adjust your grip as needed before attempting to remove it again. Patience and attentiveness are key to ensuring a successful and damage-free removal of the SD card from your action camera HD 1080P.
Once the SD card is fully extracted, inspect it for any signs of damage or foreign particles that may have accumulated in the slot during its use. If necessary, gently clean the card and the slot using a soft, dry cloth to maintain optimal functionality and prevent potential issues in future use.
By following these meticulous steps to remove the SD card from your action camera, you can safeguard the integrity of your data and equipment, setting the stage for seamless data transfer and continued photographic adventures.
Conclusion
Mastering the art of removing an SD card from your action camera HD 1080P is a fundamental skill that ensures the smooth transition of your captured moments from the camera to your storage devices. By following the step-by-step process outlined above, you can confidently and safely remove the SD card, preserving the integrity of your data and the functionality of your camera.
From powering off the camera to delicately releasing and removing the SD card, each step is designed to minimize the risk of data corruption, physical damage, or operational issues. By adhering to these guidelines, you can effectively manage your SD card with precision and care, fostering a seamless workflow for transferring and archiving your cherished memories.
Remember, the safety of your data and the longevity of your equipment hinge on the meticulous execution of these steps. Whether you”re a seasoned action camera enthusiast or a newcomer to the exhilarating world of action-packed photography and videography, mastering the art of SD card removal is a valuable skill that enhances your overall experience with your action camera.
So, the next time you embark on a thrilling adventure with your action camera HD 1080P, rest assured that you can confidently handle the removal of the SD card, paving the way for uninterrupted creativity and seamless data management.