Introduction
Are you looking to enhance the audio quality of your camcorder recordings? Connecting a Zoom H1N to your camcorder can significantly improve the overall sound experience, capturing clear and crisp audio to complement your visuals. Whether you're shooting a vlog, interview, or capturing a live event, this simple setup can elevate the professionalism and impact of your videos.
The Zoom H1N is a compact and versatile audio recorder that offers high-quality sound capture in a portable package. By connecting it to your camcorder, you can leverage its advanced audio capabilities to achieve superior sound quality, reducing ambient noise and ensuring that every spoken word or musical note is faithfully reproduced.
In this guide, we will walk you through the step-by-step process of connecting your Zoom H1N to your camcorder, adjusting the audio settings, and testing the connection to ensure everything is functioning optimally. With just a few simple steps, you can unlock the full potential of your camcorder and elevate the audio quality of your recordings.
Whether you're a content creator, filmmaker, or hobbyist videographer, improving your audio setup can make a significant difference in the overall impact and professionalism of your videos. By following this guide, you'll be able to seamlessly integrate the Zoom H1N with your camcorder, opening up a world of possibilities for capturing high-fidelity audio in your video productions.
Now, let's dive into the detailed steps to connect your Zoom H1N to your camcorder and unleash the full potential of your audio-visual creations.
Step 1: Gather the Necessary Equipment
Before you begin the process of connecting your Zoom H1N to your camcorder, it’s essential to gather the necessary equipment to ensure a seamless setup. Here’s a list of items you’ll need:
- Zoom H1N: This portable audio recorder will serve as the primary device for capturing high-quality audio. Ensure that the device is fully charged or equipped with fresh batteries to avoid any interruptions during the setup process.
- Camcorder: Your preferred camcorder, equipped with an external microphone input, is essential for integrating the Zoom H1N into your recording setup. Verify that the camcorder’s audio input ports are accessible and in working condition.
- 3.5mm TRS to TRS Cable: A high-quality 3.5mm TRS (Tip-Ring-Sleeve) to TRS cable will be required to establish a physical connection between the Zoom H1N and the camcorder. This cable facilitates the transmission of audio signals from the Zoom H1N’s output to the camcorder’s input.
- Headphones: While not mandatory for the initial setup, having a pair of headphones on hand can be beneficial for monitoring the audio levels and ensuring that the connection between the Zoom H1N and the camcorder is functioning as intended.
- Mounting Accessories (Optional): Depending on your recording setup, you may require mounting accessories such as a tripod, camera rig, or other stabilizing equipment to securely position both the Zoom H1N and the camcorder during the recording process.
By gathering these essential components, you’ll be well-prepared to proceed with the seamless integration of the Zoom H1N with your camcorder. With the equipment in hand, you can confidently move on to the next step, which involves physically connecting the devices and configuring the audio settings for optimal performance.
Step 2: Connect the Zoom H1N to the Camcorder
With the necessary equipment assembled, it’s time to proceed with connecting the Zoom H1N to your camcorder. Follow these steps to establish a seamless audio integration:
- Power Off Devices: Before making any connections, ensure that both the Zoom H1N and the camcorder are powered off to prevent any potential electrical interference or audio feedback.
- Locate Audio Input Ports: Identify the audio input ports on both the Zoom H1N and the camcorder. The Zoom H1N features a 3.5mm output jack, while the camcorder should have a corresponding 3.5mm input jack for external microphones or audio devices.
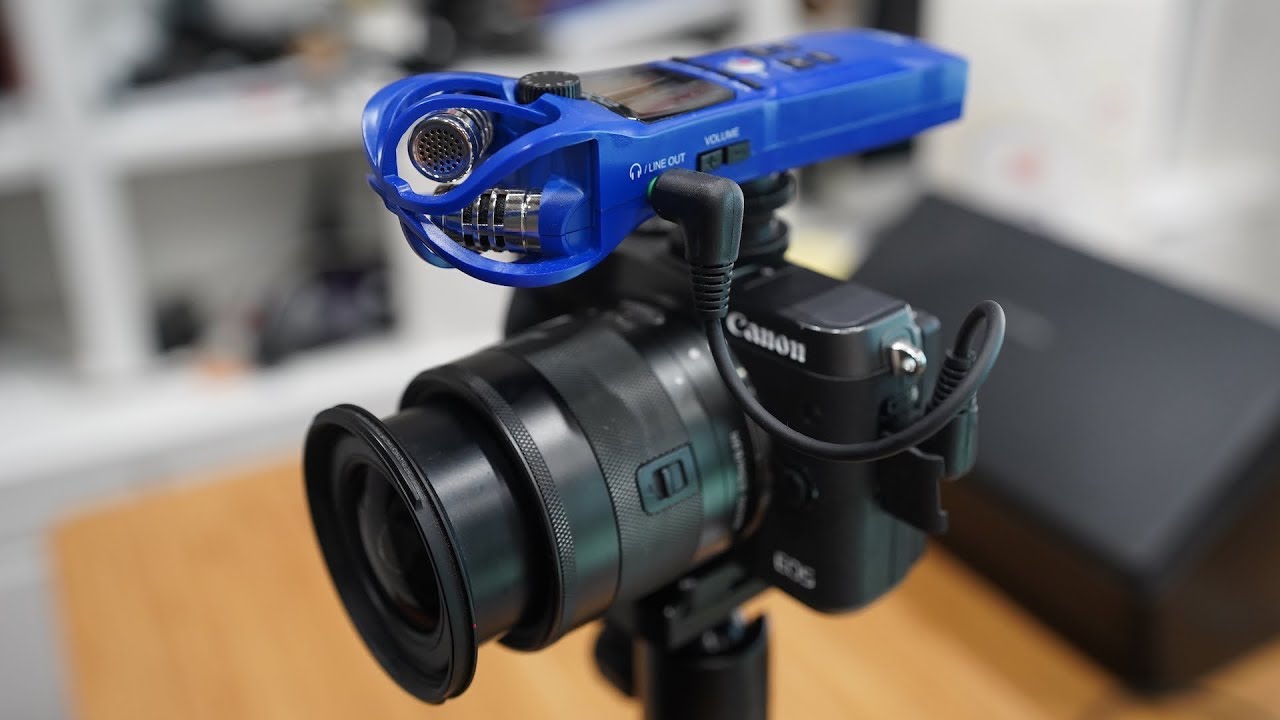
- Connect the Cable: Take the 3.5mm TRS to TRS cable and insert one end into the output jack of the Zoom H1N and the other end into the audio input port of the camcorder. Ensure that the connections are secure to prevent any signal loss or audio distortion during recording.
- Power On Devices: Once the cable is securely connected, power on both the Zoom H1N and the camcorder. The devices should recognize the audio input from the Zoom H1N, and you may need to select the external microphone input on the camcorder to route the audio signal properly.
- Adjust Volume Levels: Use the audio level controls on the Zoom H1N to set an appropriate recording volume. It’s essential to avoid peaking or clipping, so monitor the audio levels on the Zoom H1N’s display and adjust the input gain accordingly.
- Monitor Audio: If you have headphones available, plug them into the headphone output of the Zoom H1N to monitor the audio input and ensure that the connection is functioning correctly. This allows you to listen for any potential issues or distortions in the recorded audio.
Once the Zoom H1N is successfully connected to the camcorder, you’ve established a direct audio link that will capture high-quality sound for your video recordings. The physical connection between the devices sets the stage for optimizing the audio settings and fine-tuning the recording parameters to achieve the best possible audio quality for your videos.
With the connection in place, you’re ready to move on to the next step, which involves adjusting the audio settings on both the Zoom H1N and the camcorder to ensure optimal performance and fidelity.
Step 3: Adjust the Audio Settings
Now that the Zoom H1N is successfully connected to your camcorder, it’s crucial to fine-tune the audio settings to ensure optimal sound quality and performance. Follow these steps to adjust the audio settings for your recording setup:
- Input Gain Control: Utilize the input gain control on the Zoom H1N to adjust the recording level. Carefully monitor the audio levels displayed on the device to prevent overloading or distortion, ensuring that the input gain is set at an appropriate level for your recording environment.
- Audio Format and Quality: Explore the audio format and quality settings on the Zoom H1N to select the desired recording parameters. Depending on your preferences and the specific requirements of your video project, you can choose between different audio formats and quality options to achieve the best results.
- Camcorder Audio Settings: Access the audio settings menu on your camcorder to verify that the external microphone input is selected and properly configured to receive the audio signal from the Zoom H1N. Adjust any relevant settings, such as input levels or audio monitoring options, to align with the connected audio device.
- Monitoring the Audio: If your camcorder features audio monitoring capabilities, use the built-in headphone jack or audio level indicators to monitor the incoming audio signal from the Zoom H1N. This allows you to ensure that the audio levels are consistent and free from any unwanted noise or interference.
- Test Recording: Conduct a test recording with the adjusted audio settings to evaluate the sound quality and overall performance. Capture a brief sample of audio and review it to identify any potential issues or areas for improvement, such as adjusting input levels or refining the recording parameters.
By carefully adjusting the audio settings on both the Zoom H1N and the camcorder, you can optimize the recording setup to deliver exceptional sound quality for your video productions. These adjustments enable you to tailor the audio capture to suit your specific recording environment and the intended content of your videos.
With the audio settings fine-tuned, you’re prepared to move on to the final step, which involves testing the connection between the Zoom H1N and the camcorder to confirm that the audio integration is functioning seamlessly.
Step 4: Test the Connection
Before finalizing the setup, it’s essential to conduct a thorough test of the connection between the Zoom H1N and the camcorder to ensure that the audio integration is seamless and the recording quality meets your expectations. Follow these steps to effectively test the connection:
- Record Sample Footage: Initiate a recording on your camcorder while capturing audio through the connected Zoom H1N. Record a brief sample of footage, ensuring that the audio levels are consistent and that the sound is being captured accurately.
- Playback and Review: After recording the sample footage, review the audio playback to assess the quality and clarity of the captured sound. Listen for any potential issues, such as background noise, distortion, or uneven audio levels, and make note of any adjustments that may be necessary.
- Assess Ambient Noise: Pay attention to the presence of ambient noise or unwanted sounds in the recorded audio. Evaluate the effectiveness of the Zoom H1N in minimizing background noise and capturing clear, focused audio that enhances the overall viewing experience.
- Verify Audio Synchronization: If your video includes synchronized audio and visual elements, ensure that the audio captured by the Zoom H1N aligns seamlessly with the corresponding visuals. Check for any discrepancies or delays between the audio and video components of the recording.
- Adjustments and Refinements: Based on your assessment of the test recording, make any necessary adjustments to the audio settings, input levels, or recording parameters. Fine-tune the setup to address any identified issues and optimize the audio quality for future recordings.
By rigorously testing the connection between the Zoom H1N and the camcorder, you can confirm that the audio integration is functioning as intended and that the recording setup is capable of delivering high-quality sound for your video projects. This testing phase allows you to identify and address any potential concerns before proceeding with actual recordings, ensuring that your audio-visual productions meet the desired standards of excellence.
With the connection successfully tested and any refinements implemented, you’re now ready to leverage the integrated setup of the Zoom H1N and your camcorder to capture professional-grade audio that enhances the impact and quality of your video content.
Conclusion
By following the step-by-step process outlined in this guide, you’ve gained the knowledge and practical insights needed to seamlessly connect a Zoom H1N to your camcorder, significantly enhancing the audio quality of your video recordings. This integration empowers you to capture clear, crisp sound that complements the visual elements of your videos, elevating the overall impact and professionalism of your content.
From gathering the necessary equipment to fine-tuning the audio settings and rigorously testing the connection, each step in the process is essential for ensuring that the Zoom H1N and the camcorder work in harmony to deliver superior audio performance. The careful adjustments and thorough testing enable you to optimize the recording setup, resulting in high-fidelity audio that enhances the storytelling and immersive experience of your videos.
Whether you’re a content creator, filmmaker, or enthusiast looking to elevate the quality of your video productions, the integration of the Zoom H1N with your camcorder opens up a world of creative possibilities. With improved audio capture capabilities, you can confidently embark on diverse projects, from vlogs and interviews to cinematic storytelling and event coverage, knowing that your recordings will deliver exceptional sound quality.
As you apply the knowledge and techniques acquired from this guide, consider experimenting with different recording environments, audio settings, and creative approaches to leverage the full potential of your integrated setup. Embrace the art of capturing compelling audio that resonates with your audience and enhances the impact of your visual storytelling.
With the enhanced audio capabilities afforded by the Zoom H1N and your camcorder, you’re well-equipped to embark on a journey of creating captivating, immersive video content that captivates and resonates with your audience. Embrace the power of high-quality audio integration and unleash the full potential of your video productions.