Introduction
Are you eager to transfer videos from your camcorder's SD card to your trusty MacBook Air? The process may seem daunting at first, but fear not! With a few simple steps, you can seamlessly transfer your cherished videos and relive those precious moments on your Macbook Air. Whether you're a seasoned tech enthusiast or a novice, this guide will walk you through the process, ensuring that you can effortlessly upload your videos.
The seamless integration of hardware and software in Apple products, including the MacBook Air, makes it remarkably straightforward to import videos from your camcorder's SD card. By following the steps outlined in this guide, you'll be able to navigate the process with ease, even if you're not particularly tech-savvy.
So, grab your camcorder's SD card, fire up your MacBook Air, and let's dive into the simple yet rewarding process of transferring your videos. Whether it's a family vacation, a cherished milestone, or a creative project, your videos deserve to be enjoyed on your MacBook Air's vibrant display. Let's get started!
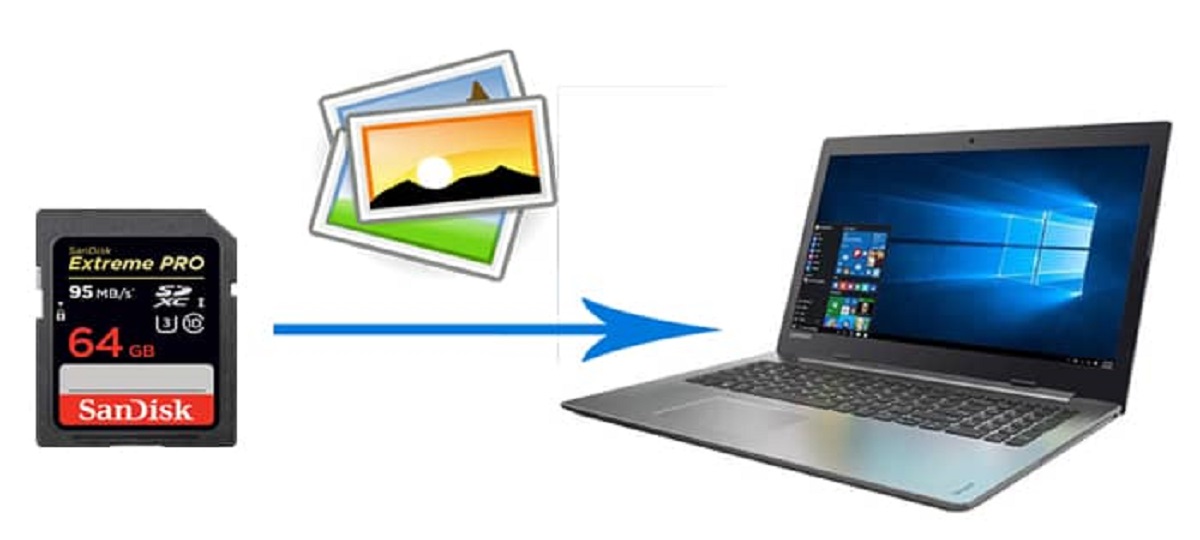
Step 1: Insert the SD card into your Macbook Air
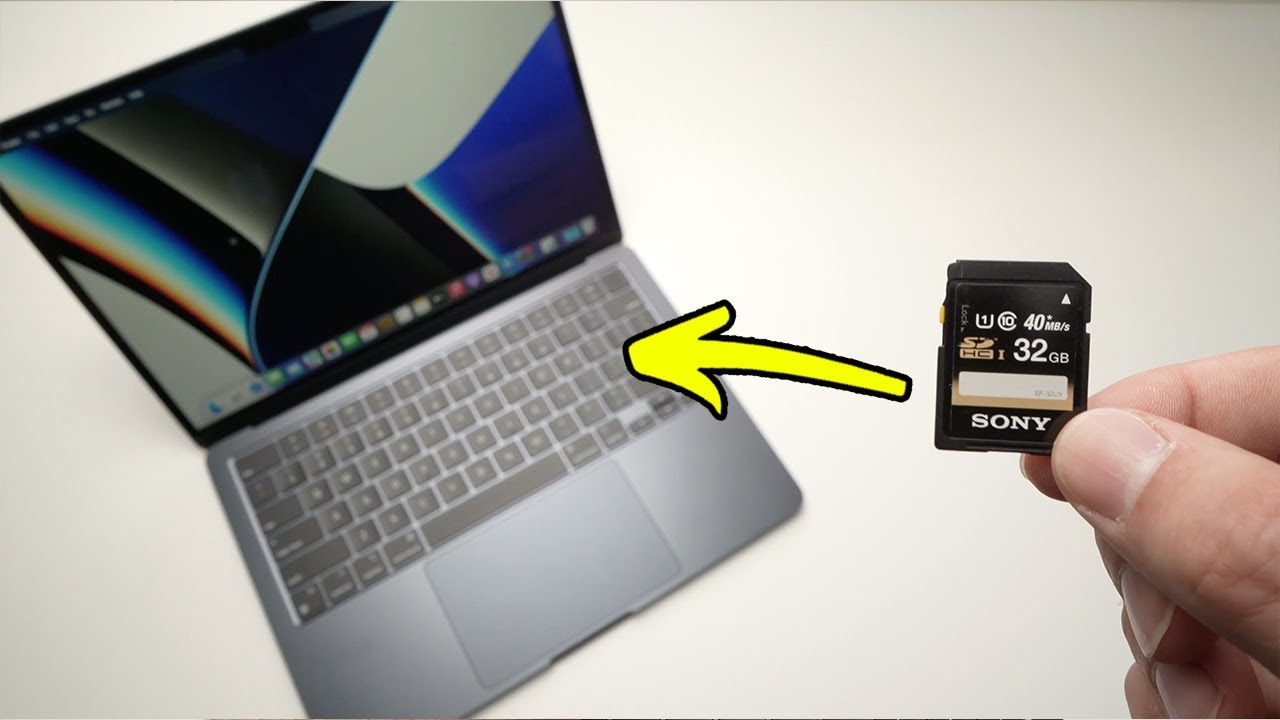
Before delving into the video transfer process, you’ll need to physically connect your camcorder’s SD card to your MacBook Air. The MacBook Air is equipped with an SD card slot, conveniently located on the side of the device, allowing for direct insertion of the SD card.
To begin, power off your camcorder and locate the SD card slot on your MacBook Air. The slot is typically found on the right-hand side of the device. Gently insert the SD card into the slot, ensuring that it is oriented correctly to avoid any potential damage. Once inserted, you should feel a slight click, indicating that the SD card is securely in place.
Upon successful insertion, your MacBook Air will automatically detect the SD card, and you’ll be one step closer to accessing and transferring your videos. It’s important to handle the SD card with care, avoiding any unnecessary force or rough handling that could potentially damage the card or the MacBook Air’s slot.
With the SD card securely inserted, you’re now ready to proceed to the next step in the video transfer process. This straightforward physical connection sets the stage for the seamless transfer of your cherished videos from the camcorder’s SD card to your MacBook Air.
Step 2: Open the Photos app
With the SD card securely inserted into your MacBook Air, the next step is to open the Photos app, which is a native application designed to manage and organize your photos and videos. The Photos app provides a user-friendly interface, making it effortless to import and organize your media content.
To open the Photos app, simply click on the Launchpad icon located in the dock at the bottom of your MacBook Air’s screen. Once the Launchpad is open, you can easily locate the Photos app by typing “Photos” into the search bar at the top or by scrolling through the available applications. Click on the Photos app icon to launch the application.
Alternatively, you can access the Photos app directly from the dock if it has already been added to the dock for quick and easy access. Simply click on the Photos app icon in the dock to open the application.
Upon opening the Photos app, you’ll be greeted with a visually appealing interface that showcases your existing photo and video library. The intuitive design of the Photos app ensures that you can seamlessly navigate through your media content, making it an ideal platform for importing and managing your videos from the SD card.
By opening the Photos app, you’re setting the stage for the next crucial step in the process of transferring your videos from the camcorder’s SD card to your MacBook Air. The user-friendly nature of the Photos app ensures that you can proceed with confidence, knowing that your videos will be effortlessly imported and organized within the application.
Step 3: Import the videos from the SD card
Now that you have the Photos app open and ready, it’s time to import the videos from the SD card of your camcorder to your MacBook Air. The Photos app simplifies this process, ensuring that you can seamlessly transfer your cherished videos with just a few clicks.
To begin the import process, navigate to the top menu of the Photos app and click on the “File” option. From the dropdown menu, select “Import” to initiate the import process. Alternatively, you can also click on the “Import” button located in the top-right corner of the Photos app interface to start importing your videos.
Upon selecting the import option, the Photos app will detect the videos stored on the inserted SD card. A preview of the videos will be displayed, allowing you to review and select the specific videos you wish to import. You can choose to import all the videos at once or selectively import individual videos based on your preferences.
Once you’ve made your selections, click on the “Import” button to begin transferring the videos from the SD card to your MacBook Air. The Photos app will indicate the progress of the import process, ensuring that you are informed of the status as the videos are being transferred.
It’s important to ensure that your MacBook Air remains powered during the import process to prevent any interruptions. Depending on the size and quantity of the videos being transferred, the import process may take some time to complete. However, the Photos app’s intuitive interface ensures that you can monitor the progress and eagerly anticipate the successful transfer of your videos.
By following these simple steps, you can effortlessly import your videos from the camcorder’s SD card to your MacBook Air, setting the stage for seamless access and enjoyment of your cherished video content.
Step 4: Review and organize the imported videos
With the videos successfully imported into the Photos app on your MacBook Air, it’s time to review and organize your newly transferred video content. The Photos app provides intuitive tools and features that empower you to effortlessly manage and organize your videos, ensuring that you can easily locate and enjoy your cherished moments.
Upon completion of the import process, the Photos app will display the imported videos within your library. You can navigate to the “Imports” album to access the newly imported videos, allowing you to review them and ensure that all your desired videos have been successfully transferred.
The Photos app offers robust organizational capabilities, enabling you to create albums and folders to categorize your videos based on themes, events, or any other criteria that resonate with your preferences. By organizing your videos into distinct albums, you can streamline the browsing and retrieval process, making it effortless to locate specific videos when you’re ready to relive those memorable moments.
Furthermore, the Photos app allows you to add tags, titles, and descriptions to your videos, enhancing the overall organization and searchability of your video library. By leveraging these features, you can enrich the metadata associated with your videos, making it easier to locate specific videos based on relevant keywords and descriptors.
Additionally, the Photos app offers editing tools that enable you to enhance the visual appeal of your videos. Whether it’s adjusting the lighting, applying filters, or adding captions, the Photos app empowers you to refine and personalize your videos, ensuring that they are presented exactly as you envision them.
By reviewing and organizing your imported videos within the Photos app, you’re taking proactive steps to ensure that your video library is well-structured and easily accessible. The user-friendly interface and versatile features of the Photos app make the organization process a seamless and enjoyable experience, allowing you to curate your video collection with precision and creativity.
Step 5: Eject the SD card from your Macbook Air
As the final step in the video transfer process, it’s essential to safely eject the SD card from your MacBook Air to ensure that it can be removed without risking data corruption or damage. Ejecting the SD card properly is a crucial practice that safeguards the integrity of your data and the functionality of the SD card itself.
To begin, navigate to the desktop of your MacBook Air and locate the icon representing the SD card. The icon typically appears on the desktop as a removable storage device, denoting the presence of the inserted SD card.
With the SD card icon visible on the desktop, right-click on the icon to reveal a dropdown menu of options. From the menu, select the “Eject” option, which initiates the safe ejection of the SD card from your MacBook Air.
Alternatively, if you prefer using the trackpad, you can simply click on the SD card icon to select it and then click on the “Eject” button located in the top menu bar. This action prompts your MacBook Air to safely eject the SD card, allowing you to remove it without any risk to the data stored on the card.
Upon initiating the ejection process, your MacBook Air will ensure that any ongoing data transfers or operations involving the SD card are completed before it is safely dismounted. This precautionary measure prevents data loss or corruption, safeguarding the videos and any other data stored on the SD card.
Once the ejection process is complete, a notification will appear on the screen, indicating that the SD card can now be safely removed. At this point, you can gently remove the SD card from the slot, ensuring that you handle it with care to avoid any physical damage.
By safely ejecting the SD card from your MacBook Air, you’re concluding the video transfer process with the utmost care and consideration for your data and hardware. This best practice ensures that your videos are securely transferred, and the SD card is ready for future use, setting the stage for continued seamless video management and enjoyment on your MacBook Air.