Introduction
So, you've just gotten your hands on the MXL Mics 770 Cardioid Condenser Microphone, and you're eager to set it up and start recording your vocals or instruments. This versatile microphone is a popular choice for both home and professional recording studios due to its exceptional sound quality and affordability. Whether you're a musician, podcaster, or content creator, the MXL Mics 770 offers a fantastic opportunity to elevate the audio quality of your recordings.
In this guide, we'll walk you through the step-by-step process of setting up your MXL Mics 770 Cardioid Condenser Microphone, from unboxing to making the necessary adjustments for optimal performance. By the end of this tutorial, you'll have a clear understanding of how to connect the microphone to your audio interface, set it up on a mic stand, and configure the microphone settings to achieve the best sound possible.
But before we dive into the technical details, let's take a moment to appreciate the MXL Mics 770's impressive features. This microphone boasts a cardioid polar pattern, which means it captures sound primarily from the front and minimizes background noise, making it ideal for recording vocals and solo instruments. Its wide frequency response and high SPL handling capability ensure that it can faithfully reproduce the nuances of your voice or instrument without distortion.
The MXL Mics 770 also comes with a shock mount to reduce handling noise and a carrying case for convenient storage and transportation. Its rugged construction and gold-sputtered diaphragm reflect MXL's commitment to delivering reliable and high-quality audio equipment.
Now that you're acquainted with the exceptional capabilities of the MXL Mics 770 Cardioid Condenser Microphone, let's embark on the journey of setting it up to unleash its full potential. Get ready to transform your recording space into a professional studio with the help of this remarkable microphone.
Unboxing the MXL Mics 770 Cardioid Condenser Microphone
Upon receiving your MXL Mics 770 Cardioid Condenser Microphone, the excitement of unboxing a professional-grade audio device is palpable. The packaging is designed to protect the microphone and its accessories during transit, ensuring that everything arrives in pristine condition.
As you carefully open the box, you’ll find the MXL Mics 770 nestled securely within custom-fitted foam padding, safeguarding it from any potential damage. Alongside the microphone, you’ll discover the shock mount, a crucial accessory that isolates the microphone from vibrations and handling noise, allowing for cleaner recordings. The shock mount’s sturdy construction and easy-to-use design make it an invaluable addition to your recording setup.
Additionally, the package includes a carrying case, providing a safe and convenient way to transport and store the microphone when not in use. This thoughtful inclusion ensures that your MXL Mics 770 remains protected and readily accessible, whether you’re recording at home or on the go.
As you delve deeper into the packaging, you’ll uncover the user manual, which offers comprehensive guidance on using and caring for your microphone. This resource is invaluable for understanding the technical specifications of the MXL Mics 770, as well as providing insights into optimal recording techniques and maintenance practices.
Overall, the unboxing experience sets the stage for the exceptional quality and attention to detail that MXL Mics is renowned for. From the secure packaging to the inclusion of essential accessories and informative documentation, every aspect of the unboxing process reflects MXL’s commitment to ensuring that you can start using your microphone with confidence and ease.
Connecting the Microphone to Your Audio Interface
Once you’ve unboxed your MXL Mics 770 Cardioid Condenser Microphone, the next crucial step is connecting it to your audio interface. The audio interface serves as the bridge between your microphone and your recording device, ensuring that the sound is captured and processed with the highest fidelity. Here’s how to seamlessly integrate your MXL Mics 770 into your recording setup:
First, identify the XLR cable that came with your microphone. The XLR cable features three pins and is designed to carry balanced audio signals, making it the ideal connection method for professional microphones such as the MXL Mics 770.
Locate the XLR input on your audio interface. This input is typically labeled as “Mic Input” or “XLR Input” and is often found on the front or top panel of the interface for easy access. Ensure that your audio interface is powered off before making any connections.
With the XLR cable in hand, connect one end to the output of the MXL Mics 770. The connection should be secure but not overly tight, as excessive force can potentially damage the pins or connectors.
Next, connect the other end of the XLR cable to the designated input on your audio interface. Take care to align the pins properly and gently twist the connector to lock it in place. Once the connection is secure, you’re ready to power on your audio interface.
Upon powering on the audio interface, you may need to adjust the input gain or phantom power settings, if applicable, to accommodate the requirements of the MXL Mics 770. Phantom power is often necessary for condenser microphones to operate, so ensure that this feature is activated on your audio interface if the microphone requires it.
With the microphone successfully connected to your audio interface, you’ve established the essential link that enables you to capture professional-quality audio. The seamless integration of the MXL Mics 770 with your audio interface sets the stage for impactful recordings, whether you’re tracking vocals, instruments, or any other sound source that demands exceptional clarity and fidelity.
Setting Up the Microphone on a Mic Stand
With the MXL Mics 770 Cardioid Condenser Microphone connected to your audio interface, the next step is to set it up on a mic stand for optimal positioning and stability. Proper microphone placement is essential for capturing the best possible sound, whether you’re recording vocals, acoustic instruments, or any other audio source. Here’s how to set up your MXL Mics 770 on a mic stand:
Begin by selecting a sturdy mic stand that suits your recording environment. Whether it’s a floor stand, boom stand, or desktop stand, ensure that the stand is capable of securely supporting the weight and size of the MXL Mics 770 without any risk of tipping over or wobbling during recording sessions.
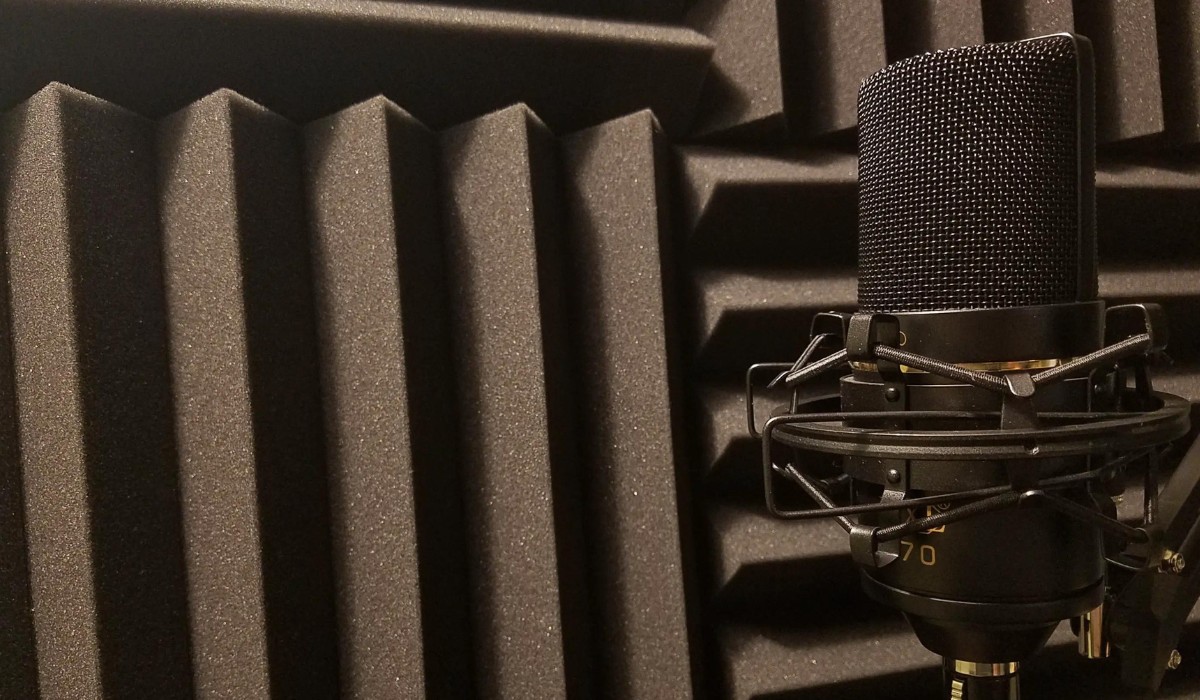
Once you’ve chosen the appropriate mic stand, attach the shock mount to the stand’s microphone holder or boom arm. The shock mount serves as a crucial component for isolating the microphone from vibrations and handling noise, allowing for pristine recordings free from unwanted disturbances.
Gently place the MXL Mics 770 into the shock mount, taking care to align the microphone securely within the mount’s cradle. The shock mount’s design ensures a snug fit while providing the flexibility to adjust the microphone’s position as needed.
Position the mic stand in close proximity to the sound source you intend to capture. Whether it’s in front of a vocalist, an acoustic instrument, or a speaker cabinet, ensure that the microphone is placed at an optimal distance and angle for capturing the desired sound with clarity and presence.
Adjust the height and angle of the mic stand to achieve the ideal microphone position. The MXL Mics 770’s cardioid polar pattern is optimized for capturing sound from the front while minimizing background noise, so positioning the microphone to face the sound source directly will yield the best results.
Once the microphone is securely positioned on the mic stand, take a moment to ensure that all connections and adjustments are secure and stable. This attention to detail sets the stage for successful recording sessions, allowing you to focus on capturing exceptional audio without any concerns about the microphone’s stability or positioning.
By setting up the MXL Mics 770 on a reliable mic stand and positioning it thoughtfully, you’re ready to unleash the microphone’s full potential and capture stunning recordings that showcase the true essence of your sound source.
Adjusting the Microphone Settings on Your Audio Interface
Now that the MXL Mics 770 Cardioid Condenser Microphone is securely positioned on the mic stand and connected to your audio interface, it’s time to delve into the crucial process of adjusting the microphone settings to ensure optimal performance. The settings on your audio interface play a pivotal role in shaping the characteristics of the recorded sound, allowing you to tailor the microphone’s response to suit the specific requirements of your recording session. Here’s how to adjust the microphone settings on your audio interface for the best results:
Begin by accessing the input channel corresponding to the microphone on your audio interface. Most audio interfaces feature dedicated input channels with individual gain controls, allowing you to adjust the input level for each connected microphone or instrument.
Locate the gain control for the input channel connected to the MXL Mics 770. The gain control determines the preamplification level of the microphone signal, allowing you to set an appropriate input level that captures the nuances of the sound source without introducing unwanted distortion or noise.
Gradually increase the gain while monitoring the input level on your audio interface’s metering display. As you speak or perform with the sound source, observe the metering display to ensure that the signal level remains within an optimal range, avoiding both excessively low levels that may introduce noise and excessively high levels that may cause distortion.
If your audio interface provides phantom power, ensure that it is activated for the input channel connected to the MXL Mics 770. Phantom power is essential for condenser microphones to operate, as it supplies the necessary voltage for the microphone’s internal circuitry.
Depending on your audio interface’s features, you may have additional settings such as high-pass filters, phase inversion, and impedance adjustments. Familiarize yourself with these settings and their potential impact on the microphone’s response, and make adjustments as needed to achieve the desired tonal characteristics and sonic clarity.
By carefully adjusting the microphone settings on your audio interface, you’re able to harness the full potential of the MXL Mics 770 and tailor its performance to suit the unique demands of your recording environment. This meticulous attention to detail ensures that the microphone operates optimally, allowing you to capture stunning recordings with precision and fidelity.
Testing the Microphone and Making Adjustments
With the MXL Mics 770 Cardioid Condenser Microphone connected to your audio interface and the settings adjusted to suit your recording environment, it’s time to put the microphone to the test and make any necessary adjustments to achieve the desired sound quality. Testing the microphone allows you to evaluate its performance in capturing the nuances of your sound source, whether it’s a vocal performance, an acoustic instrument, or any other audio signal. Here’s how to test the microphone and make the necessary adjustments:
Begin by setting the recording levels on your audio interface to capture a test performance with the MXL Mics 770. Ensure that the input levels are optimized to prevent clipping while capturing a healthy signal that accurately represents the dynamics of the sound source.
Perform a sound check by speaking or performing with the sound source in close proximity to the microphone. Monitor the audio signal on your recording software or audio interface’s metering display to gauge the microphone’s response to the sound source. Pay attention to the clarity, presence, and overall tonal characteristics of the captured sound.
Listen critically to the test recording, paying attention to any potential issues such as background noise, sibilance, plosives, or other artifacts that may affect the overall quality of the recording. Take note of any areas that require improvement or adjustment to achieve the desired sonic characteristics.
If you encounter issues such as excessive background noise, consider adjusting the microphone’s positioning, the gain level on your audio interface, or the use of acoustic treatment in your recording environment to minimize unwanted noise and reflections.
If vocal recordings exhibit sibilance or plosives, experiment with the microphone’s positioning and consider using a pop filter to mitigate these issues. Additionally, adjusting the input gain on your audio interface and employing appropriate microphone techniques can help address these common challenges.
For instrument recordings, evaluate the microphone’s ability to capture the full frequency range and dynamic nuances of the sound source. Make adjustments to the microphone’s positioning, input gain, and any additional processing or equalization to achieve a balanced and faithful representation of the instrument’s sonic characteristics.
By testing the microphone and making the necessary adjustments, you’re able to refine the recording setup and optimize the MXL Mics 770’s performance to capture stunning audio with precision and clarity. This iterative process of testing, evaluating, and adjusting ensures that you can achieve exceptional results that showcase the true essence of your sound source.
Conclusion
As you’ve navigated through the process of setting up and optimizing the MXL Mics 770 Cardioid Condenser Microphone, you’ve embarked on a journey to elevate the quality of your recordings and unleash the full potential of this exceptional microphone. From the moment you unboxed the microphone to the meticulous adjustments made on your audio interface, each step has been instrumental in shaping the foundation for capturing professional-grade audio with clarity, precision, and fidelity.
The unboxing experience provided a glimpse into the meticulous craftsmanship and thoughtful packaging that encapsulates the MXL Mics 770, setting the stage for a seamless and gratifying setup process. The inclusion of essential accessories and informative documentation underscored MXL’s commitment to ensuring that you can harness the microphone’s capabilities with confidence and ease.
Connecting the microphone to your audio interface was a pivotal step that established the essential link between the MXL Mics 770 and your recording setup. The careful attention to detail in adjusting the microphone settings on your audio interface allowed you to tailor the microphone’s response to suit the unique demands of your recording environment, ensuring that it operates optimally to capture stunning audio with precision and fidelity.
Setting up the microphone on a reliable mic stand and positioning it thoughtfully further reinforced the foundation for impactful recordings, allowing you to focus on capturing exceptional audio without any concerns about the microphone’s stability or positioning. Testing the microphone and making the necessary adjustments provided valuable insights into the microphone’s performance, enabling you to refine the recording setup and optimize the MXL Mics 770’s capabilities to capture stunning audio with clarity and presence.
As you continue to explore the creative possibilities that the MXL Mics 770 offers, remember that the journey of setting up this exceptional microphone is a continuous process of refinement and discovery. Whether you’re recording vocals, instruments, podcasts, or any other audio content, the meticulous setup and optimization of the MXL Mics 770 empower you to capture captivating recordings that resonate with clarity and authenticity.
With the MXL Mics 770 Cardioid Condenser Microphone as your trusted companion in the realm of audio recording, you’re equipped to embark on a sonic adventure where every nuance is faithfully captured and every performance is brought to life with unparalleled fidelity. Embrace the journey of creativity, innovation, and sonic excellence as you harness the remarkable capabilities of the MXL Mics 770 to craft compelling audio experiences that resonate with impact and artistry.