Introduction
Electronic drum machines are incredible tools for musicians, offering a wide range of sounds and the flexibility to create unique beats. However, to keep them in top condition and ensure optimal performance, regular cleaning is essential. Dust, dirt, and debris can accumulate on the pads, cymbals, and control panel, potentially affecting the sensitivity and responsiveness of the instrument. Additionally, a clean drum machine not only looks more professional but also promotes a hygienic and enjoyable playing experience.
In this guide, we will walk through the step-by-step process of cleaning an electronic drum machine, providing valuable tips and techniques to help you maintain your instrument. By following these cleaning procedures, you can extend the lifespan of your drum machine and preserve its pristine sound quality. Whether you are a professional drummer, a hobbyist, or a music enthusiast, this comprehensive cleaning guide will assist you in keeping your electronic drum machine in top-notch condition.
Cleaning your electronic drum machine not only ensures its longevity and performance but also demonstrates your commitment to maintaining your musical equipment. With the right tools and techniques, you can effectively remove dust, dirt, and grime, allowing your drum machine to continue producing fantastic beats for years to come. Let's dive into the essential steps and methods for cleaning your electronic drum machine, ensuring that it remains a reliable and enjoyable instrument for all your musical endeavors.
Gather Your Supplies
Prior to cleaning your electronic drum machine, it’s crucial to gather the necessary supplies to ensure a thorough and effective cleaning process. Here’s a list of the essential items you’ll need:
- Microfiber cloths: These are ideal for gently wiping and polishing the surfaces of the drum pads, cymbals, and control panel without leaving lint or scratches.
- Soft-bristled brush: Use a clean, soft-bristled brush to remove dust and debris from the nooks and crevices of the drum pads and control panel.
- Mild cleaning solution: Prepare a solution of mild dish soap and water or use specialized electronic-safe cleaning solutions for wiping down the surfaces of the drum machine.
- Water and isopropyl alcohol: For cleaning stubborn stains or marks, a mixture of water and isopropyl alcohol can be used sparingly on a cloth to gently remove them.
- Cotton swabs: These are handy for reaching into small areas around buttons and sliders to remove grime and dirt.
- Compressed air: Utilize compressed air to blow away dust and debris from hard-to-reach areas, such as between buttons and sliders.
- Owner’s manual: Keep the owner’s manual nearby to refer to specific cleaning instructions recommended by the manufacturer.
By ensuring you have these supplies on hand, you’ll be well-prepared to tackle the cleaning process efficiently and effectively, maintaining the pristine condition of your electronic drum machine.
Power Off and Unplug
Prior to beginning the cleaning process, it is essential to power off and unplug your electronic drum machine. This precautionary step is crucial for your safety and the protection of the instrument. Here’s a detailed guide on how to safely power off and unplug your drum machine:
1. Turn Off the Power: Locate the power switch or button on your electronic drum machine and ensure that it is in the “off” position. If your drum machine is connected to a power adapter or outlet, unplug it from the power source.
2. Shut Down Any Connected Devices: If your drum machine is connected to any external devices or amplifiers, power them down and disconnect them from the drum machine. This will prevent any interference during the cleaning process and safeguard the connected equipment.
3. Allow the Drum Machine to Cool: If your drum machine has been in use and has become warm, allow it to cool down before initiating the cleaning process. Cleaning a hot electronic device can lead to condensation, potentially causing damage to the internal components.
4. Unplug the Power Cord: Carefully unplug the power cord from the drum machine and the electrical outlet. Ensure that the cord is fully disconnected to prevent any electrical hazards during the cleaning process.
By following these steps to power off and unplug your electronic drum machine, you’ll create a safe and secure environment for cleaning the instrument. This precautionary measure helps minimize the risk of electrical shock and protects the internal circuitry of the drum machine. Once the power is off and the machine is unplugged, you can proceed with confidence to the next steps in the cleaning process, ensuring the optimal maintenance of your electronic drum machine.
Remove Dust and Debris
Over time, dust and debris can accumulate on the surfaces and components of your electronic drum machine, potentially affecting its performance and responsiveness. To maintain the optimal functionality of the instrument, it’s crucial to remove this buildup regularly. Here’s a detailed guide on how to effectively remove dust and debris from your electronic drum machine:
1. Use Compressed Air: Begin by using compressed air to blow away dust and debris from the nooks and crevices of the drum pads, control panel, and other intricate areas. Hold the can of compressed air upright and use short bursts to dislodge the accumulated dust without causing any damage to the components.
2. Brush Away Loose Debris: Employ a soft-bristled brush to gently sweep away any remaining loose debris from the drum pads, cymbals, and control panel. Ensure that the brush is clean and dry to prevent transferring any additional particles onto the surfaces.
3. Inspect the Drum Pads: Carefully examine the drum pads for any stubborn debris or buildup that may have accumulated between the rubberized surfaces. If necessary, use a soft, dry cloth to wipe away the remaining dust and grime, ensuring that the pads are clean and free from any obstructions.
4. Clean the Control Panel: Use a soft cloth and gentle cleaning solution to wipe down the control panel, buttons, and sliders, removing any dust or residue that may have collected on these surfaces. Exercise caution to prevent excess moisture from seeping into the electronic components.
By meticulously removing dust and debris from your electronic drum machine, you can maintain its pristine condition and ensure optimal performance. This regular cleaning practice not only enhances the longevity of the instrument but also contributes to a hygienic and enjoyable playing experience. With the initial step of dust and debris removal complete, you’re ready to proceed to the next stages of cleaning your electronic drum machine, ensuring that it remains a reliable and high-performing musical instrument.
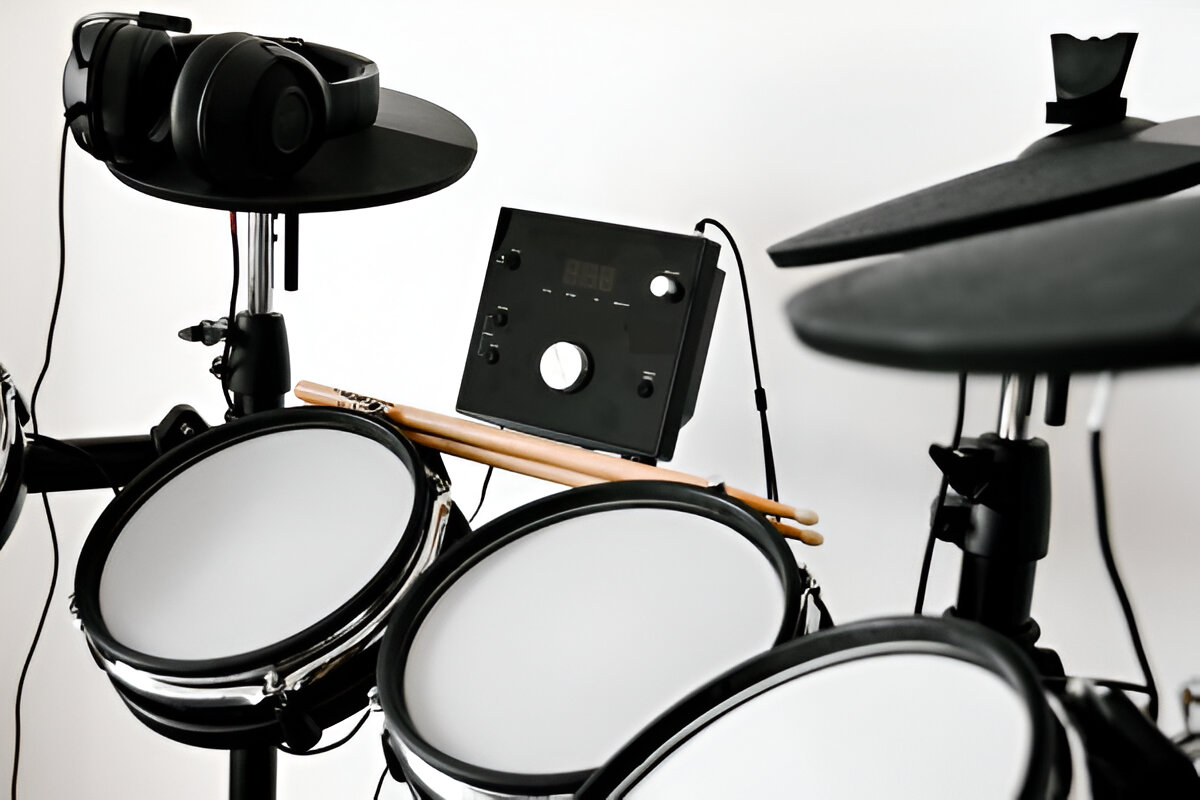
Clean the Pads and Cymbals
The drum pads and cymbals of your electronic drum machine are integral components that require regular cleaning to maintain their sensitivity and responsiveness. Over time, these surfaces can accumulate dirt, oils, and residue from prolonged use, potentially affecting the instrument’s performance. Here’s a comprehensive guide on how to effectively clean the pads and cymbals of your electronic drum machine:
1. Use a Damp Cloth: Begin by dampening a soft cloth with a mild cleaning solution or water. Gently wipe down the rubberized drum pads and cymbal surfaces, removing any visible dirt, oils, or smudges. Avoid using excessive moisture to prevent any liquid from seeping into the electronic components.
2. Focus on the Edges: Pay special attention to the edges and rims of the drum pads and cymbals, as these areas are prone to accumulating grime and residue. Use a gentle, circular motion to ensure thorough cleaning while being mindful of the sensitivity of the electronic surfaces.
3. Inspect and Clean the Sensors: Carefully inspect the sensors located beneath the drum pads for any debris or buildup that may affect their functionality. If necessary, use a cotton swab lightly dampened with water to clean the sensors, ensuring that they remain free from obstructions.
4. Dry the Surfaces: After cleaning the drum pads and cymbals, use a dry microfiber cloth to gently dry the surfaces, removing any remaining moisture and ensuring that the rubberized components are free from water or cleaning solution.
5. Test the Responsiveness: Once the cleaning process is complete, test the responsiveness of the drum pads and cymbals to ensure that they are functioning optimally. Trigger each pad and cymbal to verify that they accurately register hits and produce the intended sounds.
By meticulously cleaning the pads and cymbals of your electronic drum machine, you can maintain their sensitivity and performance, ensuring an exceptional playing experience. This regular maintenance not only extends the lifespan of the instrument but also contributes to the preservation of its pristine sound quality. With the drum pads and cymbals now clean and responsive, you’re ready to proceed to the next steps of cleaning your electronic drum machine, ensuring that it remains a reliable and high-performing musical instrument.
Clean the Control Panel and Buttons
The control panel and buttons of your electronic drum machine are essential for navigating settings, adjusting sounds, and triggering various functions. Over time, these components can accumulate dust, grime, and residue, potentially affecting their responsiveness and overall functionality. Here’s a detailed guide on how to effectively clean the control panel and buttons of your electronic drum machine:
1. Use a Soft Cloth and Cleaning Solution: Dampen a soft, lint-free cloth with a mild cleaning solution or water. Gently wipe down the control panel and buttons, removing any visible dust, fingerprints, or residue that may have accumulated from regular use. Exercise caution to prevent excess moisture from coming into contact with the electronic components.
2. Focus on Button Openings: Pay special attention to the openings around the buttons and sliders, as these areas are prone to collecting dust and debris. Use a cotton swab lightly dampened with water to reach into these spaces and remove any accumulated grime, ensuring that the buttons remain responsive and free from obstructions.
3. Inspect for Residue: Carefully inspect the control panel and buttons for any stubborn residue or marks that may require additional cleaning. If necessary, use a mixture of water and isopropyl alcohol on a cloth to gently remove any persistent stains, taking care to avoid excessive moisture.
4. Dry the Surfaces: After cleaning the control panel and buttons, use a dry microfiber cloth to gently dry the surfaces, ensuring that any remaining moisture is removed and that the electronic components are free from water or cleaning solution.
5. Test Button Responsiveness: Following the cleaning process, test the responsiveness of the buttons and sliders to ensure that they function smoothly and accurately. Press each button and slide the control sliders to verify that they respond as intended without sticking or experiencing any irregularities.
By thoroughly cleaning the control panel and buttons of your electronic drum machine, you can maintain their responsiveness and ensure seamless navigation and operation. This regular maintenance not only preserves the functionality of the instrument but also contributes to a professional and hygienic playing experience. With the control panel and buttons now clean and responsive, you’re ready to proceed to the next stages of cleaning your electronic drum machine, ensuring that it remains a reliable and high-performing musical instrument.
Wipe Down the Exterior
The exterior of your electronic drum machine, including the casing and surfaces, requires regular cleaning to maintain its appearance and ensure the longevity of the instrument. Here’s a comprehensive guide on how to effectively wipe down the exterior of your electronic drum machine:
1. Use a Damp Cloth: Begin by dampening a soft microfiber cloth with a mild cleaning solution or water. Gently wipe down the exterior surfaces of the drum machine, including the casing and any exposed areas, to remove dust, fingerprints, and smudges. Take care to avoid excessive moisture, especially around any openings or ports.
2. Focus on Detailing: Pay special attention to any intricate detailing or textured surfaces on the exterior of the drum machine. Use a soft-bristled brush or a cotton swab to gently clean these areas, ensuring that any accumulated dust or debris is effectively removed without causing damage to the surface.
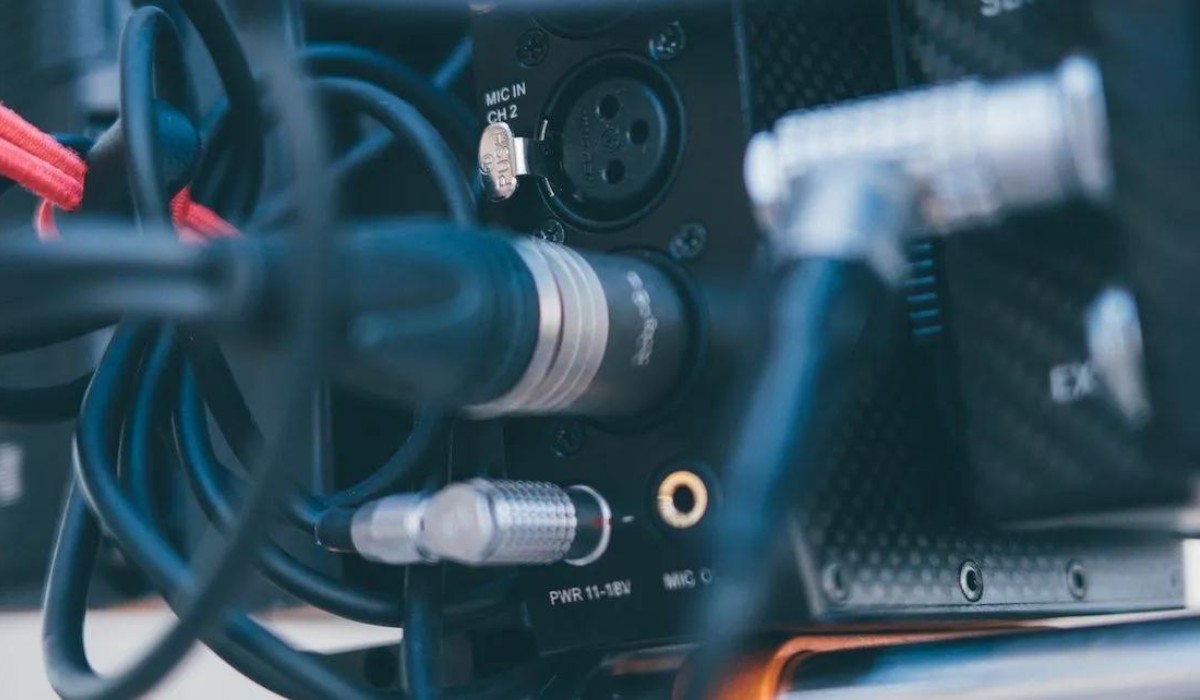
3. Clean Around Ports and Connections: If your drum machine features input/output ports or connection points, use a dry cotton swab to remove any debris or dust that may have collected around these areas. Ensure that the ports remain clean and free from obstructions to maintain optimal connectivity.
4. Dry the Surfaces: After wiping down the exterior surfaces, use a dry microfiber cloth to gently dry the casing and any remaining moisture. Pay close attention to the details and textured areas to ensure that they are free from moisture and residue.
5. Polish for Shine: If the exterior surfaces of the drum machine have a glossy or polished finish, use a clean, dry microfiber cloth to gently buff the surfaces, enhancing their shine and luster. This step adds a professional touch to the appearance of the instrument.
By meticulously wiping down the exterior of your electronic drum machine, you can maintain its visual appeal and ensure that it remains a professional and well-maintained musical instrument. This regular cleaning practice not only enhances the aesthetics of the drum machine but also contributes to a hygienic and enjoyable playing experience. With the exterior now clean and polished, you’ve successfully completed this vital step in the cleaning process, ensuring that your electronic drum machine remains a reliable and high-performing instrument.
Reassemble and Test
After completing the cleaning process for your electronic drum machine, it’s crucial to reassemble the instrument and conduct thorough testing to ensure that it functions optimally. Here’s a detailed guide on how to reassemble and test your electronic drum machine:
1. Allow Surfaces to Dry: Before reassembling the drum machine, ensure that all cleaned surfaces, including the drum pads, control panel, and exterior casing, are completely dry. This will prevent any moisture from affecting the internal components during reassembly.
2. Secure Drum Pads and Cymbals: If any drum pads or cymbals were removed during the cleaning process, securely reattach them to their designated positions on the drum machine. Ensure that they are properly aligned and firmly in place to maintain their responsiveness and functionality.
3. Reconnect Cables and Power: If any cables or connections were disconnected before cleaning, carefully reconnect them to their respective ports on the drum machine. Ensure that all connections are secure and that the power cord is safely plugged into the electrical outlet.
4. Power On the Drum Machine: Turn on the power to the electronic drum machine and allow it to initialize. Verify that the display, lights, and indicators function as expected, indicating that the instrument is operating normally.
5. Test Sound and Functionality: Trigger each drum pad and cymbal to verify that they produce the intended sounds and respond accurately to hits. Navigate the control panel settings and test the buttons and sliders to ensure that they function smoothly and without any irregularities.
6. Check Connectivity: If your drum machine is connected to external devices or amplifiers, test the connectivity to ensure that the instrument can successfully transmit audio signals without any issues.
7. Play a Test Beat: Play a test beat or sequence on the electronic drum machine to assess its overall performance and responsiveness. Listen for any anomalies in sound or functionality that may require further attention.
By reassembling and thoroughly testing your electronic drum machine, you can ensure that it remains in optimal working condition following the cleaning process. This final step not only confirms the successful maintenance of the instrument but also provides the assurance that it is ready for continued use in rehearsals, performances, or recording sessions. With the reassembly and testing phase complete, you can confidently resume using your electronic drum machine, knowing that it has been meticulously cleaned and is primed for exceptional performance.