Introduction
Are you ready to breathe new life into your electric guitar? Changing the strings on your electric guitar is an essential skill that every guitarist should master. Whether you're a seasoned musician or just starting your musical journey, knowing how to change your guitar strings will keep your instrument sounding its best.
As you play your guitar, the strings gradually accumulate dirt, sweat, and oils from your fingers, leading to a loss of brightness and tone. Changing your strings regularly not only revitalizes your guitar's sound but also ensures that your instrument stays in optimal playing condition.
By following a few simple steps and using the right tools, you can easily replace your electric guitar strings at home. This guide will walk you through the process, from removing the old strings to tuning the new ones, and provide valuable tips to help you achieve the best results.
With a fresh set of strings, your electric guitar will sing with renewed clarity and resonance, inspiring you to create music that resonates with your soul. Let's dive into the world of guitar maintenance and learn how to give your instrument the care it deserves.
Tools and Materials Needed
Before embarking on the journey of changing your electric guitar strings, it’s essential to gather the necessary tools and materials. Having everything at hand will streamline the process and ensure a smooth string replacement experience. Here’s what you’ll need:
- New Guitar Strings: Select the appropriate set of strings for your electric guitar, considering factors such as gauge and material. The packaging should indicate the string gauge, which refers to the thickness of the strings. Common gauges include light, medium, and heavy, each impacting the playability and tone of the guitar.
- String Winder: This handy tool makes winding and unwinding the strings much faster and easier. It typically features a crank and a notch for pulling bridge pins, simplifying the string-changing process.
- Wire Cutters: Precision wire cutters are essential for trimming the excess string length after installation. These ensure a clean cut without leaving sharp edges that could cause injury.
- Tuner: A reliable tuner is crucial for achieving accurate pitch and ensuring that your guitar is in tune once the new strings are installed. Whether using a clip-on tuner or a smartphone app, having a tuner on hand is indispensable.
- Clean Cloth: Keeping a clean cloth nearby allows you to wipe down the fretboard and body of the guitar, removing any accumulated grime and preserving the instrument’s finish.
- Guitar Polish (Optional): While not essential for changing strings, guitar polish can be used to maintain the shine and cleanliness of the guitar’s body, enhancing its overall appearance.
By ensuring that you have these tools and materials ready, you’ll be well-equipped to proceed with confidence as you embark on the journey of revitalizing your electric guitar with a fresh set of strings.
Removing the Old String
Before installing new strings on your electric guitar, it’s crucial to remove the old ones carefully. Follow these steps to ensure a smooth and efficient removal process:
- Prepare Your Workspace: Find a comfortable and well-lit area to work on your guitar. Having ample space and good lighting will make the process more manageable.
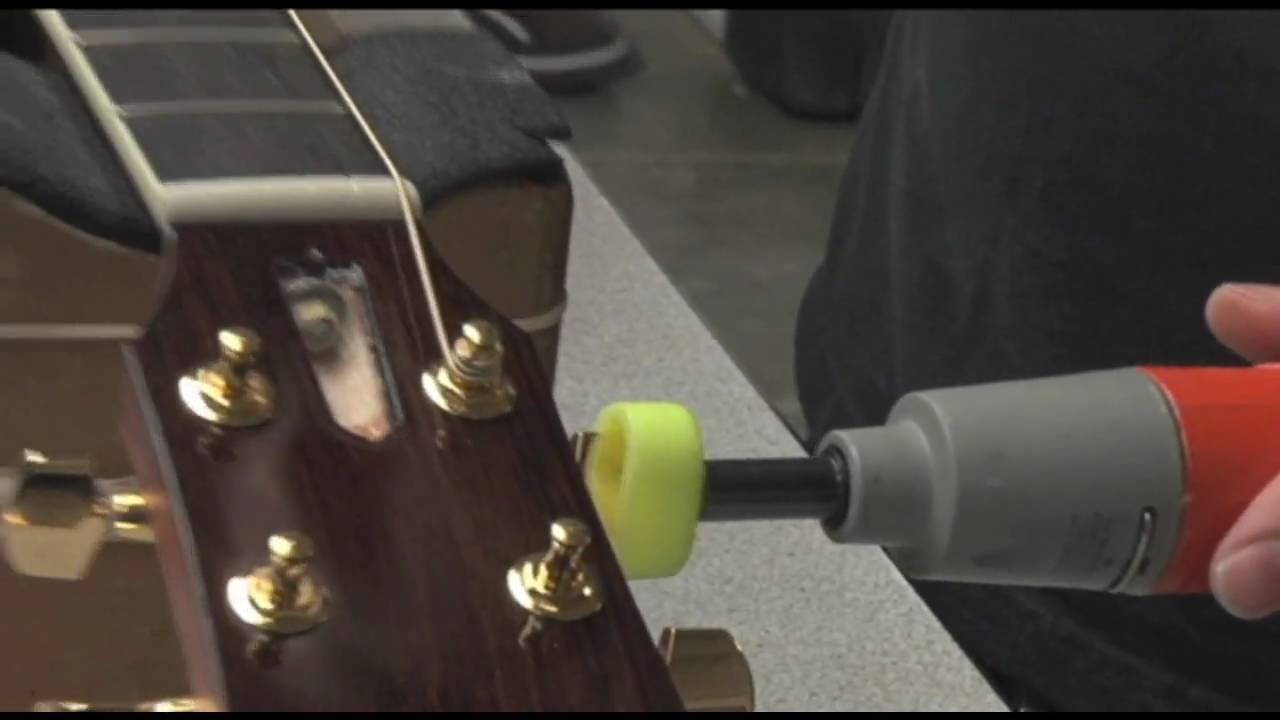
- Loosen the String Tension: Using a string winder or by hand, begin loosening the tension of the first string by turning the tuning peg. Continue until the string is slack and can be easily removed from the peg.
- Unwind the String: Once the string is slack, unwind it from the tuning peg and carefully remove it from the bridge and nut of the guitar. Take care to avoid any sudden movements that could scratch the guitar’s finish.
- Dispose of the Old String: Safely discard the old string, ensuring that it is properly disposed of to prevent any potential hazards.
- Clean the Guitar: With the old string removed, take the opportunity to gently clean the fretboard and other areas of the guitar where dirt and grime may have accumulated. A clean cloth can be used to wipe down these areas, preparing the guitar for the installation of new strings.
By following these steps, you can safely and effectively remove the old strings from your electric guitar, setting the stage for the exciting process of installing fresh, vibrant strings that will breathe new life into your instrument.
Preparing the New String
As you prepare to install new strings on your electric guitar, taking the time to properly ready each string for installation is crucial for achieving optimal performance and longevity. Follow these steps to ensure that your new strings are primed for a seamless installation:
- Inspect the New String: Before unwinding the new string from its packaging, inspect it for any kinks, bends, or imperfections that may affect its performance. A smooth, evenly wound string is essential for consistent tone and tuning stability.
- Unwind the String: Carefully remove the new string from its packaging, taking care to avoid any unnecessary kinking or tangling during the process. Handling the string gently will help maintain its integrity.
- Identify the String End: Most strings are designed with one end featuring a ball or loop, while the other end is plain. Identify which end will be inserted into the guitar’s bridge, as this will determine the correct orientation for installation.
- Align the String: If the string features a ball end, ensure that it is securely positioned in the bridge of the guitar. For strings with a plain end, take note of which tuning peg it will be attached to, as this will dictate the direction in which the string should be wound.
- Stretch the String (Optional): Some guitarists prefer to gently stretch new strings before installation to minimize initial stretching and tuning instability. This can be done by grasping the string at various points and applying light tension to help pre-stretch the material.
By meticulously preparing each new string for installation, you can set the stage for a successful and satisfying string replacement process. Taking the time to ensure that each string is in optimal condition and properly oriented will contribute to the overall playability and tonal quality of your electric guitar.
Installing the New String
With the old strings removed and the new ones prepared, it’s time to embark on the exciting phase of installing fresh strings on your electric guitar. Follow these steps to ensure a smooth and successful installation process:
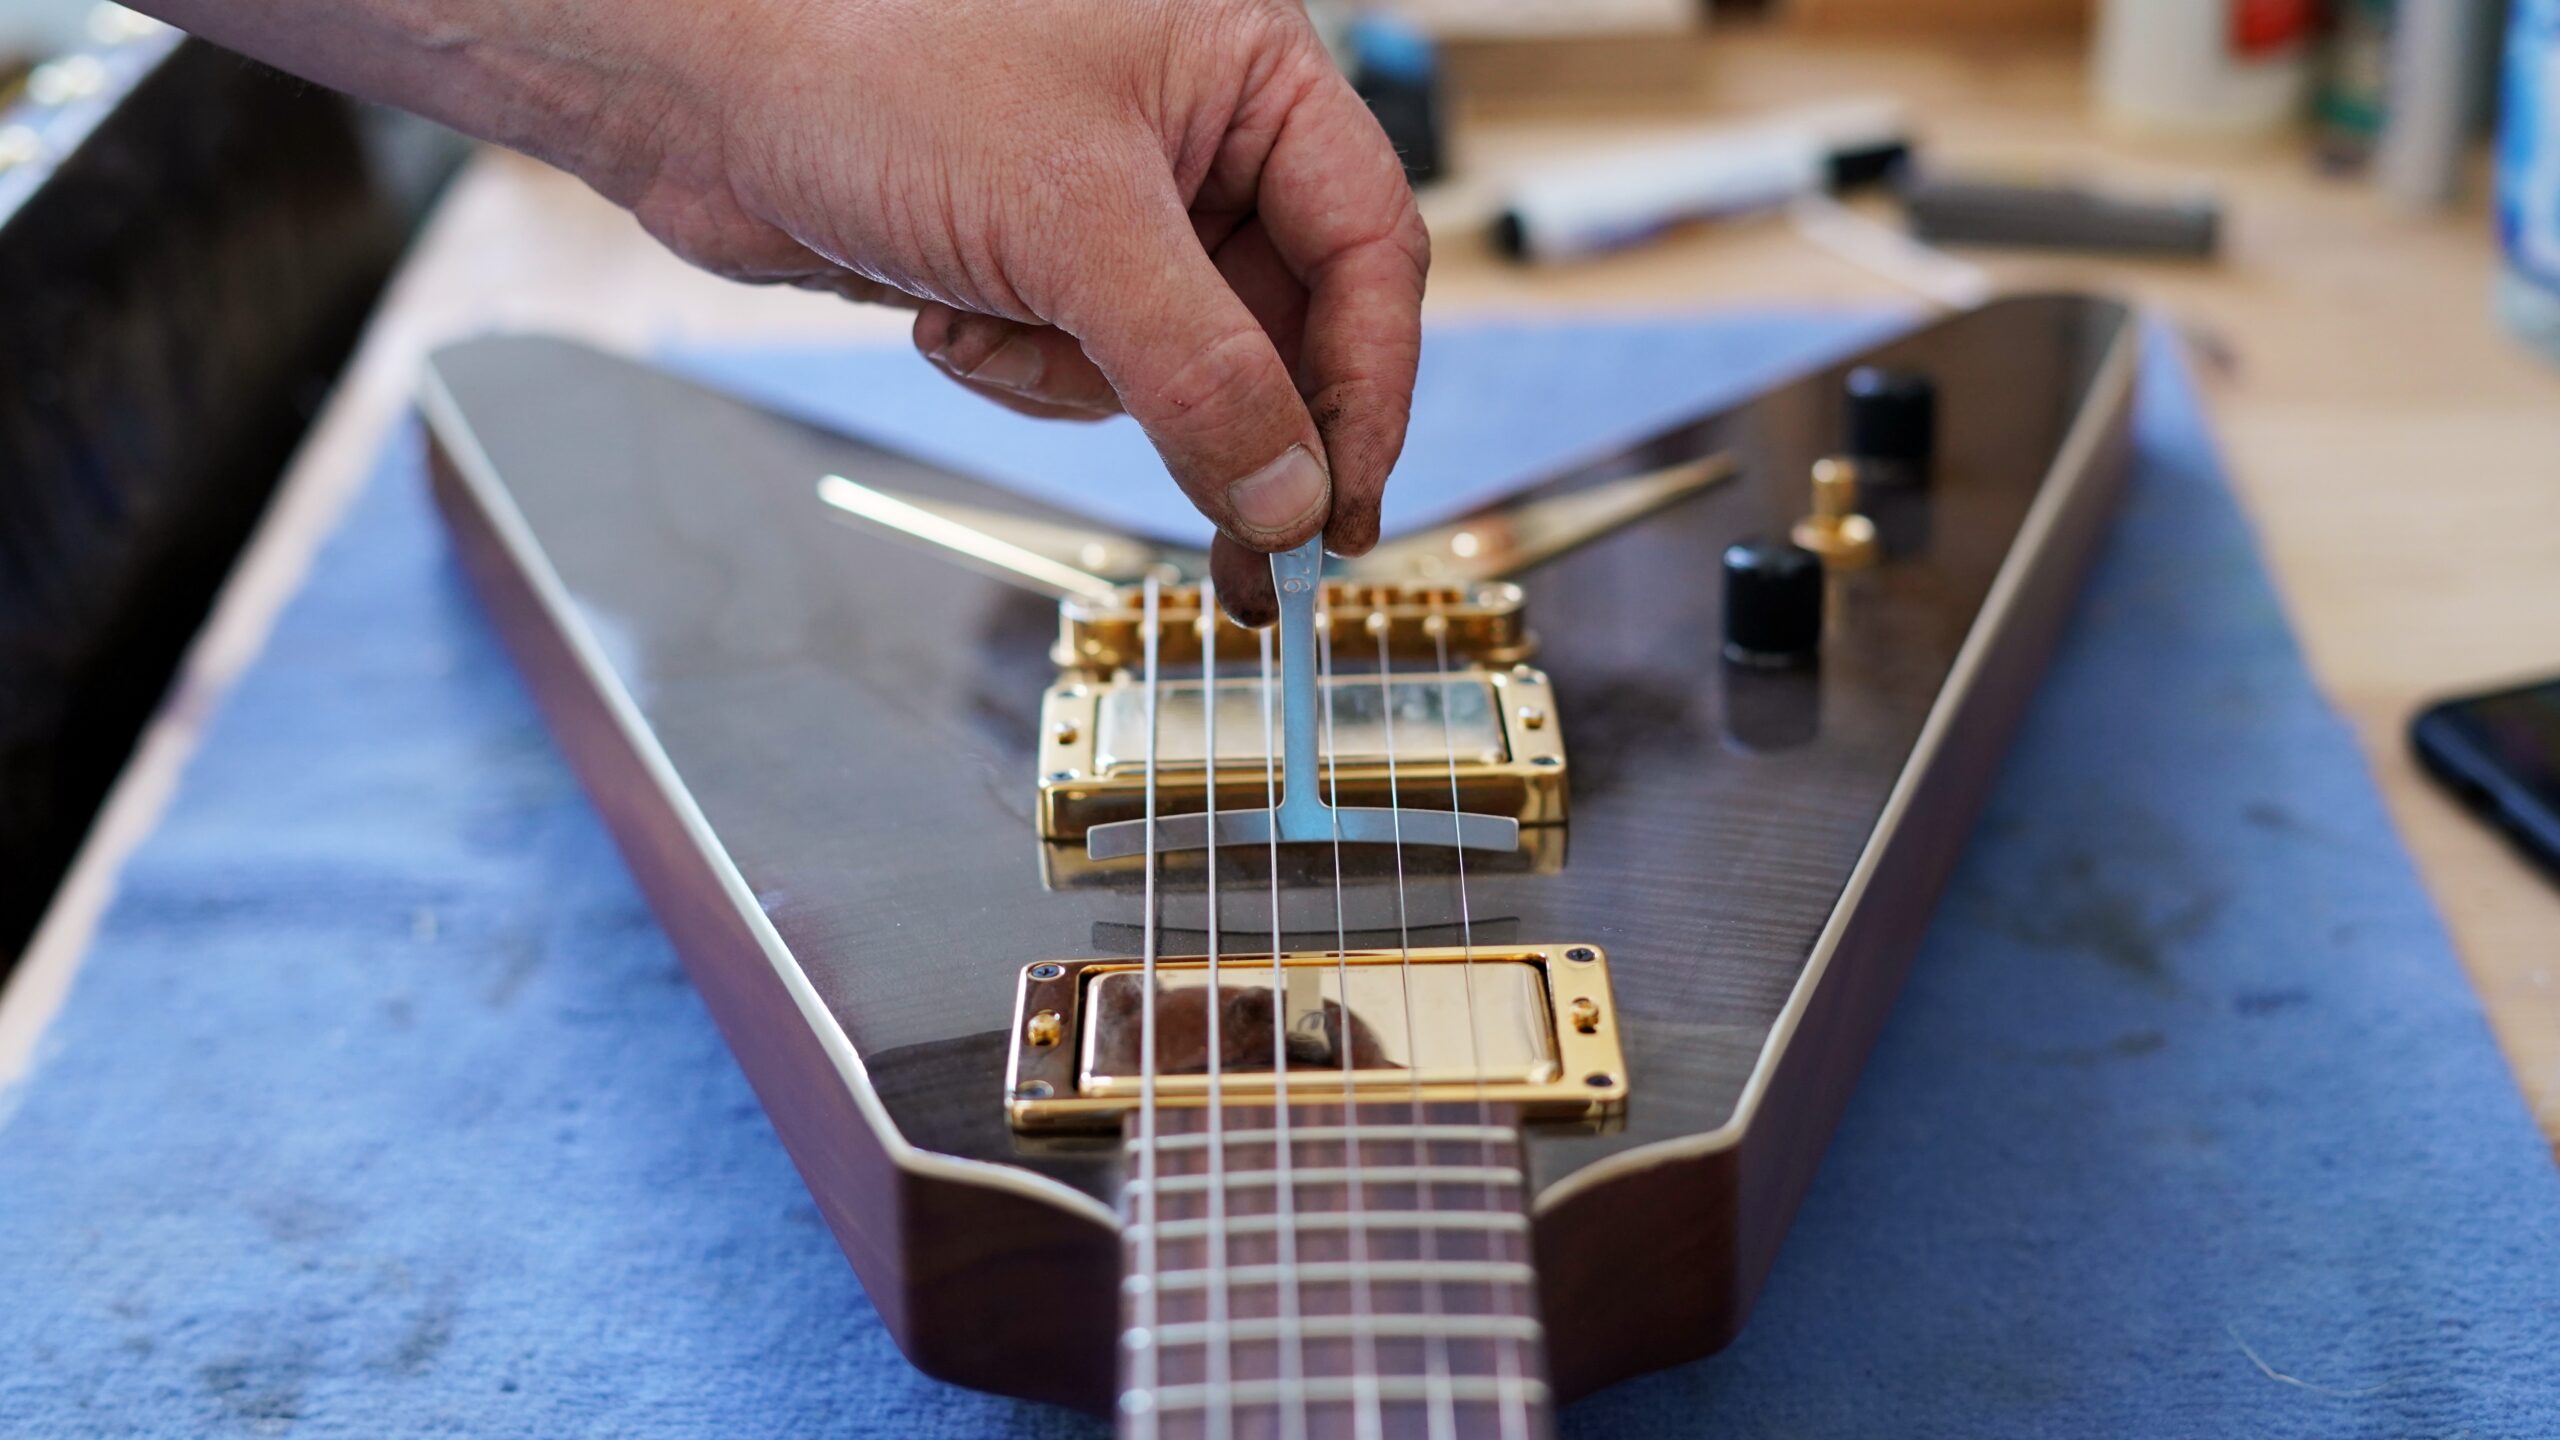
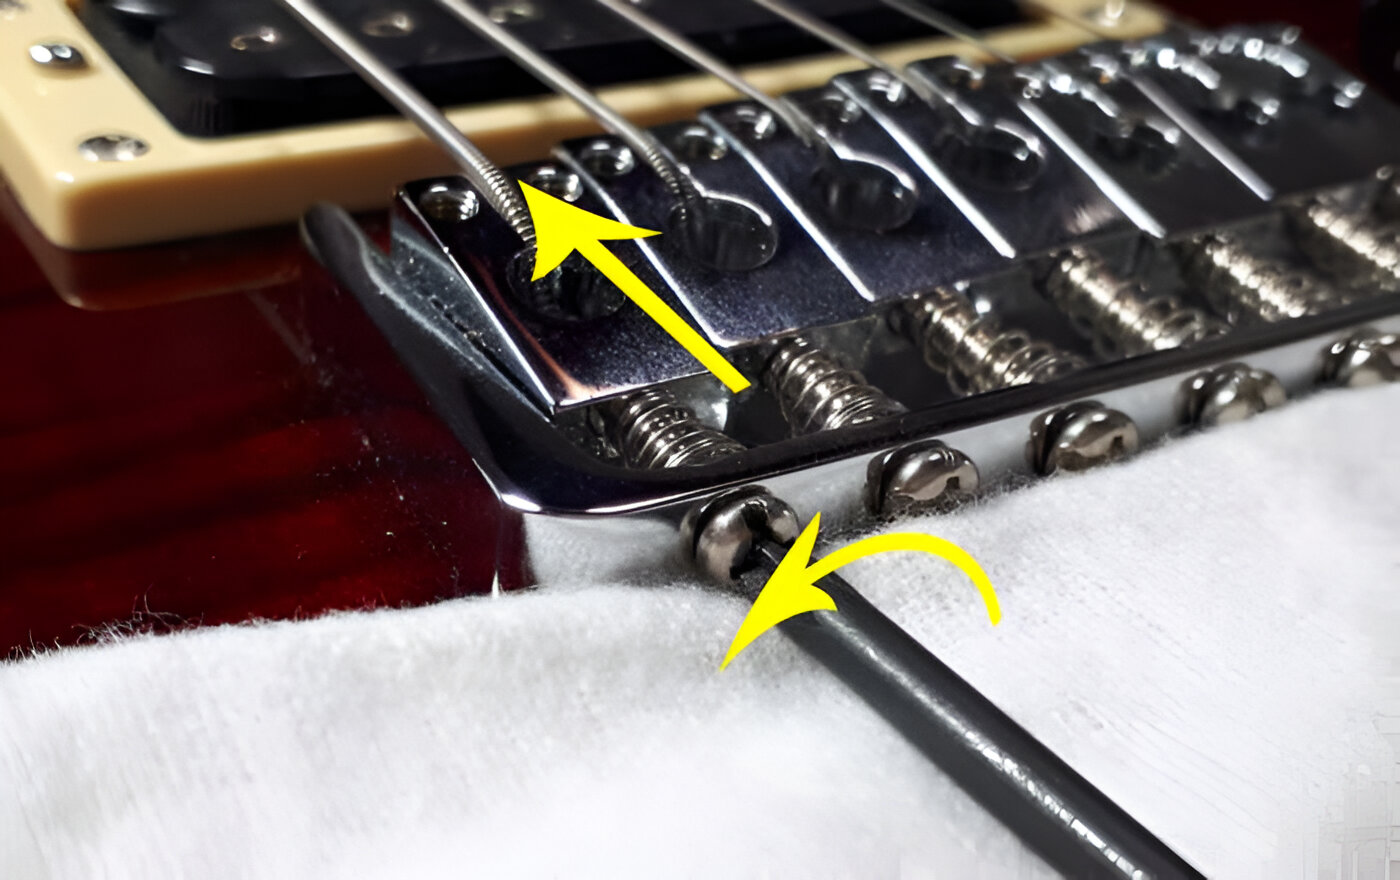
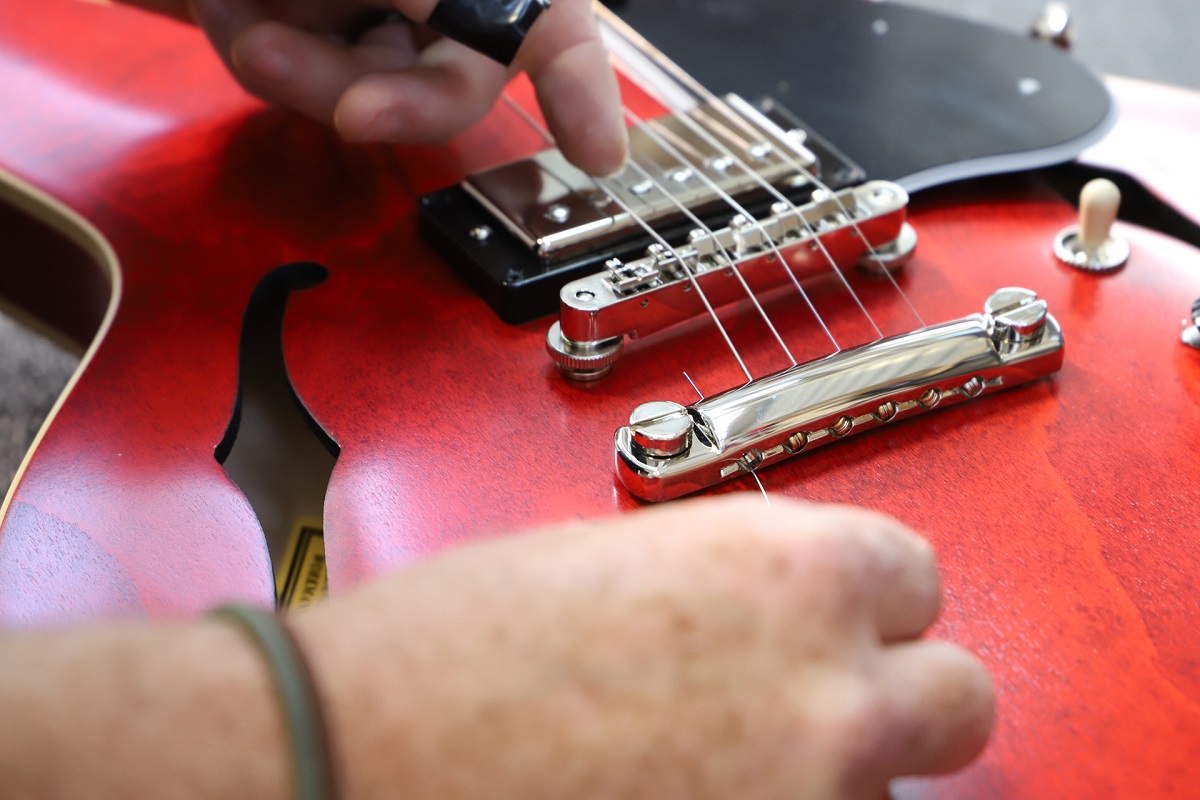
- Insert the String: Begin by inserting the plain or ball end of the new string into the corresponding slot on the bridge of the guitar. Ensure that the string is properly seated and secure in its placement.
- Guide the String to the Tuning Peg: Pull the opposite end of the string towards the appropriate tuning peg, aligning it with the corresponding slot or hole. This step is crucial for ensuring that the string winds smoothly and evenly onto the peg.
- Leave Slack at the Tuning Peg: Before winding the string, leave a few inches of slack between the bridge and the tuning peg. This excess slack will allow for multiple windings around the peg, promoting tuning stability and minimizing the risk of slippage.
- Wind the String: Using a string winder or by hand, begin winding the string onto the tuning peg in the direction that tightens the string when tuned. Ensure that the winds are neat and even, with each coil sitting snugly against the previous one.
- Trim Excess String: Once the string is securely wound and tuned to pitch, use wire cutters to trim the excess length, leaving a small amount for flexibility. Be cautious when cutting the string to avoid any sharp protrusions that could cause injury.
By following these steps with care and precision, you can confidently install the new strings on your electric guitar, setting the stage for an enhanced playing experience and a rejuvenated sonic character from your instrument.
Tuning the New String
After installing the new string on your electric guitar, it’s essential to tune it to the correct pitch to ensure that it harmonizes with the other strings and produces the desired musical tones. Follow these steps to effectively tune the new string:
- Use a Tuner: Utilize a reliable tuner to gauge the pitch of the new string accurately. Whether using a clip-on tuner, pedal tuner, or smartphone app, ensure that the tuner is set to the correct string and note designation.
- Pluck the String: Pluck the newly installed string, allowing it to resonate freely. Observe the tuner’s display to determine whether the string is tuned too low or too high in pitch.
- Adjust the Tuning Peg: If the string is flat (tuned too low), tighten the tension by turning the tuning peg in the appropriate direction. Conversely, if the string is sharp (tuned too high), loosen the tension by adjusting the tuning peg in the opposite direction.
- Monitor the Pitch: Continuously pluck the string and monitor the tuner’s display as you make adjustments. Aim to bring the string’s pitch into alignment with the desired note, ensuring that it harmonizes with the rest of the guitar’s strings.
- Verify Stability: Once the string is tuned to the correct pitch, play various notes and chords to verify its stability. Ensure that the string maintains its tuning and does not exhibit excessive detuning or slippage.
By carefully tuning the new string to the appropriate pitch, you can integrate it seamlessly into the sonic tapestry of your electric guitar, setting the stage for a harmonious and resonant playing experience.
Final Tips and Considerations
As you complete the process of changing the strings on your electric guitar, consider the following tips and additional considerations to ensure that your instrument receives the care and attention it deserves:
- Stretch the Strings: After installing the new strings, gently stretch each one by pulling and tugging along its length. This helps to minimize future tuning instability and ensures that the strings settle into their optimal tension.
- Check String Height: Take the opportunity to assess the action, or string height, of your guitar. If desired, this is an ideal time to make adjustments to the bridge or truss rod to achieve your preferred playing feel.
- Monitor String Condition: Regularly inspect your guitar strings for signs of wear, corrosion, or tonal degradation. Changing your strings preemptively before they become excessively worn can help maintain consistent tone and playability.
- Experiment with String Gauges: Consider exploring different string gauges to tailor the playability and tone of your guitar to your preferences. Lighter gauges may offer increased flexibility, while heavier gauges can provide enhanced sustain and resonance.
- Keep Your Guitar Clean: Routinely clean your guitar’s body, fretboard, and hardware to prevent the buildup of grime and oils. A clean instrument not only looks appealing but also contributes to its longevity and performance.
- Seek Professional Setup: If you encounter challenges with string installation, tuning stability, or overall playability, consider seeking the expertise of a professional guitar technician for a comprehensive setup and adjustment.
By incorporating these final tips and considerations into your guitar maintenance routine, you can elevate your playing experience and ensure that your electric guitar remains in optimal condition, ready to inspire your musical creativity for years to come.