Introduction
Introduction
Over-ear headphones are a popular choice for music enthusiasts and professionals alike due to their superior sound quality and comfortable design. However, with extended use, these headphones can accumulate dirt, dust, and oils from the skin, which can affect both hygiene and sound quality. Regularly cleaning your over-ear headphones is essential to maintain their performance and extend their lifespan.
In this comprehensive guide, we will walk you through the step-by-step process of cleaning over-ear headphones, ensuring that you can enjoy crisp, clear audio while keeping your headphones in top condition. Whether you use your headphones for leisure, work, or gaming, taking the time to clean them properly will not only enhance your audio experience but also contribute to a more hygienic and pleasant wearing experience.
By following the techniques outlined in this guide, you can effectively remove dirt and grime from the ear pads, headband, ear cups, cables, and connectors, restoring your headphones to their pristine condition. Additionally, regular maintenance will help prevent the buildup of bacteria and germs, ensuring that your headphones remain a safe and enjoyable accessory for years to come.
So, grab your cleaning supplies and let's dive into the process of revitalizing your over-ear headphones. Whether you're a music aficionado, a professional audio engineer, or simply someone who appreciates high-quality sound, this guide will equip you with the knowledge and skills to keep your over-ear headphones looking and sounding their best.
Step 1: Remove Ear Pads
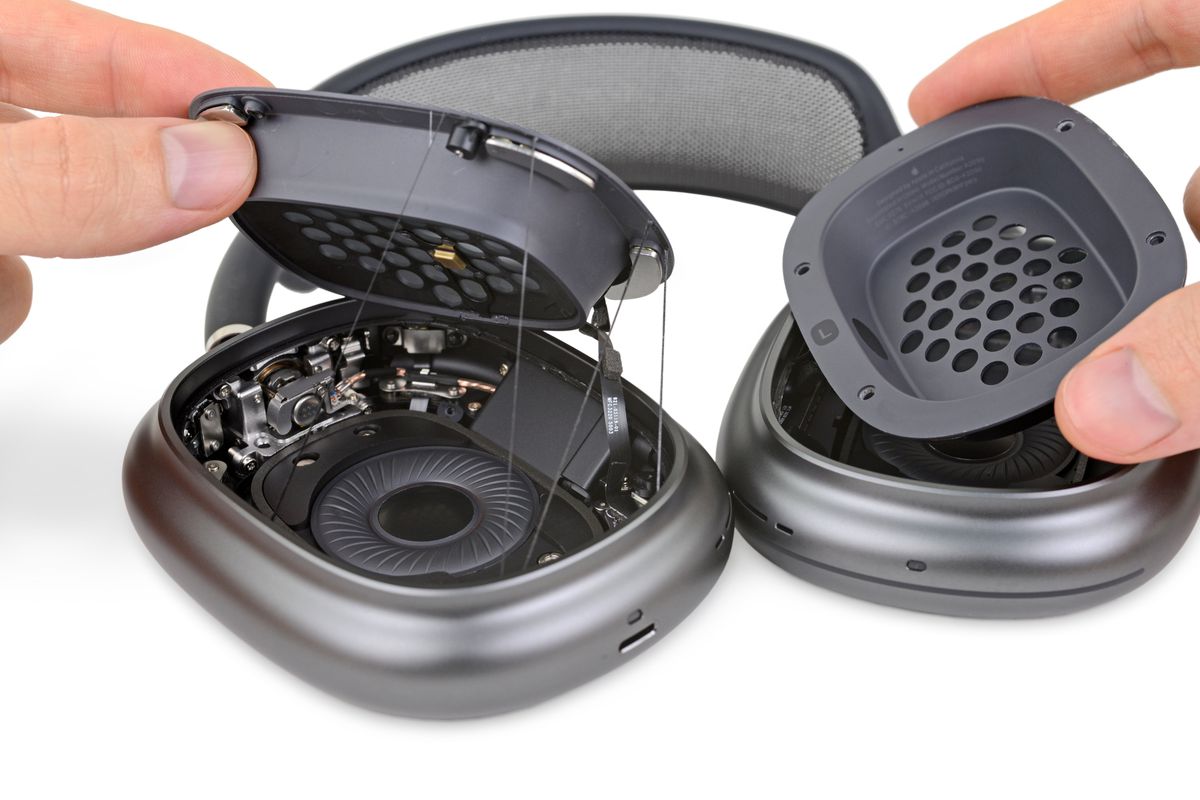
Before embarking on the cleaning process, it’s crucial to remove the ear pads from your over-ear headphones. This step allows for thorough cleaning and prevents any damage to the delicate components of the headphones.
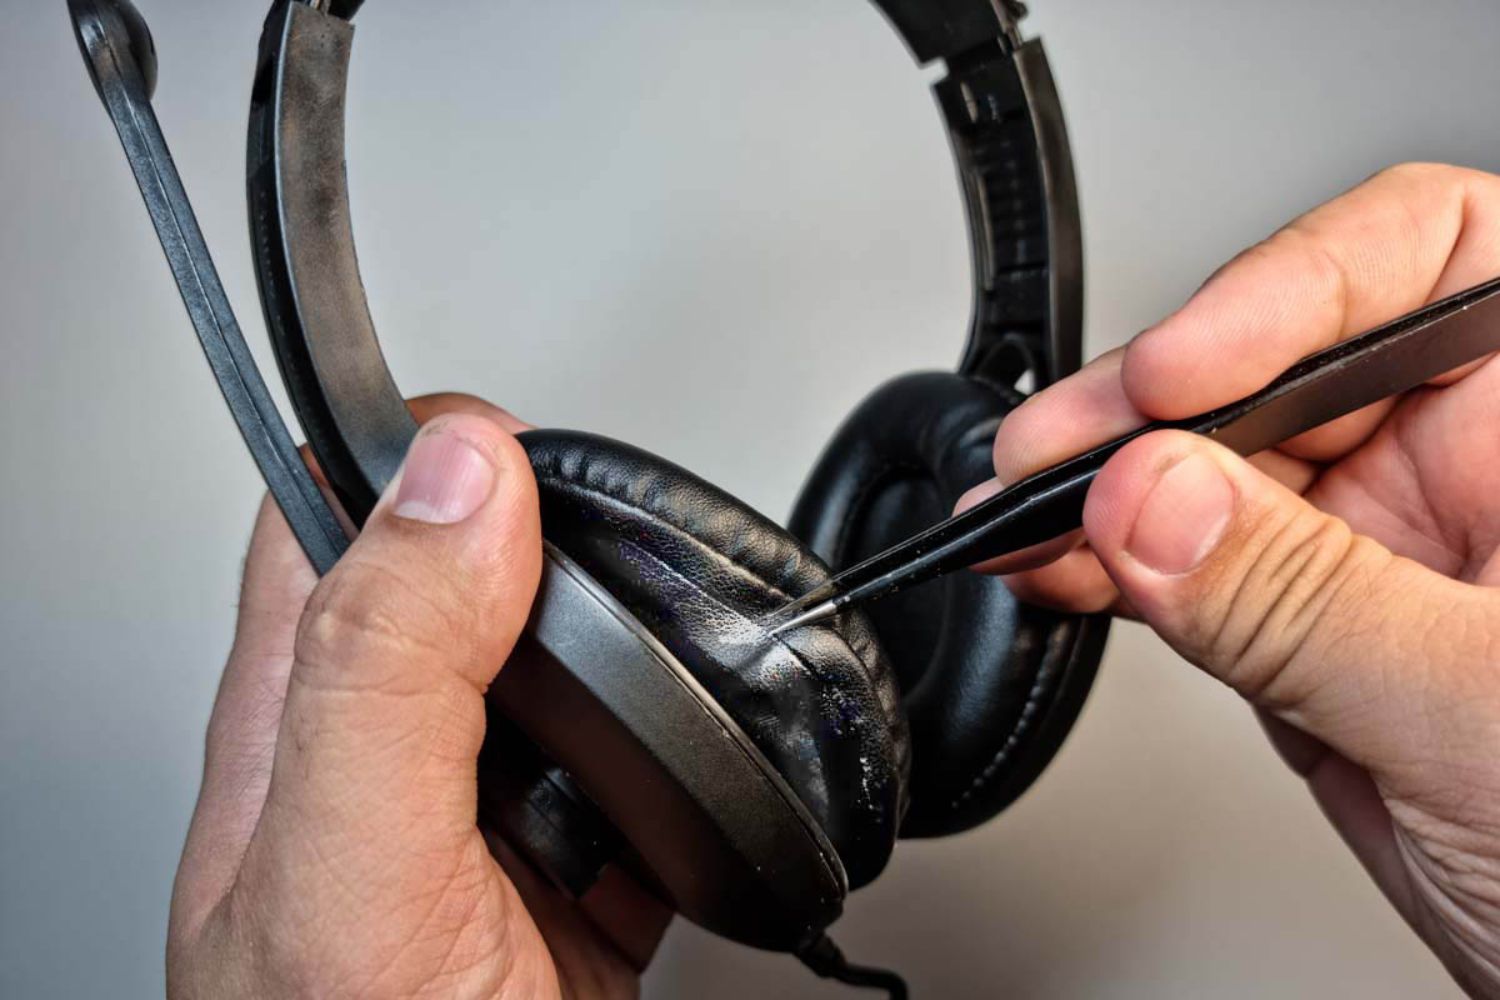
To begin, gently grasp the edge of the ear pad and carefully pull it away from the ear cup. Some ear pads may be attached using a clip mechanism, while others may simply slide off. If your ear pads are secured with a clip, carefully unhook them from the ear cup. Take your time and exercise caution to avoid tearing or damaging the ear pads during removal.
It’s important to note that some over-ear headphone models have ear pads that are held in place by screws. In this case, you will need a small screwdriver to carefully remove the screws before detaching the ear pads. Be sure to keep track of the screws to prevent any loss or misplacement.
Once the ear pads are detached, set them aside in a safe and clean location. This will prevent them from getting in the way during the cleaning process and ensure that they remain free from any potential contaminants.
By carefully removing the ear pads, you create a clear path for thorough cleaning of the ear cups and other headphone components. This initial step sets the stage for the comprehensive maintenance of your over-ear headphones, allowing you to achieve optimal cleanliness and performance.
Step 2: Clean Ear Pads
After removing the ear pads from your over-ear headphones, it’s time to focus on cleaning this essential component. Ear pads not only contribute to the comfort of wearing headphones but also accumulate oils, dirt, and debris over time. By cleaning them regularly, you can ensure a hygienic and comfortable listening experience.
Begin by examining the material of the ear pads. Most over-ear headphones feature ear pads made of leather, faux leather, velour, or memory foam. The cleaning method will vary depending on the material, so it’s important to identify the specific type of ear pads you have.
For leather or faux leather ear pads, a gentle cleaning solution is recommended. Mix a small amount of mild liquid soap or leather cleaner with water to create a diluted cleaning solution. Dampen a soft cloth with the solution and gently wipe the ear pads, taking care to remove any accumulated oils and dirt. Avoid soaking the ear pads or using excessive moisture, as this can damage the material.
If your ear pads are made of velour or fabric, a different approach is needed. Use a gentle fabric or upholstery cleaner to spot clean any stains or dirt on the ear pads. Lightly dampen a cloth with the cleaner and carefully blot the affected areas, taking care not to oversaturate the material. Allow the ear pads to air dry completely before reattaching them to the headphones.
Memory foam ear pads require a delicate cleaning method to maintain their shape and integrity. Use a mild detergent or baby shampoo mixed with water to create a gentle cleaning solution. Gently massage the solution into the foam, focusing on areas with visible dirt or oils. Rinse the ear pads with clean water and gently squeeze out excess moisture before allowing them to air dry thoroughly.
Regardless of the material, it’s important to avoid harsh chemicals, excessive moisture, or abrasive cleaning tools, as these can damage the ear pads and compromise their comfort and durability.
By carefully cleaning the ear pads, you not only maintain their pristine appearance but also ensure a hygienic and comfortable listening experience each time you put on your over-ear headphones.
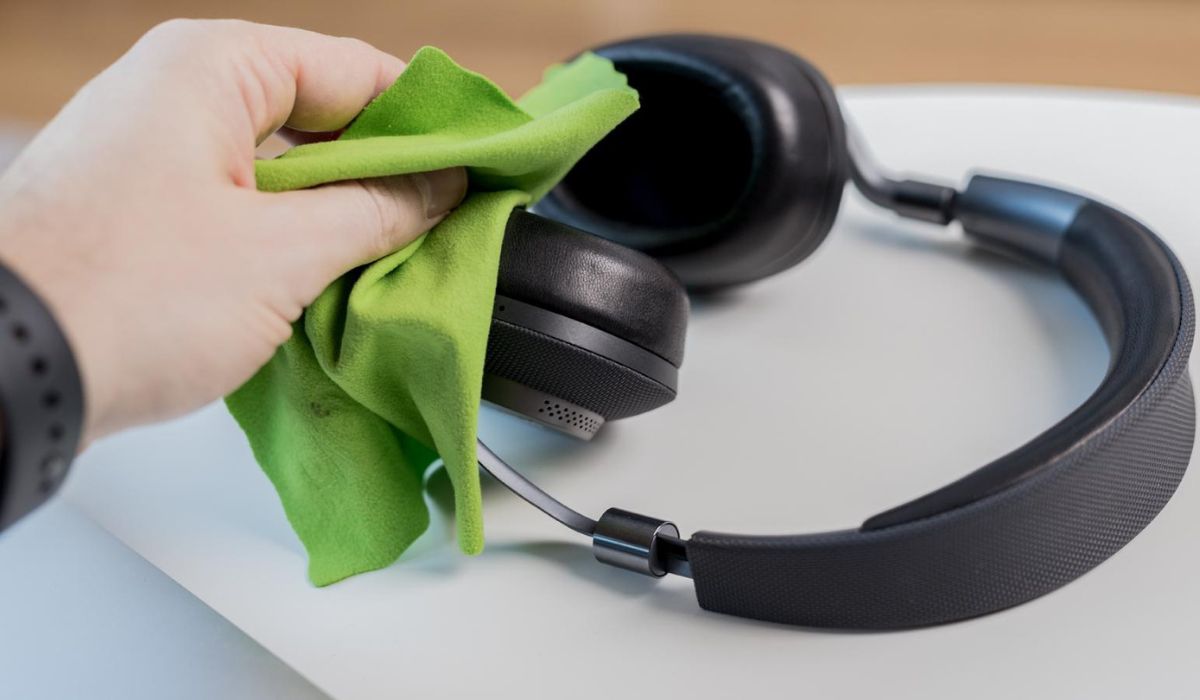
Step 3: Clean Headband
As a critical component of over-ear headphones, the headband plays a significant role in providing comfort and support during extended listening sessions. Over time, the headband can accumulate oils, sweat, and dirt, detracting from both its appearance and comfort. Cleaning the headband regularly is essential for maintaining hygiene and preserving the overall condition of your headphones.
To begin the cleaning process, use a soft, slightly damp cloth to gently wipe the surface of the headband. If the headband is made of leather or faux leather, consider using a mild leather cleaner to effectively remove any accumulated oils and dirt. Avoid using excessive moisture, as this can damage the material and compromise the structural integrity of the headband.
If the headband is constructed from a fabric or mesh material, a gentle fabric cleaner or upholstery cleaner can be used to spot clean any stains or dirt. Dampen a cloth with the cleaner and carefully blot the affected areas, taking care not to oversaturate the material. Allow the headband to air dry thoroughly before reattaching the ear pads.
In the case of adjustable headbands with exposed metal or plastic components, it’s important to pay attention to these areas during the cleaning process. Use a soft, dry cloth to wipe down the metal or plastic components, removing any dust or debris that may have accumulated. For stubborn dirt or grime, a small amount of mild detergent or cleaner can be applied to the cloth to target specific areas for thorough cleaning.
For headphones with a cushioned headband, take care to clean the cushioned areas using the appropriate cleaning method based on the material. Whether it’s leather, fabric, or memory foam, gentle cleaning techniques will help maintain the cleanliness and comfort of the cushioned headband.
Regularly cleaning the headband not only enhances the overall aesthetic appeal of your over-ear headphones but also contributes to a more hygienic and comfortable wearing experience. By incorporating headband cleaning into your headphone maintenance routine, you can ensure that your headphones remain in top condition for years to come.
Step 4: Clean Ear Cups
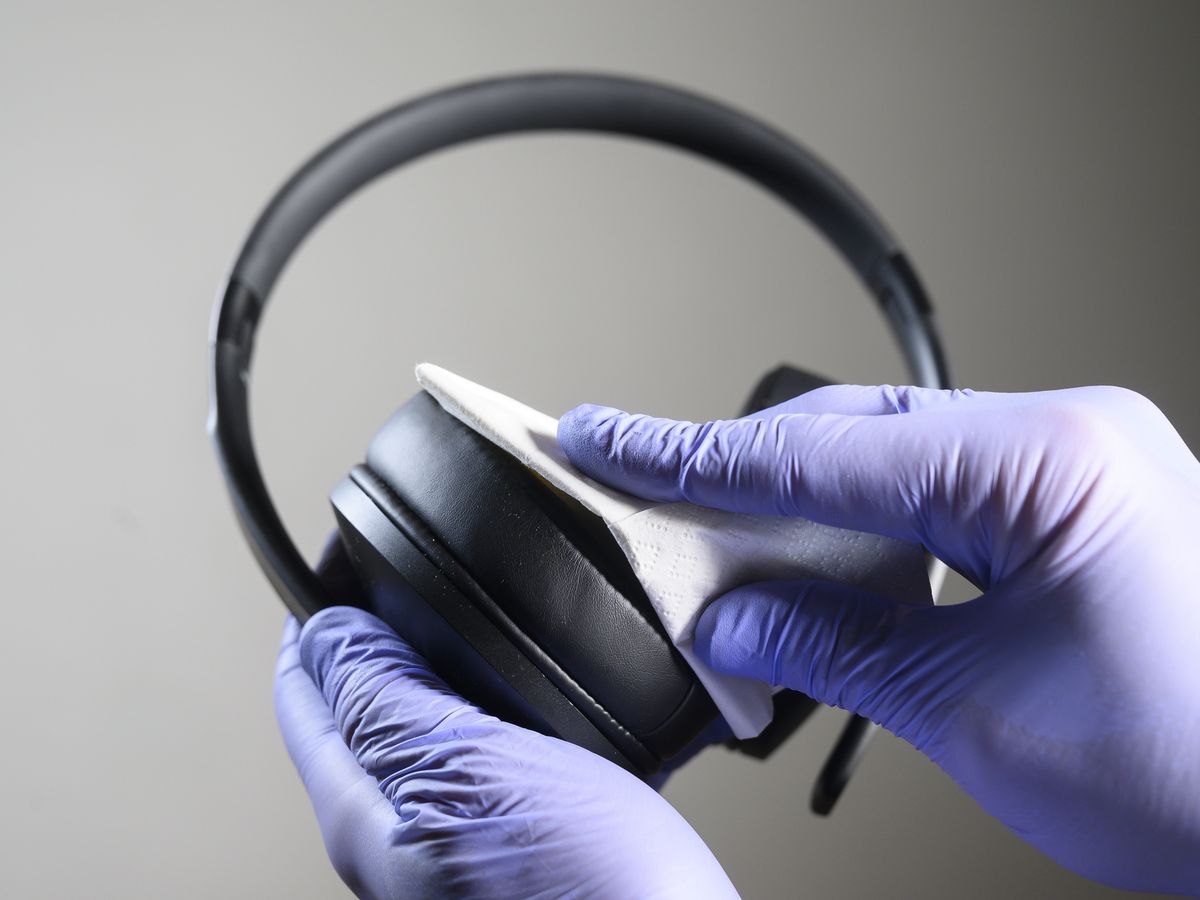
The ear cups of over-ear headphones are pivotal in delivering immersive sound and providing a comfortable fit. However, they are also prone to accumulating dirt, oils, and debris over time, especially in the areas that come into contact with the skin. Cleaning the ear cups is essential not only for maintaining hygiene but also for preserving the quality of the audio experience.
Start by using a soft, dry cloth to gently wipe the exterior surfaces of the ear cups. This initial step helps remove any loose dust or dirt, preparing the ear cups for a more thorough cleaning process. Pay attention to the seams and crevices where dirt may accumulate, ensuring a comprehensive cleaning process.
If the ear cups are made of leather or faux leather, a mild leather cleaner can be used to effectively remove oils and dirt. Dampen a soft cloth with the diluted cleaner and gently wipe the ear cups, taking care not to saturate the material. Avoid using excessive moisture, as this can damage the leather or faux leather. Once cleaned, use a dry cloth to remove any remaining moisture and allow the ear cups to air dry completely.
For fabric or velour ear cups, a gentle fabric cleaner or upholstery cleaner is suitable for spot cleaning any stains or dirt. Dampen a cloth with the cleaner and carefully blot the affected areas, ensuring that the cleaning solution does not oversaturate the material. Allow the ear cups to air dry thoroughly before reattaching them to the headphones.
When dealing with memory foam ear cups, a delicate approach is necessary to maintain their shape and integrity. Use a mild detergent or baby shampoo mixed with water to create a gentle cleaning solution. Gently massage the solution into the foam, focusing on areas with visible dirt or oils. Rinse the ear cups with clean water and gently squeeze out excess moisture before allowing them to air dry completely.
By regularly cleaning the ear cups of your over-ear headphones, you not only ensure a hygienic and comfortable wearing experience but also contribute to the preservation of the headphones’ overall condition and sound quality. Incorporating ear cup cleaning into your headphone maintenance routine is a simple yet effective way to enhance the longevity and performance of your headphones.
Step 5: Clean Cables and Connectors
While cleaning the physical components of over-ear headphones is essential, it’s equally important to pay attention to the cables and connectors to maintain optimal functionality and audio quality. Over time, these components can accumulate dust, dirt, and grime, potentially affecting the electrical connections and overall performance of the headphones.
Begin by carefully inspecting the cables and connectors for any visible dirt, dust, or debris. Use a soft, dry cloth to gently wipe the entire length of the cables, including the connectors. This initial step helps remove loose particles and prepares the cables for a more thorough cleaning process.
For cables and connectors that require more intensive cleaning, a small amount of isopropyl alcohol can be applied to a clean cloth. Gently wipe the cables and connectors with the dampened cloth, taking care not to apply excessive pressure or moisture. Isopropyl alcohol is effective in removing oils, dirt, and contaminants without causing damage to the electrical components.
When cleaning the connectors, such as the 3.5mm audio jack or the connectors that attach to the ear cups, it’s important to use a cotton swab lightly dampened with isopropyl alcohol. Carefully clean the metal contacts and the surrounding areas to ensure a secure and reliable connection for optimal audio transmission.
When dealing with detachable cables, such as those with a 3.5mm or 1/4-inch connector, it’s crucial to clean both the male and female ends of the connectors. This comprehensive approach ensures that the electrical connections remain free from debris, contributing to clear and uninterrupted audio playback.
It’s essential to allow the cables and connectors to air dry completely before reconnecting them to the headphones. This prevents any residual moisture from affecting the electrical connections and ensures that the headphones can be used safely and effectively.
By incorporating cable and connector cleaning into your headphone maintenance routine, you can prolong the lifespan of your over-ear headphones while maintaining optimal audio performance. Regular maintenance of these components contributes to a reliable and enjoyable listening experience, allowing you to fully appreciate the quality of your headphones.
Step 6: Reassemble Headphones
After completing the cleaning process for the individual components of your over-ear headphones, the final step involves reassembling the headphones to restore them to their fully functional and pristine state. Proper reassembly ensures that the headphones are ready for immediate use and that all components are securely in place.
Begin by reattaching the clean ear pads to the ear cups. Carefully align the ear pads with the ear cups and gently press them into place, ensuring that any clips or attachment mechanisms are securely fastened. Take your time to ensure that the ear pads are properly positioned, as this contributes to both the comfort and acoustic seal of the headphones.
If your headphones feature an adjustable headband, extend the headband to a comfortable size and ensure that the headband cushion, if present, is securely in place. Verify that the adjustment mechanism functions smoothly and that the headband provides a secure and comfortable fit when worn.
For headphones with detachable cables, reattach the cables to the designated connectors on the ear cups or the headband. Ensure that the connections are secure and that the cables are free from any twists or tangles that could affect their functionality or longevity.
Once all components are reassembled, take a moment to inspect the headphones for any signs of residual moisture or cleaning solution. Use a soft, dry cloth to gently wipe the exterior surfaces of the headphones, removing any remaining moisture or cleaning residue. This final step ensures that the headphones are clean, dry, and ready for use.
Before enjoying your freshly cleaned headphones, take a moment to power them on and verify that the audio playback is clear and free from any issues. Test the functionality of any integrated controls, such as volume adjustments or playback buttons, to ensure that the headphones are operating as expected.
By meticulously reassembling your over-ear headphones after cleaning, you can rest assured that all components are in optimal condition and that the headphones are ready to deliver an exceptional audio experience. Proper reassembly is the final touch that completes the maintenance process, allowing you to fully appreciate the benefits of clean and well-maintained headphones.
Conclusion
Cleaning over-ear headphones is a crucial aspect of maintaining their performance, comfort, and longevity. By following the comprehensive cleaning process outlined in this guide, you have taken significant steps to ensure that your headphones remain in optimal condition, providing a hygienic and enjoyable listening experience.
Regular maintenance of over-ear headphones, including the removal and cleaning of ear pads, headband, ear cups, and cables, is essential for preserving their appearance and functionality. By incorporating these cleaning techniques into your headphone care routine, you contribute to the longevity of your headphones and the quality of your audio experience.
Proper cleaning not only removes dirt, oils, and grime but also helps prevent the buildup of bacteria and germs, creating a more hygienic environment for prolonged headphone use. Additionally, maintaining clean and well-cared-for headphones enhances their aesthetic appeal and ensures that they remain a reliable and enjoyable accessory for music, work, and leisure activities.
As you reassemble your freshly cleaned headphones, take pride in knowing that you have invested in their care and maintenance. The attention to detail and thorough cleaning process will undoubtedly result in a rewarding listening experience, free from distractions or discomfort caused by neglected maintenance.
By regularly cleaning and maintaining your over-ear headphones, you not only extend their lifespan but also maximize their performance, ensuring that you can continue to enjoy high-quality audio for years to come. Embrace the satisfaction of revitalizing your headphones and relish the pristine condition and exceptional sound they offer.
With your headphones now cleaned and reassembled, take a moment to appreciate the effort you’ve invested in their care. Whether you’re an audiophile, a professional in the audio industry, or simply someone who appreciates great sound, the dedication to maintaining your headphones will undoubtedly pay off in the form of a consistently exceptional listening experience.