Introduction
Welcome to our guide on how to install the Nest Hello video doorbell! Adding a video doorbell to your home security system can provide you with peace of mind and convenience. The Nest Hello is a popular choice due to its advanced features and easy installation process. By following the steps outlined in this guide, you’ll have your Nest Hello up and running in no time.
The Nest Hello video doorbell offers a seamless integration with your smartphone, allowing you to monitor your front door from anywhere. With its high-resolution camera and two-way audio, you can see and speak to visitors in real-time. Whether you’re at work, running errands, or even on vacation, you can always keep an eye on your front door.
Before we begin the installation process, it’s important to ensure that you have the necessary tools and materials. This will help you avoid any unnecessary delays or trips to the hardware store. We’ll also guide you through the process of checking your existing doorbell setup to make sure it’s compatible with the Nest Hello.
Installing the Nest Hello requires turning off the power to your existing doorbell to ensure your safety. We’ll walk you through the steps to do this properly. You’ll then learn how to remove the existing doorbell and install the Nest Hello mounting bracket.
Connecting the wires to the Nest Hello is a crucial step in the installation process. Our guide will provide you with clear instructions on how to do this correctly. Once the wires are connected, you’ll be ready to attach the Nest Hello to the mounting bracket and test your installation.
After the physical installation is complete, we’ll guide you through the process of setting up the Nest Hello on your smartphone. This includes downloading the Nest app, creating an account, and connecting the Nest Hello to your Wi-Fi network.
By the end of this guide, you’ll have successfully installed your Nest Hello video doorbell and be ready to enjoy all its benefits. Let’s get started with Step 1: Gather the necessary tools and materials.
Step 1: Gather the necessary tools and materials
Before you begin installing your Nest Hello video doorbell, it’s important to gather all the necessary tools and materials. Having everything on hand will make the installation process much smoother and efficient.
Here’s a list of the tools and materials you’ll need:
- A screwdriver (flathead or Phillips, depending on your existing doorbell)
- A voltage tester to ensure the power is off
- Wire strippers or scissors to strip the wires
- A drill and appropriate drill bits
- Anchors and screws for mounting the doorbell bracket
- A smartphone or tablet with the Nest app installed
- A stable Wi-Fi network with internet access
Once you have gathered these tools and materials, double-check to ensure you have everything before proceeding to the next steps. It can be frustrating to discover you’re missing a crucial tool in the middle of the installation process.
Keep in mind that the specific tools and materials needed may vary depending on your existing doorbell setup and personal preferences. It’s always a good idea to consult the Nest Hello installation guide or product manual for any additional recommendations or requirements.
With all your tools and materials prepared, you’re now ready to move on to Step 2: Check your existing doorbell setup. This step will help you determine if your current doorbell is compatible with the Nest Hello and if any additional modifications or adjustments are needed. Let’s continue our installation journey to ensure a successful setup.
Step 2: Check your existing doorbell setup
Before proceeding with the installation of the Nest Hello video doorbell, it’s important to check your existing doorbell setup to ensure compatibility and determine if any modifications are required. This step will help you avoid any surprises or issues during the installation process.
Here are a few things to consider when checking your existing doorbell setup:
- Transformer compatibility: The Nest Hello requires a low-voltage transformer to power the doorbell. Check if your existing transformer meets the recommended voltage range of 16V to 24V. If your transformer doesn’t meet the requirements, you may consider upgrading it to ensure proper functionality of the Nest Hello.
- Wiring compatibility: Inspect the wiring connected to your existing doorbell. The Nest Hello is compatible with both wired and wireless doorbell systems, but it’s essential to examine the wiring to determine if any adjustments are needed. Ensure that the wiring is in good condition and compatible with the Nest Hello.
- Chime compatibility: The Nest Hello has specific requirements for the doorbell chime. Check if your current chime is compatible with the Nest Hello. Some older mechanical chimes may not work, and you might need to upgrade to a compatible digital chime or use the Nest Chime accessory for audio alerts.
It’s crucial to follow the guidelines provided by Nest for proper installation and compatibility. Refer to the Nest Hello installation guide or consult Nest’s official website for detailed information on transformer compatibility, wiring compatibility, and chime compatibility.
If you encounter any issues or are unsure about the compatibility of your existing doorbell setup, it’s recommended to seek professional assistance, such as consulting an electrician or contacting the Nest support team for guidance.
By taking the time to check your existing doorbell setup before proceeding, you’ll ensure a smooth installation process and minimize any potential complications or setbacks. Once you have verified the compatibility of your setup, you can continue to Step 3: Turn off the power to your existing doorbell.
Step 3: Turn off the power to your existing doorbell
Before starting any electrical work, it’s critical to ensure your safety by turning off the power to your existing doorbell. This step will protect you from any potential electrical shocks or accidents during the installation process.
Here’s how to turn off the power to your existing doorbell:
- Locate your home’s main electrical panel. It is usually located in the basement, utility room, or garage.
- Open the electrical panel door and look for the circuit breaker labeled “doorbell” or something similar. If you’re unsure which breaker controls the doorbell, you may need to flip each breaker one at a time and test the doorbell to see when it loses power.
- Once you’ve identified the correct circuit breaker, switch it to the “off” position.
- To double-check that the power is off, test your existing doorbell by pressing the doorbell button. If it doesn’t ring or make any sound, you have successfully turned off the power.
It’s essential to use caution when working with electricity. Even though you’ve turned off the power, it’s a good practice to use a voltage tester to confirm that there is no electrical current flowing to the doorbell. This extra step ensures your safety and gives you peace of mind during the installation process.
Remember, if you’re uncomfortable or unsure about working with electrical systems, it’s always best to consult a professional electrician for assistance. They have the expertise to handle electrical tasks safely and efficiently.
With the power turned off to your existing doorbell, you can proceed to the next step: removing the existing doorbell. This step will prepare the installation site for the Nest Hello video doorbell. Let’s move forward in our installation journey!
Step 4: Remove the existing doorbell
Now that the power to your existing doorbell is turned off, you can proceed with removing the old doorbell. This step will prepare the installation site for the Nest Hello video doorbell, ensuring a clean and smooth installation.
Follow these steps to remove the existing doorbell:
- Inspect the doorbell housing and look for any screws or fasteners securing it to the wall. Typically, there will be two screws holding the doorbell in place.
- Using a screwdriver (flathead or Phillips, depending on the type of screws), carefully unscrew and remove the screws, keeping them in a safe place for later use or disposal.
- Gently pull the doorbell housing away from the wall, revealing the wiring behind it. Take note of how the wires are connected and make a mental or written note of their placement.
- If the existing doorbell is wired, use wire strippers or scissors to carefully strip away the insulation from the ends of the wires, exposing the bare copper. This will make it easier to connect the wires to the Nest Hello later on.
- Once the wires are stripped, disconnect them from the doorbell. Take care not to let the wires fall back into the wall cavity.
- With the wires disconnected, you can remove the old doorbell housing completely from the wall. Dispose of it responsibly or keep it as a backup if it’s still in good condition.
It’s worth noting that some existing doorbells may be attached using adhesive or other unconventional methods. In such cases, refer to the manufacturer’s instructions or consult a professional if you’re unsure how to safely remove the doorbell.
By carefully removing the existing doorbell, you’ve cleared the way for the installation of the Nest Hello video doorbell. The next step, Step 5, will guide you through the process of installing the Nest Hello mounting bracket. Let’s continue our installation journey!
Step 5: Install the Nest Hello mounting bracket
With the old doorbell removed, it’s time to install the Nest Hello mounting bracket. The mounting bracket provides a secure base for the Nest Hello video doorbell and ensures a stable installation. Follow these steps to install the mounting bracket:
- Take the Nest Hello mounting bracket out of the packaging.
- Hold the mounting bracket against the wall where you want to install your Nest Hello. Choose a location that provides a clear view of your front door and is within range of your Wi-Fi network.
- Position the bracket vertically or horizontally, depending on your preference or the existing space available.
- Using a pencil or marker, mark the screw holes on the wall through the holes in the mounting bracket. This will serve as a guide for drilling.
- Carefully remove the mounting bracket from the wall and set it aside.
- Using a drill and an appropriate drill bit for your wall material (e.g., wood, concrete), drill pilot holes at the marked screw hole locations.
- If necessary, insert the provided anchors into the pilot holes. This step is crucial for added stability, especially if you’re mounting the bracket onto a concrete or brick wall.
- Align the mounting bracket with the pilot holes and screw the bracket into the wall using the appropriate screws for your wall material.
- Ensure that the bracket is securely attached to the wall, using a level if needed to ensure it is straight.
By properly installing the mounting bracket, you have created a sturdy base for your Nest Hello video doorbell. The bracket will ensure that the doorbell is securely attached and remains in place, regardless of weather conditions or frequent use.
Once the mounting bracket is installed, you’re now ready to move on to Step 6: Connect the wires to the Nest Hello. This step will guide you through the process of connecting the wiring, an essential step to power your Nest Hello and enable its features. Let’s continue with the installation process!
Step 6: Connect the wires to the Nest Hello
Now that the Nest Hello mounting bracket is securely installed, it’s time to connect the wires to the Nest Hello video doorbell. This step is essential for providing power to the doorbell and enabling its features. Follow these steps to connect the wires:
- Ensure that the power to the doorbell is still turned off at the electrical panel.
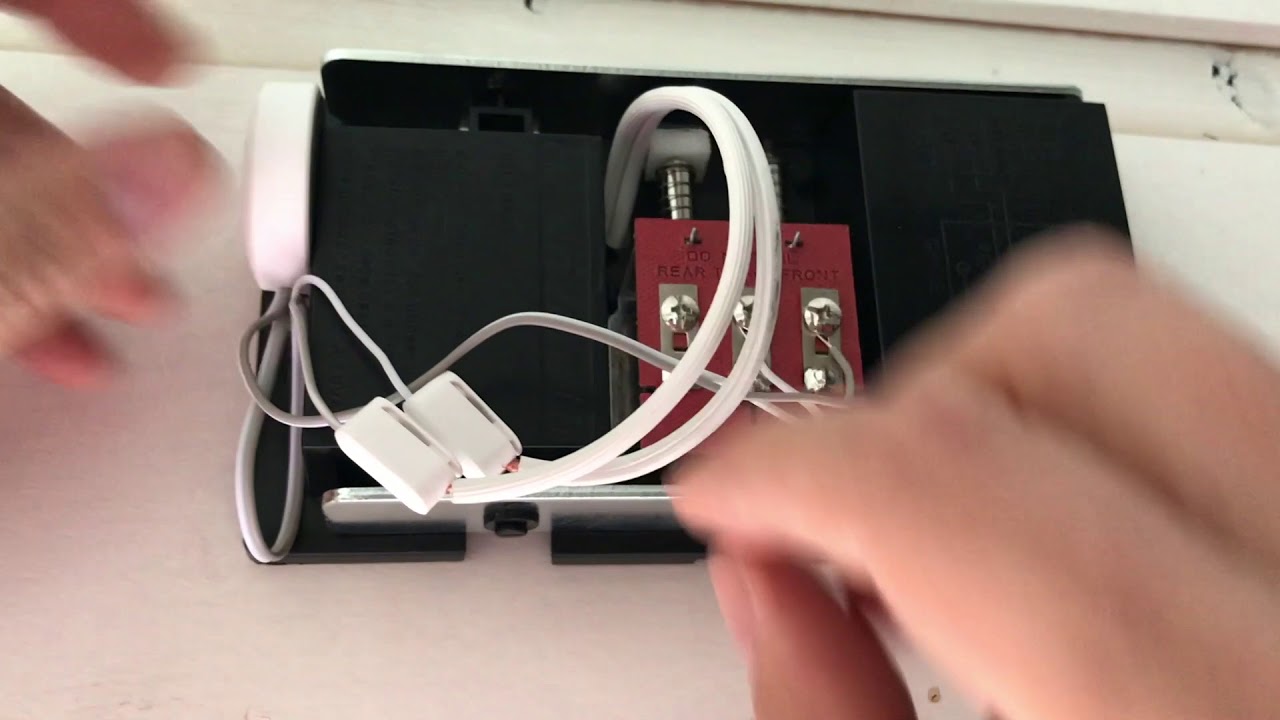
- Locate the wires that were previously connected to your old doorbell. These wires typically consist of a red wire (for power) and a white or black wire (for the chime).
- If the wires are not stripped, use wire strippers or scissors to carefully strip away a small portion of the insulation from the ends of the wires, exposing the bare copper.
- Take the Nest Hello video doorbell and locate the wiring terminals on the back of the device. The terminals are labeled “N” for the neutral wire, “L” for the live wire, and “T” for the chime wire.
- Insert the bare copper ends of the wires into the corresponding terminals on the Nest Hello. The neutral wire (usually the white wire) goes into the “N” terminal, the live or power wire (usually the red wire) goes into the “L” terminal, and the chime wire (usually the black or white wire) goes into the “T” terminal.
- Using a screwdriver, tighten the screws on the terminals to secure the wires in place. Ensure that the connections are tight and secure.
- Inspect the connections to ensure there are no exposed or loose wires. If needed, trim any excess wire and double-check that the insulation is intact.
It’s important to follow the provided wiring instructions and ensure proper connection to avoid any electrical hazards or malfunctions. If you are unsure about the wiring or have any concerns, consult a professional electrician for assistance.
Once the wires are securely connected to the Nest Hello, you’re one step closer to completing the installation process. The next step, Step 7: Attach the Nest Hello to the mounting bracket, will guide you through securing the doorbell and completing the installation. Let’s continue with the installation of your Nest Hello video doorbell!
Step 7: Attach the Nest Hello to the mounting bracket
With the Nest Hello wiring properly connected, it’s time to attach the Nest Hello video doorbell to the mounting bracket. This step will secure the doorbell in place and ensure it is properly aligned for optimal performance. Follow these steps to attach the Nest Hello to the mounting bracket:
- Take the Nest Hello video doorbell and position it in front of the mounting bracket. Make sure the doorbell aligns with the screw holes on the bracket.
- Gently slide the Nest Hello down onto the mounting bracket. Apply slight pressure until the doorbell clicks into place.
- Once the doorbell is securely attached, use a screwdriver or the provided screws to fasten the doorbell to the mounting bracket. Insert the screws through the screw holes on the sides or bottom of the Nest Hello and tighten them until the doorbell is securely fastened.
- Take a step back and ensure that the Nest Hello is level and aligned properly. Use a level if necessary to make any adjustments.
It’s important to secure the Nest Hello tightly to the mounting bracket to ensure stability, especially in areas with high winds or frequent doorbell use. This will prevent the doorbell from accidentally falling or shifting out of position.
Once the Nest Hello is securely attached to the mounting bracket, you’re almost there! The next step, Step 8: Turn the power back on and test your Nest Hello, will guide you through powering on the doorbell and ensuring its functionality. Let’s proceed with the final steps of installing your Nest Hello video doorbell!
Step 8: Turn the power back on and test your Nest Hello
Now that your Nest Hello video doorbell is securely installed, it’s time to turn the power back on and test its functionality. This step will ensure that your Nest Hello is receiving power and working properly. Follow these steps to turn the power back on and test your Nest Hello:
- Go to your home’s main electrical panel where you previously turned off the power.
- Locate the circuit breaker labeled “doorbell” or the one you turned off during Step 3.
- Flip the circuit breaker to the “on” position to restore power to your doorbell.
- Wait for a few moments to allow the Nest Hello to power up and initialize.
- On your smartphone or tablet, open the Nest app and log in to your Nest account. If you haven’t already, download and install the Nest app from your device’s app store.
- Follow the on-screen instructions in the app to add a new device. Select “Nest Hello” as the device type and follow the prompts to complete the setup process.
- Once the setup is complete, you should be able to see the live video feed from your Nest Hello doorbell on your smartphone or tablet.
- Test the doorbell functionality by pressing the doorbell button or simulating a visitor. You should receive a notification on your device, and you’ll be able to see and hear the visitor through the Nest app.
- If the doorbell is not functioning correctly, double-check the wiring connections and consult the Nest Hello installation guide or the troubleshooting section on the Nest website for assistance.
By turning the power back on and testing your Nest Hello, you can ensure that it’s working as expected and that you’re ready to receive visitors. It’s important to regularly check the camera feed and ensure that the notifications are functioning correctly to maximize your home security.
If you encounter any issues during the testing process or need additional support, don’t hesitate to reach out to Nest customer support for assistance. They can provide guidance and troubleshooting tips to ensure that your Nest Hello is working optimally.
Now that your Nest Hello is installed and tested, you’re ready to enjoy the convenience and security it provides. The final step of our installation journey is Step 9: Set up the Nest Hello on your smartphone, where you’ll configure additional settings and personalize your experience. Let’s move on to the last step of installing your Nest Hello video doorbell!
Step 9: Set up the Nest Hello on your smartphone
With your Nest Hello successfully installed and tested, it’s time to set it up on your smartphone or tablet. This step will allow you to access and control your Nest Hello from anywhere using the Nest app. Follow these steps to set up the Nest Hello on your smartphone:
- Ensure you have the Nest app downloaded and installed on your smartphone or tablet. You can find the Nest app in your device’s app store.
- Open the Nest app and log in to your Nest account. If you don’t have an account, you can create one using the app’s registration process.
- Add a new device to your Nest account by selecting “Add Product” or similar options in the app’s menu.
- Select “Nest Hello” as the device type.
- Follow the on-screen instructions to set up your Nest Hello. This may include connecting the Nest Hello to your Wi-Fi network, configuring settings such as motion detection or facial recognition, and customizing notifications and alerts.
- During the setup process, you may be prompted to name your Nest Hello and specify its location. This will help you easily identify and manage multiple Nest devices in the future.
- Once the setup is complete, you will have full access to the features and controls of your Nest Hello through the Nest app on your smartphone or tablet.
Setting up your Nest Hello on your smartphone allows you to conveniently monitor and manage your doorbell from anywhere. With the Nest app, you’ll have live video feed access, receive alerts and notifications, and have control over various settings and preferences.
It’s recommended to explore the different options and settings within the Nest app to personalize your Nest Hello experience. You can customize features like Home/Away Assist, activity zones, and integration with other smart home devices.
If you encounter any difficulties during the setup process or have questions about specific features, refer to the Nest app’s Help Center or consult the Nest support resources online. They can provide comprehensive guidance and troubleshooting assistance.
Congratulations! You have successfully set up your Nest Hello on your smartphone, completing the installation process. You can now enjoy the convenience, security, and peace of mind that the Nest Hello video doorbell brings to your home.
Thank you for following this installation guide. If you have any further questions or need additional assistance, don’t hesitate to reach out to Nest customer support. Enjoy your new Nest Hello video doorbell!
Conclusion
Congratulations on successfully installing your Nest Hello video doorbell! You have taken an important step towards enhancing your home security and convenience. By following the step-by-step guide provided, you have ensured a proper and reliable installation of your Nest Hello.
The Nest Hello offers advanced features such as high-resolution video, two-way audio, and smartphone connectivity, allowing you to monitor your front door from anywhere. With its easy installation process, you can enjoy the benefits of a video doorbell without the need for professional assistance.
Throughout the installation process, we covered essential steps, including gathering the necessary tools and materials, checking your existing doorbell setup, turning off the power, removing the old doorbell, installing the mounting bracket, connecting the wires, attaching the Nest Hello, and finally setting it up on your smartphone.
Remember to consult the provided Nest Hello installation guide or product manual for specific instructions and guidelines. Furthermore, if you encounter any issues or have any questions, do not hesitate to reach out to Nest customer support or consult their online resources.
Now that your Nest Hello is installed and set up, take some time to explore and familiarize yourself with its features. Customize the settings according to your preferences and enjoy the peace of mind of having a reliable and advanced video doorbell system.
Thank you for choosing Nest Hello and we hope that this installation guide has been helpful to you. Should you require any further assistance or have any other questions, the Nest support team is ready to assist you. Enjoy the added security and convenience that your Nest Hello video doorbell brings to your home!