Introduction
Are you ready to transform your home entertainment experience with immersive surround sound? Connecting a surround sound system to your LG TV using an AV receiver can elevate your audio experience to new heights, bringing the theater right into your living room. With the right equipment and a few simple steps, you can enjoy rich, multi-dimensional sound that enhances your favorite movies, shows, and music.
In this comprehensive guide, we'll walk you through the process of connecting your LG TV to a surround sound system using an AV receiver. Whether you're a seasoned audiophile or a novice seeking to enhance your home theater setup, this step-by-step tutorial will help you achieve the optimal audio setup for your viewing pleasure.
By following these instructions, you'll be able to seamlessly integrate your LG TV with an AV receiver and speakers, unlocking the full potential of your audiovisual experience. So, gather your equipment, roll up your sleeves, and let's embark on this audio adventure together. Get ready to immerse yourself in the captivating world of surround sound right in the comfort of your own home.
Step 1: Gather the Necessary Equipment
Before diving into the process of connecting your LG TV to a surround sound system with an AV receiver, it’s essential to gather all the necessary equipment. Ensuring that you have the right components will set the stage for a smooth and successful setup. Here’s a checklist of the essential items you’ll need:
- LG TV: Your LG television will serve as the central hub for your home entertainment system. Ensure that it has available audio output ports, such as HDMI ARC, optical, or RCA connections, which will be used to link it to the AV receiver.
- AV Receiver: Select a high-quality AV receiver that suits your audio preferences and room size. Look for a receiver that supports the audio formats you desire, such as Dolby Atmos or DTS:X, and has sufficient input and output ports to accommodate your devices and speakers.
- Surround Sound Speakers: Choose a set of surround sound speakers that complement your AV receiver and fit your room layout. Consider the number of speakers you need for your desired audio setup, whether it’s a 5.1, 7.1, or more advanced configuration.
- Speaker Wire: Acquire high-quality speaker wire of the appropriate length to connect your speakers to the AV receiver. Opt for wire that minimizes signal loss and interference, ensuring optimal audio performance.
- Subwoofer (Optional): If you desire deep, resonant bass, include a subwoofer in your setup. Ensure that the subwoofer is compatible with your AV receiver and speakers, and position it strategically within your room for optimal bass response.
- HDMI, Optical, or RCA Cables: Depending on the available audio output ports on your LG TV and the input options on your AV receiver, gather the necessary cables to establish the audio connection between the TV and the receiver.
- Power Cords and Batteries: Ensure that you have the required power cords for the AV receiver and speakers, as well as batteries for any remote controls that accompany the equipment.
By assembling these essential components, you’ll be well-prepared to proceed with the seamless integration of your LG TV and surround sound system using an AV receiver. With the equipment in hand, you’re one step closer to unlocking the full potential of your home audiovisual setup.
Step 2: Connect the AV Receiver to the LG TV
Now that you have gathered all the necessary equipment, it’s time to establish the vital connection between your LG TV and the AV receiver. This pivotal link will serve as the gateway for transmitting audio signals from your television to the surround sound system, enabling you to experience immersive, high-fidelity sound. Follow these steps to seamlessly connect the AV receiver to your LG TV:
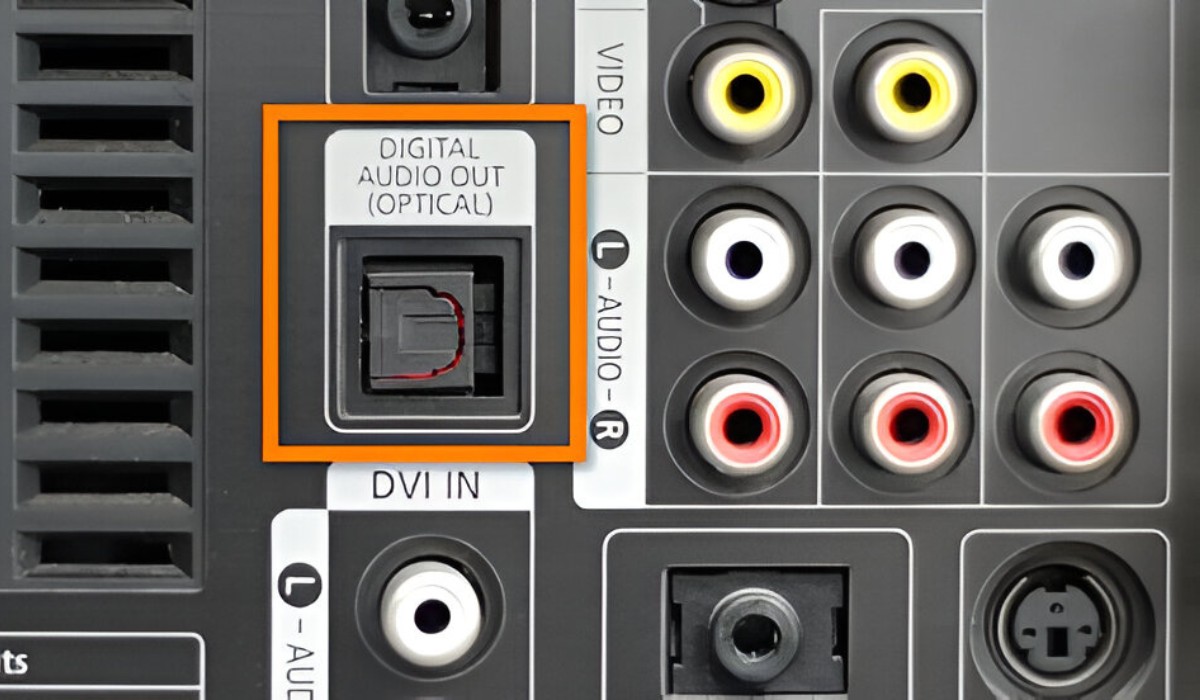
- Identify the Audio Output Port on Your LG TV: Examine your LG TV to locate the audio output ports. Common options include HDMI ARC, optical, and RCA connections. Choose the port that best suits your setup and is supported by your AV receiver.
- Choose the Corresponding Input on the AV Receiver: On your AV receiver, identify the input port that corresponds to the audio output port you selected on the TV. This may involve using HDMI, optical, or RCA cables, depending on the available connections on both devices.
- Connect the TV and Receiver Using the Chosen Cable: With the appropriate cable in hand, establish the physical connection between the LG TV and the AV receiver. Ensure a secure and snug fit for the cable connections to minimize signal interference and maintain audio integrity.
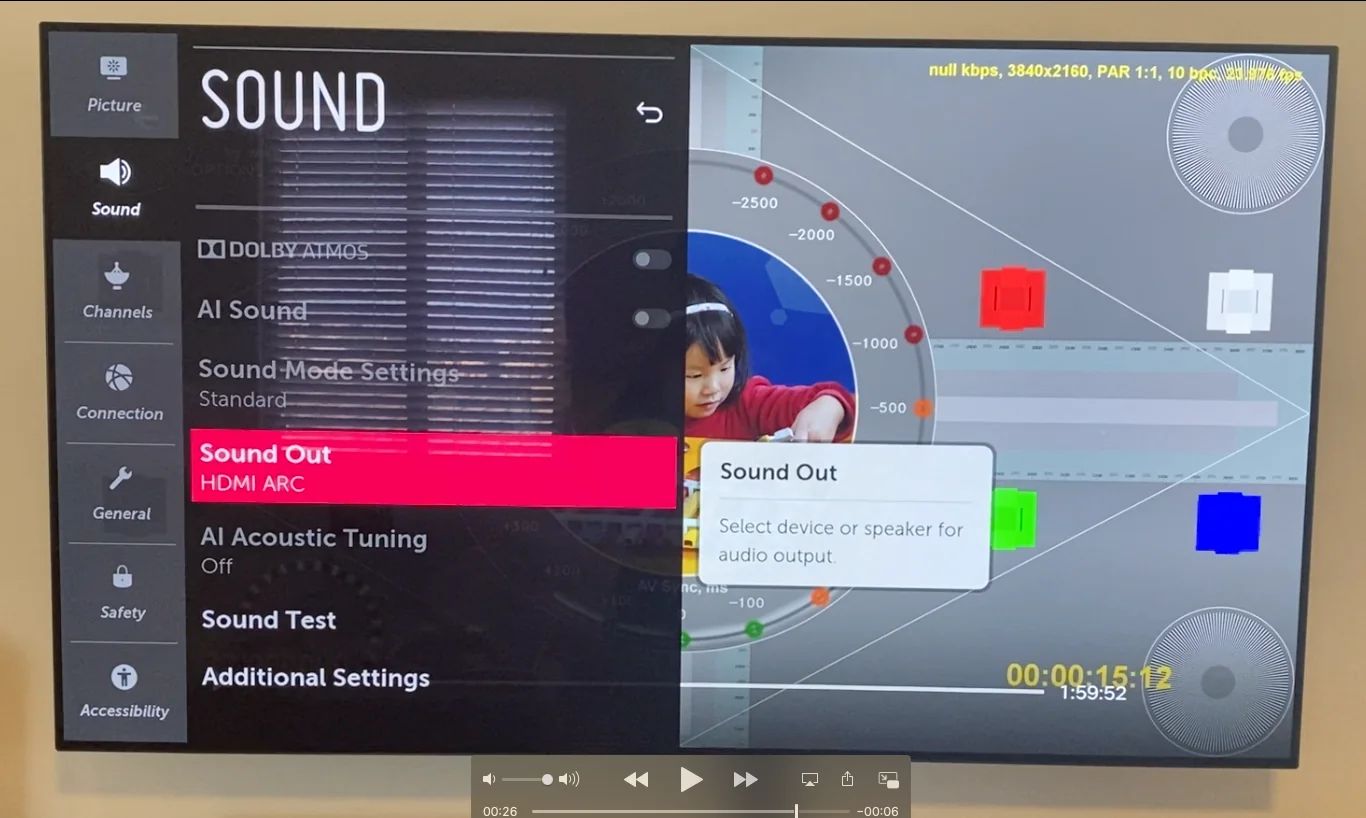
- Configure the TV Audio Settings: Access the audio settings on your LG TV and select the appropriate output source. Depending on your TV model, you may need to enable the audio output port to ensure that sound is transmitted to the connected AV receiver.
- Configure the AV Receiver Input Settings: On your AV receiver, designate the input source that corresponds to the connected TV. This step ensures that the receiver recognizes the audio signal being transmitted from the television, allowing it to process the sound accordingly.
- Test the Audio Connection: Play a sample audio or video clip on your LG TV to verify that the audio is being transmitted to the AV receiver. Listen for clear, balanced sound emanating from the connected speakers, indicating that the audio setup is functioning as intended.
By establishing a robust connection between your LG TV and the AV receiver, you pave the way for a seamless audio transmission that will enrich your viewing experience. With this critical link in place, you’re ready to proceed to the next step of connecting the speakers to the AV receiver, bringing you closer to the immersive surround sound experience you desire.
Step 3: Connect the Speakers to the AV Receiver
With the AV receiver successfully linked to your LG TV, the next crucial step is to connect the speakers to the receiver, creating a unified audio system that delivers immersive surround sound. Properly configuring the speaker connections ensures that audio signals are distributed effectively, enveloping you in a captivating auditory experience. Follow these steps to connect the speakers to the AV receiver:
- Position the Speakers: Determine the optimal placement for each speaker within your viewing area. Consider the speaker configuration you’ve chosen, whether it’s a 5.1, 7.1, or more advanced setup, and position the speakers accordingly for balanced sound distribution.
- Identify the Speaker Terminals on the AV Receiver: Locate the speaker terminals on the back of the AV receiver. These terminals are typically labeled to correspond with the different speaker channels, such as front left, front right, center, surround left, surround right, and subwoofer.
- Prepare the Speaker Wire: Strip the insulation from the ends of the speaker wire to expose the bare conductors. Ensure that the wire length is sufficient to reach from the AV receiver to each speaker location while allowing some slack for adjustments.
- Connect the Speaker Wire to the AV Receiver: For each speaker, identify the corresponding speaker terminal on the AV receiver and connect the stripped ends of the speaker wire. Ensure a secure connection by fastening the wire to the terminals and avoiding any stray strands that could cause signal interference.
- Label the Speaker Wires: To avoid confusion and ensure accurate speaker placement, consider labeling the speaker wires with the corresponding speaker channel (e.g., front left, front right) before routing them to their respective speaker locations.
- Connect the Speaker Wire to the Speakers: At each speaker location, connect the labeled speaker wire to the corresponding terminals on the speakers. Ensure a secure and proper connection to maintain optimal audio performance.
- Verify the Speaker Connections: Double-check all speaker connections to confirm that each speaker is correctly linked to the AV receiver. This meticulous approach helps prevent wiring errors that can impact sound quality and spatial imaging.
By meticulously connecting the speakers to the AV receiver, you establish the foundation for a cohesive and dynamic surround sound system. With the speakers seamlessly integrated into the audio setup, you’re poised to embark on the next steps of configuring the AV receiver and testing the surround sound system, bringing you closer to a captivating audiovisual experience.
Step 4: Set Up the AV Receiver
Now that the speakers are connected to the AV receiver, it’s time to set up the receiver to optimize the audio performance and tailor the sound to your preferences. The AV receiver serves as the central control unit for your surround sound system, providing a range of audio processing and customization options. Follow these essential steps to configure and fine-tune your AV receiver:
- Position the AV Receiver: Choose a well-ventilated and easily accessible location for the AV receiver, ensuring that it’s within reach for making adjustments and accessing the controls. Avoid placing the receiver in enclosed spaces or near heat sources that can affect its performance.
- Power On the AV Receiver: Connect the power cord to the AV receiver and plug it into a reliable power outlet. Power on the receiver and familiarize yourself with the control panel, display, and remote to prepare for the setup process.
- Access the On-Screen Setup Menu: Many modern AV receivers feature an on-screen setup menu that guides you through the initial configuration process. Use your TV display to navigate the receiver’s settings and customize the audio parameters to suit your preferences.
- Configure Speaker Settings: Within the AV receiver’s setup menu, designate the speaker configuration based on the layout of your surround sound system. Specify the number of speakers, subwoofer presence, and their respective sizes to ensure accurate audio reproduction.
- Calibrate Speaker Levels: Utilize the receiver’s built-in speaker calibration system, if available, to automatically adjust the volume levels and optimize the sound output for each speaker. This process ensures balanced audio across all channels and compensates for room acoustics.
- Adjust Audio Settings: Explore the receiver’s audio settings to customize the sound characteristics to your liking. Options may include equalizer presets, surround sound modes, dialogue enhancement, and dynamic range control, allowing you to tailor the audio to different content types.
- Enable Room Correction (Optional): Some AV receivers offer advanced room correction features that analyze room acoustics and apply digital processing to optimize audio playback. Follow the receiver’s instructions to utilize this feature for enhanced sound quality.
- Save and Confirm Settings: Once you’ve configured the AV receiver to your satisfaction, save the settings and confirm the adjustments. Take note of any specific configurations you’ve applied, such as custom EQ settings or preferred surround sound modes.
By meticulously setting up the AV receiver, you fine-tune the audio parameters and establish the foundation for an exceptional surround sound experience. With the receiver optimized to your preferences, you’re ready to put the system to the test and immerse yourself in the captivating world of multi-dimensional audio.
Step 5: Test the Surround Sound System
With the AV receiver and speakers configured, it’s time to put your newly integrated surround sound system to the test. Verifying the functionality and performance of the system ensures that you’ll experience immersive audio that complements your visual entertainment. Follow these steps to test and fine-tune your surround sound setup:
- Select an Audio Source: Choose a suitable audio source to evaluate the surround sound system. This can include a movie with rich soundscapes, a music track that showcases spatial audio, or a dedicated surround sound test pattern.
- Engage Surround Sound Content: Play content that is specifically designed to showcase surround sound capabilities. Look for movies, TV shows, or music recordings that feature dynamic sound mixing and utilize multiple audio channels for a captivating auditory experience.
- Verify Speaker Output: As the content plays, verify that audio is emanating from each speaker in the surround sound configuration. Listen for distinct sound effects, spatial imaging, and seamless transitions as the audio moves across different channels.
- Assess Dialogue Clarity: Pay attention to the clarity of dialogue and vocal performances, ensuring that the center channel speaker accurately reproduces speech and maintains clear audio during on-screen conversations.
- Evaluate Low-Frequency Response: If a subwoofer is part of your setup, assess its performance by listening for impactful, well-defined bass during action sequences, music with low-frequency content, and other audio that demands robust low-end output.
- Experiment with Surround Sound Modes: Explore the different surround sound modes offered by your AV receiver to determine which settings best suit the content you’re experiencing. Test modes such as Dolby Atmos, DTS:X, and other immersive audio processing options to discern their impact on the overall soundstage.
- Make Adjustments as Needed: If you notice any imbalances in the audio, inconsistent speaker output, or other anomalies, consider revisiting the AV receiver settings to fine-tune the audio parameters. This may involve adjusting speaker levels, equalizer settings, or room correction features.
- Confirm Overall Satisfaction: After testing the surround sound system with various audio sources, confirm that the audio performance meets your expectations. Take note of any specific adjustments or preferences that enhance your listening experience.
By thoroughly testing the surround sound system, you ensure that it delivers the captivating audio immersion you desire. With each speaker contributing to a cohesive and enveloping auditory experience, you’re ready to enjoy a new dimension of audiovisual entertainment right in the comfort of your own home.
Conclusion
Congratulations on successfully connecting your LG TV to a surround sound system using an AV receiver. By following the detailed steps outlined in this guide, you’ve embarked on a journey to elevate your home entertainment experience with immersive, multi-dimensional audio. The integration of your TV, AV receiver, and surround sound speakers has laid the groundwork for a captivating audiovisual setup that brings the theater experience into your living space.
With the essential equipment gathered and meticulously connected, you’ve established a cohesive audio system that delivers rich, dynamic sound across multiple channels. The careful positioning of speakers, fine-tuning of the AV receiver, and meticulous testing of the surround sound system have culminated in an audio setup that brings movies, music, and other content to life in a whole new way.
As you enjoy the fruits of your labor, take the time to appreciate the intricate details of sound design, the spatial imaging of audio effects, and the seamless integration of dialogue and music. Whether you’re immersed in a thrilling action sequence, captivated by a cinematic masterpiece, or simply enjoying your favorite music, the enveloping soundstage created by your surround sound system enriches every moment.
As you continue to explore the capabilities of your newly integrated audio setup, don’t hesitate to experiment with different content types, audio sources, and surround sound modes offered by your AV receiver. Fine-tuning the system to your preferences and discovering the nuances of multi-channel audio further enhances your home entertainment experience.
With your LG TV now seamlessly connected to a surround sound system through an AV receiver, you’ve unlocked the potential for a captivating audiovisual journey within the comfort of your home. Embrace the power of immersive sound, and let your surround sound system transport you to new realms of audio excellence as you indulge in the magic of home theater entertainment.