Introduction
Welcome to this comprehensive guide on how to connect two DisplayPort monitors to a Thunderbolt dock! In today’s digital age, having multiple monitors can greatly enhance your productivity and multitasking capabilities. Whether you are a content creator, a professional designer, or simply a tech enthusiast, knowing how to effectively connect and configure multiple monitors is essential.
Thunderbolt technology has revolutionized the way we connect and transfer data between devices. With its high-speed capabilities and versatility, Thunderbolt docks have become a popular choice for expanding connectivity options for laptops and desktop computers. By utilizing Thunderbolt docks, you can easily connect a wide range of peripherals, including multiple monitors.
DisplayPort is a widely adopted video interface standard that delivers high-quality visuals and audio. It allows for the transmission of high-resolution content and supports multi-monitor setups. By using DisplayPort connectors, you can connect your monitors to the Thunderbolt dock and take advantage of its powerful features.
Choosing the right Thunderbolt dock is crucial to ensure optimal performance and compatibility with your devices. There are various factors to consider, such as the number of ports, resolution support, power delivery capabilities, and additional features. By understanding your specific requirements and researching the available options, you can make an informed decision and select the Thunderbolt dock that suits your needs.
In this guide, we will walk you through the step-by-step process of setting up and connecting two DisplayPort monitors to a Thunderbolt dock. We will cover everything from cable connections to display configurations, as well as troubleshooting common issues that you may encounter along the way.
So, if you are ready to enhance your workstation and unlock the full potential of your Thunderbolt dock, let’s dive right in and learn how to connect two DisplayPort monitors!
Understanding Thunderbolt Technology
Thunderbolt technology is a high-speed data transfer interface that allows for fast and versatile connections between devices. It was initially developed by Intel in collaboration with Apple and has since become a standard feature in many laptops and desktop computers.
One of the key advantages of Thunderbolt technology is its ability to support multiple types of data transfers simultaneously. This means that you can connect and use various peripherals, such as external hard drives, displays, audio interfaces, and more, all through a single Thunderbolt port.
Thunderbolt utilizes a combination of DisplayPort and PCIe (Peripheral Component Interconnect Express) technologies to provide fast data transfer speeds. In its latest iteration, Thunderbolt 4, it offers a maximum data transfer rate of up to 40 Gbps.
Another important feature of Thunderbolt technology is its ability to provide power delivery. This means that you can not only transfer data but also charge your devices using the same Thunderbolt connection. It eliminates the need for separate power adapters, making for a cleaner and more organized workspace.
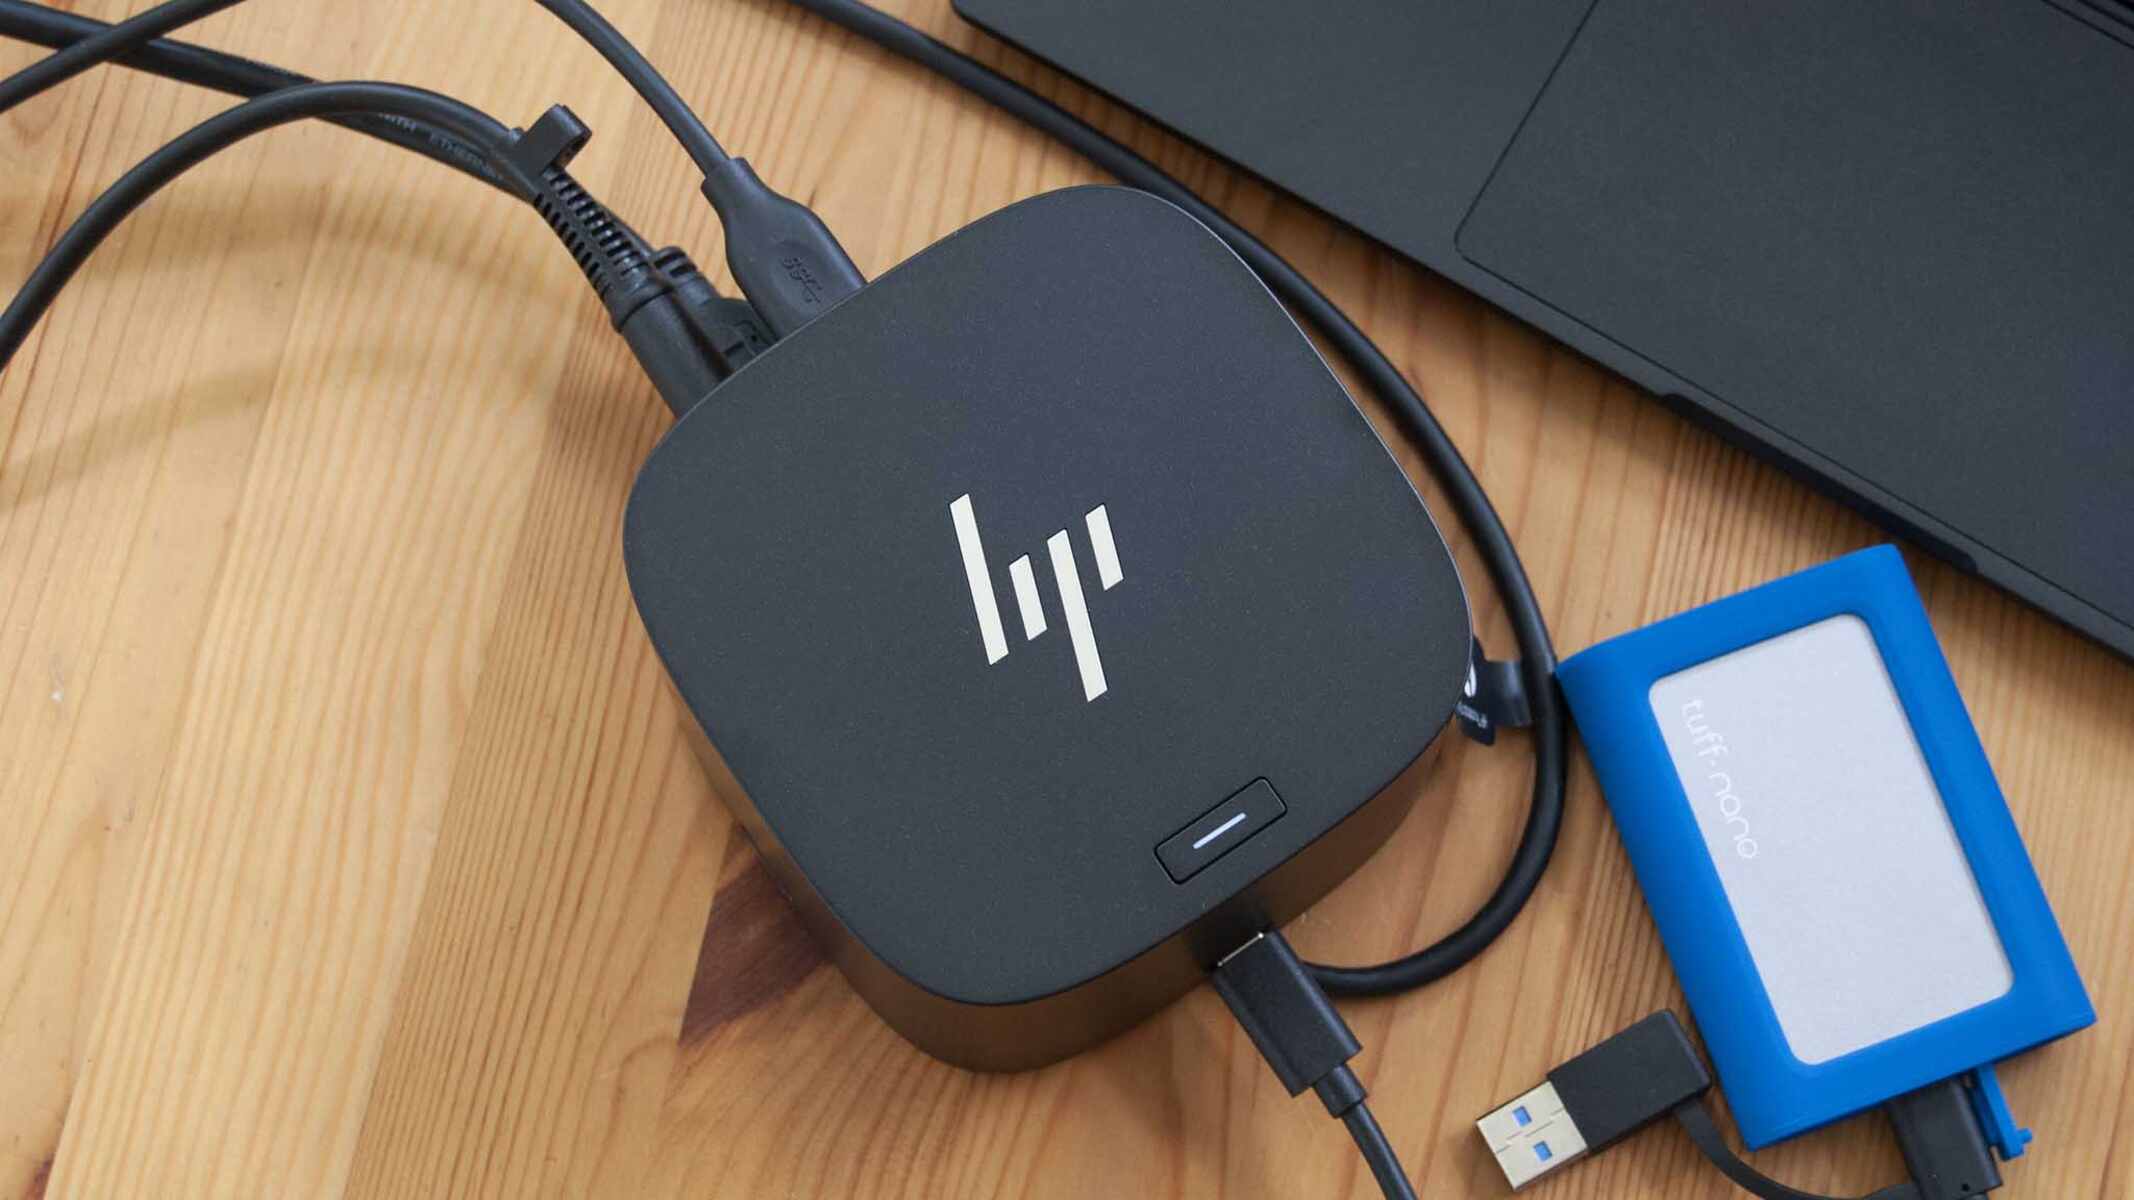
Thunderbolt docks are the perfect companion for laptops and desktop computers, as they provide additional ports and expand connectivity options. They act as a hub, allowing you to connect multiple peripherals, including monitors, USB devices, Ethernet cables, and more, to your computer through a single Thunderbolt connection.
Understanding the specifications of Thunderbolt technology is crucial when selecting a Thunderbolt dock. It is important to consider factors such as the number of Thunderbolt ports, power delivery capabilities, and the compatibility with your specific devices.
With its high-speed data transfer, power delivery capabilities, and the ability to connect multiple devices through a single port, Thunderbolt technology has become a game-changer in the world of connectivity. By harnessing the power of Thunderbolt, you can significantly enhance your productivity and streamline your workflow.
In the following sections, we will focus on connecting two DisplayPort monitors to a Thunderbolt dock. We will explore the details of DisplayPort technology and guide you through the step-by-step process of setting up your dual monitor configuration.
What is DisplayPort?
DisplayPort is a digital video and audio interface that is commonly used for connecting displays to computers, laptops, and other multimedia devices. It was developed by the Video Electronics Standards Association (VESA) as a successor to older standards like VGA and DVI.
One of the key advantages of DisplayPort is its ability to support high-quality video and audio signals. It offers a high bandwidth, allowing for the transmission of uncompressed video and audio data, resulting in sharp, vibrant visuals and clear, immersive sound.
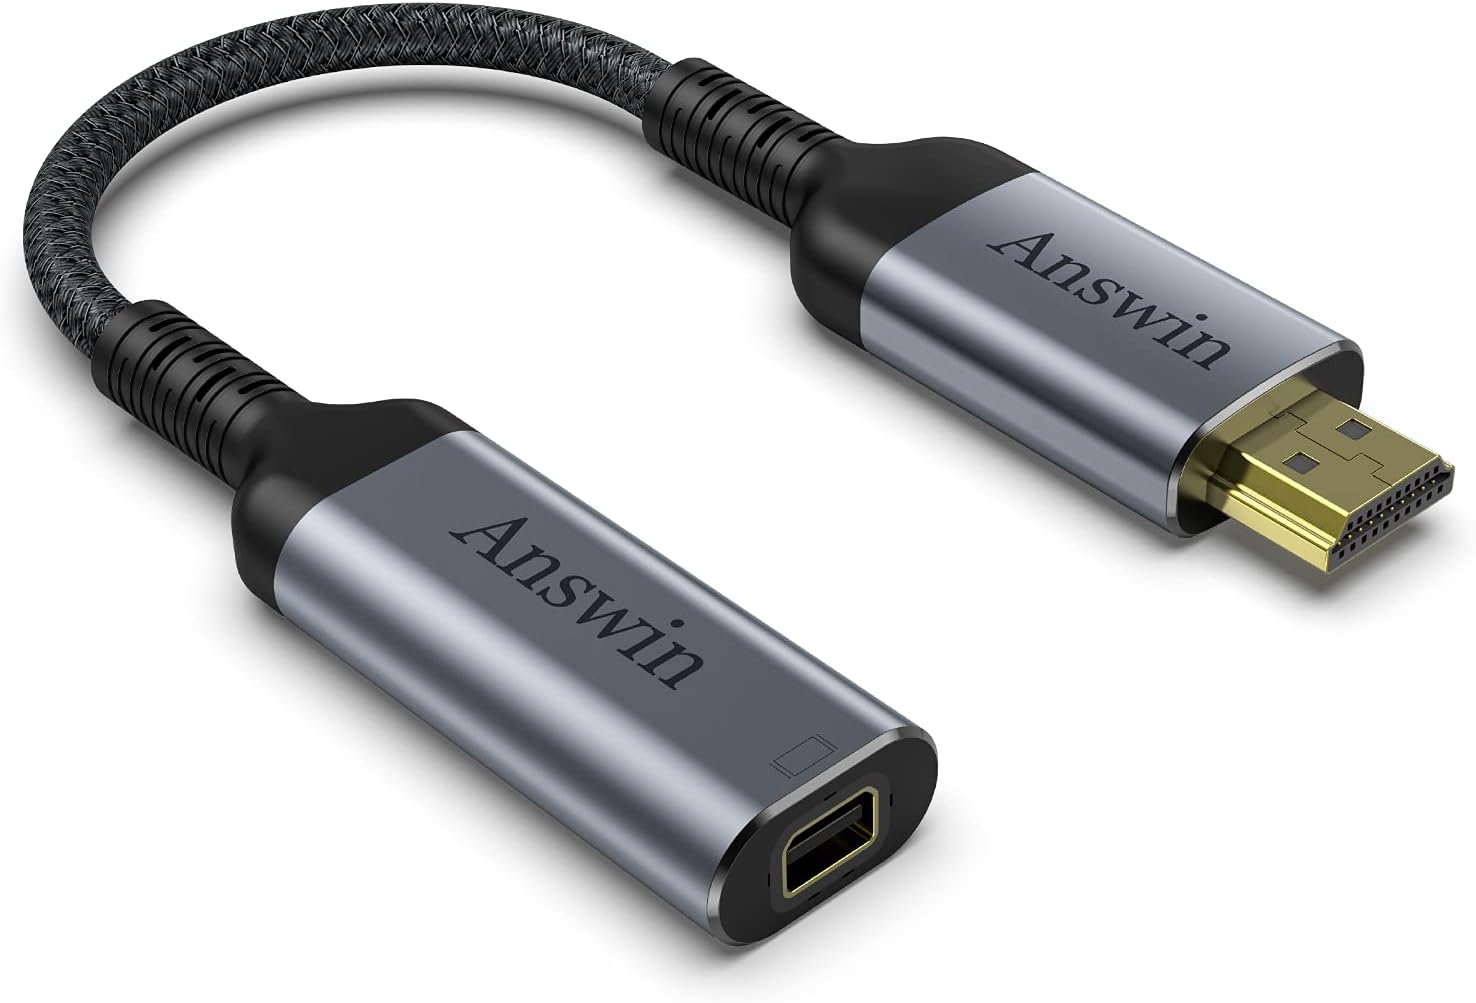
DisplayPort connectors come in different sizes, including the standard DisplayPort, mini DisplayPort, and USB Type-C with DisplayPort alternate mode. These connectors can be found on a wide range of devices, from laptops and desktop computers to monitors, TVs, and projectors.
One of the notable features of DisplayPort is its ability to support daisy-chaining. This means that you can connect multiple DisplayPort monitors or devices in a chain, using a single cable from your computer or Thunderbolt dock. This simplifies cable management and reduces clutter on your desk.
Furthermore, DisplayPort supports multiple monitor configurations, allowing you to connect multiple displays to a single computer or Thunderbolt dock. Depending on the version of DisplayPort and the capabilities of your graphics card, you can set up dual, triple, or even quad monitor setups.
DisplayPort also offers support for various resolutions, including 4K, 5K, and even 8K. This makes it an ideal choice for users who require high-resolution displays for tasks such as video and photo editing, gaming, and content creation.
In terms of audio capabilities, DisplayPort supports both digital and analog audio. It can transmit multi-channel audio signals, including formats like Dolby TrueHD and DTS-HD Master Audio. You can connect speakers or headphones directly to your DisplayPort monitor or use a separate audio cable for external audio devices.
Overall, DisplayPort is a versatile and powerful video interface that provides high-quality visual and audio experiences. Its compatibility with a wide range of devices and support for multiple monitors make it an excellent choice for those looking to create a flexible and immersive computing or entertainment setup.
Now that we have an understanding of DisplayPort, let’s move on to selecting the right Thunderbolt dock for your dual monitor configuration.
Choosing the Right Thunderbolt Dock
When it comes to choosing a Thunderbolt dock for connecting two DisplayPort monitors, there are a few factors to consider to ensure compatibility and optimal performance.
Firstly, you need to think about the number of Thunderbolt ports you require. If you have multiple Thunderbolt-enabled devices that you want to connect simultaneously, consider a dock with multiple Thunderbolt ports. This will allow you to expand your connectivity options without the need for additional hubs or adapters.
Power delivery capabilities are also an important consideration. If you want your Thunderbolt dock to charge your laptop or other devices while connected, look for a dock that supports power delivery. This will eliminate the need for extra power adapters and simplify your setup.
Next, check the maximum resolution supported by the Thunderbolt dock. Ensure that it aligns with the resolution capabilities of your DisplayPort monitors. This is especially crucial if you are using high-resolution monitors like 4K or 8K displays.
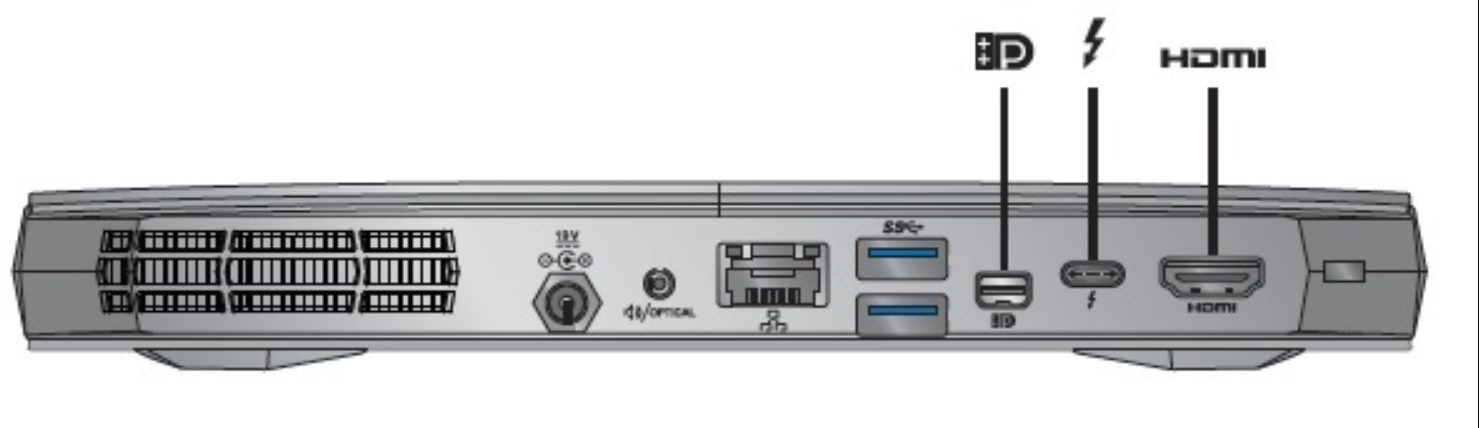
Consider the additional ports and features offered by the Thunderbolt dock. Common ports to look for include USB-A and USB-C, HDMI, Ethernet, and audio jacks. Having these extra ports can greatly expand your connectivity options and make your setup more versatile.
Compatibility with your specific devices is essential. Ensure that the Thunderbolt dock you choose is compatible with your computer’s operating system, whether it’s Windows or macOS. Additionally, double-check that your graphics card supports multiple monitors and the desired resolution to avoid any compatibility issues.
Budget is another factor to consider. Thunderbolt docks vary in price, and more expensive options often come with additional features and higher data transfer rates. Determine your budget and choose a Thunderbolt dock that strikes a balance between your requirements and affordability.
Lastly, it’s always a good idea to read reviews and check customer feedback before making a final decision. Look for reputable brands and models that have positive reviews and a good track record of performance and reliability.
By taking these factors into account, you can ensure that you choose the right Thunderbolt dock for your dual DisplayPort monitor setup. A well-chosen dock will provide seamless connectivity, optimal video and audio quality, and an overall enhanced user experience.
With the Thunderbolt dock selected, let’s now move on to setting up the dock and connecting the first DisplayPort monitor.
Setting Up the Thunderbolt Dock
Setting up a Thunderbolt dock for your dual DisplayPort monitor configuration involves a few simple steps. Here’s a step-by-step guide to help you get started:
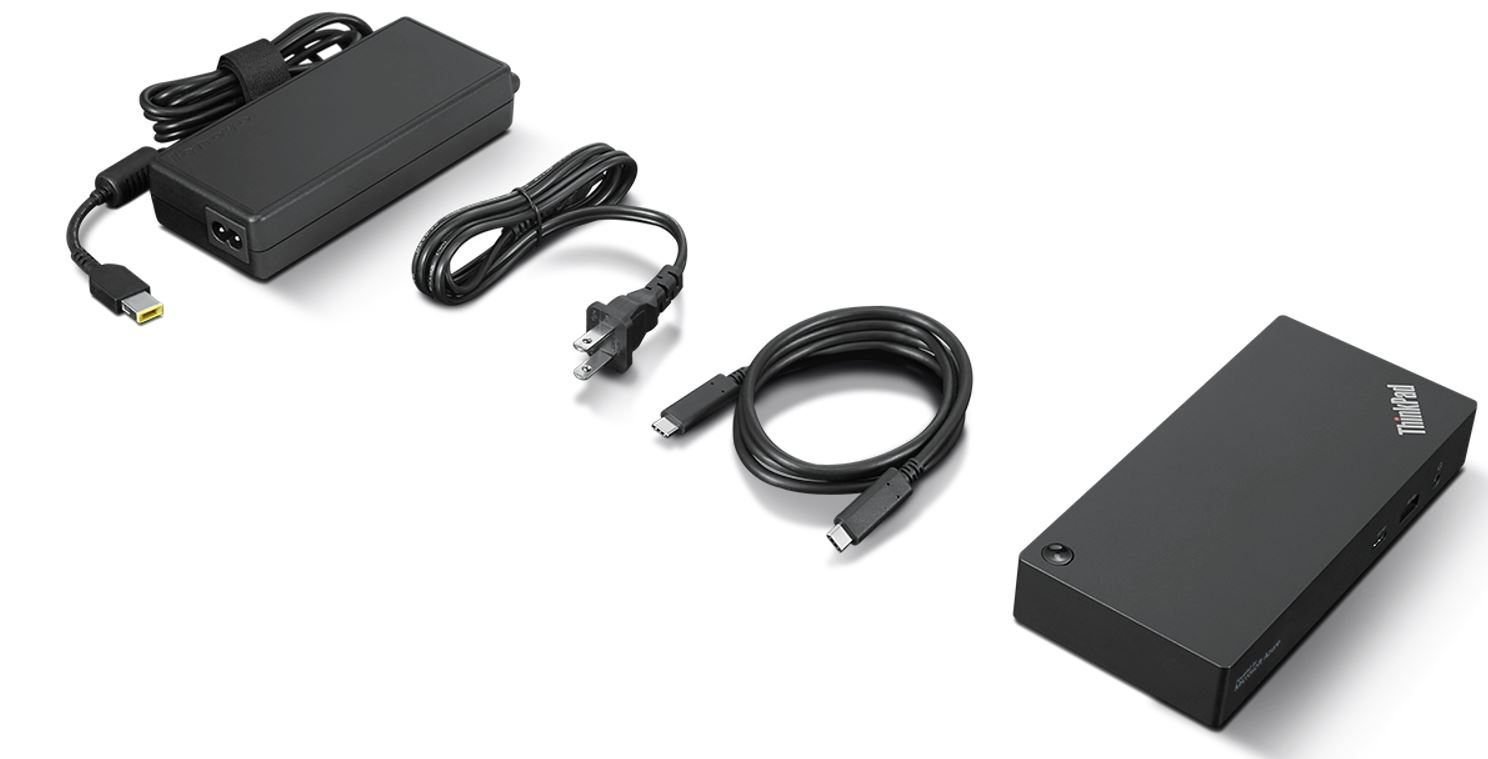
1. Start by unpacking the Thunderbolt dock and all its accessories. Ensure that you have the necessary cables, including the Thunderbolt cable, power adapter, and any additional cables required for your monitors.
2. Connect one end of the Thunderbolt cable to the Thunderbolt port on your computer or laptop. Depending on the model, the Thunderbolt port may have a different shape, such as a USB-C shape.
3. Connect the other end of the Thunderbolt cable to the Thunderbolt port on the dock. Make sure to firmly push the connection in place to ensure a secure connection.
4. If your Thunderbolt dock has power delivery capabilities, connect the provided power adapter to the dock and plug it into a power outlet. This will provide power to the dock and any connected devices.
5. Now it’s time to connect the first DisplayPort monitor. Take the DisplayPort cable and connect one end to the DisplayPort output on the Thunderbolt dock.
6. Connect the other end of the DisplayPort cable to the DisplayPort input on the back of your first monitor. Ensure that the cable is firmly plugged into both the dock and the monitor.
7. If your Thunderbolt dock supports daisy-chaining, you can connect the second DisplayPort monitor to the first one using a separate DisplayPort cable. This will allow you to have a daisy-chained monitor setup. Alternatively, if your dock has multiple DisplayPort outputs, you can connect the second monitor directly to one of those outputs using another DisplayPort cable.
8. Once both monitors are connected, power them on and switch to the appropriate input source on each monitor. Use the monitor’s menu options or buttons to select the DisplayPort input.
9. Finally, make sure your computer recognizes the connected monitors. Go to your computer’s display settings and check if both monitors are detected. If they are not, try restarting your computer to allow it to detect the monitors.
That’s it! You have successfully set up your Thunderbolt dock and connected the first DisplayPort monitor. Now, it’s time to move on to connecting the second DisplayPort monitor and configuring your display settings.
Connecting the First DisplayPort Monitor
In this section, we will guide you through the process of connecting the first DisplayPort monitor to your Thunderbolt dock. Follow these steps to ensure a smooth and successful setup:
1. Start by locating the DisplayPort output on the Thunderbolt dock. It is usually labeled as “DP” or “DisplayPort”. Take note of its location for easier cable connection.
2. Connect one end of the DisplayPort cable to the DisplayPort output on the Thunderbolt dock. Make sure to securely plug it in to avoid any loose connections.
3. Locate the DisplayPort input on the back or side of your first monitor. It is typically marked as “DP” or “DisplayPort”. Insert the other end of the DisplayPort cable into the DisplayPort input of the monitor.
4. Ensure that the cable is securely connected to both the Thunderbolt dock and the monitor. Gently twist the cable connection clockwise to secure it in place.
5. Power on your first monitor by pressing the power button. Wait for a few seconds for it to fully boot up.
6. Now, switch your attention to your computer or laptop. Go to the display settings of your operating system. On Windows, you can right-click the desktop and select “Display settings”. On macOS, open “System Preferences” and click on “Displays”.
7. In the display settings, you should see two detected displays – your computer’s built-in screen and the newly connected DisplayPort monitor. You can rearrange their positions by clicking and dragging the monitor icons to match the physical layout of your workspace.
8. Adjust the resolution and other display settings according to your preferences. You can select the desired resolution for the monitor and choose the appropriate scale or display mode.
9. Test the connection and ensure that the first DisplayPort monitor is functioning correctly. Drag windows or applications from your computer’s screen to the monitor and verify that everything appears as expected.
Congratulations! You have successfully connected the first DisplayPort monitor to your Thunderbolt dock. Now, it’s time to move on to connecting the second DisplayPort monitor and configuring your display settings to complete your dual monitor setup.
Connecting the Second DisplayPort Monitor
In this section, we will guide you through the process of connecting the second DisplayPort monitor to your Thunderbolt dock. Follow these steps to ensure a seamless setup:
1. Take note of the available DisplayPort outputs on your Thunderbolt dock. Identify which one you will be using to connect the second monitor.
2. If you have daisy-chaining support on your Thunderbolt dock, connect one end of a DisplayPort cable to the DisplayPort output of the first monitor.
3. Connect the other end of the DisplayPort cable to the DisplayPort input of the second monitor. Ensure a secure connection by firmly plugging in the cable.
4. If your Thunderbolt dock doesn’t support daisy-chaining or you prefer not to use it, connect a separate DisplayPort cable from an available DisplayPort output on the dock to the DisplayPort input of the second monitor.
5. Power on your second monitor and wait for it to boot up. This may take a few seconds.
6. Go to your computer’s display settings as mentioned earlier. Both the first and second monitors should now be detected.
7. In the display settings, you can choose how you want to use the second monitor. You have options such as extending your desktop, duplicating your screen, or using the second monitor as the primary display.
8. Adjust the position and orientation of the second monitor in the display settings. Drag and drop the monitor icons to match the physical arrangement of your workspace.
9. Make sure to set the correct resolution and other display settings for the second monitor. This will ensure that the visuals appear sharp and consistent across both screens.
10. Test the connection by moving windows or applications between the two monitors. Verify that everything functions smoothly and that both monitors are displaying the content as expected.
Congratulations! You have successfully connected the second DisplayPort monitor to your Thunderbolt dock. Your dual monitor setup is now complete.
Remember, you can further personalize your display settings and explore additional features depending on your operating system and graphics card capabilities. Enjoy the expanded workspace, increased productivity, and immersive experience offered by your dual DisplayPort monitor setup!
Configuring Display Settings
Once you have successfully connected both DisplayPort monitors to your Thunderbolt dock, it’s time to configure the display settings to optimize your dual monitor setup. Follow these steps to customize your display settings:
1. Open the display settings on your computer’s operating system. On Windows, right-click the desktop and select “Display settings.” On macOS, go to “System Preferences” and click on “Displays.”
2. In the display settings, you will see both connected displays (monitors) listed. Identify which display is labeled as “1” or “2” based on their physical arrangement.
3. Drag and drop the monitor icons on the display settings screen to match the physical layout of your workspace. This ensures that moving the cursor across displays feels natural.
4. You can adjust the resolution for each display individually. Select the desired resolution from the drop-down menu. Choose the maximum resolution supported by your monitors to ensure optimal image quality.
5. If necessary, modify the scale or display mode for each monitor. Scaling adjusts the size of text and objects on each screen, while display mode changes the arrangement and orientation of the displays. Experiment with different settings to find what works best for you.
6. Consider setting one display as the primary monitor. The primary monitor is where the system tray, desktop icons, and certain program windows will initially open. Right-click the desired monitor icon and select “Make this my main display” or a similar option based on your operating system.
7. Some operating systems offer additional display customization options. Explore advanced settings such as color calibration, orientation, and positioning to fine-tune your dual monitor experience.
8. Test the configuration by moving windows and applications between displays. Check for any alignment issues or discrepancies in window placement. If needed, adjust the position of the monitors or adjust the display settings accordingly.
9. Take advantage of features like extended desktop mode, which allows you to use both monitors as one continuous workspace. This enables multitasking, where you can have different applications open on each monitor simultaneously.
10. Lastly, save your display settings and close the display settings window. Your custom configuration is now in effect, and your dual DisplayPort monitor setup is ready for use.
By configuring your display settings to align with your preferences and workflow, you can maximize productivity, enhance visual clarity, and enjoy a seamless dual monitor experience.
Now that your display settings are configured, you can fully utilize the power of your dual DisplayPort monitor setup. Enjoy the expanded screen real estate and improved multitasking capabilities to boost your productivity!
Troubleshooting and Common Issues
While setting up and configuring your dual DisplayPort monitor setup with a Thunderbolt dock, you may encounter some common issues. Here are a few troubleshooting steps to help you address these problems:
1. No display signal: If one or both of your monitors are not receiving a display signal, check the cable connections. Ensure that the DisplayPort cables are securely plugged into both the Thunderbolt dock and the monitors. Restart your computer and monitors to refresh the connection.
2. Incorrect display resolution: If the resolution of either monitor is not as expected, go to the display settings and verify that the correct resolution is selected. Ensure that both monitors are set to their native resolutions for the best visual experience.
3. Display alignment issues: If there are alignment discrepancies between the two monitors, go to the display settings and drag the monitor icons to match the physical layout of your workspace. Adjust the position and orientation of the monitors as needed.
4. Display duplication instead of extension: If both monitors are displaying the same content instead of extending the desktop, go to the display settings and make sure the “Extend these displays” option is selected. This allows you to use both monitors as one continuous workspace.
5. Daisy-chaining issues: If you are using daisy-chaining to connect the monitors, ensure that both monitors support daisy-chaining and that the cables are properly connected. It may also be necessary to update your Thunderbolt dock’s firmware or consult the manufacturer’s documentation for specific daisy-chaining instructions.
6. Graphics card or driver compatibility: In some cases, certain graphics cards or outdated display drivers may cause compatibility issues with dual monitor setups. Check for driver updates on the manufacturer’s website or try connecting the monitors to different Thunderbolt ports on the dock to rule out any port-specific issues.
7. Power delivery limitations: If your Thunderbolt dock supports power delivery to charge your laptop or other devices, ensure that the power requirements are within the dock’s specified limits. Some devices may require a higher wattage or separate power adapter to function properly.
8. Unsupported resolution: If one or both monitors are not displaying the desired resolution, double-check the maximum resolution supported by the Thunderbolt dock and the monitors. If necessary, update your graphics card driver or consult the manufacturer’s documentation for any specific resolution requirements.
9. Interference or color issues: If you experience interference or color inconsistencies with the display, make sure there are no electronic devices or magnetic sources near the monitors that may cause interference. Adjust the color settings in the display settings to correct any color discrepancies.
If you have exhausted these troubleshooting steps and the issues persist, consider contacting the manufacturer’s customer support for further assistance. They will be able to provide more specific guidance and help resolve any technical difficulties you may encounter.
By addressing these common issues and following the troubleshooting steps, you can ensure a smooth and problem-free experience with your dual DisplayPort monitor setup.
Conclusion
Congratulations on successfully setting up and configuring your dual DisplayPort monitor setup with a Thunderbolt dock! By following the steps outlined in this guide, you have expanded your screen real estate, enhanced productivity, and created a more immersive computing experience.
We began by understanding the power of Thunderbolt technology and the versatility of DisplayPort for high-quality video and audio transmission. We then discussed the important factors to consider when choosing a Thunderbolt dock, such as the number of ports, power delivery capabilities, resolution support, and compatibility with your devices.
Through step-by-step instructions, we guided you through the process of setting up the Thunderbolt dock, connecting the first DisplayPort monitor, and then adding the second monitor to your dual monitor configuration. We also discussed the importance of configuring your display settings to match your workspace layout and personal preferences.
Furthermore, we provided troubleshooting tips to address common issues that may arise during the setup process, such as no display signal, incorrect display resolution, alignment issues, and more. By following the troubleshooting steps, you can overcome these obstacles and ensure a smooth functioning dual monitor setup.
Remember, the dual DisplayPort monitor setup offers numerous benefits, including increased productivity, improved multitasking capabilities, and enhanced visual experiences. Take advantage of the extended screen real estate to streamline your workflow, create seamless multitasking scenarios, and immerse yourself in vibrant visuals.
As technology evolves, it’s always beneficial to stay up to date with the latest advancements and updates. Periodically check for firmware updates for your Thunderbolt dock, graphics card drivers, and monitor firmware to ensure optimal performance and compatibility.
We hope that this guide has provided you with the knowledge and guidance needed to connect and configure two DisplayPort monitors to a Thunderbolt dock successfully. Enjoy the expanded productivity and immersive experience that your dual monitor setup brings to your computing experience!