Introduction
Inserting a SIM card into your Samsung Galaxy S22 is a crucial step in setting up your new device for communication and connectivity. The SIM card, short for Subscriber Identity Module, is a small, removable card that securely stores your mobile subscriber information. It is essential for accessing your mobile network, making calls, sending texts, and using mobile data.
The process of inserting a SIM card into your Samsung Galaxy S22 is relatively straightforward, and by following a few simple steps, you can ensure that your device is ready to use. Whether you're setting up a new phone or replacing an existing SIM card, this guide will walk you through the process, ensuring that you can seamlessly integrate your SIM card with your Samsung Galaxy S22.
Properly inserting the SIM card into your Samsung Galaxy S22 is vital for ensuring that your device can connect to your mobile network and function as intended. With the right guidance, you can complete this process quickly and efficiently, allowing you to enjoy the full functionality of your Samsung Galaxy S22 without any hassle.
In the following steps, we will guide you through the process of locating the SIM card tray, ejecting the tray, inserting the SIM card, and reinserting the tray into your Samsung Galaxy S22. By following these steps, you will be able to successfully install or replace the SIM card in your device, setting the stage for seamless communication and connectivity.
Now, let's dive into the step-by-step process of inserting a SIM card into your Samsung Galaxy S22 to ensure that you can make the most of your mobile device's capabilities.
Step 1: Locate the SIM card tray
Locating the SIM card tray on your Samsung Galaxy S22 is the first step in the process of inserting or replacing your SIM card. The SIM card tray is a small, discreet slot on the side of your device that houses the SIM card and ensures its secure placement within the phone. To begin the process, you will need to identify the exact location of the SIM card tray on your Samsung Galaxy S22.
-
Examine the Sides of Your Device: Start by carefully examining the sides of your Samsung Galaxy S22. The SIM card tray is typically located on the upper part of the device's frame, often on the left or right side, depending on the specific model. It is important to handle the device gently and avoid applying excessive pressure during this step to prevent any accidental damage.
-
Use the User Manual for Reference: If you are having difficulty locating the SIM card tray, you can refer to the user manual that came with your Samsung Galaxy S22. The user manual provides detailed illustrations and descriptions of the device's features, including the location of the SIM card tray. This resource can be especially helpful for first-time smartphone users or individuals who are unfamiliar with the specific design of the Samsung Galaxy S22.
-
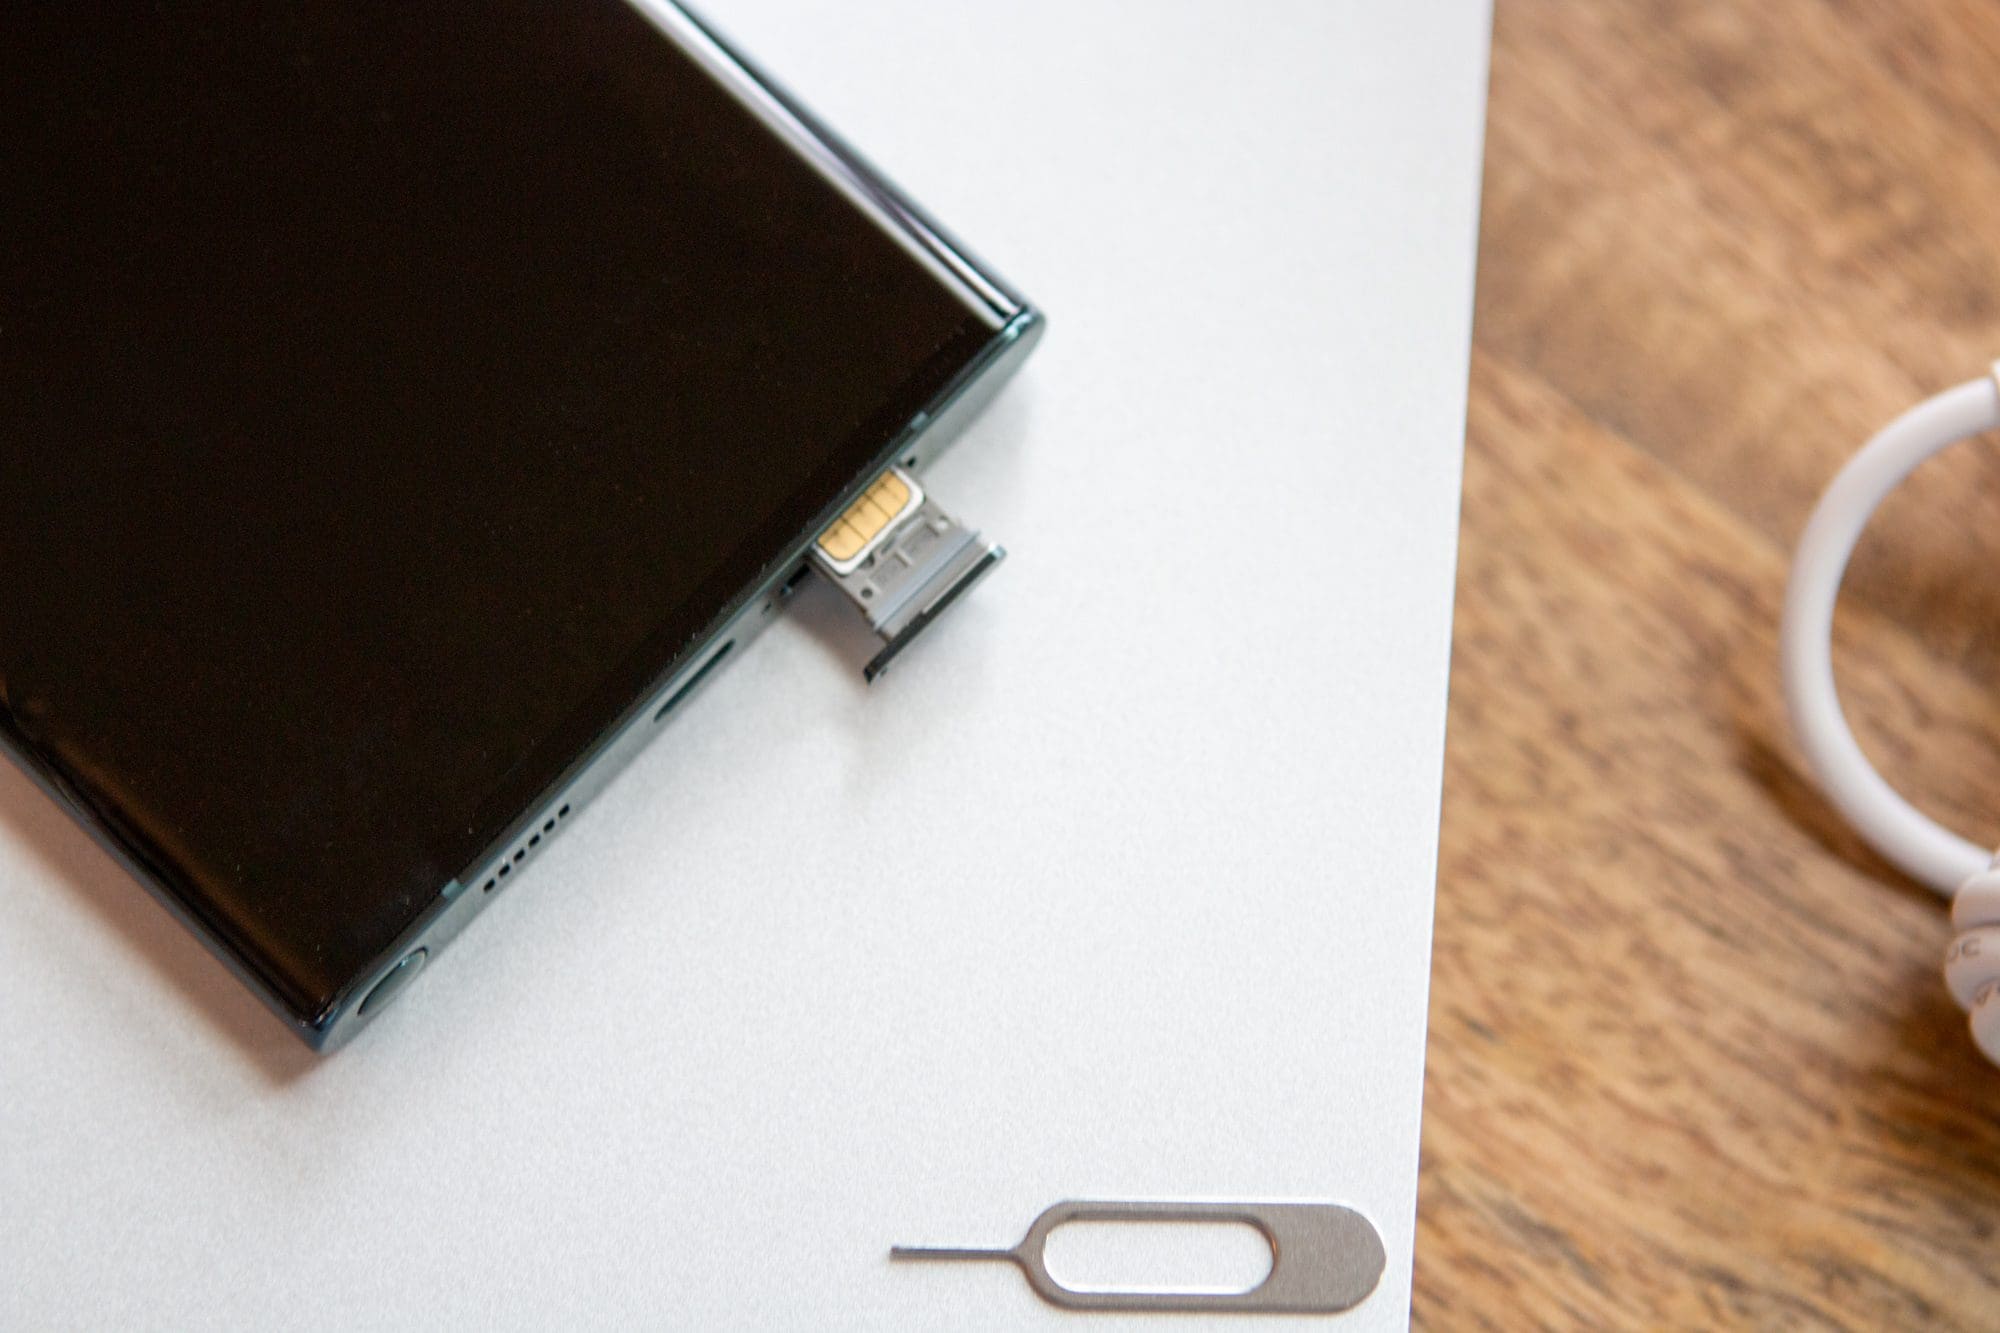
Check for a Small Pinhole: In some cases, the SIM card tray may be accompanied by a small pinhole adjacent to it. This pinhole is designed to accommodate the SIM card ejection tool, which is used to safely remove the SIM card tray from the device. By identifying the presence of this pinhole, you can confirm the location of the SIM card tray and prepare for the subsequent steps in the process.
By carefully examining the sides of your Samsung Galaxy S22, referencing the user manual, and checking for additional indicators such as a pinhole, you can effectively locate the SIM card tray on your device. Once you have successfully identified the SIM card tray, you will be ready to proceed to the next step of ejecting the tray in preparation for inserting or replacing the SIM card.
Step 2: Eject the SIM card tray
Ejecting the SIM card tray from your Samsung Galaxy S22 is a crucial step in the process of inserting or replacing your SIM card. The SIM card tray is designed to securely hold the SIM card within your device, and by ejecting the tray, you can gain access to the slot where the SIM card is inserted. This step requires precision and care to ensure that the SIM card and the device are not damaged in the process.
To eject the SIM card tray from your Samsung Galaxy S22, follow these steps:
-
Locate the SIM Card Tray: As discussed in the previous step, identify the exact location of the SIM card tray on your device. Once you have located the tray, ensure that your device is powered on and that the screen is active. It is important to handle the device gently and avoid applying excessive pressure.
-
Prepare the SIM Card Ejection Tool: The SIM card ejection tool, often provided by the manufacturer, is a small, pointed instrument designed specifically for ejecting the SIM card tray. If the ejection tool is not readily available, a paperclip can be used as an alternative. Ensure that the ejection tool is clean and free from any debris that could potentially interfere with the ejection process.
-
Insert the Ejection Tool: Identify the small pinhole adjacent to the SIM card tray. Insert the pointed end of the ejection tool into the pinhole, applying gentle and consistent pressure. It is essential to align the ejection tool with the pinhole to avoid causing damage to the device or the SIM card tray.
-
Apply Uniform Pressure: Once the ejection tool is properly inserted into the pinhole, apply uniform pressure in a straight line. This action will activate the internal mechanism that releases the SIM card tray from the device. It is important to exercise caution and avoid using excessive force to prevent any potential damage.
-
Remove the SIM Card Tray: Upon successful activation of the internal mechanism, the SIM card tray will be partially ejected from the device. Carefully remove the tray from the device, ensuring that it is fully detached and accessible for the next steps in the process.
By following these steps, you can effectively eject the SIM card tray from your Samsung Galaxy S22, preparing the device for the insertion or replacement of the SIM card. This careful and precise process ensures that the SIM card and the device remain undamaged, setting the stage for seamless communication and connectivity.
Step 3: Insert the SIM card
After successfully ejecting the SIM card tray from your Samsung Galaxy S22, the next crucial step is to insert the SIM card into the designated slot. This process ensures that your device is ready to establish a secure connection with your mobile network, allowing you to make calls, send texts, and access mobile data. Properly inserting the SIM card is essential for seamless communication and connectivity, and by following the steps outlined below, you can complete this task with precision and ease.
To insert the SIM card into your Samsung Galaxy S22, follow these steps:
-
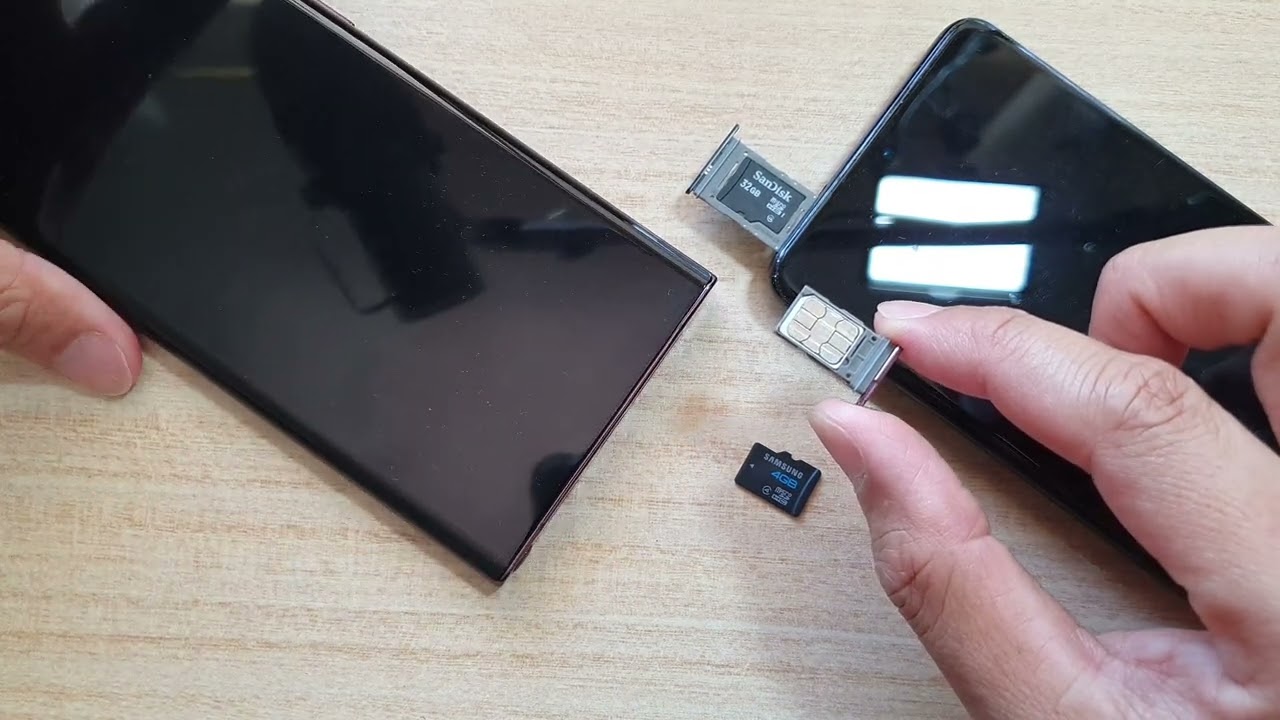
Prepare the SIM Card: Before inserting the SIM card, ensure that it is clean and free from any visible damage. The SIM card features a unique shape and size that corresponds to the slot within the SIM card tray. It is important to handle the SIM card with care, avoiding any bending or scratching that could potentially affect its functionality.
-
Align the SIM Card: Examine the SIM card tray and identify the slot specifically designed for the SIM card. Align the SIM card with the slot, ensuring that it fits securely and matches the outlined shape. The SIM card should be positioned in a manner that allows it to be smoothly inserted into the slot without any resistance.
-
Insert the SIM Card: Gently place the SIM card into the designated slot within the SIM card tray. Apply light pressure to ensure that the SIM card is fully seated within the slot, maintaining a secure and flush position. It is crucial to avoid forcing the SIM card into the slot, as this could lead to potential damage to the card or the device.
-
Verify the Placement: After inserting the SIM card, carefully inspect the tray to confirm that the SIM card is positioned correctly within the slot. The SIM card should be level and flush with the surface of the tray, indicating that it is securely placed and ready for reinsertion into the device.
By following these steps, you can effectively insert the SIM card into your Samsung Galaxy S22, ensuring that your device is equipped to establish a strong connection with your mobile network. This precise and careful process sets the stage for seamless communication and connectivity, allowing you to make the most of your Samsung Galaxy S22's capabilities.
Step 4: Reinsert the SIM card tray
After successfully inserting the SIM card into the designated slot within the SIM card tray, the final step in the process involves reinserting the tray back into your Samsung Galaxy S22. This critical step ensures that the SIM card is securely integrated into the device, allowing for seamless communication and connectivity. By following the steps outlined below, you can complete this process with precision and care, setting the stage for optimal functionality of your Samsung Galaxy S22.
To reinsert the SIM card tray into your Samsung Galaxy S22, follow these steps:
-
Position the SIM Card Tray: Take the SIM card tray with the inserted SIM card and position it carefully, ensuring that it aligns with the corresponding slot within the device. The tray should fit snugly into the slot, with the SIM card securely housed within the device.
-
Apply Uniform Pressure: Gently push the SIM card tray back into the device, applying uniform pressure to ensure that it smoothly reenters its original position. It is crucial to avoid using excessive force during this step, as the tray should slide back into place with minimal resistance.
-
Verify the Placement: After reinserting the SIM card tray, visually inspect the device to confirm that the tray is securely positioned. The tray should be flush with the device's frame, indicating that it is fully inserted and ready for use.
-
Power On Your Device: Once the SIM card tray is securely reinserted, power on your Samsung Galaxy S22 to initiate the device's activation process. This step allows the device to recognize the newly inserted SIM card and establish a connection with your mobile network.
By following these steps, you can effectively reinsert the SIM card tray into your Samsung Galaxy S22, ensuring that the SIM card is securely integrated into the device. This careful and precise process sets the stage for seamless communication and connectivity, allowing you to make the most of your Samsung Galaxy S22's capabilities.
Now that you have successfully completed the process of inserting or replacing the SIM card in your Samsung Galaxy S22, your device is ready to be activated and utilized for calls, texts, and mobile data access. With the SIM card securely in place, you can enjoy the full functionality of your Samsung Galaxy S22, staying connected and engaged with ease.
Conclusion
Successfully inserting or replacing the SIM card in your Samsung Galaxy S22 is a fundamental step in ensuring that your device is fully equipped for seamless communication and connectivity. By following the step-by-step process outlined in this guide, you have gained the knowledge and confidence to handle the essential task of managing your device's SIM card.
The process began with locating the SIM card tray, a critical step that familiarized you with the physical layout of your device and the specific location of the tray. By carefully examining the sides of your Samsung Galaxy S22 and referencing the user manual, you were able to identify the SIM card tray and prepare for the subsequent steps.
Ejecting the SIM card tray required precision and care, as you utilized the SIM card ejection tool to safely remove the tray from the device. This step allowed you to gain access to the slot where the SIM card is inserted, setting the stage for the next crucial phase of the process.
Inserting the SIM card into the designated slot within the SIM card tray involved aligning the card and ensuring that it was seated securely. By following the detailed steps, you successfully integrated the SIM card into the device, preparing it for reinsertion into your Samsung Galaxy S22.
Reinserting the SIM card tray back into your device marked the final step in the process, ensuring that the SIM card was securely integrated and ready for use. By carefully positioning the tray and applying uniform pressure, you completed the process with precision, setting the stage for the activation and utilization of your Samsung Galaxy S22.
Now, with the SIM card securely in place, your Samsung Galaxy S22 is ready to be activated and utilized for calls, texts, and mobile data access. The successful completion of this process ensures that your device is fully equipped to establish a strong connection with your mobile network, allowing you to make the most of its capabilities.
By mastering the process of handling the SIM card in your Samsung Galaxy S22, you have empowered yourself to seamlessly manage essential components of your device, setting the stage for a smooth and efficient user experience. With the SIM card securely integrated, you can confidently engage with your device, staying connected and informed with ease.
Remember, the process of inserting or replacing the SIM card may vary slightly depending on the specific model of your Samsung Galaxy S22. Always refer to the user manual and manufacturer's guidelines for detailed instructions tailored to your device.
Congratulations on successfully completing the process of managing your Samsung Galaxy S22's SIM card. With this essential task accomplished, you can now fully enjoy the communication and connectivity features of your device, staying connected and engaged in today's dynamic digital landscape.