Introduction
The Redmi Note 3 is a popular smartphone known for its impressive features and user-friendly interface. One of the key advantages of this device is its expandable storage option, which allows users to insert a microSD card for additional storage space. Activating the SD card on the Redmi Note 3 can significantly enhance the device's storage capacity, enabling users to store more photos, videos, music, and other files without worrying about running out of space.
In this comprehensive guide, we will walk you through the step-by-step process of activating the SD card on your Redmi Note 3. Whether you're a tech-savvy individual or a novice user, this guide is designed to provide clear and easy-to-follow instructions, ensuring that you can seamlessly expand your device's storage capabilities.
By following the instructions outlined in this guide, you will be able to insert the SD card into your Redmi Note 3, access the device's settings, format the SD card to ensure compatibility, and set the SD card as the default storage option for your photos, videos, and other media files. With these simple yet essential steps, you can make the most of your Redmi Note 3's expandable storage feature, empowering you to enjoy a seamless and efficient user experience.
Now, let's dive into the step-by-step process of activating the SD card on your Redmi Note 3, unlocking the full potential of your device's storage capabilities.
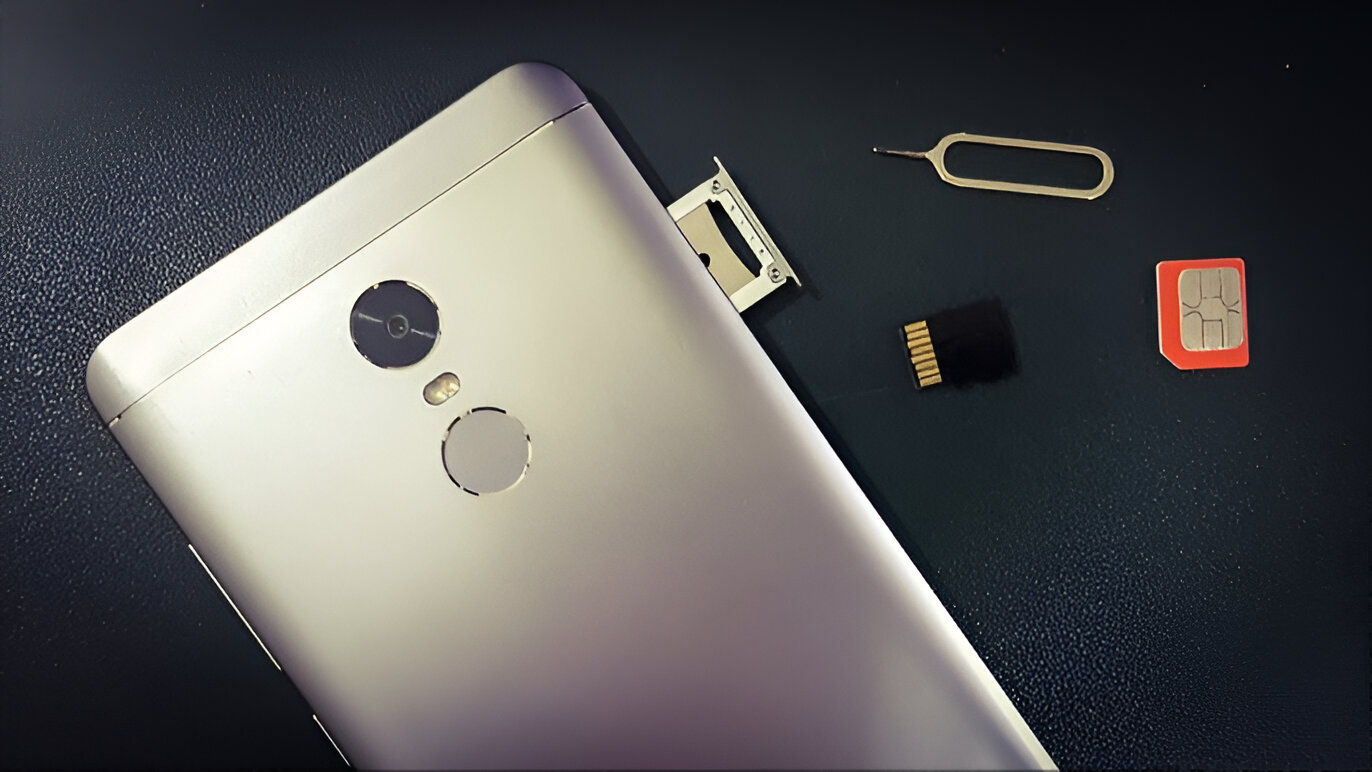
Step 1: Inserting the SD Card
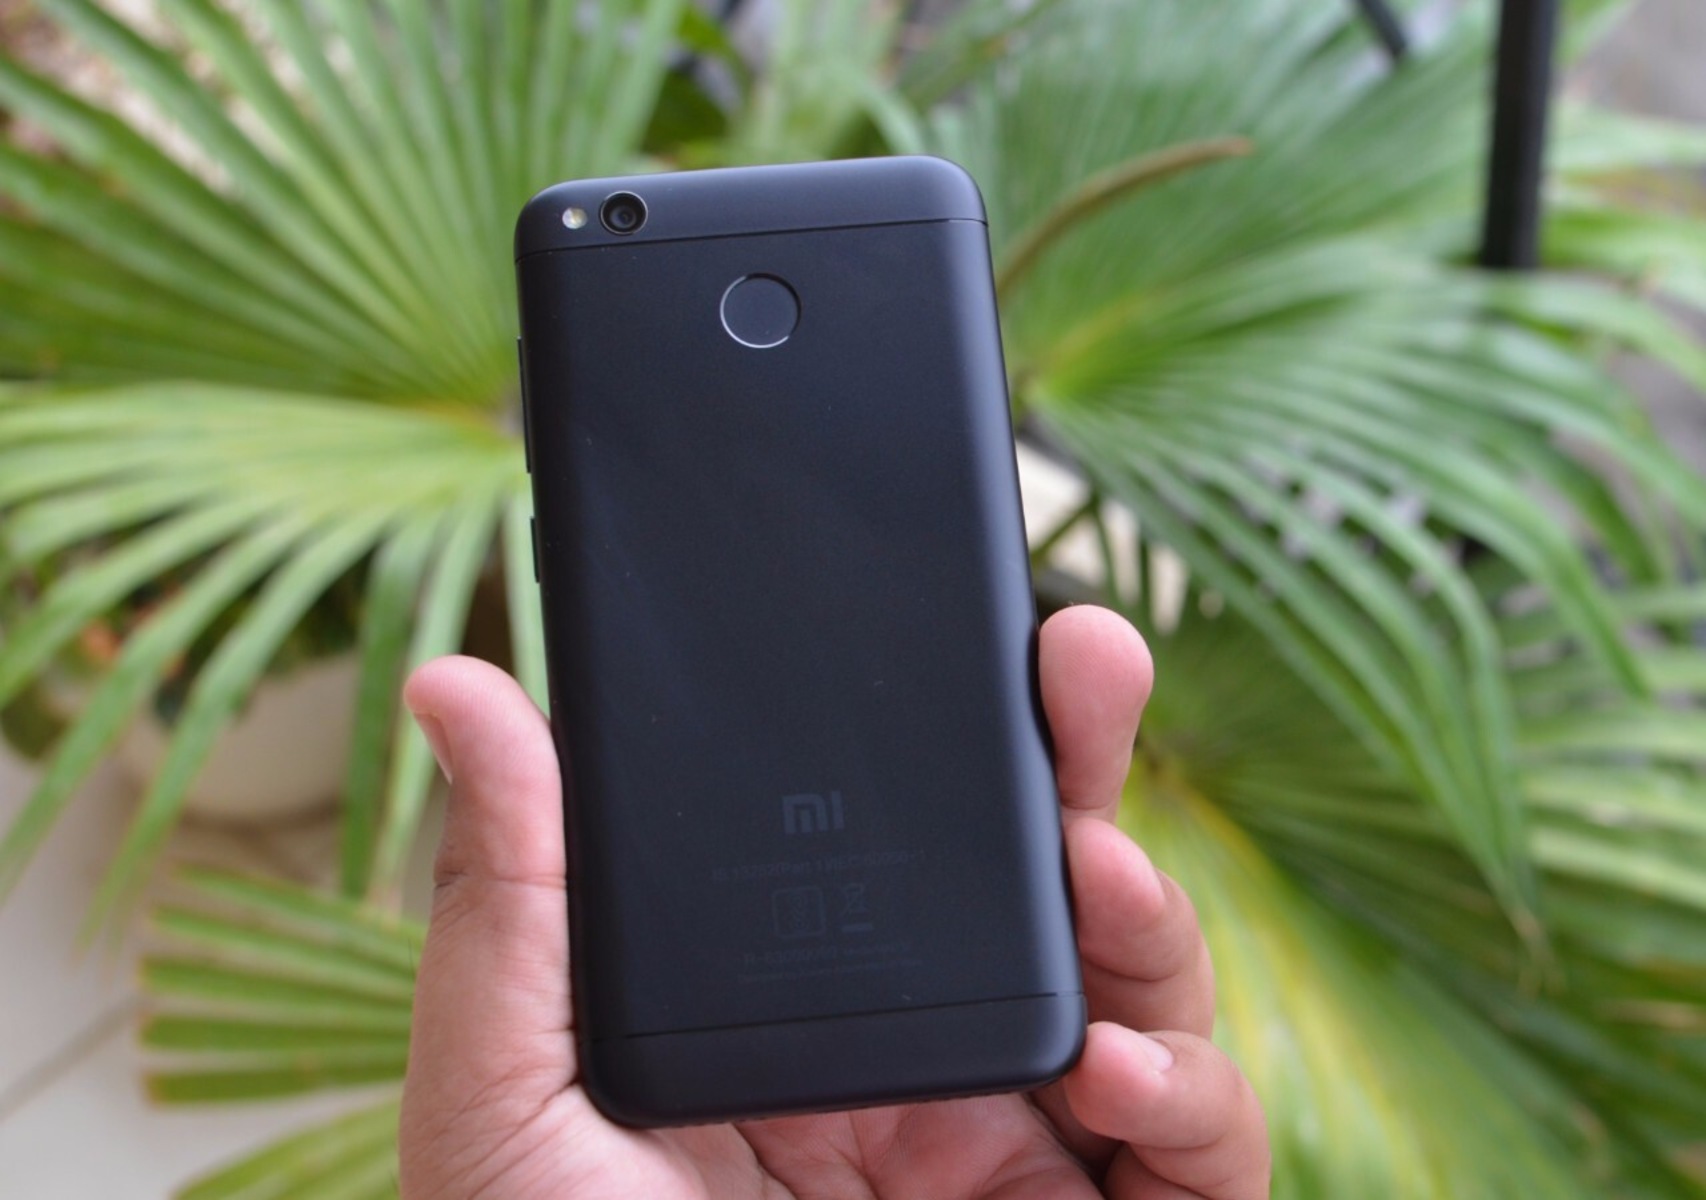
Inserting an SD card into your Redmi Note 3 is a straightforward process that allows you to expand the device's storage capacity effortlessly. Before you begin, ensure that you have a compatible microSD card on hand. The Redmi Note 3 supports microSD cards with capacities of up to 32GB, providing ample space for storing photos, videos, music, and other files.
To insert the SD card, follow these simple steps:
-
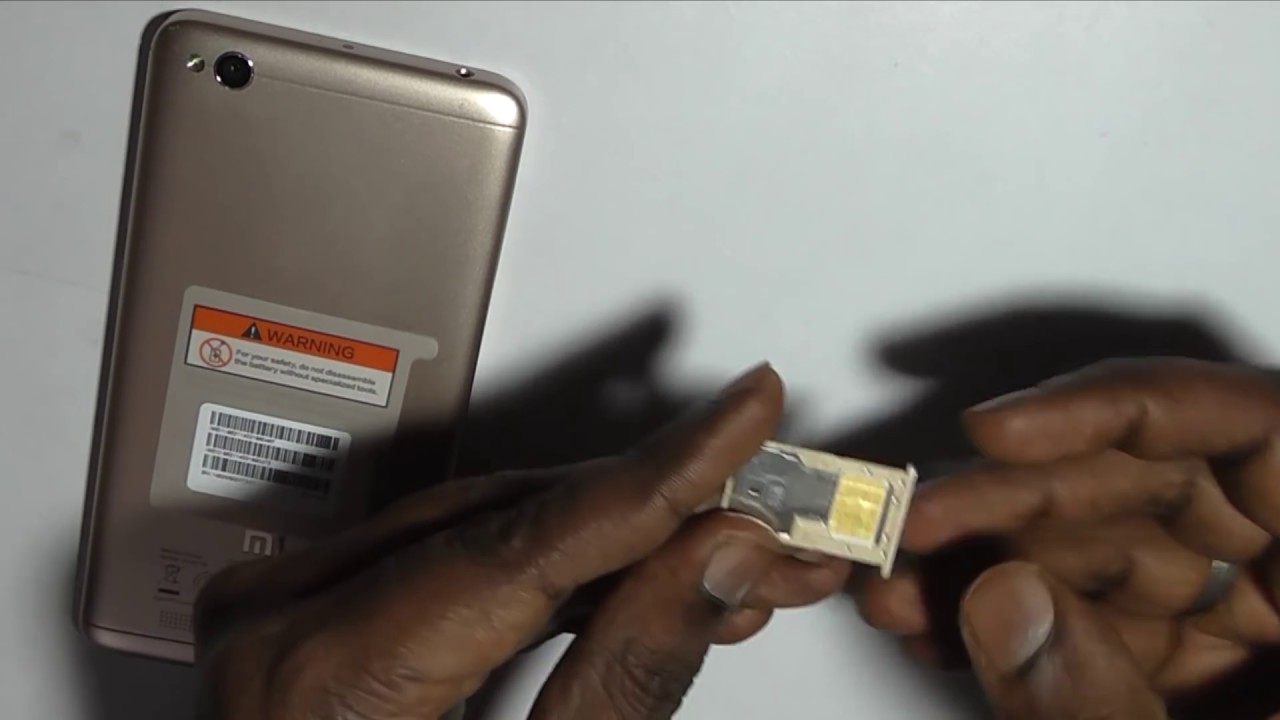
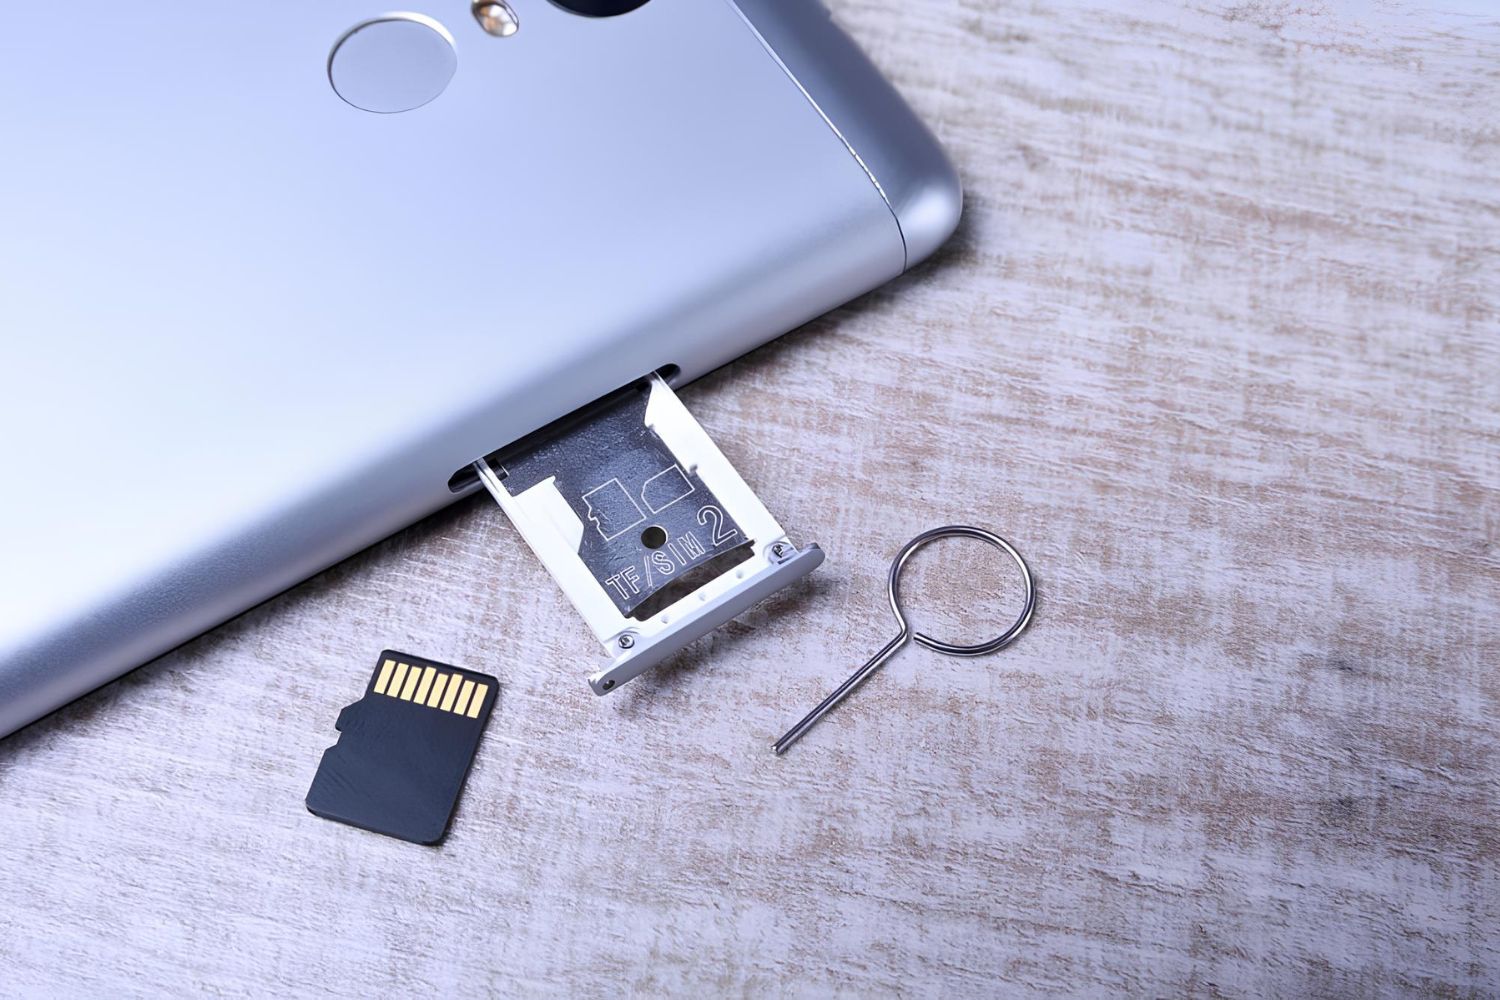
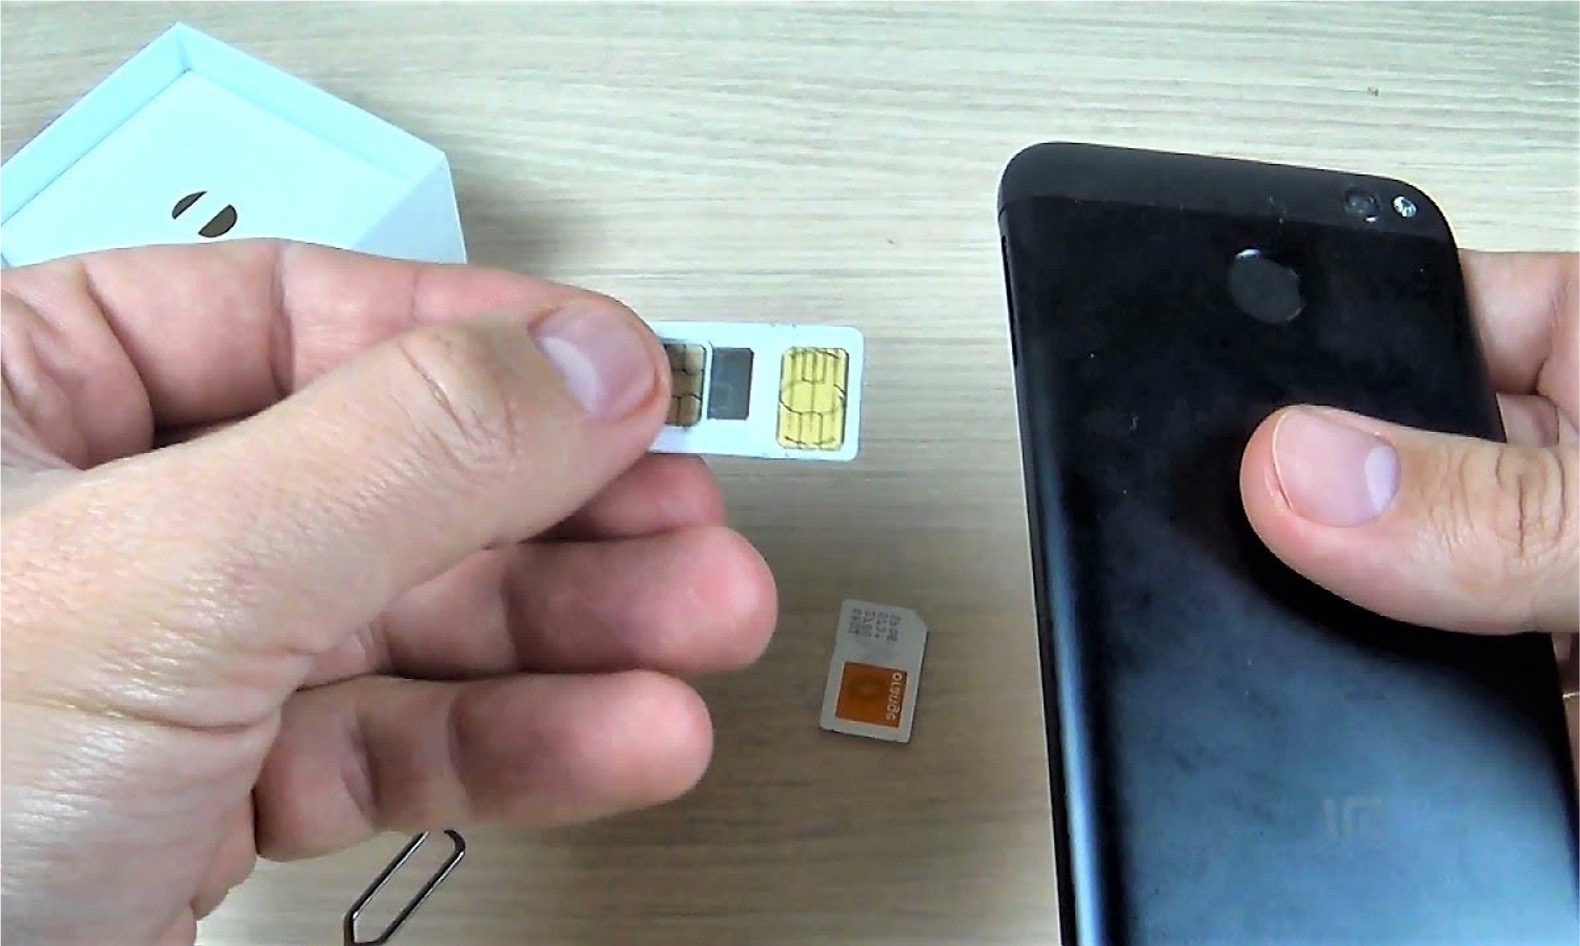
Locate the SIM Card Tray: The SIM card tray on the Redmi Note 3 also serves as the slot for the microSD card. You can find the SIM card tray on the left side of the device, near the top edge.
-
Eject the SIM Card Tray: Use the SIM ejector tool that came with your Redmi Note 3 to gently push into the small hole located next to the SIM card tray. This will release the tray from the device.
-
Insert the SD Card: Once the SIM card tray is ejected, carefully place the microSD card into the designated slot on the tray. Ensure that the card is inserted in the correct orientation to avoid any potential damage.
-
Reinsert the Tray: After securely placing the microSD card on the tray, gently slide the tray back into the device until it is fully seated. Be cautious not to apply excessive force during this process.
-
Verify the Installation: Power on your Redmi Note 3 and navigate to the device's settings to confirm that the SD card has been successfully recognized. You can also check the storage section in the settings to view the available space on the newly inserted SD card.
By following these steps, you can seamlessly insert an SD card into your Redmi Note 3, expanding the device's storage capacity and unlocking the potential to store a myriad of media files. With the SD card in place, you can now proceed to the next steps to activate and optimize its usage on your device.
Step 2: Accessing the Settings
Accessing the settings on your Redmi Note 3 is a fundamental step in the process of activating the SD card and optimizing its functionality. The settings menu serves as the control center for various aspects of your device, allowing you to customize and manage essential features, including storage options. By navigating through the settings, you can access the necessary tools to format the SD card and set it as the default storage location for your media files.
To access the settings on your Redmi Note 3, follow these simple steps:
-
Unlock Your Device: If your device is locked, unlock it by using your preferred method, such as entering your PIN, pattern, or fingerprint.
-
Navigate to the Home Screen: Press the home button or swipe up from the bottom of the screen to access the home screen of your Redmi Note 3.
-
Locate the Settings App: Look for the settings app on your home screen or in the app drawer. The settings app is represented by a gear icon and is typically located among the pre-installed system apps.
-
Open the Settings App: Tap on the settings app icon to launch the settings menu. Upon opening the settings app, you will be presented with a range of options and configurations to customize your device.
-
Navigate to Additional Settings: Within the settings menu, scroll down and locate the "Additional Settings" option. Tap on "Additional Settings" to access a variety of advanced configurations for your Redmi Note 3.
-
Access Storage Settings: Within the "Additional Settings" menu, you will find the "Storage" option. Tap on "Storage" to access detailed information about the device's storage, including internal storage and any inserted SD cards.
By following these steps, you can effortlessly access the settings on your Redmi Note 3, paving the way for further customization and optimization of your device's storage options. With access to the settings menu, you are now ready to proceed to the next steps, where you will format the SD card and set it as the default storage location for your media files.
Accessing the settings is a pivotal stage in the process of activating the SD card on your Redmi Note 3, empowering you to harness the full potential of the device's expandable storage feature.
Step 3: Formatting the SD Card
Formatting the SD card is a crucial step in the process of activating and optimizing its functionality on your Redmi Note 3. By formatting the SD card, you ensure that it is compatible with your device and ready to store and manage your media files efficiently. This step is essential, especially if the SD card has been used in a different device previously, as formatting it for your Redmi Note 3 will ensure seamless integration and optimal performance.
To format the SD card on your Redmi Note 3, follow these simple steps:
-
Access the Storage Settings: As outlined in the previous step, navigate to the settings menu on your Redmi Note 3 and access the "Storage" option within the "Additional Settings" menu. Here, you will find detailed information about the device's storage, including the internal storage and any inserted SD cards.
-
Select the SD Card: Within the storage settings, locate the section that displays the details of the inserted SD card. Tap on the SD card option to access specific settings and configurations related to the SD card.
-
Initiate the Format Process: Once you have selected the SD card, look for the option to format or erase the SD card. This option may be labeled as "Format SD Card" or "Erase SD Card." Tap on this option to initiate the formatting process.
-
Confirm the Formatting: A confirmation prompt will appear, informing you that formatting the SD card will erase all data stored on it. Ensure that you have backed up any important data from the SD card before proceeding. If you are ready to format the SD card, confirm the action to initiate the formatting process.
-
Wait for the Formatting to Complete: The formatting process may take a few moments to complete, depending on the size and speed of the SD card. Once the formatting is finished, you will receive a notification indicating that the SD card has been successfully formatted and is ready for use.
By following these steps, you can seamlessly format the SD card on your Redmi Note 3, ensuring that it is optimized for storing your media files and compatible with your device's specifications. With the SD card formatted and ready for use, you are now prepared to proceed to the next step, where you will set the SD card as the default storage location for your photos, videos, and other media files.
Step 4: Setting the SD Card as Default Storage
Setting the SD card as the default storage location on your Redmi Note 3 is a pivotal step in maximizing the benefits of the expandable storage feature. By designating the SD card as the primary storage location for your photos, videos, and other media files, you can ensure that new content is automatically saved to the SD card, freeing up space on the device's internal storage and providing a seamless and efficient user experience.
To set the SD card as the default storage on your Redmi Note 3, follow these essential steps:
-
Access the Storage Settings: Navigate to the settings menu on your device and select the "Storage" option within the "Additional Settings" menu. Here, you will find detailed information about the device's storage, including the internal storage and any inserted SD cards.
-
Select Default Storage Preferences: Within the storage settings, look for the option to set the default storage preferences. This option may be labeled as "Default Write Disk" or "Storage Preferences." Tap on this option to access the default storage settings.
-
Choose the SD Card as Default Storage: Upon accessing the default storage preferences, you will be presented with the available storage options, including the device's internal storage and the inserted SD card. Select the SD card as the default storage preference to ensure that new content is automatically saved to the SD card.
-
Confirm the Selection: After choosing the SD card as the default storage location, confirm your selection to apply the changes. Once confirmed, your Redmi Note 3 will prioritize the SD card for storing new photos, videos, and other media files.
By following these steps, you can seamlessly set the SD card as the default storage location on your Redmi Note 3, optimizing the device's storage capabilities and ensuring that you can efficiently manage and access your media files. With the SD card designated as the default storage, you can enjoy the convenience of expanded storage space while maintaining a streamlined user experience.
Activating the SD card on your Redmi Note 3 empowers you to make the most of the device's expandable storage feature, providing ample space for storing a diverse range of media files. Whether you're capturing memorable moments through photos and videos or enjoying your favorite music and movies, the activated SD card enhances your device's storage capacity, allowing you to seamlessly store, access, and manage your content.
Conclusion
In conclusion, activating the SD card on your Redmi Note 3 is a transformative process that unlocks the full potential of your device's storage capabilities. By following the step-by-step guide outlined in this comprehensive tutorial, you have successfully expanded your device's storage capacity and optimized its functionality to accommodate a myriad of media files.
With the SD card seamlessly inserted into your Redmi Note 3, you have taken the first essential step towards enhancing your device's storage capabilities. The process of accessing the settings and formatting the SD card has empowered you to ensure compatibility and seamless integration, laying the foundation for efficient storage management.
Setting the SD card as the default storage location represents a pivotal stage in this activation process. By designating the SD card as the primary storage preference, you have streamlined the storage management on your Redmi Note 3, ensuring that new content is automatically saved to the expanded storage space, thereby alleviating the burden on the device's internal storage.
The activated SD card not only provides ample space for storing photos, videos, music, and other media files but also enhances the overall user experience by enabling seamless access to a diverse range of content. Whether you're capturing precious memories through photos and videos or enjoying your favorite music and movies, the expanded storage capacity empowers you to curate and manage your digital content effortlessly.
Furthermore, the activation of the SD card on your Redmi Note 3 reflects your commitment to maximizing the device's capabilities, ensuring that you can make the most of its features and functionalities. With expanded storage at your disposal, you are well-equipped to embrace the versatility and convenience offered by your Redmi Note 3, allowing you to explore new horizons in creativity, productivity, and entertainment.
In essence, the activation of the SD card on your Redmi Note 3 is not merely a technical process but a gateway to a richer and more fulfilling user experience. By seamlessly integrating the expanded storage into your device, you have elevated its potential, enabling you to store, access, and manage your digital content with unparalleled ease and efficiency.
Congratulations on successfully activating the SD card on your Redmi Note 3, and may your enhanced storage capacity open new avenues of enjoyment and productivity in your digital journey.