Introduction
Casting your laptop screen to a Redmi TV can significantly enhance your viewing experience by allowing you to enjoy your favorite content on a larger display. Whether you want to stream movies, share presentations, or simply mirror your laptop screen for a better view, the process of casting to a Redmi TV is relatively straightforward. This step-by-step tutorial will guide you through the seamless process of connecting your laptop to a Redmi TV for an immersive viewing experience.
By following these instructions, you can effortlessly mirror your laptop screen onto the Redmi TV, creating a versatile setup that enables you to enjoy a wide range of multimedia content. Whether you're a tech enthusiast looking to explore new possibilities or a professional seeking to streamline your presentations, the ability to cast your laptop screen to a Redmi TV opens up a world of possibilities.
In the following steps, you will learn how to check compatibility, connect your Redmi TV to the same Wi-Fi network as your laptop, enable screen mirroring on the Redmi TV, and establish the connection between your devices. With these simple yet effective guidelines, you can seamlessly cast your laptop screen to the Redmi TV, unlocking a new dimension of entertainment and productivity.
Stay tuned as we delve into the intricacies of this process, empowering you to harness the full potential of your devices and elevate your viewing experience to new heights. Let's embark on this journey together and unlock the seamless connectivity between your laptop and Redmi TV.
Step 1: Check Compatibility
Before embarking on the process of casting your laptop screen to a Redmi TV, it's crucial to ensure that your devices are compatible and meet the necessary requirements for seamless connectivity. Compatibility plays a pivotal role in establishing a successful connection, allowing you to mirror your laptop screen onto the Redmi TV without encountering technical hurdles.
First and foremost, verify that your laptop supports screen mirroring or casting functionality. Most modern laptops are equipped with this feature, often referred to as "screen mirroring," "cast screen," or "Miracast." To confirm whether your laptop supports this capability, refer to the user manual or visit the official website of the laptop manufacturer for detailed specifications.
Additionally, ascertain that your Redmi TV is compatible with screen mirroring from external devices, such as laptops. Redmi TVs typically support screen mirroring through technologies like Miracast or DLNA (Digital Living Network Alliance). These technologies enable seamless wireless display mirroring, allowing you to project your laptop screen onto the Redmi TV without the need for physical cables.
Furthermore, ensure that both your laptop and Redmi TV are connected to the same Wi-Fi network. This step is crucial for establishing a stable connection between the devices, as screen mirroring typically relies on a shared wireless network for communication. By confirming that both devices are connected to the same Wi-Fi network, you lay the foundation for a smooth and uninterrupted casting experience.
In some cases, specific laptop models or Redmi TV variants may require firmware updates to enable screen mirroring functionality. Check for any available updates for your laptop's operating system and the Redmi TV's firmware to ensure that both devices are equipped with the latest software, including any necessary drivers or compatibility enhancements for screen mirroring.
By meticulously checking the compatibility of your laptop and Redmi TV, you can preemptively address any potential compatibility issues and set the stage for a seamless casting experience. This proactive approach minimizes the likelihood of encountering connectivity challenges and ensures that your devices are primed for successful screen mirroring.
With compatibility confirmed, you are now ready to proceed to the next step and connect your Redmi TV to the same Wi-Fi network as your laptop, laying the groundwork for effortless screen mirroring.
Stay tuned as we delve into the subsequent steps, guiding you through the process of casting your laptop screen to the Redmi TV with precision and clarity.
Step 2: Connect Redmi TV to the Same Wi-Fi Network
Ensuring that your Redmi TV is connected to the same Wi-Fi network as your laptop is a fundamental prerequisite for seamless screen mirroring. This step establishes the essential wireless link between your devices, enabling them to communicate and facilitating the transmission of your laptop screen to the Redmi TV.
To connect your Redmi TV to the Wi-Fi network, begin by accessing the settings menu on the Redmi TV. This can typically be achieved by using the remote control to navigate to the "Settings" or "Setup" section, where you will find the option to configure the network settings.
Once in the settings menu, locate the "Network" or "Wi-Fi" option, depending on the specific interface of your Redmi TV. Select this option to initiate the process of connecting the Redmi TV to the Wi-Fi network.
Upon selecting the "Wi-Fi" option, the Redmi TV will display a list of available wireless networks within range. Identify and select your designated Wi-Fi network from the list, and proceed to enter the network password if prompted. This password is the same one used to connect your laptop to the Wi-Fi network.
After entering the correct Wi-Fi password, the Redmi TV will establish a connection to the designated network, signifying that it is now linked to the same Wi-Fi network as your laptop. This crucial step ensures that both devices are operating within the same wireless environment, laying the groundwork for seamless communication and screen mirroring.
With the Redmi TV successfully connected to the Wi-Fi network, you have effectively established the essential wireless bridge that paves the way for the next stages of the screen mirroring process. This pivotal connection forms the backbone of the seamless communication between your laptop and the Redmi TV, setting the stage for a smooth and uninterrupted casting experience.
By meticulously following this step to connect your Redmi TV to the same Wi-Fi network as your laptop, you have taken a significant stride towards realizing the full potential of screen mirroring. This foundational connectivity ensures that your devices are primed for the subsequent steps, culminating in the seamless casting of your laptop screen to the Redmi TV.
Stay tuned as we progress to the next step, where we will delve into enabling screen mirroring on the Redmi TV, further advancing towards the seamless casting of your laptop screen for an immersive viewing experience.
Step 3: Enable Screen Mirroring on Redmi TV
Enabling screen mirroring on your Redmi TV is a pivotal step that bridges the gap between your laptop and the TV, facilitating the seamless projection of your laptop screen onto the larger display. This feature empowers you to effortlessly mirror your laptop's content, including videos, presentations, and applications, onto the Redmi TV, thereby enhancing your viewing experience and expanding the versatility of your entertainment setup.
To initiate the process of enabling screen mirroring on your Redmi TV, begin by accessing the TV's settings menu using the remote control. Navigate to the "Screen Mirroring" or "Cast Screen" option, which is typically located within the "Display" or "Connection" section, depending on the specific interface of your Redmi TV.
Upon selecting the "Screen Mirroring" option, the Redmi TV will prompt you to enable this functionality. This may involve toggling a switch or selecting an "Enable" option to activate screen mirroring. Once enabled, the Redmi TV is now primed to receive and display the content being cast from your laptop.
It's important to note that the exact terminology and location of the screen mirroring feature may vary slightly based on the model and firmware version of your Redmi TV. However, the underlying process remains consistent, allowing you to establish the necessary settings to facilitate seamless screen mirroring.
By enabling screen mirroring on your Redmi TV, you are effectively preparing the device to receive the mirrored content from your laptop, creating a cohesive link between the two devices. This pivotal step sets the stage for the subsequent connection between your laptop and the Redmi TV, culminating in the seamless casting of your laptop screen onto the larger display.
With screen mirroring enabled on the Redmi TV, you have laid the groundwork for a transformative viewing experience, where your laptop screen becomes an extension of the immersive display offered by the Redmi TV. This feature unlocks a myriad of possibilities, allowing you to seamlessly share and enjoy a diverse range of content on the expansive canvas of the TV screen.
As you progress through the steps of this tutorial, the activation of screen mirroring on the Redmi TV marks a significant milestone in the seamless connectivity between your laptop and the TV, bringing you one step closer to casting your laptop screen for an enriched viewing experience.
Stay tuned as we delve into the subsequent steps, guiding you through the process of connecting your laptop to the Redmi TV and initiating the captivating experience of casting your laptop screen onto the larger canvas of the TV display.
Step 4: Open Settings on Your Laptop
To seamlessly cast your laptop screen to the Redmi TV, the next crucial step involves accessing the settings on your laptop to initiate the process of connecting to the Redmi TV. By navigating through the settings menu on your laptop, you can configure the necessary options to establish a wireless connection with the Redmi TV, enabling the smooth transmission of your laptop screen onto the larger display.
Begin by locating and accessing the settings menu on your laptop. The method for accessing settings may vary depending on the operating system of your laptop. For Windows users, the settings menu can typically be accessed by clicking on the Start menu and selecting the "Settings" icon, which resembles a gear. Alternatively, you can use the keyboard shortcut "Windows key + I" to directly access the settings menu.
For macOS users, the settings menu is accessible through the Apple menu, located in the top-left corner of the screen. Click on the Apple menu and select "System Preferences" to open the settings window, where you can configure various system preferences and options.
Once within the settings menu of your laptop, navigate to the "Devices" or "Display" section, where you will find the option to manage external displays and screen projection settings. This section allows you to configure the display output and initiate the process of connecting to the Redmi TV for screen mirroring.
Within the "Devices" or "Display" settings, look for the option related to "Connect to a Wireless Display" or "Project to a Second Screen." This option enables you to search for available wireless displays, including the Redmi TV, and establish a connection for screen mirroring.
Select the "Connect to a Wireless Display" or similar option to initiate the search for available devices. Your laptop will scan for compatible wireless displays within range, including the Redmi TV, and present a list of available devices for connection.
Identify and select the Redmi TV from the list of available devices, initiating the process of establishing a wireless connection between your laptop and the TV. Depending on the specific interface of your laptop, you may be prompted to enter a PIN or confirm the connection to the Redmi TV.
Upon successfully connecting to the Redmi TV, your laptop screen is now poised for seamless casting onto the larger display, unlocking a myriad of possibilities for sharing content, presentations, and multimedia experiences.
By navigating through the settings on your laptop and initiating the connection to the Redmi TV, you have taken a significant stride towards realizing the full potential of screen mirroring. This pivotal step sets the stage for the seamless transmission of your laptop screen onto the expansive canvas of the Redmi TV, creating a captivating viewing experience that transcends the confines of the laptop screen.
As you proceed to the subsequent steps, the successful configuration of settings on your laptop marks a pivotal milestone in the journey towards casting your laptop screen to the Redmi TV, bringing you closer to the immersive and versatile display offered by the TV.
Step 5: Connect to Redmi TV
After configuring the settings on your laptop, the next crucial step is to establish a seamless connection between your laptop and the Redmi TV, paving the way for the captivating experience of casting your laptop screen onto the larger display.
Upon selecting the Redmi TV from the list of available devices in the settings menu of your laptop, the process of connecting to the TV commences. Depending on the specific interface of your laptop and the operating system, you may be prompted to confirm the connection to the Redmi TV. This confirmation step ensures that the wireless link between your laptop and the TV is securely established, setting the stage for the transmission of your laptop screen onto the expansive canvas of the Redmi TV.
Once the connection is confirmed, your laptop screen seamlessly extends to the Redmi TV, creating a unified viewing experience that transcends the confines of the laptop display. This pivotal connection enables you to share a diverse range of content, including videos, presentations, and applications, on the larger canvas offered by the Redmi TV, enriching your viewing experience and expanding the versatility of your entertainment setup.
The successful connection to the Redmi TV signifies the culmination of the preparatory steps, where compatibility checks, Wi-Fi network connections, and screen mirroring settings converge to create a seamless bridge between your laptop and the TV. This cohesive link empowers you to harness the full potential of screen mirroring, unlocking a myriad of possibilities for sharing and enjoying multimedia content on the immersive display provided by the Redmi TV.
With the connection established, your laptop screen becomes an extension of the captivating display offered by the Redmi TV, creating a seamless and immersive viewing experience that enhances your entertainment, productivity, and multimedia sharing capabilities. Whether you're streaming your favorite movies, delivering engaging presentations, or simply enjoying a larger canvas for your laptop content, the connection to the Redmi TV opens up a world of possibilities, enriching your digital lifestyle and transforming the way you interact with your devices.
As you proceed to the subsequent steps, the successful connection to the Redmi TV marks a significant milestone in the journey towards casting your laptop screen, bringing you closer to the immersive and versatile display offered by the TV.
Step 6: Start Casting Your Laptop Screen
With the seamless connection established between your laptop and the Redmi TV, the final step involves initiating the captivating process of casting your laptop screen onto the larger display. This transformative action unlocks a world of possibilities, allowing you to share and enjoy a diverse range of content on the expansive canvas offered by the Redmi TV.
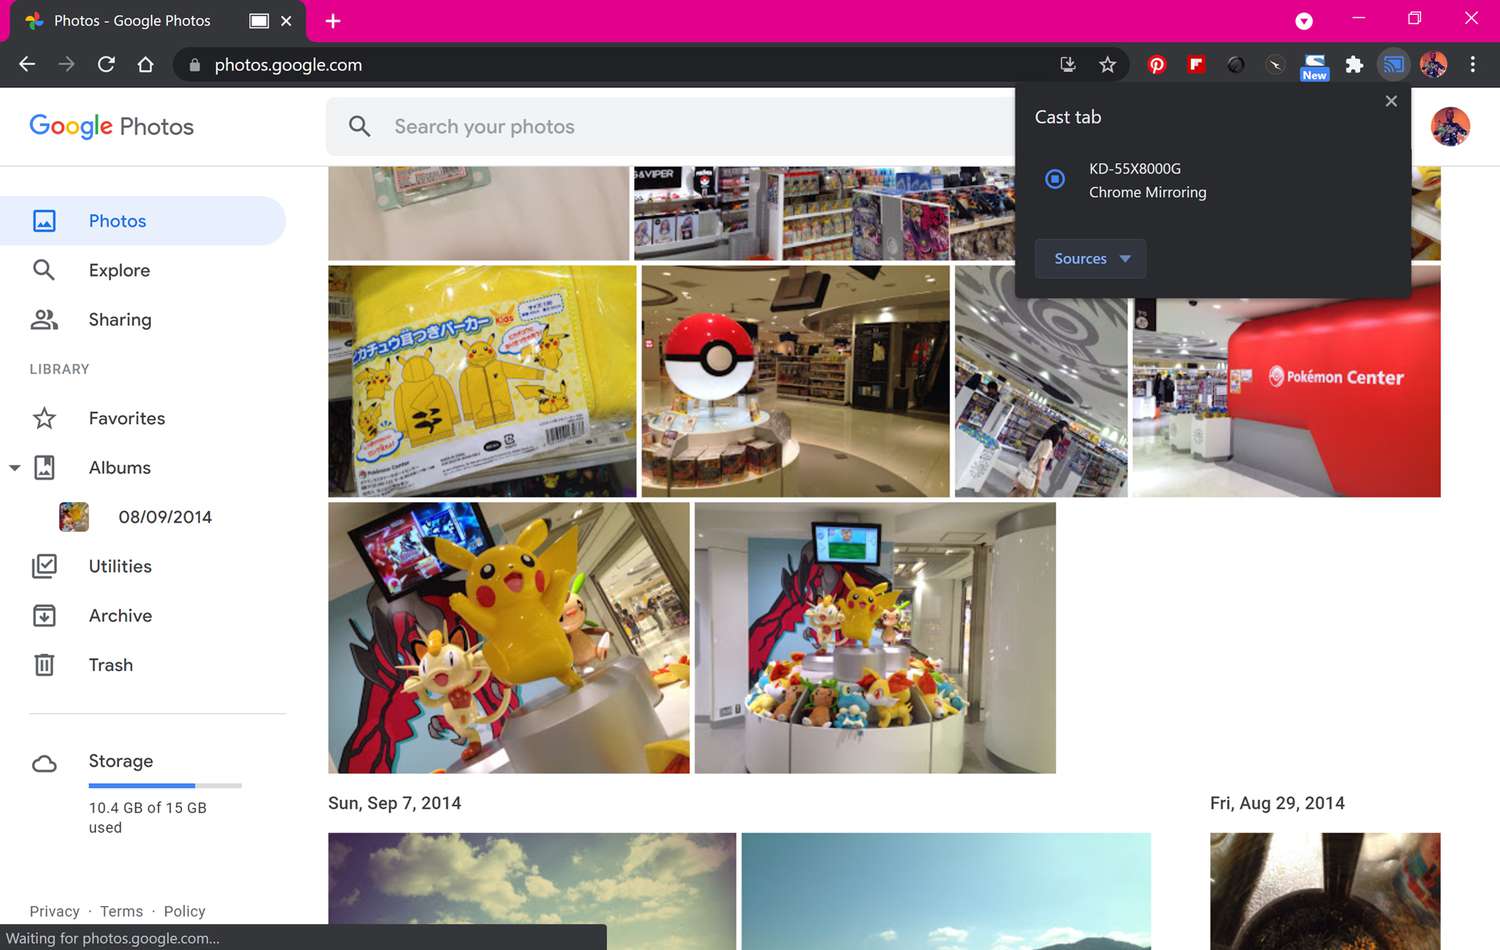
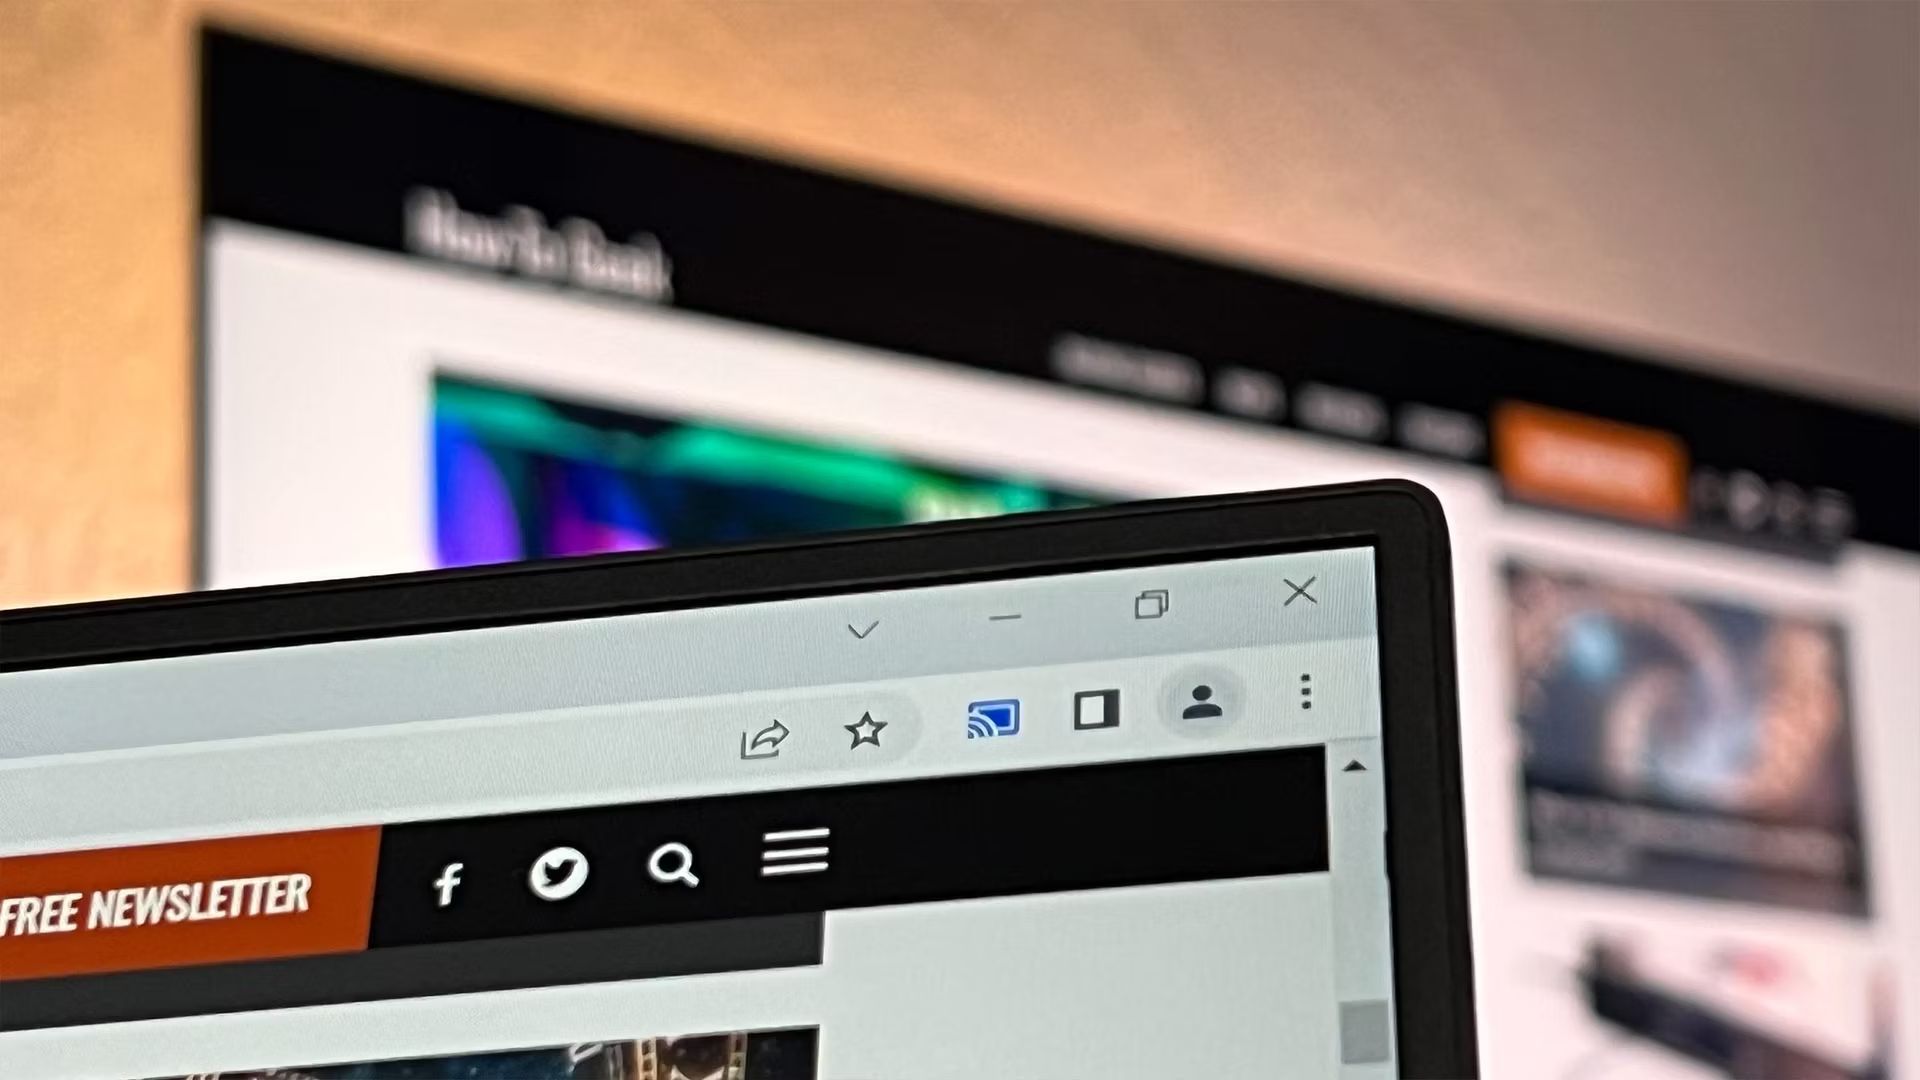
To commence the casting process, navigate to the settings or control panel on your laptop, where you initially configured the connection to the Redmi TV. Within the display or projection settings, you will find the option to "Cast" or "Mirror" your screen to the connected Redmi TV. Select this option to initiate the transmission of your laptop screen onto the TV display.
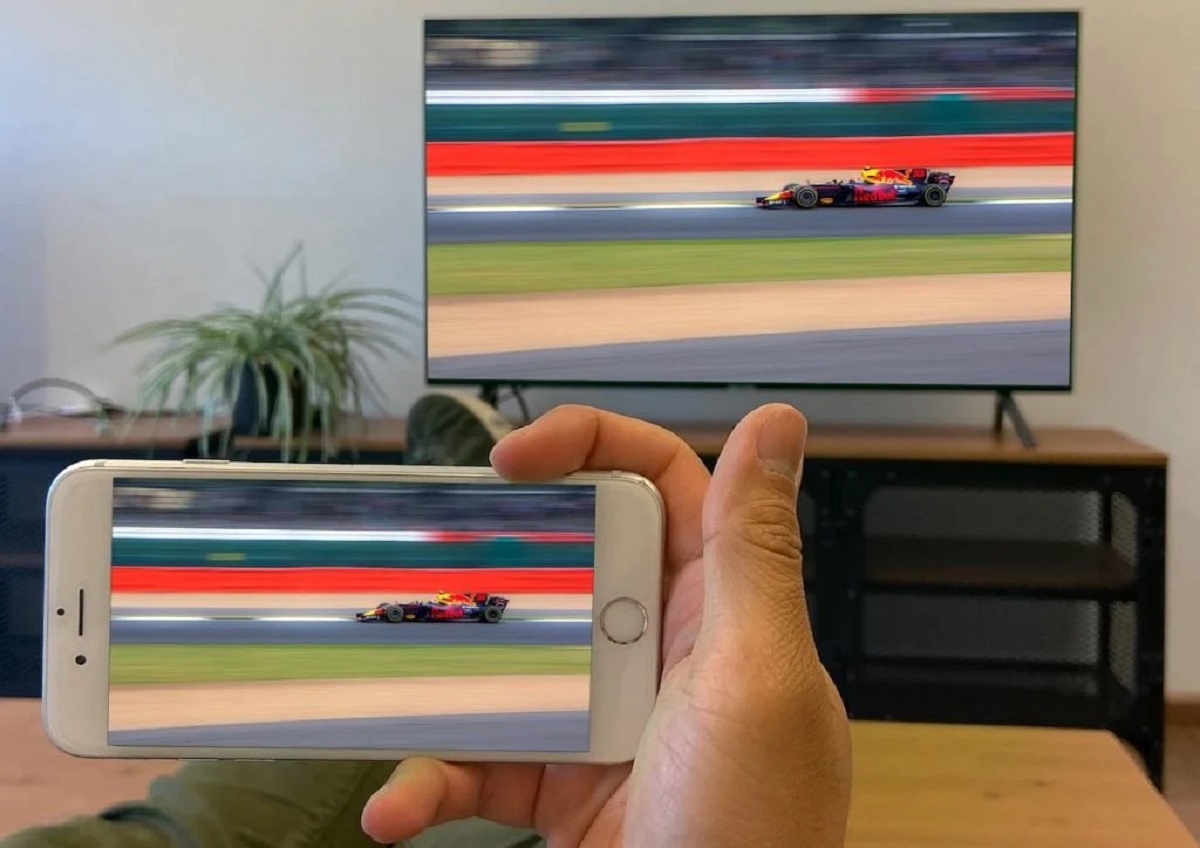
Upon selecting the "Cast" or "Mirror" option, your laptop screen seamlessly extends to the Redmi TV, creating a unified viewing experience that transcends the confines of the laptop display. This pivotal moment signifies the culmination of the preparatory steps, where compatibility checks, Wi-Fi network connections, and screen mirroring settings converge to create a seamless bridge between your laptop and the TV.
As your laptop screen is cast onto the Redmi TV, you gain access to an expansive canvas for sharing a diverse array of content. Whether you're streaming high-definition videos, delivering captivating presentations, or simply enjoying a larger display for your laptop content, the Redmi TV becomes a versatile platform for enhancing your entertainment, productivity, and multimedia sharing capabilities.
The seamless casting of your laptop screen onto the Redmi TV marks the realization of a transformative viewing experience, where the immersive display offered by the TV becomes an extension of your digital canvas. This feature empowers you to seamlessly share and enjoy multimedia content, creating a dynamic and engaging environment for entertainment, collaboration, and personal enjoyment.
By seamlessly casting your laptop screen onto the Redmi TV, you unlock the full potential of your devices, creating a cohesive ecosystem for sharing and experiencing content in a captivating manner. This seamless integration enhances your digital lifestyle, offering a versatile platform for exploring new dimensions of entertainment and productivity.
As the casting process unfolds, you are presented with a seamless and immersive viewing experience that elevates your interaction with digital content, transcending the confines of traditional displays and expanding the horizons of your multimedia experiences.
With the successful casting of your laptop screen onto the Redmi TV, you have harnessed the full potential of screen mirroring, creating a captivating and versatile setup that enriches your digital lifestyle and transforms the way you interact with your devices.
Conclusion
In conclusion, the process of casting your laptop screen to a Redmi TV unfolds as a seamless journey, characterized by meticulous compatibility checks, wireless network connections, and the activation of screen mirroring features. By following the step-by-step tutorial outlined in this comprehensive guide, you have gained valuable insights into the intricacies of connecting your laptop to a Redmi TV, unlocking a world of possibilities for sharing and enjoying multimedia content on a larger canvas.
The journey commenced with a thorough examination of compatibility, where you verified that your laptop and Redmi TV are equipped with the necessary features to facilitate seamless screen mirroring. This proactive approach ensured that potential compatibility issues were preemptively addressed, setting the stage for a smooth and uninterrupted casting experience.
Subsequently, the process delved into connecting the Redmi TV to the same Wi-Fi network as your laptop, establishing a fundamental wireless link that forms the backbone of the seamless communication between the devices. This crucial step laid the groundwork for the subsequent activation of screen mirroring on the Redmi TV, creating a cohesive environment for the transmission of your laptop screen onto the larger display.
As the journey progressed, you navigated through the settings on your laptop, configuring the necessary options to establish a wireless connection with the Redmi TV. This pivotal step culminated in the successful connection between your laptop and the TV, marking a significant milestone in the seamless casting of your laptop screen for an enriched viewing experience.
The final stages of the process witnessed the seamless casting of your laptop screen onto the Redmi TV, unlocking a myriad of possibilities for sharing high-definition videos, delivering captivating presentations, and enjoying a larger canvas for your laptop content. This transformative action marked the realization of a seamless and immersive viewing experience, where the Redmi TV became an extension of your digital canvas, enhancing your entertainment, productivity, and multimedia sharing capabilities.
In essence, the journey of casting your laptop screen to a Redmi TV transcends the confines of traditional displays, offering a versatile platform for exploring new dimensions of entertainment and productivity. By seamlessly integrating your devices, you have harnessed the full potential of screen mirroring, creating a captivating and versatile setup that enriches your digital lifestyle and transforms the way you interact with your devices.
As you embark on this journey, the seamless connectivity between your laptop and the Redmi TV opens up a world of possibilities, empowering you to share and enjoy multimedia content in a captivating manner. This seamless integration enhances your digital lifestyle, offering a versatile platform for exploring new dimensions of entertainment and productivity.