Introduction
Removing a SIM card from your Xperia ZX3 is a straightforward process that allows you to switch to a new device, change your mobile carrier, or troubleshoot SIM card-related issues. Whether you're upgrading to a new phone or need to replace a damaged SIM card, understanding the steps involved in removing the SIM card from your Xperia ZX3 can save you time and frustration.
By following the easy steps outlined in this guide, you can confidently remove the SIM card from your Xperia ZX3 without the need for professional assistance. This process requires minimal time and no technical expertise, making it accessible to all Xperia ZX3 users.
The ability to remove and replace a SIM card is a fundamental skill for any mobile device owner. It empowers you to manage your connectivity options and ensures that your Xperia ZX3 remains functional and adaptable to your changing needs. Whether you're a seasoned smartphone user or new to the world of mobile devices, mastering the art of removing a SIM card from your Xperia ZX3 is a valuable skill that can come in handy at any time.
In the following steps, we will walk you through the process of removing the SIM card from your Xperia ZX3 with clear and concise instructions. With a few simple actions, you can safely extract the SIM card from your device and proceed with your desired changes or maintenance tasks. Let's dive into the step-by-step guide to remove the SIM card from your Xperia ZX3 and take control of your mobile connectivity.
Step 1: Locate the SIM card tray
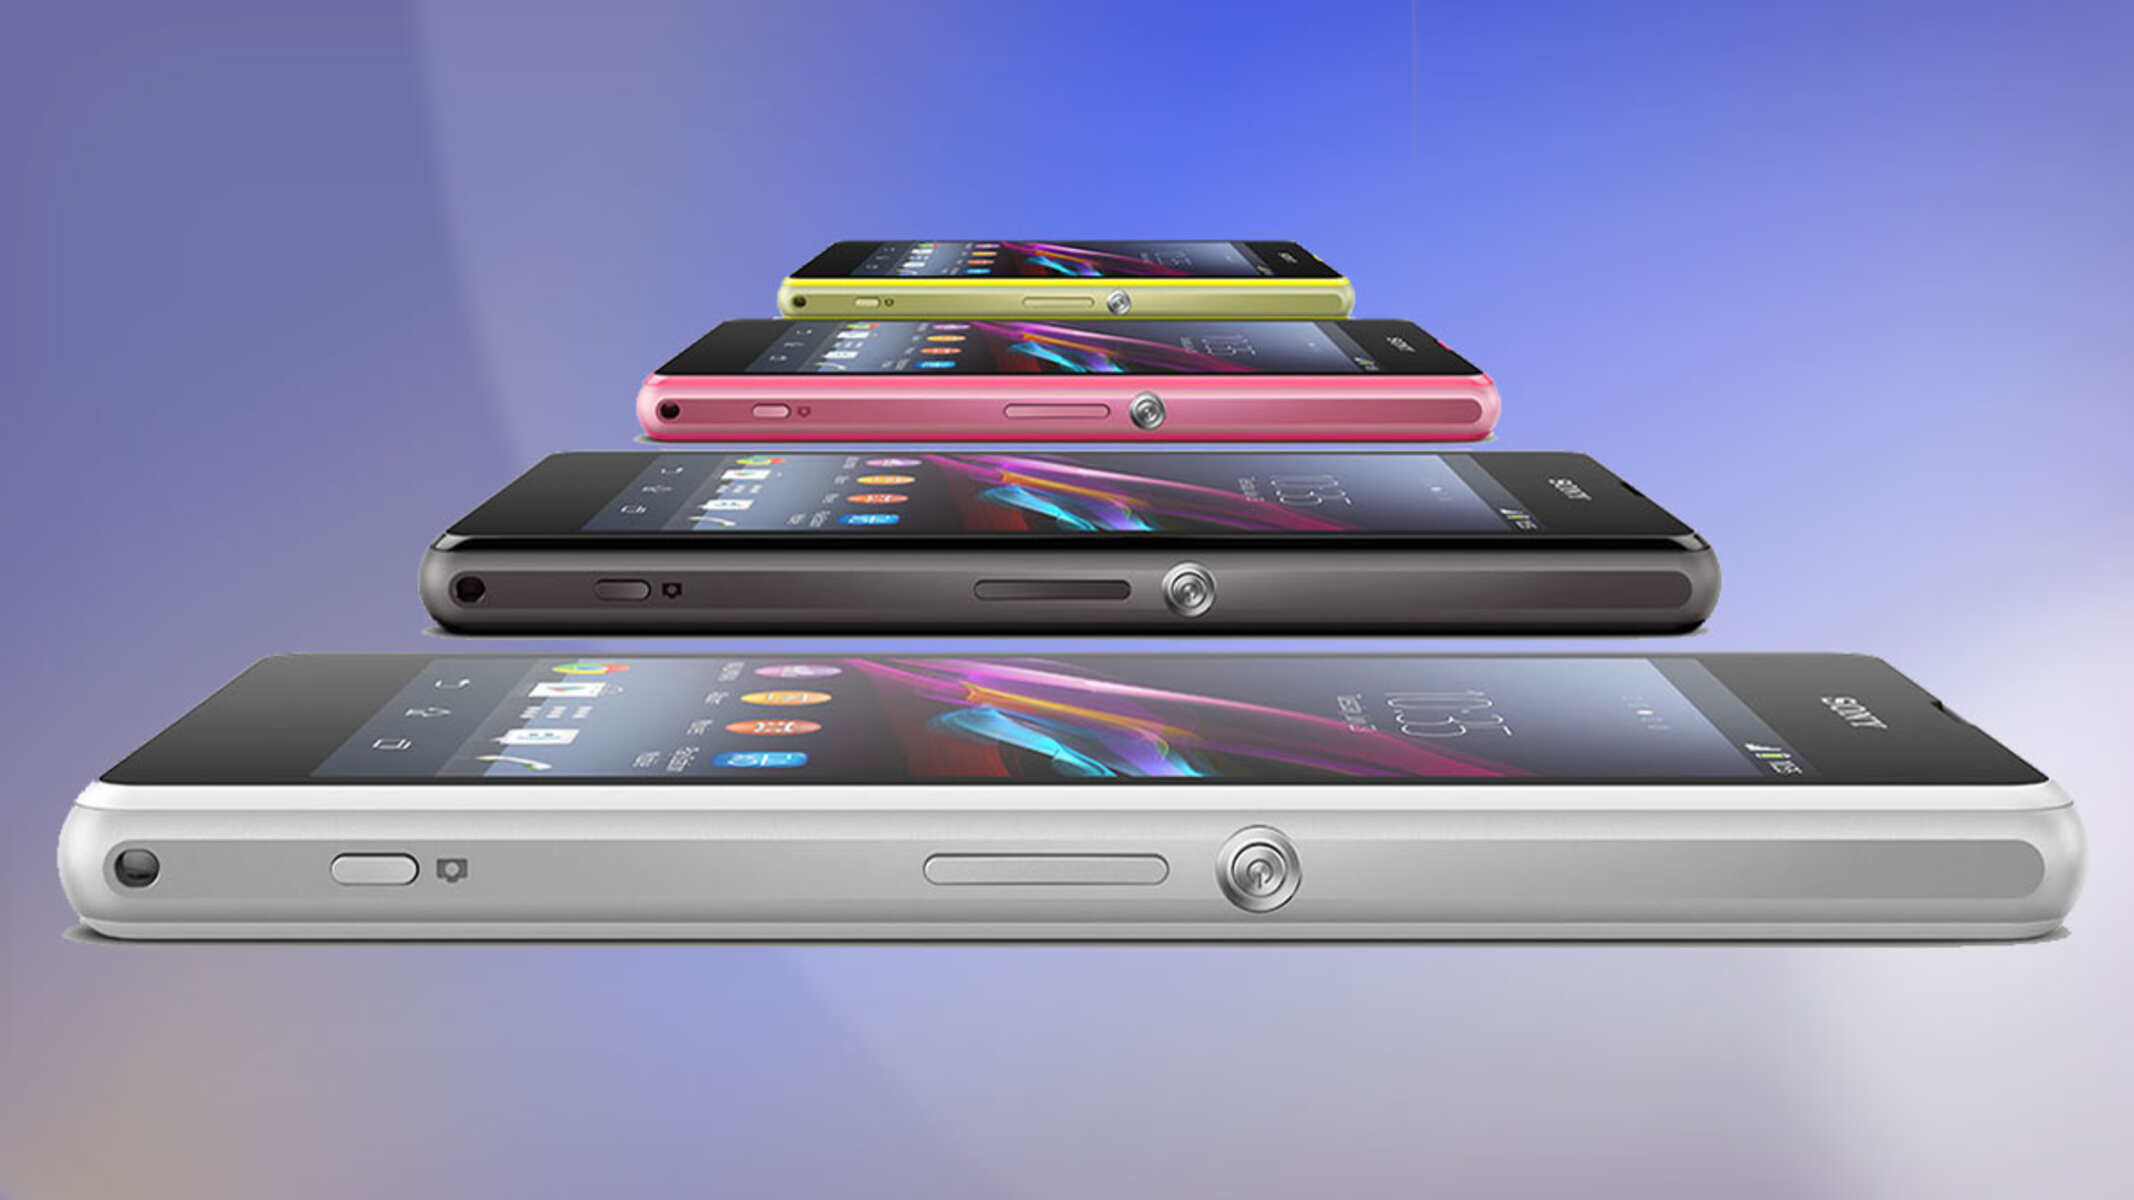
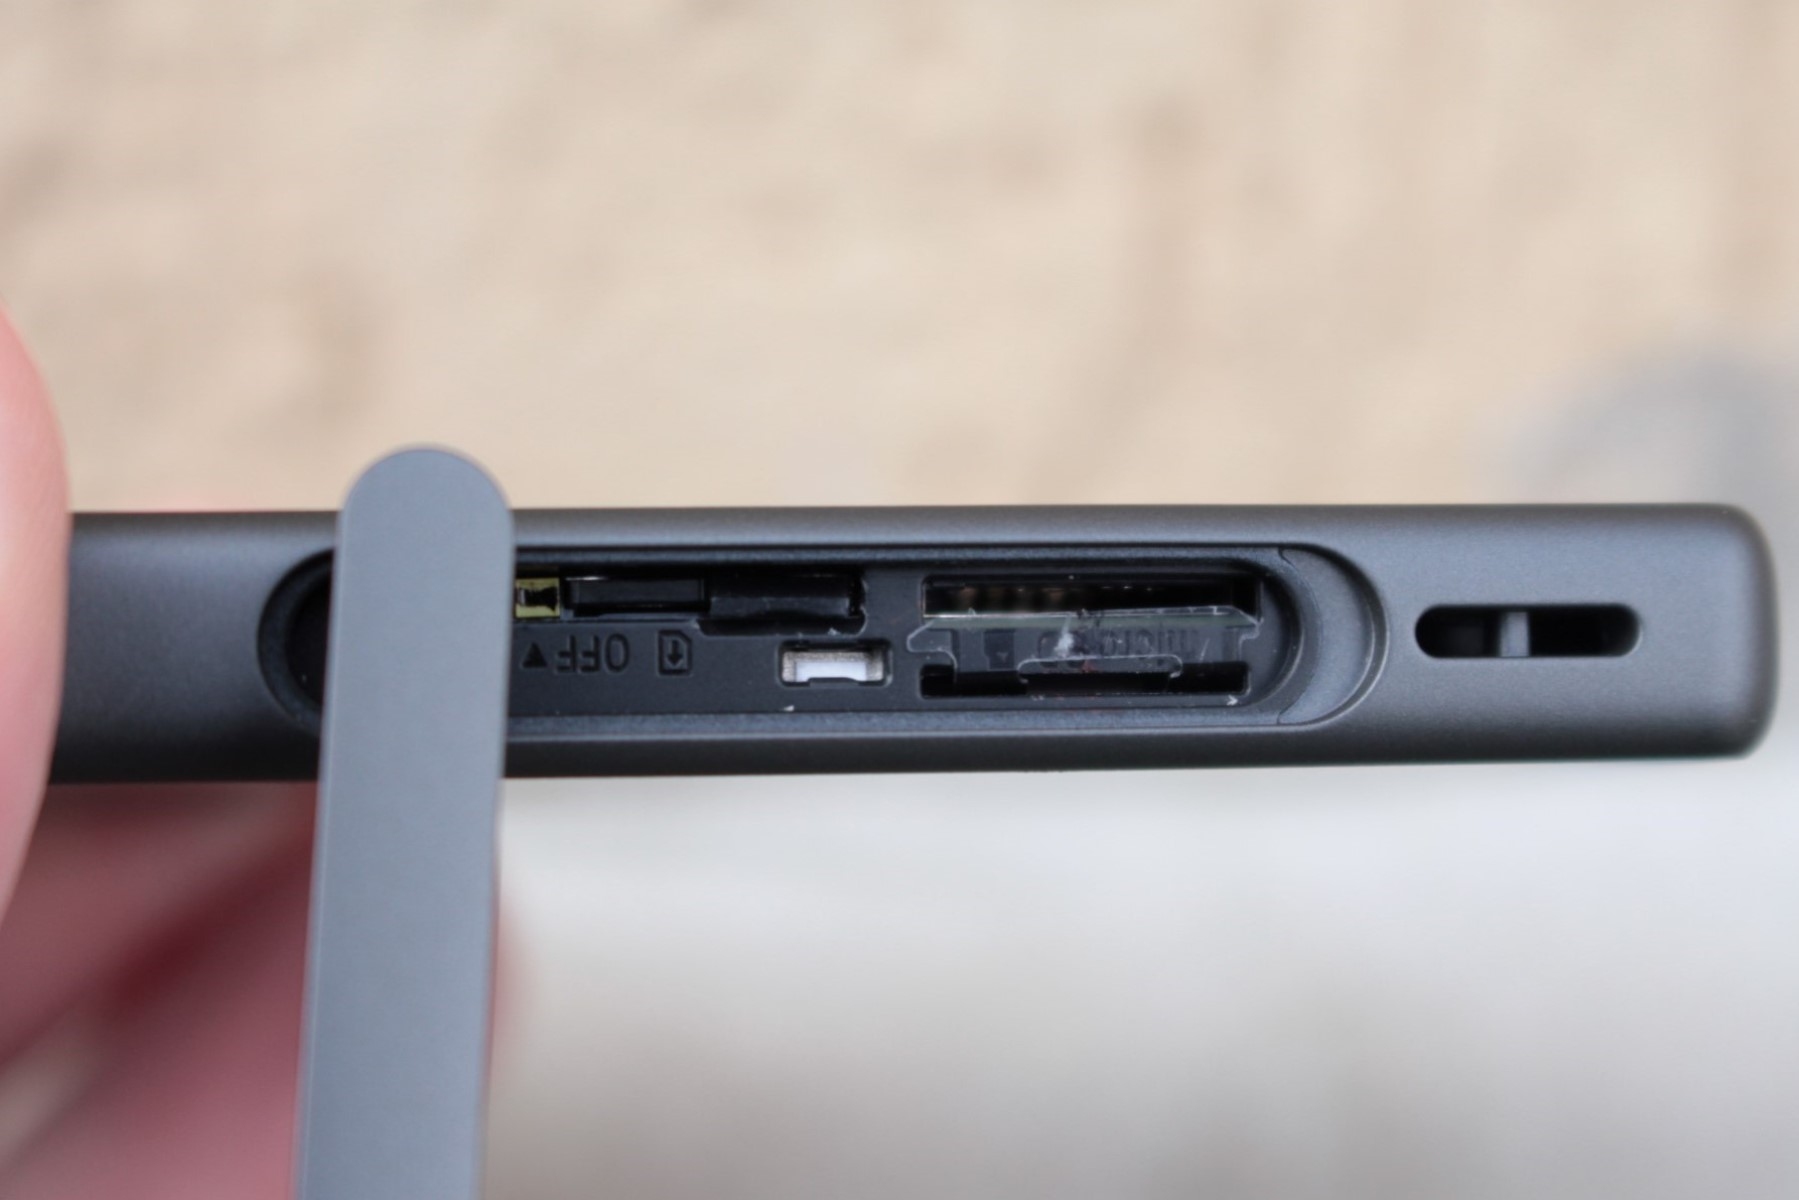
Locating the SIM card tray is the initial step in the process of removing the SIM card from your Xperia ZX3. The SIM card tray houses the SIM card and is designed to be easily accessible for removal and insertion. To begin, you will need to identify the precise location of the SIM card tray on your Xperia ZX3.
-
Turn Off Your Device: Before proceeding, ensure that your Xperia ZX3 is powered off. This precautionary measure prevents any potential disruption while handling the SIM card tray.
-
Identify the SIM Card Tray Slot: The SIM card tray slot is typically located on the side of the device. On the Xperia ZX3, you can find the SIM card tray slot on the left-hand side, near the top edge. It is important to note that the exact placement may vary slightly depending on the specific model of your Xperia ZX3.
-
Use the SIM Card Eject Tool: Sony Xperia devices are equipped with a SIM card eject tool, which is a small pin-like instrument provided by the manufacturer. This tool is essential for accessing the SIM card tray. Once you have located the SIM card tray slot, you will use the SIM card eject tool to proceed with the removal process.
By carefully following these steps, you can successfully locate the SIM card tray on your Xperia ZX3, setting the stage for the subsequent actions required to remove the SIM card. This initial step lays the foundation for a seamless and efficient SIM card removal process, ensuring that you can proceed with confidence and precision.
With the SIM card tray now identified, you are ready to move on to the next step, which involves using the SIM card eject tool to access the SIM card tray and initiate the removal process. This straightforward process allows you to proceed with the subsequent steps, ultimately leading to the successful removal of the SIM card from your Xperia ZX3.
Step 2: Insert the SIM card eject tool
With the SIM card tray located, the next crucial step in removing the SIM card from your Xperia ZX3 is to insert the SIM card eject tool. This small, specialized tool provided by Sony Xperia is designed to facilitate the safe removal of the SIM card tray without causing any damage to the device.
To begin, retrieve the SIM card eject tool that came with your Xperia ZX3. This tool is typically a compact, metallic pin with a narrow, pointed end, specifically crafted for accessing the SIM card tray. Its purpose is to gently push the internal mechanism within the SIM card tray, allowing it to pop open and grant access to the SIM card.
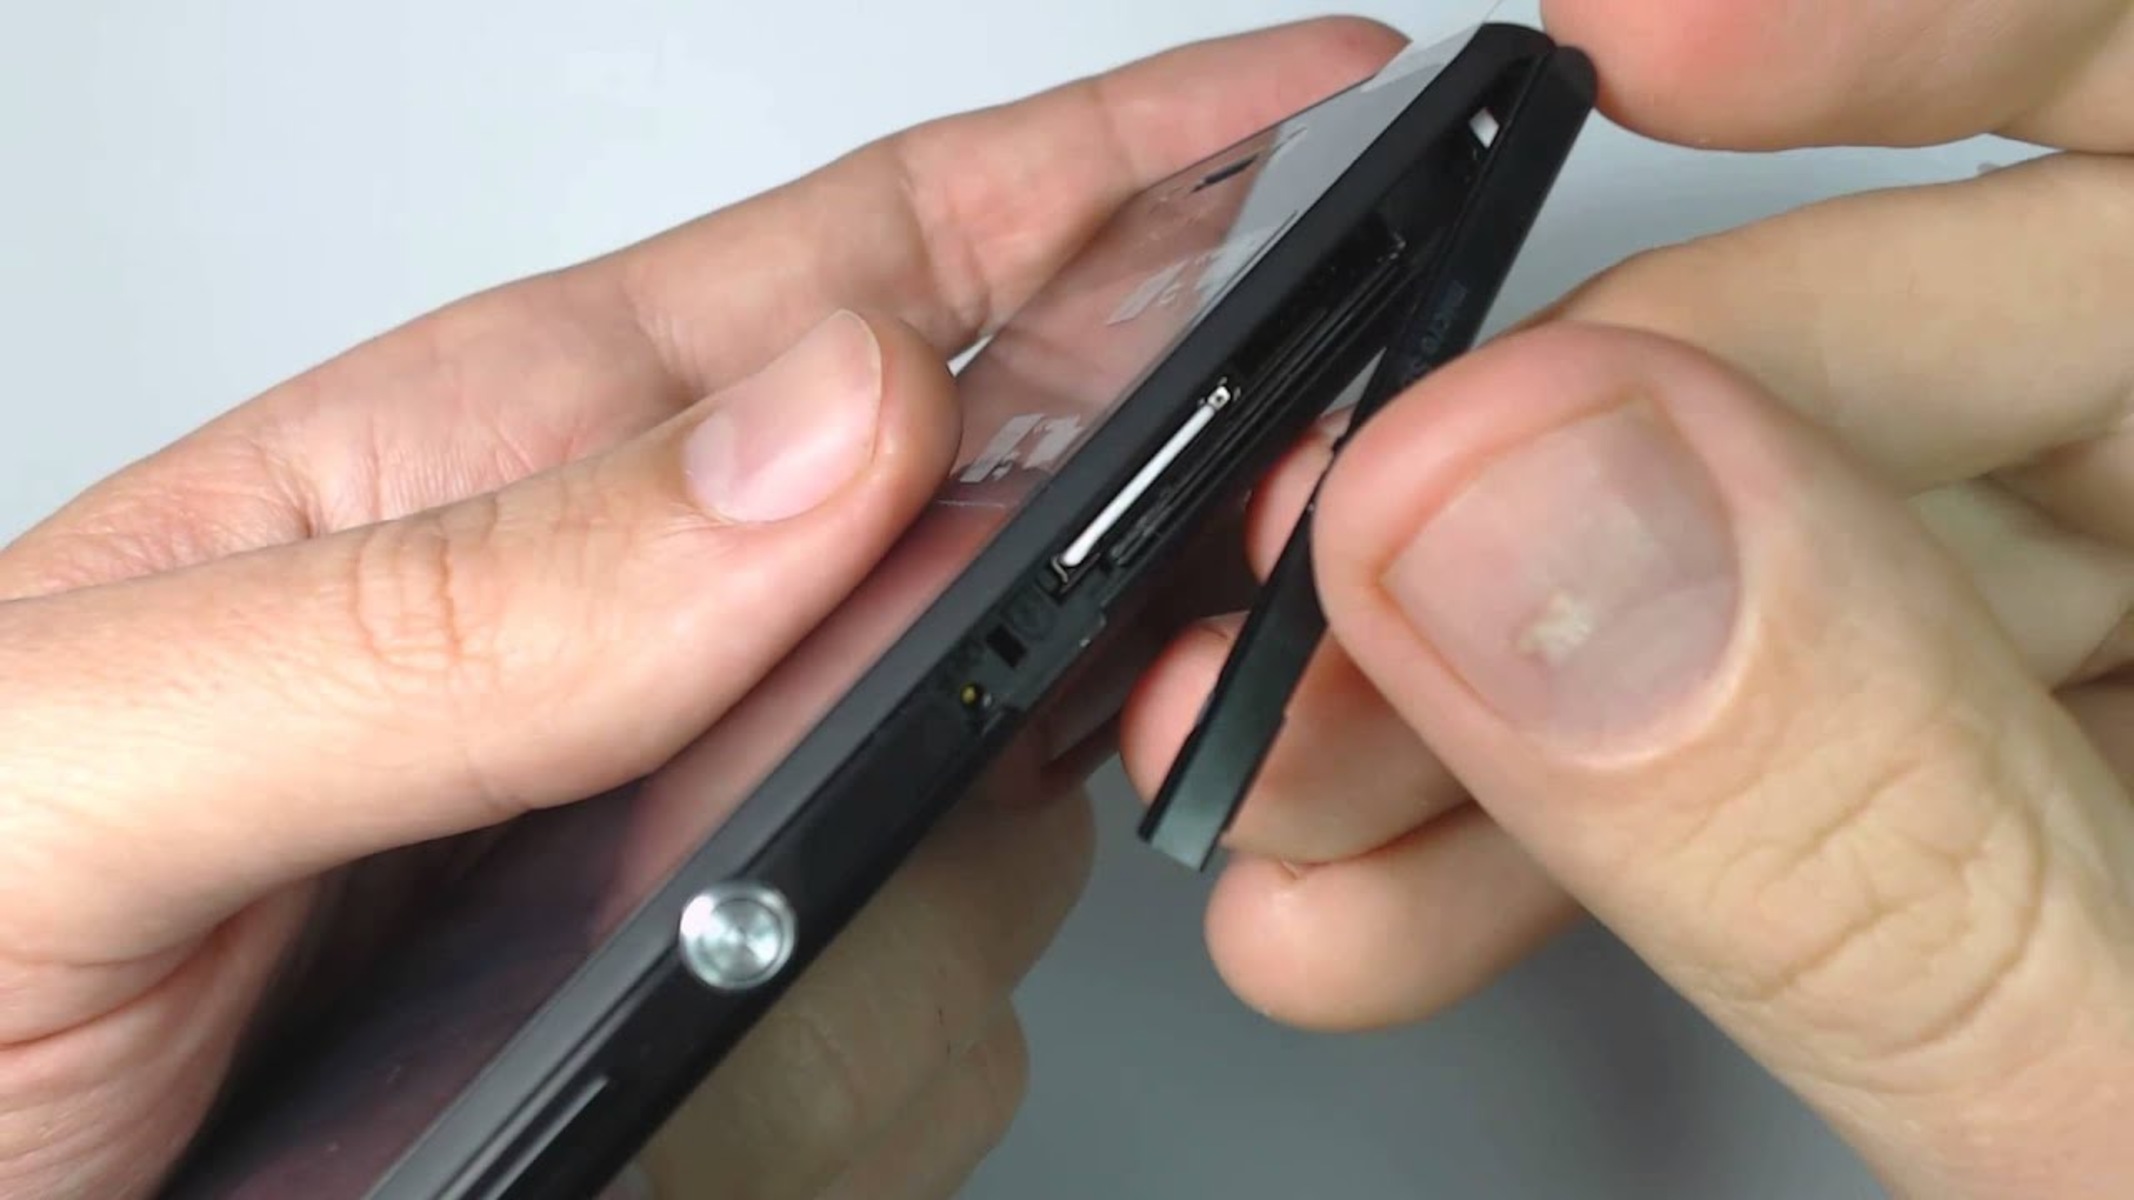
Hold the Xperia ZX3 securely in one hand, ensuring a firm grip, and take the SIM card eject tool in the other hand. Position the pointed end of the tool into the small pinhole located adjacent to the SIM card tray slot. Apply gentle pressure and push the tool into the pinhole until you feel a slight resistance. This indicates that the tool has engaged with the internal mechanism of the SIM card tray.
Once the tool is inserted, exert a steady and controlled force to activate the release mechanism within the SIM card tray. As you apply pressure, you will feel the SIM card tray begin to protrude from the device. Continue to push gently until the SIM card tray is partially ejected, allowing you to grasp and remove it manually.
It is important to exercise caution and precision during this step to avoid applying excessive force, which could potentially damage the SIM card tray or the internal components of your Xperia ZX3. By using the SIM card eject tool as intended, you can safely and effectively initiate the release of the SIM card tray, setting the stage for the subsequent steps in the SIM card removal process.
With the SIM card tray partially ejected, you are now prepared to proceed to the next step, which involves fully removing the SIM card tray from your Xperia ZX3 and accessing the SIM card housed within it. This seamless transition from one step to the next ensures a smooth and efficient SIM card removal process, allowing you to proceed with confidence and precision.
Step 3: Remove the SIM card tray
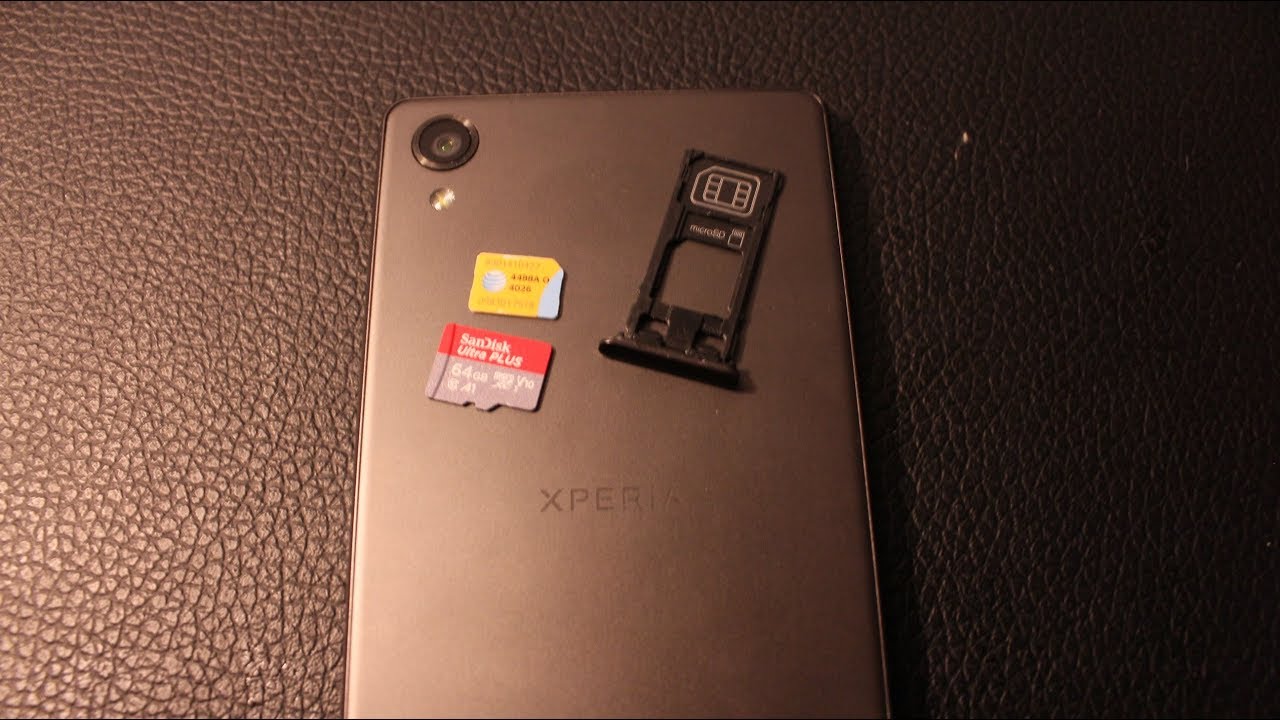
With the SIM card tray partially ejected from your Xperia ZX3, the next pivotal step is to fully remove the tray from the device, granting access to the SIM card housed within it. This process requires a delicate touch and careful handling to ensure the safe extraction of the SIM card tray without causing any damage to the device or the SIM card itself.
Once the SIM card tray is partially protruding from the Xperia ZX3, gently grasp the exposed edge of the tray with your fingertips. Exercise caution to avoid applying excessive force or bending the tray during removal. With a steady and controlled motion, carefully slide the SIM card tray out of the device, ensuring that it moves along its designated path without resistance.
As you guide the SIM card tray out of the Xperia ZX3, pay close attention to any signs of obstruction or resistance. If you encounter any unexpected difficulty, refrain from forcing the tray out and reassess the positioning and alignment of the device and the tray. It is essential to maintain a patient and methodical approach to prevent any potential damage to the SIM card tray or the device itself.
Once the SIM card tray is fully removed from your Xperia ZX3, place it on a secure and stable surface, taking care to avoid exposing it to any potential hazards or contaminants. This ensures that the SIM card tray and the SIM card within it remain in optimal condition throughout the removal process.
With the SIM card tray now safely extracted from your Xperia ZX3, you have successfully completed the critical step of accessing the SIM card housed within the tray. This seamless transition sets the stage for the final step in the SIM card removal process, allowing you to proceed with confidence and precision as you prepare to remove the SIM card from the tray itself.
The successful removal of the SIM card tray from your Xperia ZX3 marks a significant milestone in the overall process of managing your mobile connectivity. By carefully navigating this step, you have demonstrated a keen understanding of the intricacies involved in handling delicate components within your device, setting the stage for the final phase of the SIM card removal process.
Step 4: Take out the SIM card
With the SIM card tray safely removed from your Xperia ZX3, the final and crucial step in the SIM card removal process is to extract the SIM card from the tray. This step requires a delicate touch and precise handling to ensure the safe removal of the SIM card without causing any damage to the card or the tray.
Upon examining the SIM card tray, you will notice a designated slot that securely holds the SIM card in place. Gently inspect the tray to locate the SIM card and identify the specific positioning within the slot. The SIM card is typically nestled within a small, rectangular compartment, designed to accommodate its size and shape.
To remove the SIM card, carefully maneuver the tray to access the compartment containing the SIM card. Exercise caution to avoid any abrupt movements that could dislodge or damage the SIM card during extraction. With a steady and controlled approach, gently push the SIM card from the compartment, allowing it to slide out smoothly.
As the SIM card emerges from the tray, grasp it carefully between your fingertips, ensuring a secure hold without applying excessive pressure. The SIM card is a delicate component that requires gentle handling to prevent any bending or damage to its surface. By maintaining a firm yet gentle grip, you can safely extract the SIM card from the tray with precision and care.
Once the SIM card is removed from the tray, take a moment to inspect it for any signs of damage or wear. Check the metallic contacts on the back of the SIM card for any debris or discoloration, ensuring that it remains in optimal condition for future use. Additionally, examine the edges and surface of the SIM card to verify that it is free from any visible defects or irregularities.
After confirming the integrity of the SIM card, place it in a secure location, such as a protective case or a designated storage container, to prevent any potential damage or loss. This ensures that the SIM card remains in pristine condition and is readily available for future use, whether for reinsertion into your Xperia ZX3 or for storage as a backup.
By successfully completing the process of removing the SIM card from your Xperia ZX3, you have demonstrated a keen understanding of the intricate steps involved in managing the essential components of your device. This accomplishment empowers you to adapt to changing connectivity needs and ensures that your Xperia ZX3 remains versatile and functional in various scenarios.
The successful extraction of the SIM card from the tray marks the culmination of a seamless and efficient SIM card removal process, allowing you to proceed with confidence and assurance in managing your mobile connectivity. Whether you are replacing the SIM card, transitioning to a new device, or troubleshooting connectivity issues, mastering the art of removing the SIM card from your Xperia ZX3 is a valuable skill that enhances your overall mobile device experience.
Conclusion
In conclusion, the process of removing the SIM card from your Xperia ZX3 encompasses a series of straightforward yet essential steps that empower you to manage your mobile connectivity with confidence and precision. By following the easy-to-understand instructions provided in this guide, you have gained valuable insights into the intricacies of handling delicate components within your device, setting the stage for seamless SIM card removal and maintenance.
The journey begins with the initial step of locating the SIM card tray, a pivotal task that familiarizes you with the physical layout of your Xperia ZX3 and prepares you for the subsequent actions. By identifying the precise location of the SIM card tray slot and understanding the role of the SIM card eject tool, you have established a solid foundation for the removal process, setting the stage for a smooth and efficient transition to the next steps.
The insertion of the SIM card eject tool represents a critical phase in the SIM card removal process, requiring a delicate touch and precise handling to initiate the release of the SIM card tray. By carefully using the provided tool to engage with the internal mechanism of the tray, you have demonstrated a keen understanding of the importance of precision and caution in managing the components of your Xperia ZX3.
The subsequent steps of removing the SIM card tray and extracting the SIM card from the tray further underscore the significance of methodical and patient handling. By exercising care and attention to detail, you have successfully navigated the process of accessing and removing the SIM card, ensuring that both the tray and the card remain in optimal condition for future use.
As you conclude this journey of SIM card removal from your Xperia ZX3, you have not only acquired practical skills but also gained a deeper appreciation for the intricacies of mobile device maintenance. This newfound knowledge empowers you to adapt to changing connectivity needs, troubleshoot potential issues, and explore new possibilities for optimizing your mobile experience.
By mastering the art of removing the SIM card from your Xperia ZX3, you have unlocked a valuable skill that enhances your overall mobile device proficiency. Whether you are transitioning to a new device, replacing the SIM card, or troubleshooting connectivity concerns, the ability to confidently manage the essential components of your Xperia ZX3 ensures that you remain in control of your mobile connectivity journey.
In essence, the process of removing the SIM card from your Xperia ZX3 is not merely a technical task but a journey of empowerment and mastery. By embracing the steps outlined in this guide, you have embarked on a path that leads to a deeper understanding of your device and a heightened sense of confidence in managing its essential components.