Introduction
Clearing the cache on your OnePlus 9 can be a simple yet effective way to optimize the performance of your device. As you use your phone, various apps and processes generate temporary data that is stored in the cache. Over time, this cache can accumulate and potentially impact the speed and responsiveness of your device. By clearing the cache, you can free up valuable storage space and potentially resolve issues related to app performance and system stability.
In this comprehensive guide, we will walk you through the step-by-step process of clearing the cache on your OnePlus 9. Whether you are experiencing sluggishness, app crashes, or other performance issues, clearing the cache can often serve as a quick and efficient solution. Additionally, by understanding how to navigate the settings menu and access the storage options, you can gain a better understanding of your device's internal processes and maintenance procedures.
By following the instructions provided in this tutorial, you can ensure that your OnePlus 9 continues to operate smoothly and efficiently. It's important to note that clearing the cache does not delete any personal data or settings from your device, making it a safe and non-intrusive maintenance task. So, let's delve into the steps and learn how to clear the cache on your OnePlus 9, empowering you to take control of your device's performance and optimize its functionality.
Why Clearing Cache on OnePlus 9 is Important
Clearing the cache on your OnePlus 9 is a crucial maintenance task that can significantly impact the overall performance and functionality of your device. The cache is a storage location where data is temporarily held in order to expedite the retrieval and loading of content by apps and the operating system. While this mechanism is designed to enhance the user experience by reducing load times and improving responsiveness, the accumulation of cached data over time can lead to various issues that affect the device's performance.
One of the primary reasons why clearing the cache on your OnePlus 9 is important is to address potential performance bottlenecks. As you use your device, apps and system processes continuously generate and store temporary data in the cache. Over time, this accumulation of data can lead to bloating, causing apps to load slower, exhibit sluggish behavior, or even crash unexpectedly. By clearing the cache, you effectively remove this temporary data, allowing apps and the system to rebuild the cache with fresh, optimized data, thereby improving overall performance.
Furthermore, clearing the cache can also free up valuable storage space on your device. As the cache accumulates data from various apps and processes, it can consume a significant amount of storage capacity over time. By regularly clearing the cache, you can reclaim this storage space, potentially preventing your device from running low on available storage, which can lead to performance degradation and other operational issues.
In addition to performance improvements and storage space reclamation, clearing the cache can also aid in troubleshooting and resolving issues related to app malfunctions and system stability. In some cases, corrupted or outdated cache data can interfere with the proper functioning of apps, leading to crashes, freezes, or other unexpected behaviors. By clearing the cache, you effectively eliminate potentially problematic data, providing a clean slate for apps and the system to operate optimally.
Overall, the importance of clearing the cache on your OnePlus 9 cannot be overstated. It is a fundamental maintenance task that can enhance the device's performance, free up storage space, and contribute to a smoother and more reliable user experience. By understanding the significance of clearing the cache, you can proactively maintain your device and ensure that it continues to operate at its best.
Step 1: Accessing the Settings Menu
Accessing the settings menu on your OnePlus 9 is the first step towards clearing the cache and optimizing the performance of your device. The settings menu serves as a centralized hub where you can configure various aspects of your phone, including network settings, display preferences, and system maintenance options. To begin the cache-clearing process, you will need to navigate to the settings menu using the following steps:
-
Unlock Your Device: If your device is locked, unlock it by using your preferred method, such as entering your PIN, pattern, or using biometric authentication, such as fingerprint or facial recognition.
-
Open the Settings App: Locate the settings app on your device. Typically, the settings app is represented by a gear icon and is commonly found on the home screen or in the app drawer. Tap on the settings app icon to launch the settings menu.
-
Navigate to the General Settings: Once the settings app is open, you will be presented with a list of categories or tabs that organize the various settings options. Look for the category labeled "System" or "General" to access the fundamental system settings.
-
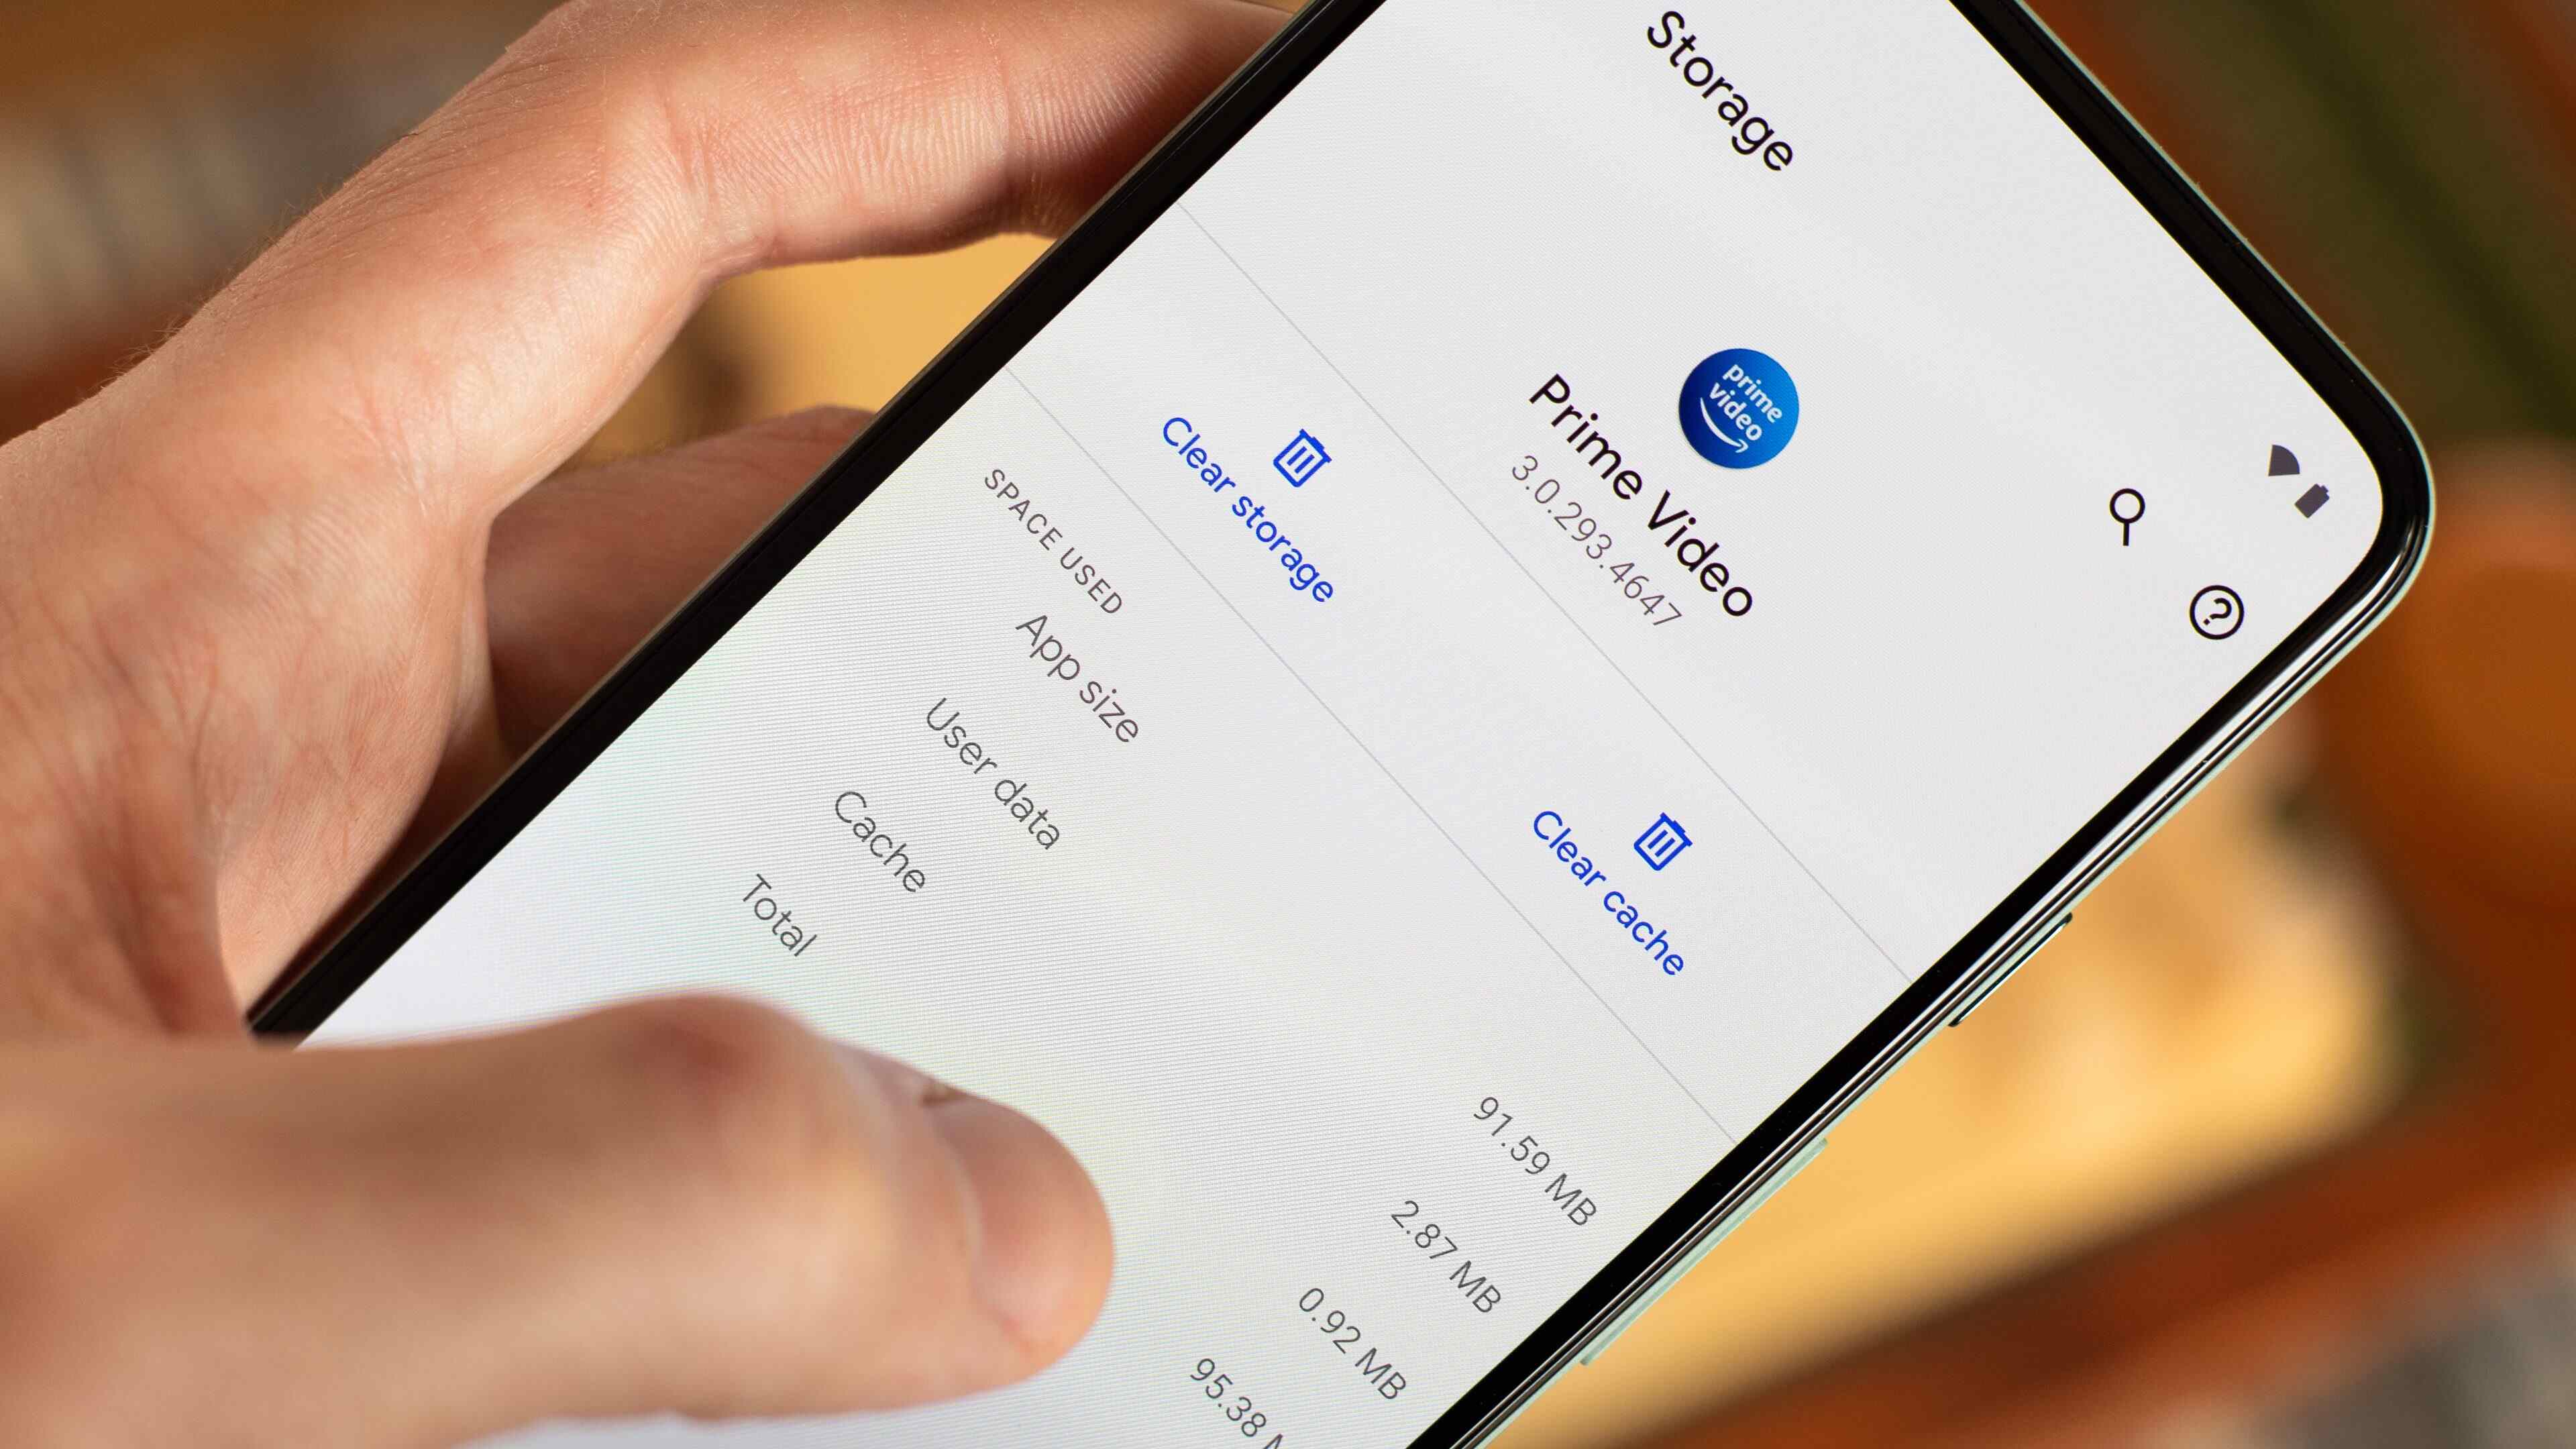
Select the Storage Option: Within the general settings, locate and tap on the "Storage" option. The storage settings provide detailed information about the storage usage on your device, including the amount of space occupied by various types of data, such as apps, images, videos, and cached data.
By following these steps, you can successfully access the settings menu and navigate to the storage option, setting the stage for the subsequent steps involved in clearing the cache on your OnePlus 9. Accessing the settings menu is the initial gateway to performing essential maintenance tasks and customizing your device to suit your preferences and usage patterns. With this foundational step completed, you are now ready to proceed to the next phase of the cache-clearing process, where you will delve deeper into the storage settings to clear the cache data and optimize your device's performance.
Step 2: Navigating to Storage
After accessing the settings menu on your OnePlus 9, the next crucial step in the cache-clearing process is navigating to the storage settings. The storage settings provide valuable insights into the usage of your device's internal storage, including the distribution of space among various types of data such as apps, images, videos, and cached data.
Upon selecting the "Storage" option within the general settings, you will be presented with a comprehensive overview of your device's storage usage. This includes a breakdown of the space occupied by different types of data, allowing you to identify areas where storage optimization may be beneficial.
Within the storage settings, you can explore detailed information such as the amount of space consumed by apps, media files, downloads, and system data. Additionally, you will find a specific section dedicated to cached data, which provides insights into the volume of temporary data accumulated by apps and processes on your device.
Navigating to the storage settings not only facilitates the cache-clearing process but also empowers you to manage and optimize your device's storage efficiently. By gaining visibility into the distribution of storage usage, you can make informed decisions regarding data management, potentially freeing up space and enhancing the overall performance of your OnePlus 9.
Furthermore, the storage settings serve as a central hub for storage-related actions, allowing you to clear cached data, manage app storage, and identify large files that may be occupying significant space. This level of control and visibility enables you to proactively maintain your device's storage, ensuring that it operates optimally and efficiently.
As you navigate through the storage settings, take note of the insights provided, particularly regarding cached data. Understanding the volume of cached data on your device can shed light on the potential impact of clearing the cache, reinforcing the significance of this maintenance task in optimizing your device's performance.
With the successful navigation to the storage settings, you are now poised to proceed to the next step in the cache-clearing process, where you will initiate the removal of cached data to rejuvenate your OnePlus 9 and enhance its responsiveness and efficiency.
Step 3: Clearing Cache Data
Clearing the cache data on your OnePlus 9 is a pivotal step in optimizing the performance and responsiveness of your device. The cached data, comprised of temporary files and app data remnants, can accumulate over time, potentially leading to performance bottlenecks and storage inefficiencies. By clearing the cache, you can effectively purge this temporary data, providing a clean slate for apps and the system to operate efficiently.
To initiate the cache-clearing process, follow these steps:
-
Access the Storage Settings: Once you have navigated to the storage settings as outlined in the previous step, you will find an option to clear the cached data. This option is typically labeled as "Cached data" or "Cache" and is accompanied by the amount of space occupied by the cached data. Tap on this option to proceed with clearing the cache.
-
Confirm Cache Clearing: Upon selecting the option to clear the cached data, a confirmation prompt will appear, seeking your confirmation to proceed with the cache-clearing action. This prompt serves as a safeguard, ensuring that you intentionally initiate the cache-clearing process. Confirm the action to proceed with clearing the cached data from your device.
-
Wait for the Process to Complete: Once the cache-clearing action is confirmed, the system will commence the process of purging the cached data from your device. Depending on the volume of cached data, this process may take a few moments to complete. It is important to allow the system to finish clearing the cache to ensure the effective removal of temporary data.
-
Completion Confirmation: After the cache-clearing process is completed, you will receive a confirmation message indicating the successful removal of the cached data. This confirmation serves as validation that the cache-clearing action has been executed, and the temporary data has been effectively purged from your device.
By following these steps, you can successfully clear the cached data on your OnePlus 9, paving the way for improved performance, enhanced storage efficiency, and a smoother user experience. With the cache now cleared, your device is poised to operate more responsively, with potential improvements in app loading times, multitasking capabilities, and overall system stability.
The cache-clearing process is a fundamental maintenance task that can be performed regularly to ensure that your OnePlus 9 continues to operate optimally. By proactively managing the cached data on your device, you can mitigate performance issues and storage inefficiencies, contributing to a more seamless and enjoyable user experience.
With the cached data effectively cleared, you are now ready to proceed to the final step, where you will confirm the successful completion of the cache-clearing process, empowering you to harness the full potential of your OnePlus 9.
Step 4: Confirming Cache Clearing
After initiating the cache-clearing process on your OnePlus 9, it is essential to confirm the successful completion of this maintenance task. The confirmation step serves as a crucial validation of the cache-clearing action, ensuring that the temporary data has been effectively purged from your device, and the system is primed to operate optimally.
Upon completing the cache-clearing process, your device will display a confirmation message indicating the successful removal of the cached data. This confirmation serves as a reassurance that the maintenance task has been executed as intended, providing peace of mind that your device's performance and storage efficiency have been enhanced.
The confirmation message typically acknowledges the amount of cached data that has been cleared, reaffirming the positive impact of this maintenance action on your device's overall performance. It serves as a tangible validation of the cache-clearing process, offering transparency and clarity regarding the outcome of the maintenance task.
Upon receiving the confirmation message, you can proceed with confidence, knowing that your OnePlus 9 has been rejuvenated through the removal of temporary data that may have been impeding its performance. This confirmation also signifies the completion of the cache-clearing process, allowing you to transition seamlessly back to using your device with the assurance that it is now optimized for efficient operation.
Furthermore, the confirmation of cache clearing reinforces the proactive approach to device maintenance, empowering you to take control of your device's performance and storage management. By routinely confirming the successful clearing of the cache, you can maintain a consistently optimized device, ensuring that it continues to operate smoothly and responsively.
With the cache now cleared and the successful confirmation received, you have effectively completed the cache-clearing process on your OnePlus 9. Your device is now poised to deliver an enhanced user experience, with improved performance, efficient storage utilization, and a heightened level of responsiveness.
By confirming the cache clearing, you have taken a proactive step towards optimizing your device's functionality, ensuring that it remains a reliable and efficient companion in your daily activities. With this essential maintenance task successfully executed, your OnePlus 9 is now ready to deliver a seamless and enjoyable user experience, free from the potential performance bottlenecks associated with accumulated cached data.
Conclusion
In conclusion, the process of clearing the cache on your OnePlus 9 is a fundamental maintenance task that can significantly impact the performance, storage efficiency, and overall user experience of your device. By following the step-by-step tutorial outlined in this guide, you have gained valuable insights into the importance of clearing the cache and have acquired the knowledge and skills necessary to perform this essential maintenance task with confidence.
Clearing the cache on your OnePlus 9 is important for several reasons. It serves as a proactive measure to address potential performance bottlenecks caused by the accumulation of temporary data. By removing outdated and unnecessary cached data, you can enhance the responsiveness of your device, potentially improving app loading times, multitasking capabilities, and overall system stability.
Furthermore, clearing the cache allows you to reclaim valuable storage space on your device. As the cache accumulates data from various apps and processes, it can consume a significant amount of storage capacity over time. By regularly clearing the cache, you can free up space, mitigating the risk of storage-related performance degradation and ensuring that your device operates efficiently.
The cache-clearing process also plays a crucial role in troubleshooting and resolving issues related to app malfunctions and system stability. By eliminating potentially problematic cached data, you provide a clean slate for apps and the system to operate optimally, potentially resolving issues such as app crashes, freezes, and unexpected behaviors.
By confirming the successful completion of the cache-clearing process, you can transition back to using your OnePlus 9 with the assurance that it is now optimized for efficient operation. The proactive approach to device maintenance empowers you to take control of your device's performance and storage management, ensuring that it continues to operate smoothly and responsively.
In essence, the process of clearing the cache on your OnePlus 9 is a simple yet impactful maintenance task that can contribute to a more seamless and enjoyable user experience. By understanding the significance of clearing the cache and following the step-by-step tutorial provided in this guide, you have equipped yourself with the knowledge and skills to maintain your device optimally, ensuring that it remains a reliable and efficient companion in your daily activities.